

Note: This DIY article is provided as a general guide only and is not intended to take the place of product-specific installation procedures; always follow applicable manufacturers’ instructions. Depending on your home’s age and condition, location within the home, and other potential factors, repairs and/or upgrades or other services may be necessary prior to the beginning and/or completion of your project that may involve the services of a home improvement professional. This article does not include advice pertaining to local building codes and/or any related inspections.
Knowing how to prep walls before painting is the quickest way to get better-looking, longer-lasting results. Even a short weekend project benefits from filling small holes, smoothing rough areas, and cleaning the surface. With the right tools, like GE Interior Fill Acrylic Putty, you can take the guesswork out of wall prep and ensure your paint goes on clean and even.
Why wall prep matters for painting
Proper wall preparation is one of the most important steps in achieving a clean, professional-looking paint job. Skipping prep can lead to uneven coverage, visible imperfections, and poor paint adhesion, ultimately shortening the life of your finish. Taking the time to patch holes, smooth rough areas, and cleaning surfaces helps paint glide on evenly and adhere correctly.
Walls often collect dust, grease, or minor dents that can interfere with your results if not addressed. Even small nail holes or hairline cracks can show through fresh paint unless they’re properly filled and sanded. Prepping the surface allows you to start with a clean slate and reduces the chance of needing touchups later.
Whether you’re painting a bedroom, hallway, or kitchen, spending a little extra time on prep can save hours in cleanup or correction. For DIYers aiming for pro-level results, wall prep is where quality begins.
For shallow holes or minor cracks, use a lightweight spackling compound or a product like GE Interior Fill Acrylic Putty, which is ideal for sealing interior gaps and joints. If the hole is deeper than 1/4 inch, fill it in layers, allowing each layer to dry before adding more. For gaps along trim, baseboards, or corners where movement might occur, use GE Interior Seal Silicone Sealant.
Patch holes and cracks
Before you think about rolling on paint, take time to patch any visible holes, cracks, or surface damage. Even small imperfections can stand out after painting, especially under natural light or on darker color walls. Begin by inspecting the wall closely. Look for nail holes, dents, hairline cracks, or any areas where drywall or plaster has chipped.

For shallow holes or minor cracks, use a lightweight spackling compound or a product like GE Interior Fill Acrylic Putty, which is ideal for sealing interior gaps and joints. If the hole is deeper than 1/4 inch, fill it in layers, allowing each layer to dry before adding more. Use a putty knife or GE’s Sealant Smoothing Tool to apply the filler smoothly, slightly overfilling to account for shrinkage.
For gaps along trim, baseboards, or corners where movement might occur, use GE Interior Seal Silicone Sealant. It stays flexible and helps prevent future cracking, plus it’s paint-ready in 30 minutes to keep your project moving.
Sand for a smooth surface
Once repairs are dry, sanding is the next essential step in prepping walls before painting. Uneven patches, residual paint lines, and general surface roughness can all show through a fresh coat, especially with glossy or semi-gloss finishes. Use fine-grit sandpaper (120–220 grit) to smooth any filled areas, feathering the edges so they blend seamlessly with the surrounding wall.
For larger areas or textured surfaces, a sanding block or pole sander helps maintain even pressure. Be careful not to oversand drywall seams or corners, as this can remove too much material and require re-patching.
Clean the walls
Once sanding is complete, vacuum or wipe the wall with a damp cloth to remove all dust, as leftover particles can prevent paint from adhering properly.
Dust, grease, and grime can also lead to streaking or uneven coverage. Kitchens and bathrooms especially tend to have buildup near sinks, stoves, and vents that need to be removed. Start by wiping down the entire wall surface with a damp sponge or microfiber cloth. For stubborn spots, use a mild soap solution, just be sure to rinse with clean water afterward to avoid leaving residue.
Pay extra attention to high-touch areas like around light switches and baseboards. Let the wall dry completely before priming or painting. Even a small amount of moisture can impact how paint adheres and dries. A clean surface helps the paint bond properly and ensures a smoother, more durable finish. Skipping this step is an often-neglected painting tip, leading to peeling or premature wear over time.
Apply tape and protect adjacent areas
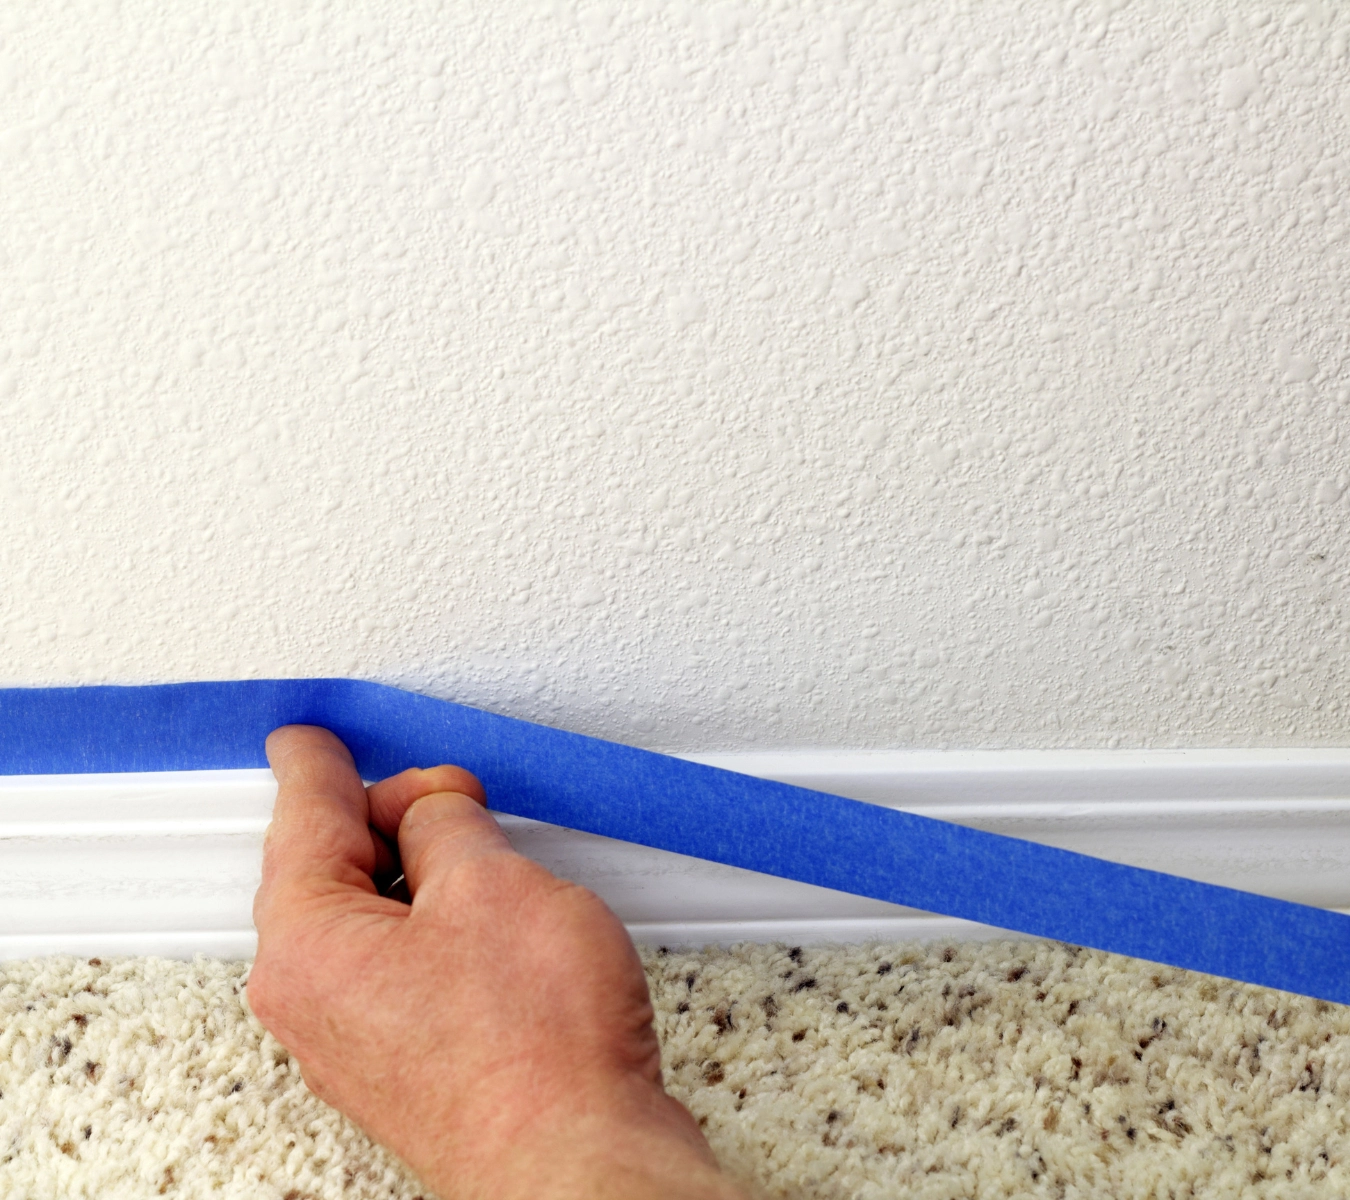
Taping off trim, outlets, wainscotting, and other adjacent surfaces helps ensure clean paint lines and protects areas you don’t want painted. Use high-quality painter’s tape to mask baseboards, door frames, window trim, and wall edges. Press the tape down firmly with a putty knife or your fingertip to prevent paint from bleeding underneath.
Cover nearby floors or furniture with drop cloths or plastic sheeting to catch drips and splatters. If you’re painting near hardware, fixtures, or built-ins, remove them or tape them off for easier work. Taking a few minutes to prep these areas saves time on cleanup and helps give your project a polished, professional-looking finish.
Final check before painting
Run your hand over patched areas to feel for any roughness. If anything catches, give it a light sanding. Double-check that all holes and gaps are filled and that the caulk along the trim and corners is dry to the touch.
If you’ve used GE Interior Fill Acrylic Putty or Interior Seal Silicone Sealant, ensure all repairs are cured according to label instructions. A final once-over now will help ensure a smooth, professional finish once you start painting.
To get GE Sealants’ products for your home improvement project, visit these fine retailers in the U.S. or Canada.


