Note: This DIY article is provided as a general guide only and is not intended to take the place of product-specific installation procedures; always follow applicable manufacturers’ instructions. Depending on your home’s age and condition, location within the home, and other potential factors, repairs and/or upgrades or other services may be necessary prior to the beginning and/or completion of your project that may involve the services of a home improvement professional. This article does not include advice pertaining to local building codes and/or any related inspections.
One slow drip can ruin the base of a cabinet. It swells particleboard, softens joints, and creates the perfect conditions for mold to form in the corners you rarely check. Sealing under-sink cabinets is how you stop the damage before it starts. With the right GE tools and silicone, it’s a one-time fix that holds.
Mold prevention: why the space under your sink is a hidden threat
The space under your sink is one of the most moisture-prone zones in any home. Leaks from shutoff valves, condensation on supply lines, or splash-back from the basin collect below the surface, often unnoticed.
The real risk comes when that moisture reaches the cabinet’s core. Most under-sink construction uses MDF or particleboard—engineered wood that pulls in water fast. Left unchecked, this leads to swelling, layer separation (delamination), and softening that can compromise the base and rear panels.
Sealing the seams and joints in these zones is one of the most effective steps you can take for long-term mold prevention and reliable under-sink protection.
You may already see the signs—and they usually show up early, if you know where to look.
Moisture finds every gap. Seal your under-sink cabinet—at the joints, corners, and pipe entries—before damage sets in.
Signs you need to seal your under-sink cabinets now
If moisture has already made its way in, here’s what you’ll see:
- The cabinet base feels soft under light pressure or shows bubbling in the finish
- Yellowing, stains, or dark streaks around pipe entry points
- Black spotting in corners or seams, often with a musty odor
- Cracked, curling, or missing sealant where the cabinet meets the wall or floor
If you’re seeing even one of these signs, it’s time to seal before the damage spreads.
What sealant does (and what mats or liners don’t)
Catch trays can help, but they won’t stop water from seeping into the structure.
Sealants work at the source. They close off the tiny gaps where moisture gets in—along joints, seams, corners, and around pipe penetrations. When applied correctly, silicone sealant forms a flexible, waterproof barrier that holds against water and movement, keeping damage out of the cabinet base.
Cabinet liners or mats can trap drips, but they only delay the problem. If moisture keeps coming, it still finds its way into the wood.
For a fully waterproof under-sink cabinet, you need both a reliable seal and a regular checkup.
What to seal—and how to spot the weak points
So, where does water find its way in?
Start at the cabinet base. Run your hand along the inside seams, especially in the back corners and along the rear joint. These areas are prone to micro-separation as materials shift with age, humidity, or settling.
Next, check around every pipe that passes through the cabinet. Look for stains, light gaps, or uneven spacing around the pipe sleeve. If there’s air, moisture can follow.
Then, scan where the cabinet touches the wall and floor. These edge seams take repeated hits from mop water, basin overflow, and daily use—and they often wear down unnoticed.
Use a flashlight and sweep slowly across each joint. If you see shadows, glints of light, or hairline openings, that’s where sealing should begin.
Choosing the right GE sealant for sealing under-sink cabinets
Under-sink cabinets are damp, cramped, and rarely identical. Materials, layout, and old damage all affect how you seal. You need a product that fits the job.
For sealing base seams, corners, and common cabinet materials
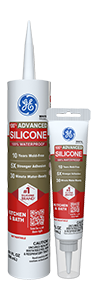
GE Advanced Silicone Kitchen & Bath is ideal for the cabinet floor and back panels, especially if they’re made of MDF, laminate, or particleboard. This sealant flexes with slight material swelling and bonds to painted wood, fiberglass, and tile. The neutral-cure formula won’t stain metal fixtures, and it’s water-ready in just 30 minutes. Use it along flat joints and corners where lasting adhesion and mold prevention matter most.
For tight pipe penetrations or vibration-prone areas
Use GE Supreme Silicone Kitchen & Bath around drain lines, copper pipes, or PVC penetrations—anywhere movement, vibration, or temperature swings are common. With Class 50 flexibility and high elongation, it seals tightly without cracking as pipes shift or flex. It also won’t discolor metal finishes like chrome, bronze, or nickel.
For sealing damp surfaces after a plumbing fix
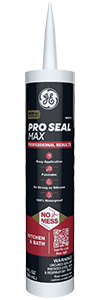
If the cabinet’s still damp after a leak or you can’t fully dry it out, go with GE Pro Seal Max Kitchen & Bath. This hybrid sealant bonds to wet or dry materials. It’s ideal for resealing the cabinet floor or back panel—right after moisture issues are addressed. It combines silicone’s moisture resistance with acrylic’s paintability, cures fast, and is ASTM C920 Class 35 (white) compliant.
Why not use caulk for sealing under-sink cabinets?
Standard acrylic caulk shrinks, cracks, and loses grip, especially in enclosed, moisture-prone areas like under your sink. GE’s silicone formulas stay flexible, seal completely, and stand up to long-term water exposure.
How to seal under-sink cabinets like a pro
Ready to seal your under-sink cabinet? Here’s how to do it.
Step 1: Prep the area
Empty the cabinet so you have full access to the floor, corners, and pipe entries. Remove any shelf liners, mats, or absorbent pads. You’ll need a clear view of every joint to inspect and seal properly.
Then use the GE Sealant Remover Tool to strip away any old sealant. Wipe all surfaces with isopropyl alcohol and let them dry completely. The sealant won’t grip if there’s residue, moisture, or dust.
Step 2: Apply the sealant
Cut the nozzle cleanly using the cartridge opener end of the GE 2-in-1 tool. Run a steady bead of sealant along all seams, corners, and gaps around pipe entries. Keep the bead uniform—this ensures it bonds evenly and doesn’t pull apart over time.
Step 3: Smooth the bead
Use the smoothing end of the GE 2-in-1 tool, slightly moistened with water. Don’t use your finger—your skin leaves oil behind, which can break the seal and leave uneven finishes. A clean, consistent bead is what keeps water out.
Step 4: Let it cure
- Pro Seal Max (White): Water-ready immediately after application.
- Advanced/Supreme Silicone: Splash-safe in 30 minutes. Allow 24 hours for full cure.
Keep it sealed: ongoing under-sink protection tips
Inspect your cabinet every 6 to 12 months, or sooner if you’ve had plumbing work or spotted a small leak. Look for cracks in the sealant, signs of mold forming at the seams, or areas where the bead has pulled away. Early resealing is one of the simplest mold prevention steps you can take.
If you catch damage early, reseal it before the water gets past the seal. When cleaning, skip harsh chemicals or scouring pads. Mild cleaners protect the seal and help keep your waterproof under-sink cabinet working as it should.
Need to seal under your under-sink cabinet? Find GE Kitchen & Bath sealants and tools at a store near you in the U.S. or Canada.


