
Note: This DIY article is provided as a general guide only and is not intended to take the place of product-specific installation procedures; always follow applicable manufacturers’ instructions. Depending on your home’s age and condition, location within the home, and other potential factors, repairs and/or upgrades or other services may be necessary prior to the beginning and/or completion of your project that may involve the services of a home improvement professional. This article does not include advice pertaining to local building codes and/or any related inspections.
Silicone sealant mistakes are one of the most common causes of messy, unsatisfactory DIY sealing work. Many homeowners assume the product alone will do the hard work, but good results usually depend on application factors like surface prep, bead control, product selection, and cure time just as much as the sealant itself. However, with the right silicone sealant techniques, a few practical silicone sealant tips, and the right GE product for the application, it is much easier to get a cleaner, longer-lasting finish.
For kitchen and bathroom sealing, use GE Advanced Silicone Kitchen & Bath. It’s designed for wet, high-moisture areas requiring a durable waterproof seal. For projects where paintability and flexibility are both more at issue, such as specific trim transitions or mixed-material joints, GE Pro Seal Max Kitchen & Bath may be the better fit.
Why silicone sealant mistakes are so easy to make
Silicone sealant mistakes happen so often because the job tends to look easier than it really is. Many DIYers focus on squeezing out a neat-looking bead, but the result depends just as much on what happens before and after application.
Dirty surfaces, leftover residue, excess moisture, and the wrong product can all weaken adhesion before the sealant even begins to cure. DIYers are also likely to apply too much material, smooth it too many times, or use the area again before the sealant has fully set. In most cases, early failure comes from rushed prep, poor technique, or simply ignoring the product instructions.
Top 6 silicone sealant mistakes
These are the most common and easily avoidable mistakes DIYers are prone to making when working with silicone sealant:
-
Skipping surface prep and sealing over residue
One of the most common silicone sealant mistakes is applying fresh sealant over surface materials like:
- Dirt
- Soap film
- Mildew
- Traces of old caulk
Silicone needs a clean, dry surface to bond well, so even a smooth-looking joint can fail early if residue is left behind. This is especially common around tubs, showers, sinks, and backsplashes, where moisture and product buildup collect over time.
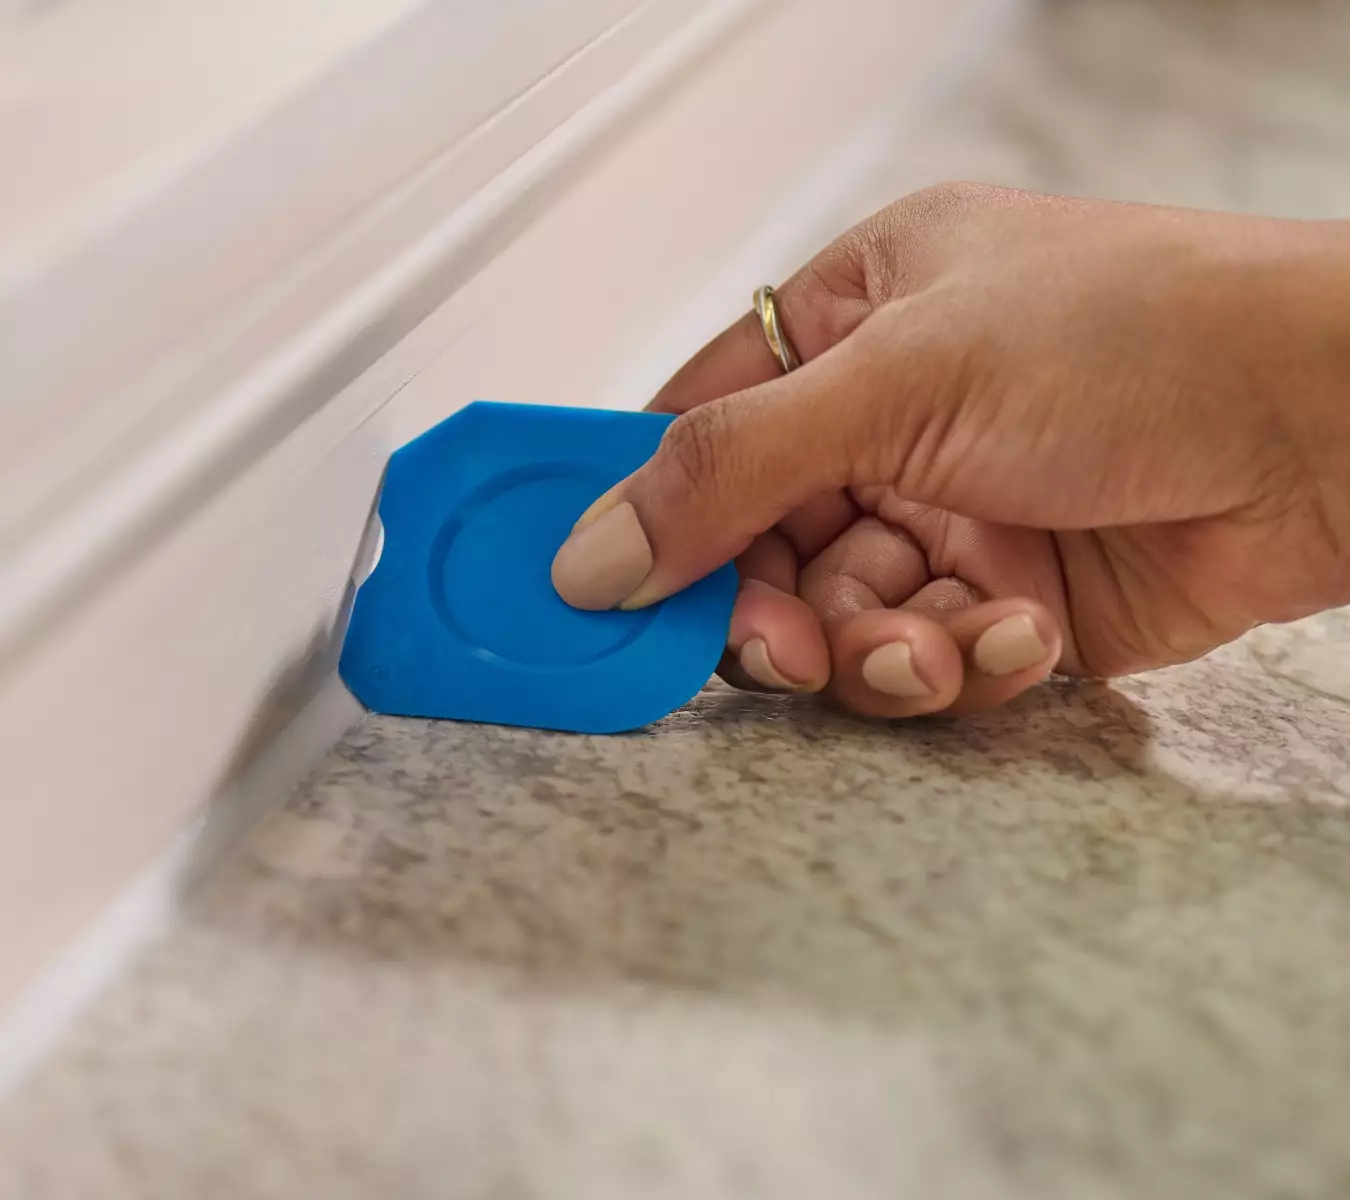
Before applying the new sealant, remove the old bead completely and clean the area thoroughly. Use the GE Sealant Remover Tool or a putty knife to lift away old material, making prep easier. Let the joint dry fully before resealing. Good prep may take extra time, but it will usually make the difference between a temporary fix and a job well done.
-
Using the wrong sealant for the job
If you tend to default to what is already in the garage instead of what the project actually needs, you should probably expect suboptimal results. Different areas around the home expose sealant to different conditions, such as:
- Water
- Humidity
- Temperature swings
- Movement
- Cleaning products
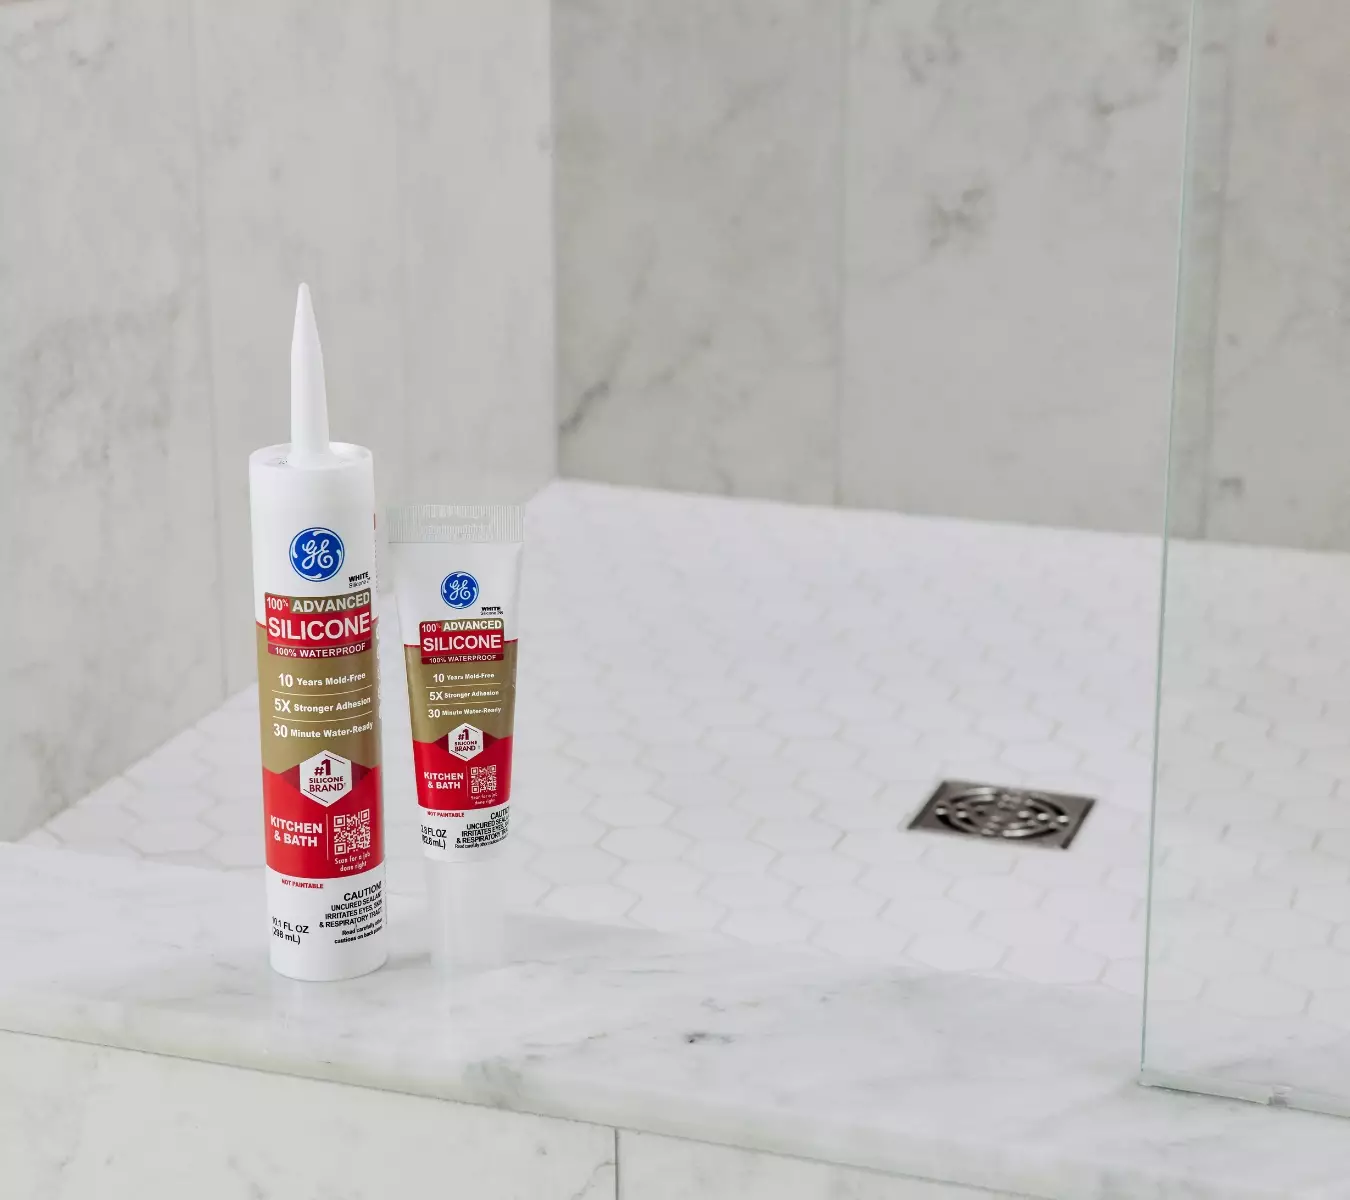
GE Advanced Silicone Kitchen & Bath For kitchen and bathroom sealing, use GE Advanced Silicone Kitchen & Bath. It’s designed for wet, high-moisture areas requiring a durable waterproof seal. For projects where paintability and flexibility are both more at issue, such as specific trim transitions or mixed-material joints, GE Pro Seal Max Kitchen & Bath may be the better fit.
-
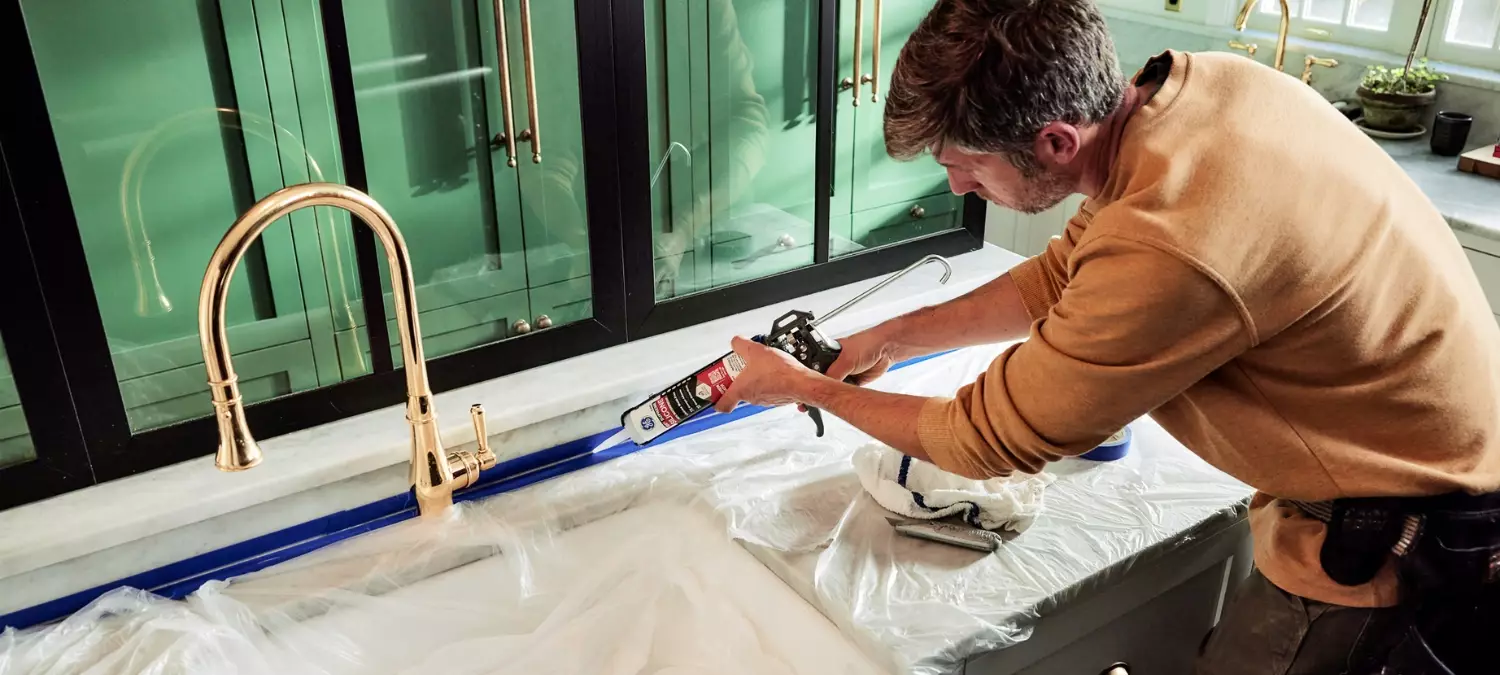
Cutting the nozzle too large and applying too much at once
A homeowner tooling sealant with GE’s Sealant Smoothing Tool. Many DIYers make the mistake of cutting the nozzle too wide, which releases more sealant than the joint actually needs. This will get you a heavy bead that is harder to control, harder to smooth, and more likely to smear onto nearby surfaces. In most cases, it is better to start with a smaller opening and apply a narrower bead that matches the size of the gap. This gives you more control and makes it easier to build a clean line without waste. A dedicated finishing tool like GE’s Sealant Smoothing Tool can also help shape the bead more evenly.
-
Overworking the bead after application
It’s easy to assume more smoothing will improve the final look, but overworking the bead usually has the opposite effect. Going back over fresh silicone again and again can drag sealant out of the joint, spread it onto surrounding surfaces, and leave an uneven finish. It can also weaken the seal by thinning out spots that need full coverage. One of the most useful silicone sealant techniques is to apply the bead with steady pressure, then smooth it once in a controlled pass. Work slowly but avoid repeated touch-ups while the sealant is still fresh. In most cases, you’ll get a cleaner finish from less handling, not more.
-
Ignoring joint size and depth
Silicone sealant works best when the joint is sized properly. If a gap is too wide or too deep, simply filling it with more sealant can lead to poor adhesion, uneven curing, or wasted product. In larger joints, a backer rod can help control depth and support a better seal. This is one of the most overlooked silicone sealant tips because the problem often stays hidden until the bead starts to pull away or fail.
-
Applying sealant in the wrong conditions
Even the right sealant will underperform if you apply it in poor conditions. Silicone should not go onto a surface that is still damp, dusty, or too cold for proper adhesion and curing. DIYers also run into trouble when they seal showers, sinks, or exterior joints right before the area will be exposed to water. Checking the label instructions first helps avoid one of the most preventable silicone sealant mistakes.
Simple silicone sealant tips for a cleaner DIY finish
A cleaner finish usually comes down to mastering a few basic habits and techniques:
- Start by removing old material fully and cleaning the surface well before you apply anything new
- Choose a sealant appropriate for the location, especially in wet areas such as kitchens and bathrooms
- Cut the nozzle small
- Apply steady pressure
- Match the bead size to the joint instead of overfilling it
- Smooth the bead once, not repeatedly
- Give the sealant enough time to cure before exposing it to water or regular use
These silicone sealant tips can also help DIYers understand how to prevent and fix caulking mistakes before a messy bead turns into a failed seal.
To get GE Sealants’ products for your home improvement project, visit these fine retailers in the U.S. or Canada.


