Note: This DIY article is provided as a general guide only and is not intended to take the place of product-specific installation procedures; always follow applicable manufacturers’ instructions. Depending on your home’s age and condition, location within the home, and other potential factors, repairs and/or upgrades or other services may be necessary prior to the beginning and/or completion of your project that may involve the services of a home improvement professional. This article does not include advice pertaining to local building codes and/or any related inspections.
There are cheap and less reliable versions of a caulking gun. In this article, you learn how to choose the best silicone caulking gun for your project and tips on turning your caulking gun into a helpful tool.
There is no significant difference between a caulking gun and a silicone gun.
Understanding the difference between caulking guns vs. silicone guns
Dispensing silicone sealant or caulk barely sounds like rocket science. You may have never bothered to give your caulking gun a second glance after placing it in the toolbox, but is there a difference between caulking guns and silicone caulking guns?
Sometimes referred to as a caulking silicone gun, a caulking gun, a silicone caulking gun, and even a silicone dispenser, all these terms refer to the same thing. Generally speaking, the distinction between caulk and silicone sealant lies more in the chemical and physical properties of the adhesives than in the tool used to dispense them.
However, it is essential to understand that some caulking guns are designed specifically for dispensing caulk or sealant by varying some key features discussed later in this article.
What are the different types of caulking guns?
The next step in understanding how to use a caulking gun silicone dispenser is clearly distinguishing between the different types available on the market. Caulking guns can be grouped into three broad categories, depending on the mechanism involved in delivering the energy required to kickstart the extrusion of the adhesive.
Manual caulking guns
With home improvement projects, the term manual might not be your favorite prefix, but it is often the most affordable. A manual caulking gun relies on manual input (pressure from your hands) to push against the plunger and begin extrusion of sealant.
Manual caulking guns are the most common type available, owing largely to their DIY-friendly nature. The manual configuration comes in the following forms:
Ratchet rod caulking guns
The ratchet rod caulking gun harbors a basic mechanism that causes an incremental movement of the plunger with each squeeze of the trigger. The technology used in ratchet rod caulking guns is relatively old, with significant drawbacks like irregular flow. These guns also have a small thrust ratio of 5:1, making pushing out the sealant harder.
Smooth rod or dripless caulking guns
Smooth rod caulking guns are a technological improvement of the ratchet rod with a smooth rod that allows for consistent pressure when squeezing the trigger, consequently facilitating smoother application. They also boast of a larger thrust ratio of 10:1.
Battery-powered caulking guns
Battery-powered caulking guns have a motorized unit that delivers a smooth and uniform flow with minimal effort. If you’ve had to caulk a project for hours, you will appreciate the extra help from the battery. Adjustable speeds may also be helpful when working on projects requiring high precision.
Pneumatic-powered caulking guns
You might benefit from a pneumatic-powered caulking gun for large-scale professional projects where time, efficiency, and precision are the determining factors. These caulking gun silicone dispensers rely on pressure from compressed air to push against the plunger. They offer the highest consistency level and can easily handle thicker sealants, making them the best for silicone.
Features to look out for in a caulking gun
Understanding the different types of caulking guns is the first step to choosing the best silicone gun for the job. You might have already noticed that a manual caulking gun should be your preferred choice for smaller projects and when you are on a budget. For labor-intensive projects, battery-powered caulking guns offer more efficiency.
For professional and large-scale operations, pneumatic caulking guns reign supreme. However, several other features might influence your choice of a caulking gun.
Thrust ratio
Unless you’re at the gym lifting weights, no one likes having their muscles put to work. The thrust ratio defines the relationship between the force produced in the tube and the pressure applied to the trigger. For example, a 10:1 thrust ratio means that 10 pounds of pressure are generated from a single pound of pressure applied on the trigger. The higher the thrust ratio, the easier it is to maintain a consistent bead.
Built-in cutter and puncture tool
Running around looking for a sharp object to open the sealant is far from convenient. Choose a caulking gun with a thin poker rod to ensure you save time when puncturing the inner foil covering the sealant. A built-in cutter can help you snip the tip of the silicone tube.
Comfortable grip and ergonomic design
The longer you work with caulking guns, the more appreciation you will have for a lightweight and comfortable one. Choose a caulking gun with an ergonomic and comfortable grip (rubberized cushions can be a godsend) to facilitate extended use.
How to use a caulking gun silicone dispenser
Choosing the best caulking gun is only half of the puzzle. Here are steps to help you properly use your caulking gun for your DIY projects.
-
Prepare the surface
Before applying a new layer of sealant to a surface, clear the surface of dirt, debris, or any old sealant, which might affect its bonding strength.
-
Cut the tip of the silicone tube
As mentioned, choosing a caulking gun with a built-in cutter saves you time and energy. However, as a pro tip, for a smoother and more consistent bead flow, you should consider using a utility knife to cut the tip at a 45-degree angle. The 90-degree angle from the cutting tool might be quick but could result in irregular flow.
Choose the size of the cut according to the size of the gap you are trying to seal.
-
Load the silicone tube into the gun and start caulking
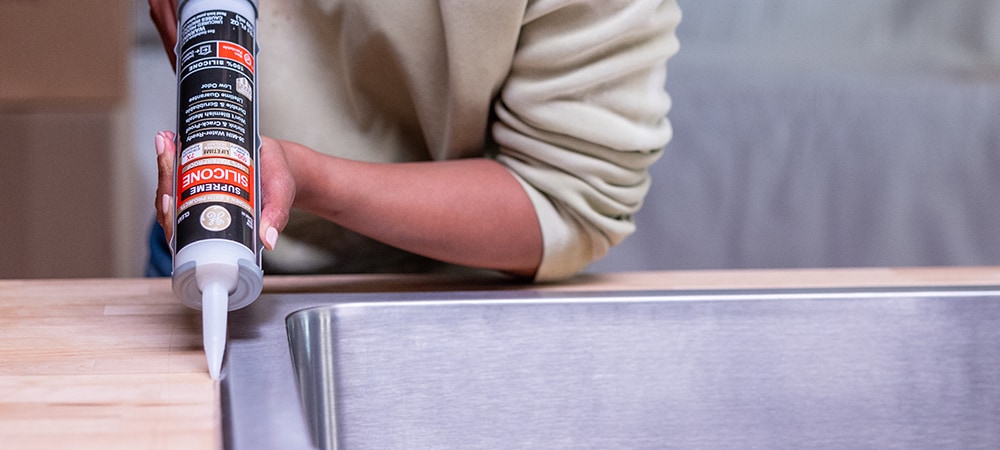
Pierce the inner foil seal of the silicone tube, then insert it into the gun, and ensure the back end of the tube is pressed firmly against the plunger. Once complete, the only thing holding you back from a smooth bead is the squeeze of a trigger.
From ease of use to professional finishes, there are many reasons to pick out the best possible caulking gun. The type, thrust ratio, built-in features, and comfort are some features to look for when choosing a caulking gun.
To find GE products near you, check out our Where to Buy page.
FAQs
Is there a difference in caulking guns?
Several types of caulking guns are available on the market, and they can be grouped into several broad categories depending on the means of delivering pressure or the corresponding applicator.
What is the best caulking gun ratio for silicone?
The best ratio to use when applying silicone sealant using a caulking gun is 10:1
Are expensive caulk guns worth it?
Caulk guns with additional features tend to cost more. Homeowners and professionals should strongly consider investing in a good caulking gun that will suit their needs.


