Note: This DIY article is provided as a general guide only and is not intended to take the place of product-specific installation procedures; always follow applicable manufacturers’ instructions. Depending on your home’s age and condition, location within the home, and other potential factors, repairs and/or upgrades or other services may be necessary prior to the beginning and/or completion of your project that may involve the services of a home improvement professional. This article does not include advice pertaining to local building codes and/or any related inspections.
Clean lines, minimal imperfections, and seamless finishes are exactly what you’re looking for in your home renovation project. Whether or not you’re a stickler for perfection, an ugly sealing job will stick out like a sore thumb and may dampen your style. In this article, we explore the do’s and don’ts of caulking when painting.
Caulk vs. sealant: Understanding the difference
As a cardinal rule, caulk and sealant should never be used interchangeably. Other than their names, caulk and sealant have several other differences, some of which affect their applications. Understanding the difference between caulk and sealant is the first step toward mastering the dos and don’ts of caulking when painting.
Caulk is an acrylic-based adhesive used to fill gaps. Due to its acrylic nature, caulk should not come into contact with moisture, which will interfere with its structural integrity and overall lifespan. On the upside, caulk is paintable and can be used in areas where aesthetic appeal is paramount.
Sealant, conversely, is a silicone-based adhesive with added flexibility and water resistance that makes it ideal for creating a barrier that keeps moisture on one side.
Caulk is preferred for interior painting projects, while sealant is preferred for high-moisture areas.
When and where to use caulk and sealant
Caulk and sealant confer varying advantages to your projects. Before understanding the best techniques and practices for applying both, you should first get a handle on when and where to use caulk or sealant. Below is an in-depth guide on how to do just that.
Caulk: A paintable option
Caulk is water-based and made from a combination of acrylic and latex, which makes it paintable. However, this feature also happens to be its Achilles heel, making it unsuitable for forming a moisture barrier. Caulk is used to fill interior gaps and cracks and is often used to seal around trims, baseboards, crown moldings, and wall cracks.
Silicone sealant: Waterproofing
Silicone sealant is flexible and waterproof, two features absent in a standard acrylic-based caulk. These added features make sealant a staple in high-moisture environments such as the kitchen and bathroom and where you might need to create an indoor-outdoor barrier, such as with windows and doors.
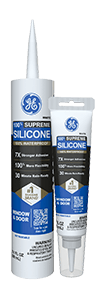
However, despite its capabilities, silicone sealant is not paintable, requiring a creative approach to any finishing that might require painting. GE has plenty of neutral-colored sealants to match most of your project needs. Alternatively, apply a clear silicone after painting to ensure the sealant blends in and remains invisible.
Hybrid paintable sealant: The best of both worlds
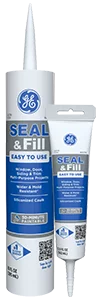
For some projects, a non-paintable sealant just doesn’t cut it. You may utilize GE’s Seal & Fill Multi-purpose Window & Door Caulk when aiming for a professional finish that blends in with the surroundings. As the name suggests, this sealant offers a blend of caulk and sealant properties, making it waterproof and paintable.
This hybrid paintable sealant can be used in the kitchen and bathroom, and around doors, windows, and siding.
When you can get away with using either caulk or sealant
In some unique cases, you may get away with using either caulk or sealant. It is important to emphasize that waterproofing, flexibility, and paintability are not of the utmost importance to the project in these scenarios. You will probably be aiming for a solution to fill a gap or crack in the interior of your home. Examples of these scenarios include:
- Trim and molding: Silicone sealant can seal around interior gaps, trims, baseboards, or crown moldings as well as caulk, as both can effectively fill the gaps and create smooth transitions.
- Door frames: For interior door frames where paintability trumps waterproofing, you may use caulk to blend in with the walls or sealant to confer additional flexibility. Both products effectively seal the gaps.
In these situations, the purposes of caulk and sealant overlap, and the choice of either depends on your professional judgment and preferences.
Caulking when painting: The dos and don’ts
Mastering your caulking technique is bound to improve several aspects of the project. From resource efficiency to time-saving and overall finish, the proper technique is a worthy investment. Below is our professional guide on the dos and don’ts of caulking when painting.
Do: Caulk before painting
Do you apply caulk before or after painting?
In most cases, caulking should come before painting since caulking is meant to cover any gaps and cracks that might stick out after the painting is done. Additionally, when applying caulk, it helps to ensure the adhesive has a smooth uninterrupted surface to ensure maximum bonding strength.
You should also smooth the caulk applied with a gloved finger.
Don’t: Use silicone sealant unless it’s a paintable version
As already mentioned, silicone sealant should not be painted over as it resists the adhesion of most paints which might cause peeling, cracking, and detraction from the surface. If it is mandatory to use silicone sealant, as is the case with the kitchen and bathroom, GE’s Paintable Supreme Kitchen and Bath sealant can offer excellent results.
Alternatively, you could pre-paint the surface and apply either a clear or color-matching sealant to make it less of an eyesore.
Do: Allow sufficient drying time for the caulk
Depending on manufacturer specifications, caulk may need anywhere between 30 minutes to 24 hours to fully cure. It is critical that you ensure the caulk properly dries before trying to paint over it. If in a hurry, you can pick a fast-drying caulk to speed up the process.
Do: Clean surfaces thoroughly before applying caulk
An uneven or dirty surface can negatively impact the caulk’s bonding strength. It is crucial that you wipe down the surface to be sealed and remove any dirt, grease, paint, or caulk remnants to ensure a durable and long-lasting seal.
How to apply caulk for the best finish
A professional finish is the desire of DIYers and professionals alike. Below is a step-by-step blueprint on how to get the best finish whenever applying caulk:
- Prepare the area to be caulked
- Cut the caulk tube tip
- Pierce the inner foil seal (if there is one)
- Apply even pressure
- Smooth the caulk
- Allow caulk to dry (30 minutes to 24 hours)
Caulk or paint first? Caulking should come before painting. If you would like to paint over the caulk to blend in with surrounding walls or surfaces, this can be done after. Siliconized acrylic caulk can be painted over while providing the sought-after waterproofing properties of sealant and should be used in moisture-prone areas.
To find GE products near you, check out our Where to Buy page.


