

Note: This DIY article is provided as a general guide only and is not intended to take the place of product-specific installation procedures; always follow applicable manufacturers’ instructions. Depending on your home’s age and condition, location within the home, and other potential factors, repairs and/or upgrades or other services may be necessary prior to the beginning and/or completion of your project that may involve the services of a home improvement professional. This article does not include advice pertaining to local building codes and/or any related inspections.
Cracked or peeling caulk around tubs, showers, and sinks gives water a way into joints that are supposed to stay protected. Good bathroom caulking is a process of removal, cleaning, application, and curing, not just squeezing out a fresh bead of sealant and hoping it holds. This guide shows how to recaulk bathroom joints in one weekend and get a smoother, more durable shower and tub caulk finish.
GE’s Sealant Remover Tool can help strip out old material cleanly, especially in corners and narrow joints. Additionally, GE’s Sealant Smoothing Tool is useful for finishing a clean final line in a single pass.
Why bathroom caulking fails in the first place
Bathroom caulking fails because the joints are exposed to stress every day. Steam, splashing water, and regular cleaning all put pressure on the bead, especially around tubs, showers, and sink edges. Soap residue and mildew buildup can also collect on the surface and around the edges, which makes it easier for the seal to break down over time.
Corners and seams are especially vulnerable because those areas tend to move slightly as materials expand, contract, or flex with use. Older acrylic products and poorly applied beads usually fail faster in wet zones because they are more likely to shrink, crack, or pull away. This is why shower and tub caulk needs to be selected and applied with bathroom conditions in mind.
What to gather before you start
Before you start, get all your tools and materials within easy reach so the job stays organized from the first cut to the final pass. You will need a caulk gun, gloves, rags or paper towels, painter’s tape, isopropyl alcohol, and GE’s Sealant Remover Tool or a utility knife if the old bead is stubborn or difficult to lift cleanly.
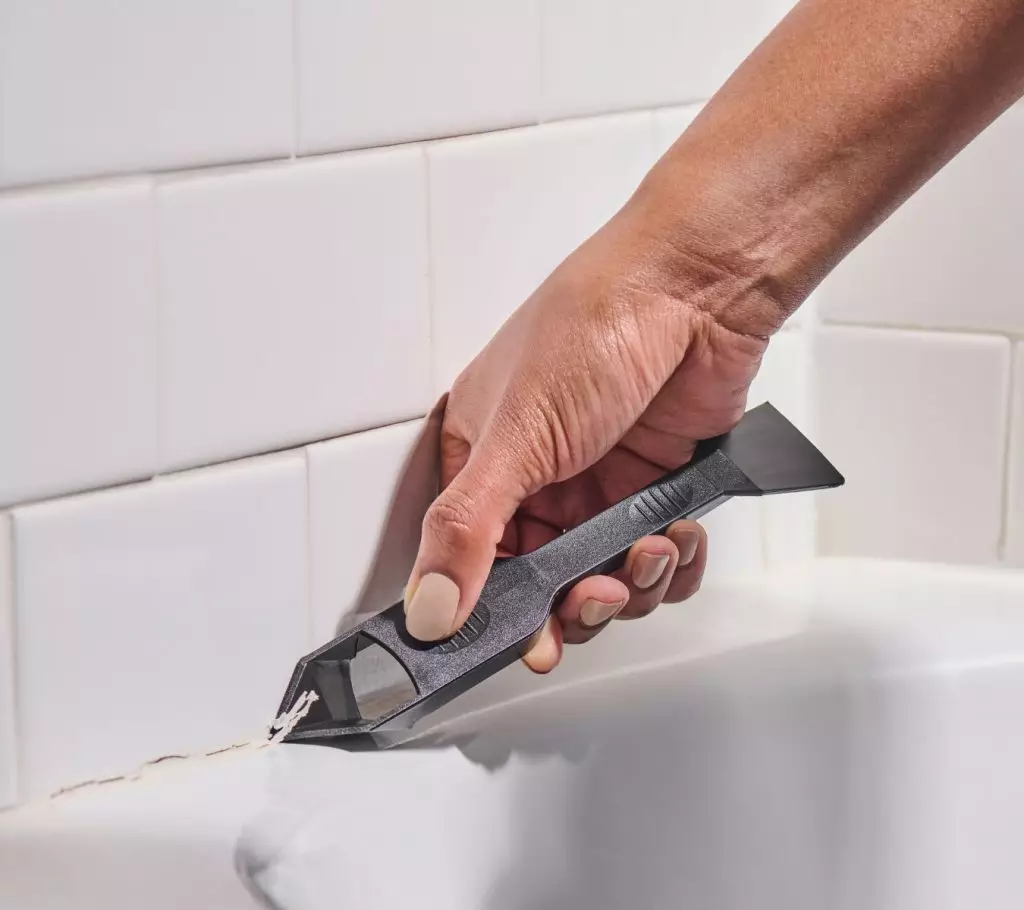
This is also the right time to set out the tools that make removal and finishing easier. GE’s Sealant Remover Tool helps strip out old material more cleanly, especially in corners and narrow joints. Additionally, GE’s Sealant Smoothing Tool is useful for finishing a cleaner final line.
Phase 1: remove the old caulk completely
The first step in any weekend bathroom recaulking project is getting the old bead out fully, not just trimming the loose edge and hoping the rest will hold. Start by cutting or lifting the existing caulk carefully so you can pull it free without gouging the surrounding tile, tub, or fixture surface. Work slowly at corners, wall transitions, and tub or shower seams, since those are usually the tightest and most failure-prone areas.
Once the main bead is gone, go back and remove the leftover residue, too. Thin traces of old material can keep the new bead from bonding evenly. It is also the stage where soap buildup, mildew staining, and trapped grime often show up. If you stop after removing only the bulk of the bead, the job will look done before the surface is actually ready for new sealant.
Phase 2: clean and dry the joint
Once the old caulk is out, clean the joint thoroughly and let it dry fully before moving on. The new sealant will not bond well over soap film, moisture, dust, or leftover residue, so this step is not optional. Wipe the area down carefully and make sure the seam is fully dry before application. If the joint is highly visible, painter’s tape can help control the bead and keep the final line cleaner.
Phase 3: apply new bathroom sealant
Once the joint is clean and dry, cut the nozzle to match the width of the seam you are sealing. A smaller opening usually gives you better control, especially around tubs, shower corners, sink edges, and backsplash transitions where the bead needs to stay neat and consistent.
Load the cartridge, then apply one steady bead with even pressure from start to finish. Try not to stop and restart unless the joint changes direction sharply, because breaks in the pass can leave weak spots or uneven buildup.
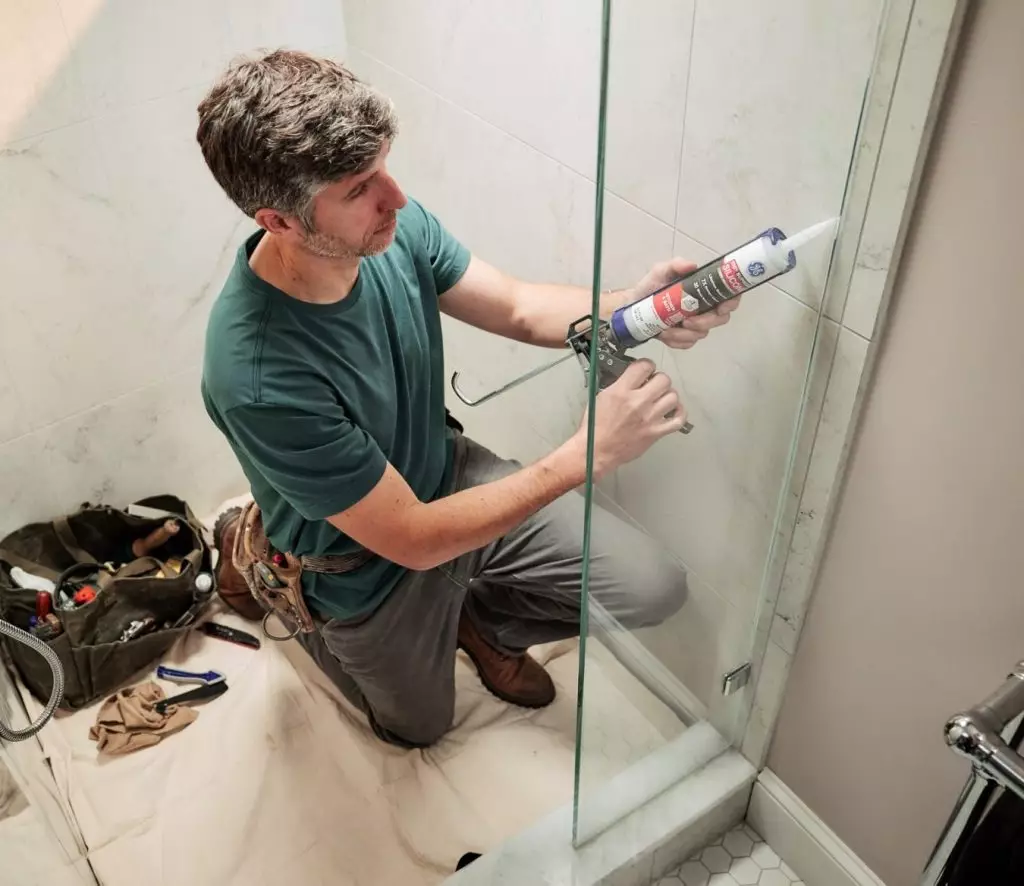
For wet, high-humidity bathroom areas, GE Supreme Silicone Kitchen & Bath Sealant is the lead choice when you want a mold-resistant finish and a strong, long-term performance. It is especially well-suited to the joints that stay exposed to frequent moisture and movement. GE Advanced Silicone Kitchen & Bath Sealant is another strong option for common bathroom joints where you need a durable, waterproof seal around sinks, tubs, and backsplashes.
In either case, the main goal is control. Keep the bead sized to the joint, avoid overapplying material, and focus on creating one continuous line that fully bridges the seam without flooding the surrounding surfaces.
Phase 4: let the new seal cure properly
After the new sealant is in place, the main job is to protect it while it sets. This is the stage where a lot of otherwise solid bathroom caulking jobs get compromised. Do not expose the joint to shower use, splashing, wiping, or cleaning too early. Keep the area as dry and undisturbed as possible for the full cure period so the bead can develop into a stable waterproof seal. If the joint gets wet too soon, the surface may look acceptable at first, but fail earlier than expected.
What a finished bathroom caulking job should look like
A finished bead should look continuous, evenly sized, and fully seated in the joint from one end to the other. Corners should look complete, not thin or broken, and the sealant should stay confined to the seam instead of spreading broadly across the surrounding tile or fixture surface.
This is also the right time to check for mistakes, such as pinholes, skipped sections, or places where the bead did not actually bridge the gap. A good result should look deliberate, neat, and suited to a wet bathroom environment.
To get GE Sealants products for your home improvement project, visit these fine retailers in the U.S. or Canada.


