Note: This DIY article is provided as a general guide only and is not intended to take the place of product-specific installation procedures; always follow applicable manufacturers’ instructions. Depending on your home’s age and condition, location within the home, and other potential factors, repairs and/or upgrades or other services may be necessary prior to the beginning and/or completion of your project that may involve the services of a home improvement professional. This article does not include advice pertaining to local building codes and/or any related inspections.
The kitchen is one of the most water-exposed areas in any home, making waterproofing a critical part of long-term surface protection. Without proper kitchen waterproofing, everyday splashes, spills, and steam can lead to warped floors, swollen cabinets, and mold growth. This guide covers how to seal key areas—and which GE silicone sealants to use—for a cleaner, drier, and more durable kitchen.
Why you need to waterproof your kitchen
Water is a constant in the kitchen—whether from cooking, cleaning, or appliances—and without proper waterproofing, it can quickly cause damage. Moisture that seeps into seams or behind surfaces can lead to swelling, warping, and rot in wood-based materials. Over time, this affects the appearance of your kitchen and can incur costly structural repairs or mold remediation.
Common areas like countertop-to-wall joints, sink rims, and floor edges are particularly vulnerable. If left unsealed, even small, unnoticed leaks can compromise cabinets or cause subfloor damage. In high-use zones like these, waterproofing is far more than just a cosmetic detail.
By proactively sealing kitchen surfaces, you create a barrier that helps defend against everyday wear and tear. It also keeps your kitchen looking clean and finished, even in high-moisture conditions. Whether you’re updating a few seams or sealing after a full remodel, kitchen waterproofing helps preserve the value and integrity of your space.
Where to seal kitchen surfaces
Effective kitchen waterproofing starts with knowing where moisture is most likely to cause problems. Key areas include countertop-to-wall joints, where water from cooking or cleaning can drip down and seep into wall cavities or behind cabinets. Similarly, backsplash seams—especially where tile meets the counter—should be sealed to prevent moisture from soaking into grout or drywall.
Around the sink rim and faucet base, daily use often leads to standing water. These areas are prime spots for mold, mildew, and material breakdown if left unsealed. Sealing around the dishwasher perimeter and cabinet bases adds an extra layer of protection from steam, condensation, or accidental overflows.
Flooring edges, especially with laminate, vinyl plank, or floating systems, are also at risk. Water that seeps into the subfloor can cause warping, buckling, and long-term structural damage. By sealing these transition points and vertical joints, you prevent water from reaching places it shouldn’t.
Don’t let small leaks turn into big problems. Waterproofing your kitchen protects it from daily wear, steam, and spills. Use GE Advanced Silicone Kitchen and Bath Sealant for counters and backsplashes, and GE Supreme Silicone Window and Door Sealant for flooring transitions—both built to resist water, mold, and movement for long-lasting results.
Best GE sealants for waterproofing your kitchen
Choosing the right sealant is key to preventing water damage in the kitchen. Two GE silicone products stand out for their performance, flexibility, and long-term protection.
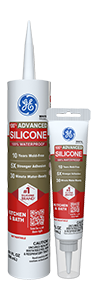
GE Advanced Silicone Kitchen & Bath Sealant is a go-to choice for sealing wet areas like sinks, backsplashes, and countertops. This 100% silicone formula is permanently waterproof and mold-resistant for up to 10 years, making it ideal for kitchens exposed to daily moisture and cleaning. It adheres well to nonporous surfaces like tile, porcelain, glass, and laminate, and it’s water-ready in just 30 minutes—perfect for fast-paced projects or quick repairs.
Recurring leaks around your kitchen sink? Learn how to seal kitchen sinks effectively.
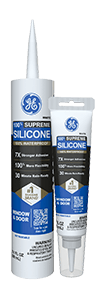
For floor-to-wall joints and cabinet base transitions, GE Supreme Silicone Window & Door Sealant offers the strength and flexibility needed for surfaces that shift or expand. It provides Class 50 flexibility, ensuring a long-lasting seal that won’t shrink or crack under pressure. Its weatherproof design makes it suitable for use near exterior walls or high-traffic areas, where temperature and humidity changes are common.
Both products are available in clear and white finishes to match your kitchen’s design. Whether you’re remodeling or simply resealing problem areas, these GE silicone sealants provide a durable barrier against leaks—and help protect your kitchen from moisture-related damage year-round.
Application tips for kitchen surfaces
Start by removing any old or damaged material using a tool like the GE Sealant Remover Tool. Clean the surface thoroughly to eliminate soap residue, grease, or debris—sealant adheres best to smooth, dry, and clean substrates.

Use painter’s tape along both sides of the joint to ensure clean lines, especially in visible areas like countertops and backsplashes. Cut the sealant nozzle at a 45-degree angle for better control, then apply a continuous bead using steady pressure. Smooth the bead immediately with the GE Smoothing Tool or a gloved finger to ensure even coverage and full contact with both surfaces.
Learn more about installing and sealing kitchen backsplashes in our how-to article.
Allow the sealant to cure according to the product’s instructions. For GE Advanced Silicone, surfaces are typically water-ready in 30 minutes, but full cure may take 24 hours. Avoid heavy cleaning or water exposure during this period.
For a clean finish and optimal sealing performance, don’t rush the process. Careful prep and application will help your sealant perform its job.
Maintenance and inspection tips
Inspect sealed joints every 6 to 12 months, especially around sinks, backsplashes, and flooring edges. Look for signs of deterioration such as cracking, peeling, mold, or separation from the surface. If you spot issues, remove the old sealant and reapply. Even though GE silicone sealants are designed for long-term durability, routine checks ensure their performance stays intact. Keeping up with these simple inspections can prevent costly repairs and extend the life of your kitchen’s surfaces and finishes.