
Note: This DIY article is provided as a general guide only and is not intended to take the place of product-specific installation procedures; always follow applicable manufacturers’ instructions. Depending on your home’s age and condition, location within the home, and other potential factors, repairs and/or upgrades or other services may be necessary prior to the beginning and/or completion of your project that may involve the services of a home improvement professional. This article does not include advice pertaining to local building codes and/or any related inspections.
Bathroom tile takes a daily beating from water, steam, and frequent cleaning. Without regular sealing and maintenance, tile surfaces can stain, loosen, or allow moisture to penetrate behind walls and floors. This guide explains how to protect tile surfaces with GE silicone sealants and simple upkeep steps that keep your bathroom looking clean and performing well.
Why your bathroom tile needs protection
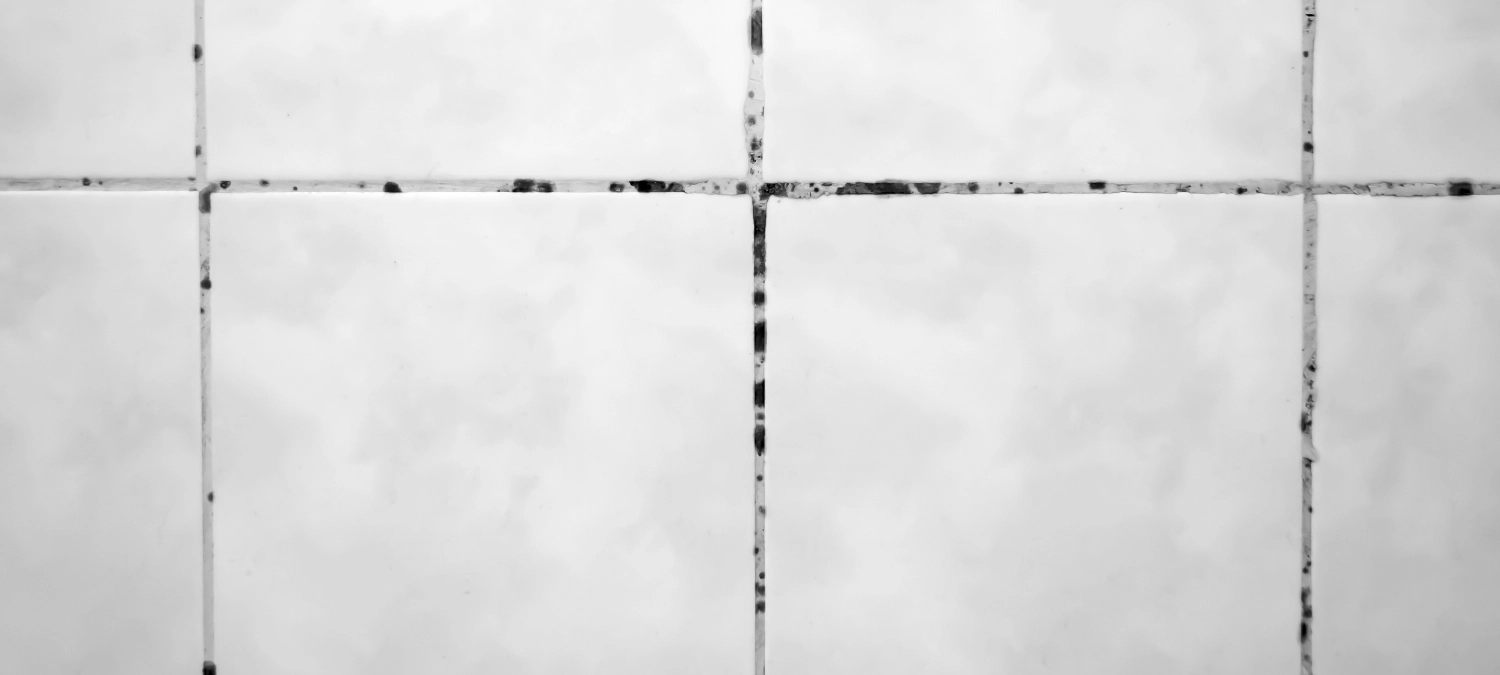
Tile may be water-resistant, but the joints and edges around it are not—and that’s where problems start. Grout and sealant lines are especially vulnerable to water, soap, and humidity, which can break them down over time. When these protective barriers fail, water can seep into walls, floors, or cabinetry, leading to mold, mildew, and long-term, costly damage.
In high-use areas like showers, tub surrounds, and backsplashes, unsealed or deteriorating joints are common trouble spots. Without proper sealing, even small gaps can let moisture in, weakening the adhesive behind tiles or staining grout. Mold and mildew can also develop in corners and seams, making the bathroom harder to clean and less hygienic.
That’s why sealing and maintaining tile surfaces is important. A well-sealed bathroom helps prevent moisture from reaching vulnerable areas while keeping the tile looking cleaner and newer longer. With the right products and a few simple steps, you can extend the life of your bathroom surfaces and protect your home from hidden water damage.
Protect your bathroom tile from daily wear with GE Supreme Silicone Kitchen & Bath Sealant for flexible, waterproof joints—and refresh stained grout with a whitening pen for a like-new finish. Maintenance is simple, but the impact is long-term.
Sealing tile surfaces: key areas
To effectively protect tile surfaces in the bathroom, focus on sealing the areas most exposed to water and humidity. These include the edges where tile meets tubs, showers, or countertops, as well as inside corners and vertical seams where walls join. These junctions are frequent trouble spots for water intrusion, especially in high-splash zones like showers and around sinks.
Don’t overlook the backsplash area behind the bathroom vanity, where water from handwashing or cleaning can easily be collected. The transition joints between tile floors and baseboards or between different flooring materials should also be sealed to prevent water from seeping beneath the surface and damaging subflooring.
Leaky undermount sink? Learn how to seal undermount sinks effectively.
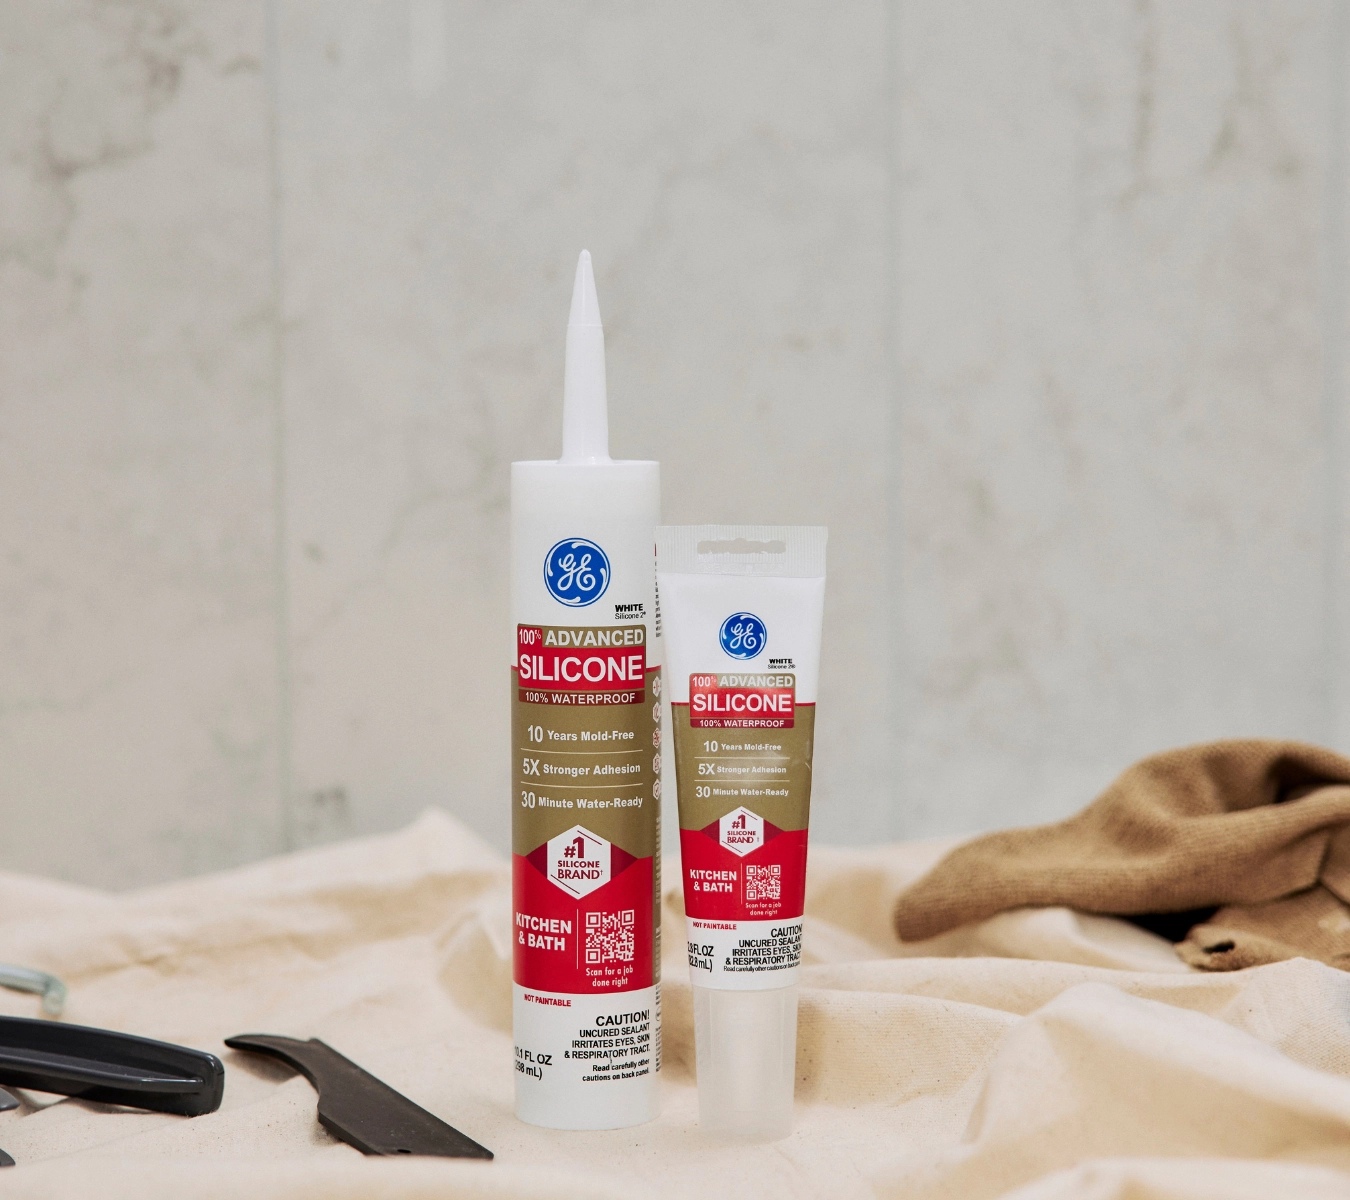
Use a 100% silicone sealant—like GE Advanced Silicone Kitchen & Bath—for these joints, as it remains flexible and waterproof even in wet, high-traffic areas. Proper sealing in these locations prevents mold growth, water stains, and structural damage. It’s a small step that plays a big role in keeping bathroom tile secure, clean, and looking its best over time.
Replacing old or damaged sealant
Over time, bathroom sealant can crack, discolor, or peel away from tile surfaces—especially in high-moisture areas like tub surrounds, backsplashes, and shower corners. When this happens, it’s important to remove and replace the sealant promptly to prevent water from reaching underlying surfaces.
Start by using the GE Sealant Remover Tool to lift away old silicone sealant without damaging tile or grout. Once removed, clean the area thoroughly with soap and water to eliminate residue, mold, or mildew. Allow the surface to dry completely before applying the new sealant.
For long-lasting protection, apply GE Supreme Silicone Kitchen & Bath Sealant. It offers Class 50 flexibility and lifetime mold-free product protection, making it well-suited for wet areas that experience movement or temperature swings. It becomes water-ready in 30 minutes, making it ideal for busy bathrooms where downtime is limited.
Apply a continuous bead along the joint and smooth it immediately with the GE Smoothing Tool or a gloved finger for a clean, finished edge. Allow the sealant to fully cure according to the label before exposing it to water.
Brighten grout lines with a grout whitening pen
Even if your tile is in good condition, dingy or discolored grout can make the entire bathroom look dated. Over time, grout absorbs moisture, soap residue, and everyday dirt—leading to dark spots and uneven coloring. Rather than regrouting, a grout whitening pen offers a simple way to refresh these lines and restore a cleaner look.
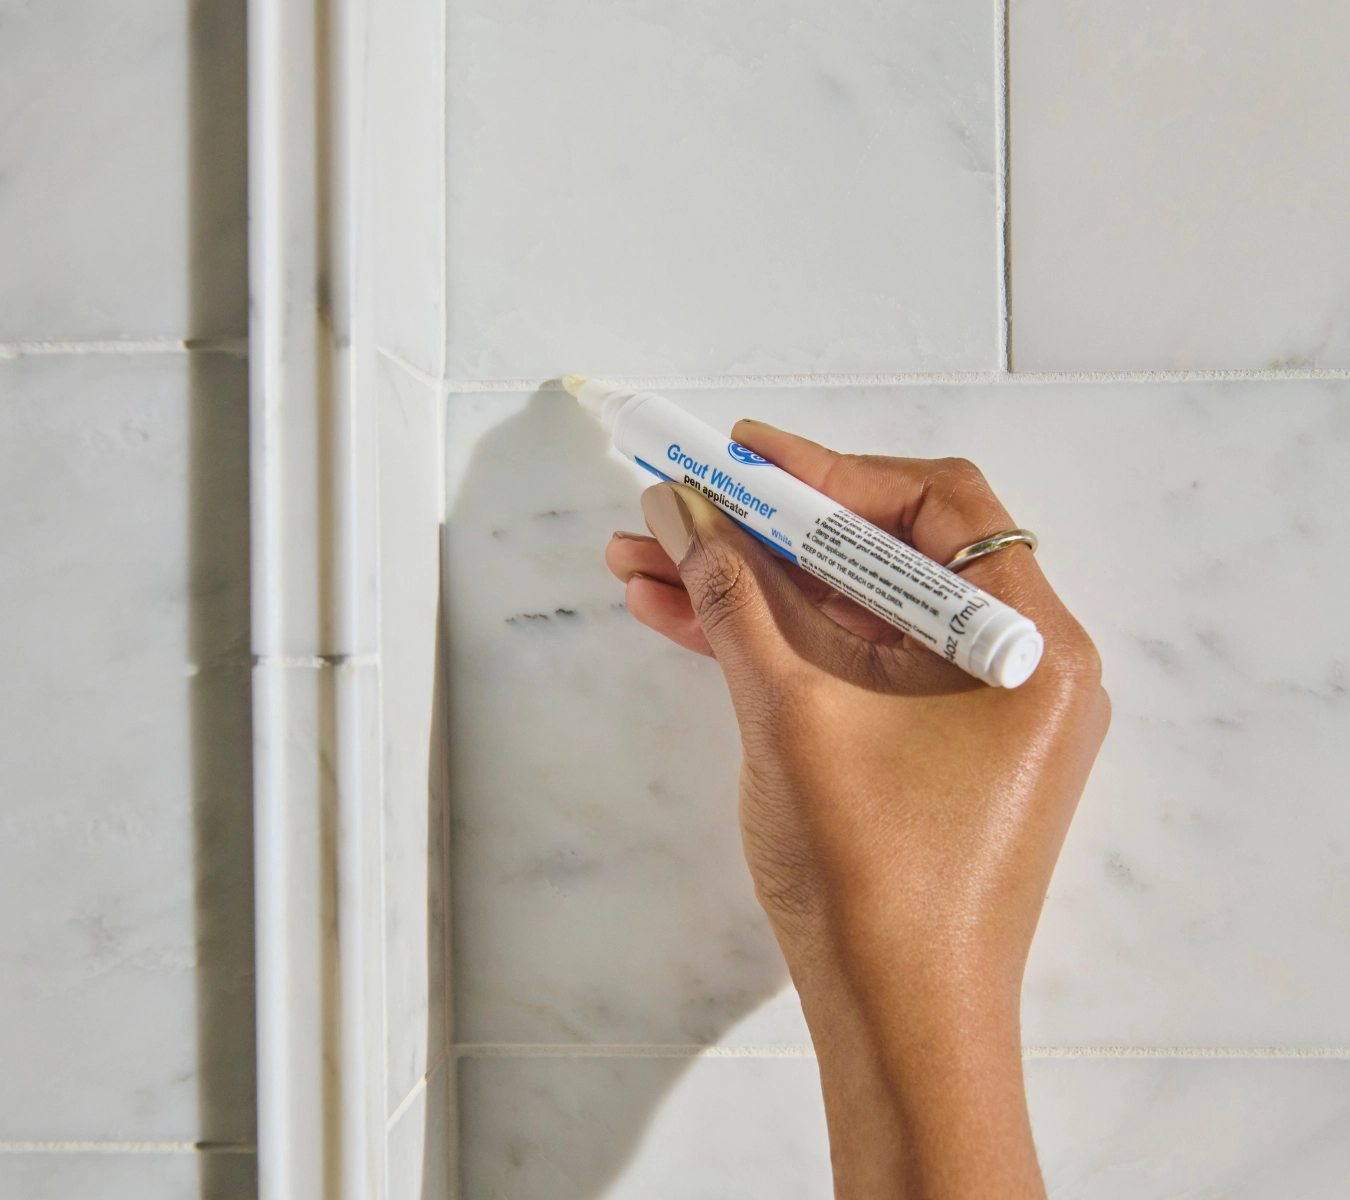
Start by cleaning the grout thoroughly using a non-abrasive bathroom cleaner or a mixture of vinegar and water. Allow it to dry completely. Shake the whitening pen well, then apply it directly along the grout lines, using a steady hand for even coverage. Wipe away any excess with a damp cloth before it dries to avoid haze on the tile surface.
Pairing this quick refresh with newly applied GE Advanced Silicone or GE Supreme Silicone around joints creates a like-new appearance throughout your bathroom. It’s a fast, cost-effective way to brighten the space and improve tile aesthetics without major renovation.
Tips for long-term tile maintenance
Keeping your tile looking new takes more than just a one-time seal. Regular maintenance helps prevent buildup, discoloration, and moisture-related issues that can shorten the lifespan of your bathroom surfaces. Start by checking sealed joints every 6 to 12 months for peeling, gaps, or signs of mold—especially in high-use areas like shower corners and backsplash seams.
Reapply silicone sealant as needed to maintain waterproof protection. Use non-abrasive cleaners to avoid damaging grout or sealant and always run ventilation during and after showers to minimize humidity buildup.
Wiping down tile walls and floors with a towel or squeegee after use also helps reduce water spots and soap residue. With a simple maintenance routine, your sealed tile surfaces will stay cleaner, brighter, and better protected for years.
Read this article if you want more bathroom sealing tips.
To get GE Sealants’ products for your home improvement project, visit these fine retailers in the U.S. or Canada.


