Note: This DIY article is provided as a general guide only and is not intended to take the place of product-specific installation procedures; always follow applicable manufacturers’ instructions. Depending on your home’s age and condition, location within the home, and other potential factors, repairs and/or upgrades or other services may be necessary prior to the beginning and/or completion of your project that may involve the services of a home improvement professional. This article does not include advice pertaining to local building codes and/or any related inspections.
Learning how to seal an outdoor light fixture can bolster your home maintenance efforts and save you money. Our guide to outdoor light fixture sealing explains everything you need to protect these fixtures from the elements.
Supplies for sealing outdoor light fixtures
Gathering the right tools and materials is key to learning how to seal an outdoor light fixture. Here’s what you need to get started when weatherproofing outdoor light fixtures.
- Screwdriver (flathead and Phillips head)
- Utility knife or a pair of heavy scissors
- Rags or paper towels
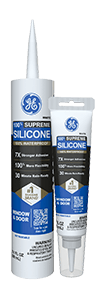
- Supreme Silicone Window & Door sealant
- Caulk gun
- Step ladder (if the fixture is high on the wall)
- Tooling aid
We recommend using silicone sealant over caulk because it’s highly water-resistant, less prone to expansion and contractions, and mold-resistant.
Silicone sealant is better than acrylic caulk for this project. Avoid using acrylic caulk when sealing around an exterior light fixture because it’s less flexible and may crack over time when exposed to inclement weather. Silicone sealants are better because they’re durable, waterproof, and can accommodate the fixture movements against the brick wall.
How to seal outdoor light fixture on brick wall
Here’s a step-by-step guide on how to seal an outdoor light fixture mounted on a brick wall.
-
Set up the work area.
Spread a drop cloth or an old blanket directly below the light fixture. Position the step ladder in the center of the work area. We recommend using a step ladder when sealing an elevated outdoor light. It provides a better view of your workspace and minimizes strain.
-
Position the step ladder.
Place it securely against the brick wall to maximize safety and safeguard your well-being.
-
Remove the fixture.
Use the step ladder to reach the outdoor luminary and detach the fixture from the wall with the screwdriver. A fixture that’s attached directly to the wall is unlikely to form a waterproof seal. While you may use a gasket or caulk to seal an outdoor fixture, they require maintenance over time. Conversely, you may use a high-quality silicone sealant to create a durable, weatherproof gasket.
-
Clean the area.
Use a moist rag or towel to clean around the outdoor fixture. Silicone sealants work best when applied to a spotless surface. Pat the area dry with paper towels or leave it to air dry.
-
Cut your silicone tube.
Use a utility knife to cut off the tip of the sealant tube. Cut the tip at a 45-degree angle instead of straight across to create a more pointed nozzle. An angled nozzle gives you better bead size and flow when applying the sealant for a clean professional finish.
-
Puncture the inner foil seal.
Swivel the metal rod attachment at the front end of your caulk gun and insert it into the cartridge’s nozzle to break the inner foil. You may also use a long pin or nail.
-
Load the caulk gun.
Insert Supreme Silicone Window & Door sealant into the gun.
-
Apply a bead of silicone sealant.
Apply a bead of silicone sealant directly on the brick wall, tracing the width of the area covered by the outdoor light fixture.
-
Smooth the silicone.
For good adhesion, create a nearly invisible seal around your fixture.
-
Refasten the fixture.
Replace the fixture and fasten it to the brick wall using the screws.
-
Let the silicone cure.
Let Supreme Silicone Window & Door sealant cure for 30 minutes. Curing is a chemical process during which the silicone reacts with the air moisture to create a waterproof seal around your fixture.
How to seal an outdoor light fixture on siding
Unlike brick walls or stucco, siding has a flat surface that allows the fixture to lie flush with the wall. As such, you may create a waterproof seal without detaching the fixture from the wall. Here’s what you’ll need to seal around an exterior light fixture:
- Rags or paper towels
- Utility knife or a pair of heavy scissors
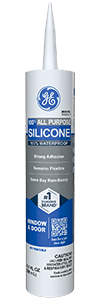
- All Purpose Silicone 1® sealant
- Caulk gun
- Step ladder (if the fixture is high on the wall)
- Tooling aid
- Water
Here’s a step-by-step guide on how to seal an outdoor light fixture on siding:
-
Prepare your work area.
Spread an old blanket below the light fixture to catch any sealant that falls on the ground. Place a step ladder below an elevated light fixture for improved access and minimize strain.
-
Clean the area around the fixture.
Use the cloth rag to remove dirt and dust around the fixture. You may also clean it with soapy water. Silicone sealants form durable and flawless seals around fixtures when the surface is spotless. Pat the area dry with paper towels or leave to air dry. Never apply a silicone sealant on a wet surface when sealing around exterior light fixtures.
-
Cut the nozzle.
Cut the nozzle of the silicone sealant tube. Use a pair of heavy scissors or a utility knife to cut the tip at a 45-degree. An angled cut created a pointed tip that allows the sealant to flow out of the tube evenly and smoothly, preventing messy blobs and drips. Such a tip lets you guide sealant into tight corners and edges as you seal an outdoor light fixture.
-
Puncture the inner foil seal.
Insert the metal rod attachment on your caulk gun into the cartridge’s nozzle and use it to break the inner foil. Any sharp, long objects, including nails and pins, may also work.
-
Load the sealant gun.
Load All Purpose Silicone 1® sealant into the gun.
-
Apply the sealant.
Hold the angled side of the nozzle to the light fixture and apply a continuous bead of the silicone sealant around the light fixture. Cover the entire fixture but leave a weep hole at the bottom to keep moisture from accumulating inside.
-
Tool the sealant.
Leave the sealant to set for 5 to 10 minutes. Use a sealant tooling aid to shape the silicone bead around the light fixture. Tooling a sealant gives your project a uniform, professional-grade finish while ensuring proper adhesion between the fixture and siding. Tooling pushes the sealant into the gaps and crevices, creating a tight, weatherproof seal. For a classy, professional finish, dip your tooling aid in water. That prevents the sealant from sticking to the tool and lets you achieve a smooth, uniform finish.
-
Leave the sealant to cure.
The All Purpose Silicone 1® sealant cures fully in 12 hours. The curing process transforms the liquid sealant into a solid, rubber-like material. The silicone reacts with the atmospheric humidity to create a durable, waterproof seal. Although silicone may feel dry to the touch within 30 minutes of application, it takes at least 12 hours before it’s waterproof or ready for full service.
Don’t let inclement weather ruin your outdoor light fixtures. Silicone sealants help you create weatherproof seals that protect your fixtures for years!


