
Note: This DIY article is provided as a general guide only and is not intended to take the place of product-specific installation procedures; always follow applicable manufacturers’ instructions. Depending on your home’s age and condition, location within the home, and other potential factors, repairs and/or upgrades or other services may be necessary prior to the beginning and/or completion of your project that may involve the services of a home improvement professional. This article does not include advice pertaining to local building codes and/or any related inspections.
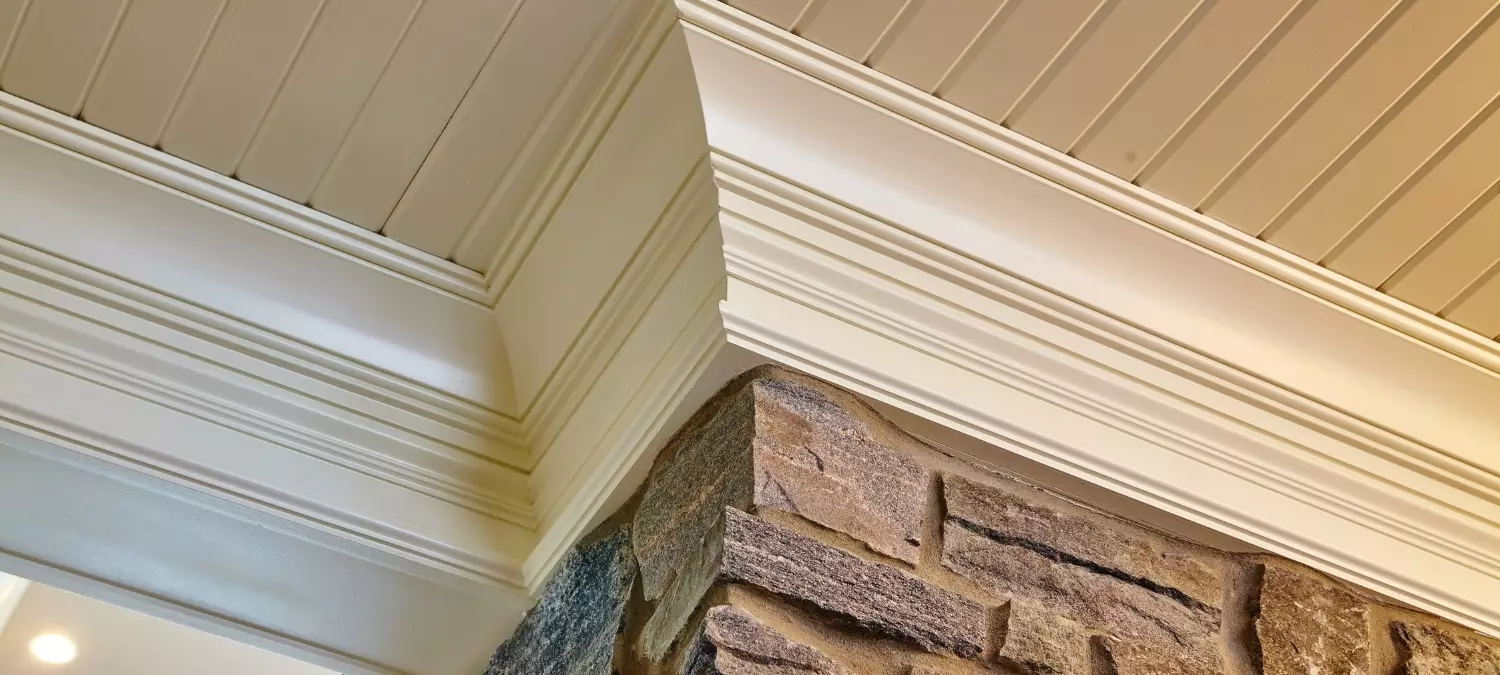
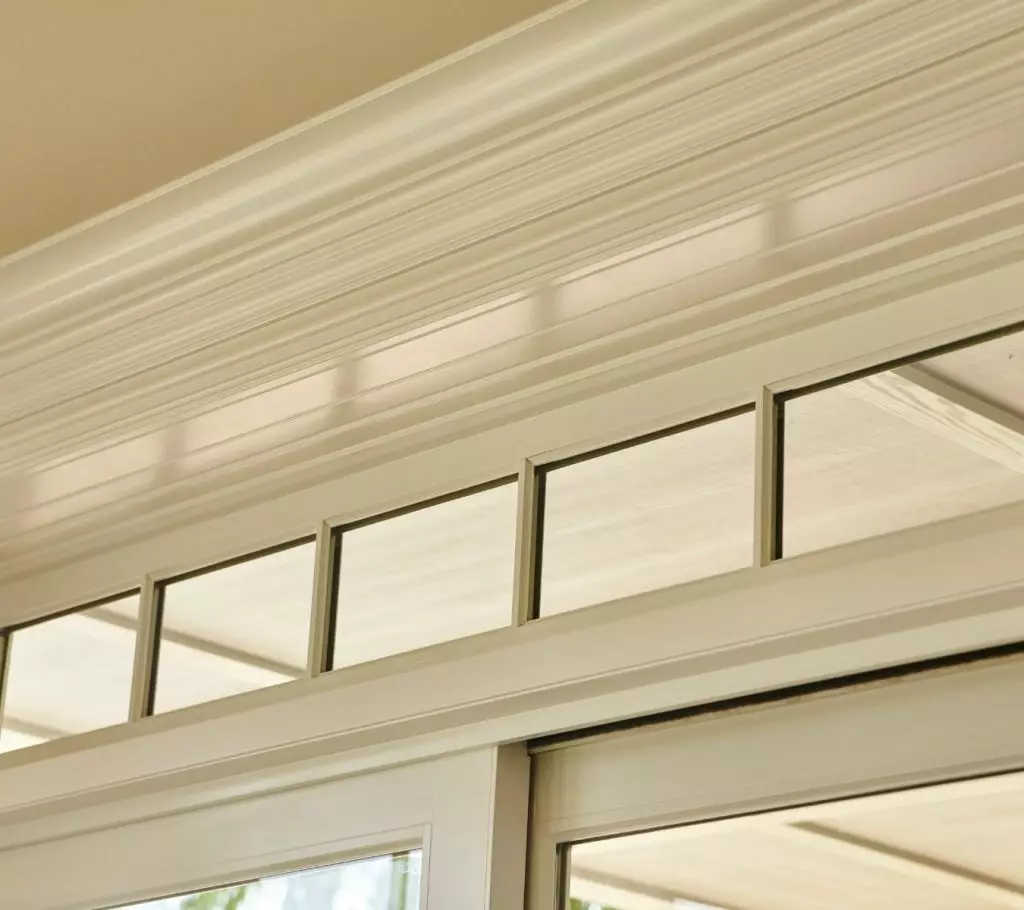
Crown molding can instantly elevate a room, adding architectural detail and a polished, finished appearance. But even perfectly installed molding can look incomplete if seams, corners, and ceiling gaps aren’t properly sealed. That’s where caulking crown molding becomes essential.
Without caulk, crown molding can appear unfinished, especially after painting. Tiny shadows and uneven seams tend to stand out once light hits the trim. Proper sealing helps the molding blend smoothly into the room’s overall design.
Why caulking crown molding matters
Even carefully installed crown molding often has small gaps where the trim meets the ceiling or wall. Seasonal temperature changes, humidity, settling, and slight installation inconsistencies can all create visible seams.
Caulking crown molding helps:
- Fill uneven gaps between molding and surfaces
- Hide nail holes and minor imperfections
- Create seamless transitions for painting
- Prevent moisture or air infiltration
- Reduce the appearance of cracks over time
- Deliver a cleaner, more professional finish
Without caulk, crown molding can appear unfinished, especially after painting. Tiny shadows and uneven seams tend to stand out once light hits the trim. Proper sealing helps the molding blend smoothly into the room’s overall design.
Choosing the best caulk for crown molding
One of the most common questions DIYers ask is: What’s the best caulk for crown molding?
The answer depends on the location, flexibility needs, and whether the molding will be painted.
Acrylic latex caulk
Acrylic latex caulk, such as GE Painter’s Pro Siliconized Acrylic Caulk, is a commonly used product for interior trim projects.
Some pros include:
- Easy to apply
- Paintable
- Quick clean up with water
- Good for small interior gaps
For basic trim work in stable indoor environments, acrylic caulk can work well. However, it doesn’t offer the same level of flexibility as silicone under temperature fluctuations and movement.
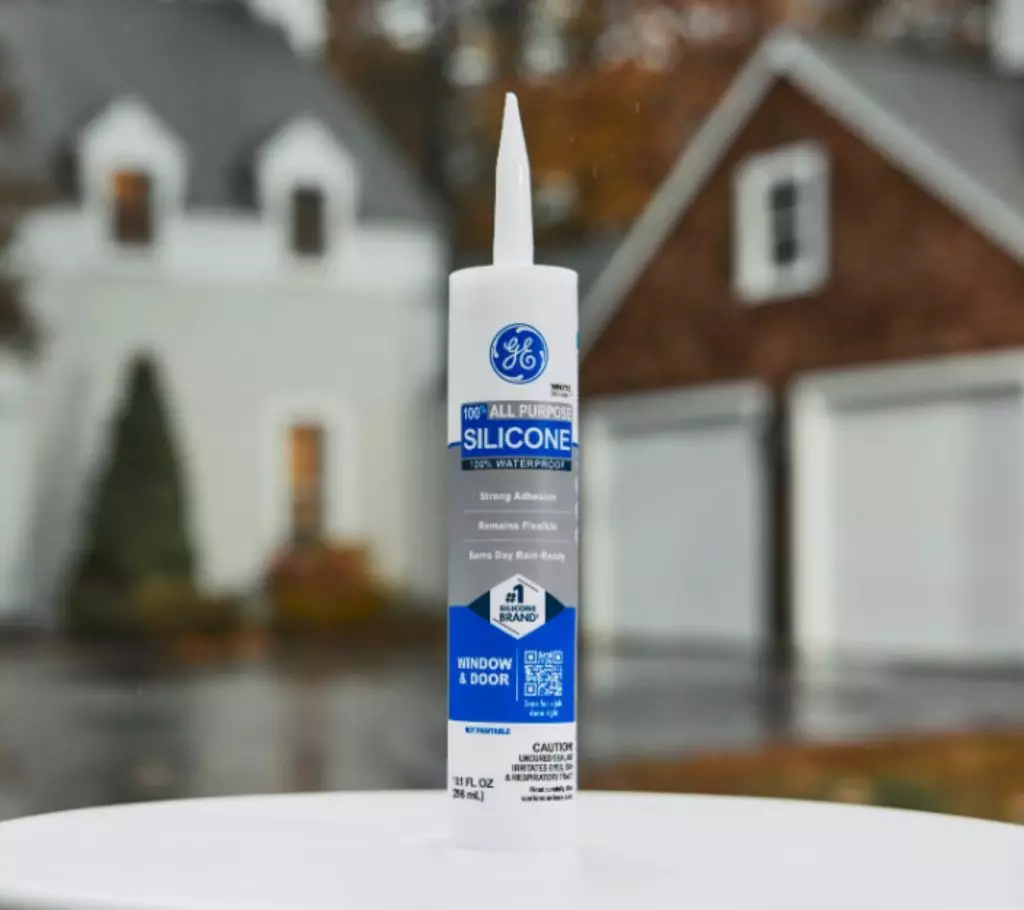
Silicone sealant
Silicone sealant offers excellent flexibility and durability.
A few of its pros are:
- Highly-flexible
- Water-resistant
- Long-lasting
- Excellent crack resistance
The biggest downside of silicone sealant, however, is that it’s not paintable. Because aesthetics are essential when you finish crown molding, you’ll need to find one that complements the trim. GE All Purpose Silicone Sealant is available in white and clear, so you can match with ease.
Paintable hybrid sealants
For many DIY trim projects, a paintable hybrid sealant like GE Pro Seal Max Window & Door offers the perfect blend of performance and appearance. It works perfectly around trim while combining the flexibility and durability of silicone with the paintability of acrylic. It resists cracking better than standard acrylic caulk while still allowing you to achieve a smooth painted finish.
How to prep crown molding before caulking
Surface preparation is one of the most important steps when you seal crown molding. Applying caulk over dust, old paint buildup, or loose debris can lead to poor adhesion and uneven lines.
Before getting started, gather the following materials:
- Your preferred crown molding caulk
- Caulk gun
- GE Sealant Remover Tool
- Painter’s tape
- Damp cloth or sponge
- Putty knife
- Sandpaper
- GE Sealant Smoothing Tool
- Paint and primer
1. Clean the surface
Wipe down the molding, wall, and ceiling areas with a damp cloth to get rid of dust and debris. Let everything dry completely before applying caulk.
2. Remove old caulk if necessary
If you’re redoing existing trim, use the GE Sealant Remover Tool to remove cracked or peeling caulk. Smooth rough areas with light sanding.
3. Tape for cleaner lines
Painter’s tape can help create sharper edges, especially for beginners. Apply tape slightly above and below the seam you plan to caulk.
Step-by-step guide to caulking crown molding
Once the surfaces are prepared, you’re ready to begin caulking crown molding.
1. Cut the caulk tube tip
Cut the nozzle at a 45-degree angle. Start with a smaller opening to avoid applying too much product at once. Then, puncture the inner seal if needed and load the tube into your caulk gun.
2. Apply a consistent bead
Hold the caulk gun at roughly a 45-degree angle and apply steady pressure while you guide it along the seam.
Focus on:
- Gaps between the molding and the ceiling
- Gaps between the molding and the wall
- Inside corner joints
- Miter seams
Try to maintain a continuous bead without stopping frequently.
3. Smooth the caulk
While some DIYers use a finger to smooth caulk, the GE Sealant Smoothing Tool typically produces cleaner, more consistent results. It helps create professional-looking lines while evenly removing excess sealant. It’ll also help reduce mess and product waste.
To use the Sealant Smoothing Tool, run it gently along the bead before the sealant skins over.
4. Remove excess caulk
Wipe away excess product using a damp cloth or sponge. If you used painter’s tape, remove it carefully before the caulk fully cures.
5. Allow proper drying time
Follow the manufacturer’s cure time recommendations before priming or painting.
Top tips for a professional finish with crown molding caulk
If your goal is to finish crown molding with a clean, polished appearance, these extra tips can make a major difference:
- Use less caulk than you think: Overapplying caulk creates bulky lines that draw attention instead of blending in naturally.
- Work in small sections: Caulk can begin to skin over quickly. Working in smaller sections helps ensure smoother results.
- Keep your Sealant Smoothing Tool clean: Wipe it frequently during use to prevent buildup and streaking.
- Prime before painting: Even paintable caulks often benefit from primer for more uniform paint coverage.
- Inspect under lighting: After caulking, check the molding under both natural and artificial light. Small imperfections are easier to spot before painting.
With patience and the right technique, you can confidently finish crown molding like a pro and achieve crisp, seamless results throughout your space.
FAQ
Should you caulk crown molding before or after painting?
It’s best to caulk crown molding before painting. Applying caulk first helps fill gaps and seams so the paint finish looks smooth and seamless. Once the sealant or caulk has fully cured, you can prime and paint over it for a polished result.
What is the best caulk for crown molding?
The best caulk for crown molding depends on your preference. Acrylic is great for its paintability. Silicone sealant offers flexible protection. Hybrid sealants combine paintability and flexibility to reduce cracking while still allowing you to achieve a smooth, professional-looking painted finish.
Can you use silicone sealant on crown molding?
Yes, you can use silicone sealant on crown molding, especially in areas exposed to moisture or movement. However, traditional pure silicone is not paintable, which makes it less than ideal for interior trim projects unless you can find a match.
Looking for the best GE product for your next home project? Find a retailer nearest you in the U.S. or Canada.


