Note: This DIY article is provided as a general guide only and is not intended to take the place of product-specific installation procedures; always follow applicable manufacturers’ instructions. Depending on your home’s age and condition, location within the home, and other potential factors, repairs and/or upgrades or other services may be necessary prior to the beginning and/or completion of your project that may involve the services of a home improvement professional. This article does not include advice pertaining to local building codes and/or any related inspections.
Improving energy efficiency is a significant pain point when the topic of cost-effectiveness is tabled. Whether you are a contractor, professional, or a simple homeowner, having an energy-efficient home can have tremendous benefits. While some architects recommend incorporating greenery to your walls, or having high ceilings, for those of you who can’t make such drastic changes, the answer may be in your windows.
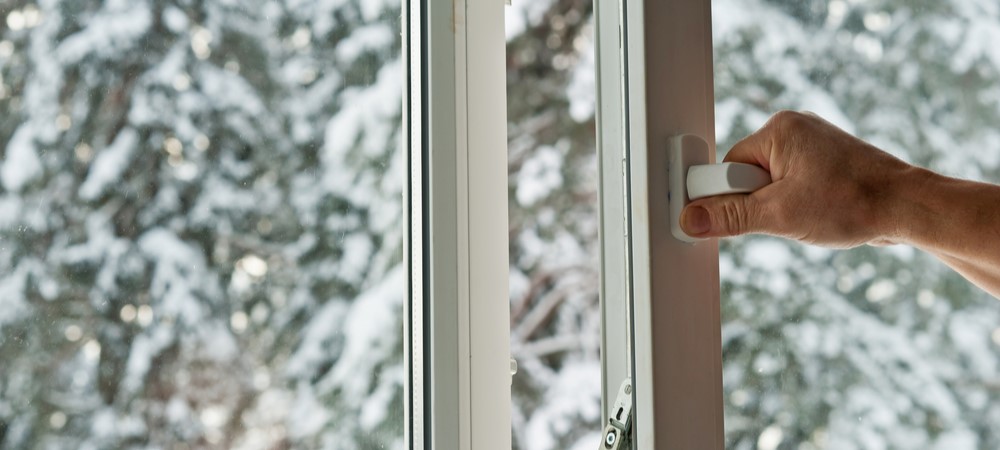
Windows offers more than an aesthetic value to a property. However, they often facilitate the flow of drafts in and out of the house. In the long run, these defects can set you back several thousand dollars in electricity bills (primarily due to air conditioning) as well as increase your carbon footprint. This article explores some of the most effective (and simple) ways of how to apply sealant to keep your home energy efficient.
Tip 1: Understanding leaks in your windows and how to find them
Before you go about fixing the various leaks and gaps in your windows, you have to find them. This task may prove to be a tremendous problem, especially when the gaps are millimeters thin and barely visible to the naked eye. Depending on the nature and material of your windows, you may need one or more of the following techniques to locate cracks.
Flames
Small open flames are very sensitive to drafts (you know this if you’ve ever tried walking with a candle in hand). Consequently, you can hold a burning candle next to your window and pass it along its length and width to identify streams of air. As a disclaimer, this method works best during windy conditions.
Smoke
If you have a smoke-emitting object lying around (like an incense stick), you could use this to identify cracks. Just like open flames, smoke can point to the trajectory of flowing air, helping you mark them up for sealant later on.
We prefer smoke over fire as it is not only safer but also works on calmer days.
Inspect glass panes
Double-pane glass windows are notorious for coming apart. Cracks and broken seals on the pane can allow heat and cool air to escape the building and, therefore, should be promptly identified.
Materials and tools needed
Sealing a window isn’t rocket science, but it can be a daunting task for some. To ensure you hit the ground running, you should consider stocking up on the following essential tools. Depending on your preferred technique, you may or may not require all the tools highlighted in the list.
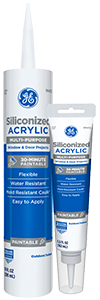
- All-purpose silicone sealant
- All-purpose caulk
- Weather stripping
- Window insulation film
- Foam tape
- Silicone caulking gun
- Sharp blade
- Measuring tape
- Screwdriver
The best sealing techniques to keep your home cozy
It is safe to say that when it comes to sealing windows, there is no such thing as one-size-fits-all. Depending on the material and characteristics of your window, different techniques may be more effective than others when getting the job done. However, you can follow our guide below on the best sealing techniques to make sure you give yourself the best start.
Tip 2: How to apply sealant
There are several things to consider when thinking of what sealant to use. Silicone-based sealants are excellent when it comes to insulating your windows, and are a quick way to start saving on those energy bills. Exterior grade sealants are ideally silicone-based because of the extreme demands from the elements. Interior-grade sealants are usually caulk-based. To apply the sealant, you should clean the area you would like to seal and ensure there is no caulk debris from any previous sealing attempts.
How to use a caulk gun
One of the caulking gun tips to keep in mind is to cut the caulk at exactly 45 degrees before placing it in the caulking gun to ensure smooth flow (you could also use a glue applicator for this). Piercing the inner foil of the cartridge before applying the sealant will prevent the tube from exploding from the back side when you apply pressure. You should then apply the sealant to your desired location and smooth it with a gloved finger (to avoid any of it sticking to you). The final step in applying the caulk would be to let it cure. Depending on the manufacturer’s specifications, this may take varying amounts of time.
Tip 3: Install some weather stripping
Popular in movable points all around your house, weather stripping is an effective way of sealing windows, but it is susceptible to wear and tear. In case your weather stripping is missing or damaged you should consider replacing it. The best options for weather stripping include:
- Self-adhesive double-sided weather stripping
- Nail-on weather stripping
- Felt
- V-strip
Your choice in weather stripping should be governed by utility. Closely evaluate your windows and follow the manufacturer’s recommendations when applying the strips.
To apply the strip, cut the weather strip according to the dimensions of your window and press it firmly into place. Ensure there are no wrinkles while doing this. An adhesive applicator can be a valuable tool here.
Tip 4: Use window insulation film
Window insulation will help you shave off a few extra degrees during summer and maintain warmer temperatures during winter. As a bonus, applying the insulation film is as easy as applying weather stripping, albeit at a larger scale. All you have to do is cut the film to size, apply it, and use a heat gun to eliminate any wrinkles made during the installation.
Tip 5: Foam application
If you have gaps that weather stripping just can’t fill, you should consider foam application. Applying foam involves measuring the gap size, cutting the foam tape to fill the gap, and then finally pressing in the foam tape until it fits snuggly. Spray foam sealants are also a healthy alternative.
Tip 6: Adapting through the seasons
Preparing for seasonal changes could be the difference between having an incident-free year or paying exorbitant energy fees from inefficient energy usage. Preparing for winter is especially important as heating costs can skyrocket in a matter of days. Before the cold weather sets in, you should address any condensation issues and assess for leaks.
Repairing leaks (using a waterproof sealant) before summer can also result in significant savings. For maximum efficiency, you should consider installing double-glazed windows or retrofitting existing windows. Additionally, you can also use window treatments such as thermal curtains, blinds, and shades. Always prioritize professional equipment when carrying out insulation to improve your window’s life expectancy.
Small gaps around windows have the potential to ruin you financially in the long run. To avoid digging deep into your pockets to cover renovation and energy fees, you should consider sealing your windows. Silicone sealant is perfect for plugging the cracks and holes that allow rogue air in and out of your home. Purchasing the best GE caulk is your first step toward making your home toasty in winter and cool during the summer.
To find GE products near you, check out our Where to Buy page.