
Note: This DIY article is provided as a general guide only and is not intended to take the place of product-specific installation procedures; always follow applicable manufacturers’ instructions. Depending on your home’s age and condition, location within the home, and other potential factors, repairs and/or upgrades or other services may be necessary prior to the beginning and/or completion of your project that may involve the services of a home improvement professional. This article does not include advice pertaining to local building codes and/or any related inspections.
An unsealed attic can let summer heat pour into your home, forcing your AC to work overtime and driving up energy costs. Small gaps around pipes, vents, and framing let hot air in—and cool air out. This guide walks you through how to air seal your attic step by step using GE sealants to keep your home cooler, more efficient, and pest-free.
Air sealing your attic with GE Advanced Silicone Window & Door Sealant and GE Multipurpose Foam helps prevent hot air, humidity, and pests from entering your home. Target small cracks, wide gaps, and hatch leaks now to reduce your energy costs and keep your home cooler through the hottest months.
How to keep your home cool
Follow this step-by-step guide to air-seal your attic before summer to keep the home cool and keep out pests.
- Inspect for air leaks Before you start sealing, take time to thoroughly inspect your attic for air leaks. Focus on common problem areas where hot outdoor air can enter or conditioned air can escape. These include gaps around plumbing stacks, light fixtures, chimney chases, attic knee walls, and places where walls meet the attic floor. Small cracks, holes, or seams in framing often go unnoticed but can have a big impact on your home’s energy efficiency.Use a flashlight to look for visible gaps, or try a smoke pencil to detect air movement on breezy days. Look for dust trails or insulation darkening, which often indicate airflow. Mark each leak with painter’s tape or a marker so they’re easy to locate when you’re ready to seal. A complete inspection ensures you target every vulnerable spot and get the most out of your sealing work.
- Seal gaps and cracks with silicone sealant

A photo of GE Advanced Silicone Window & Door Sealant. Once you’ve identified small gaps and cracks, seal them using a high-performance silicone sealant. GE Advanced Silicone Window & Door Sealant is ideal for attic use. It’s 100% waterproof, permanently flexible, and adheres well to wood, metal, and other common attic materials. This makes it especially effective for sealing around pipe penetrations, wiring, vent stacks, and framing joints exposed to seasonal temperature shifts.
Start by cleaning the area to remove dust and debris, which can impede adhesion. Cut the nozzle at a 45-degree angle, load the cartridge into a caulk gun, and apply a steady, continuous bead along each gap. Immediately smooth the sealant with GE’s Sealant Smoothing Tool or a gloved finger to ensure it bonds evenly and fills the space.
Learn more about the superior durability of silicone sealants in this how-to guide.
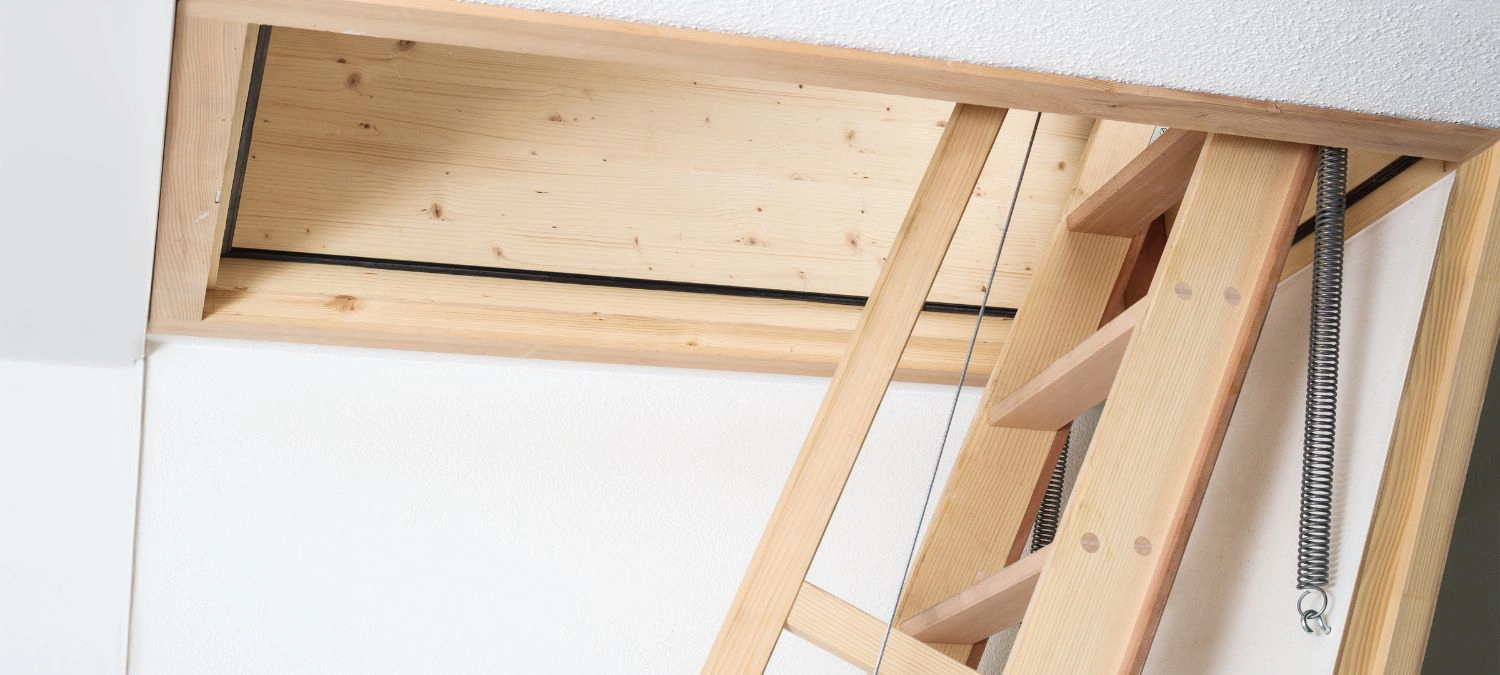
- Insulate around the attic hatchThe attic hatch is an often-overlooked part of knowing how to cool your home, but it can be a major source of air leaks and energy loss. To seal this area effectively, start by applying adhesive-backed weatherstripping around the hatch perimeter. This creates a tight seal when the hatch is closed, blocking hot attic air from entering your living space.Next, insulate the back of the hatch door using rigid foam insulation or reflective panels secured with construction adhesive. For added efficiency, consider installing a pre-fitted insulated cover or hatch tent on the attic side of the opening. These additions help reduce heat gain in summer and improve year-round temperature control.
Always make sure the hatch closes snugly against the weatherstripping. A sealed and insulated hatch is a simple upgrade that greatly improves your home’s thermal envelope and complements your attic air-sealing efforts.
- Fill larger openings with expanding foam
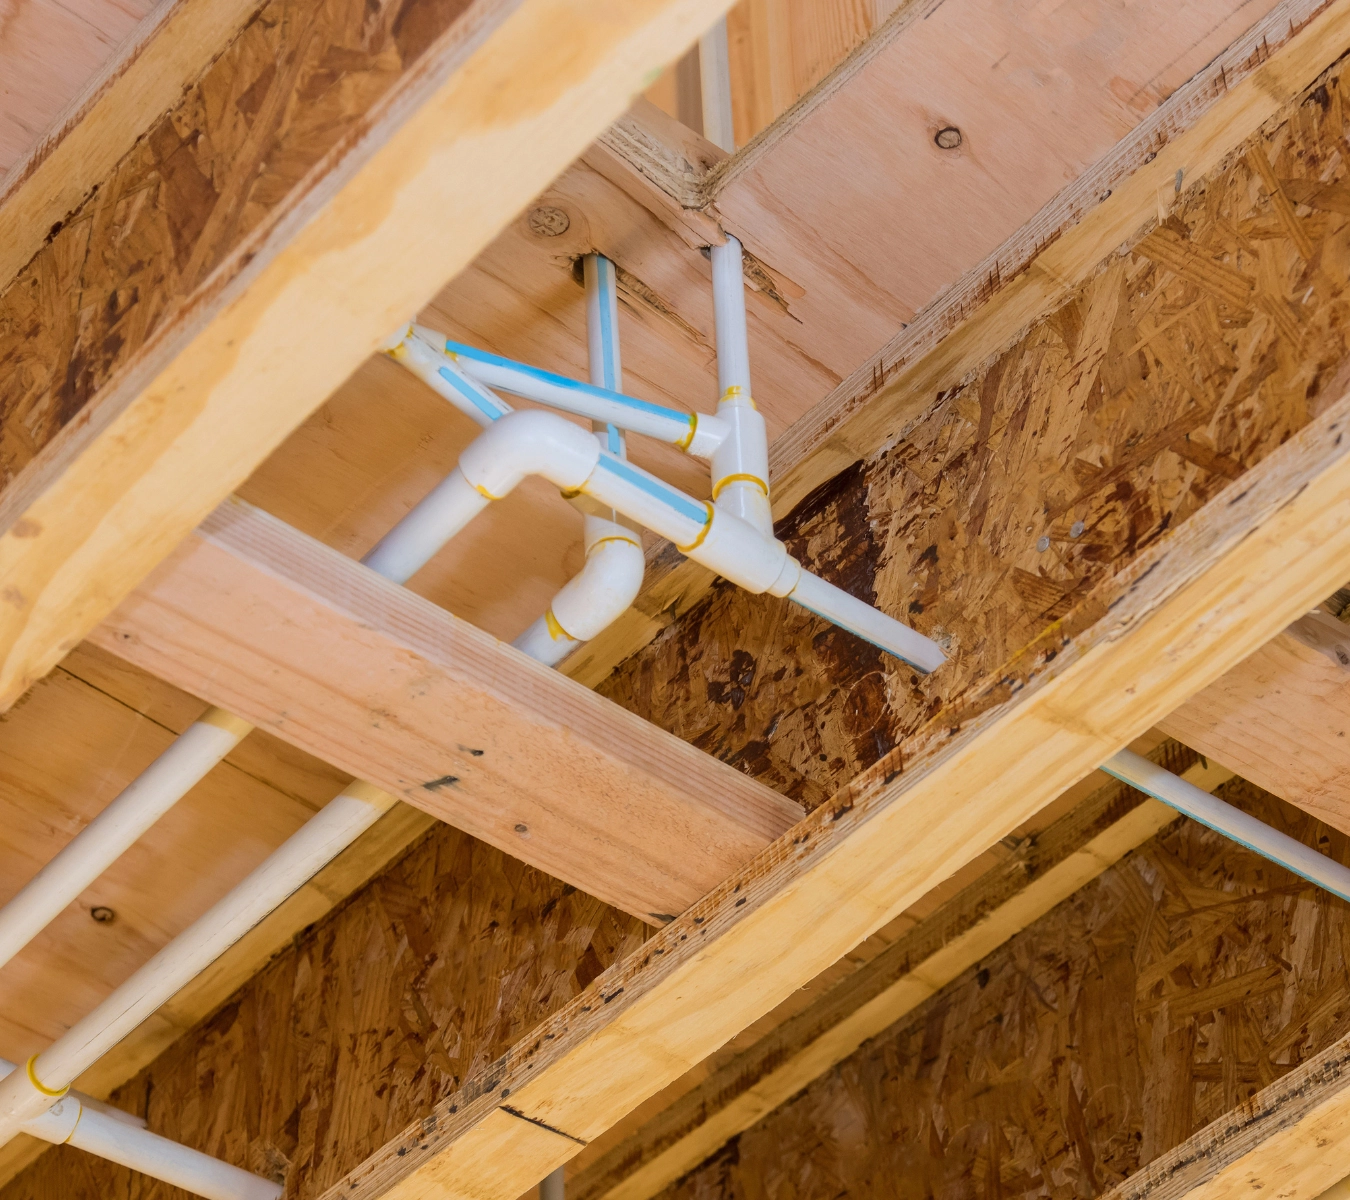
A photo of a gap around a pipe in an attic. For larger gaps around pipes, wiring, and HVAC penetrations, expanding foam is typically the best solution. GE Multipurpose Foam expands to fill irregular spaces, creating a durable, airtight seal that blocks airflow and pest entry. It’s ideal for sealing around plumbing vents, cable runs, and utility cutouts too wide for silicone alone.
Before applying, clean the area to remove dust and debris. Shake the can well, attach the nozzle, and apply the foam in short bursts—filling only about 50% of the gap, as the foam will expand to fill the rest. Once cured, trim any excess with a utility knife for a flush, finished look.
This foam is water-resistant and designed to flex with seasonal movement, making it well-suited for attic environments. Use it in combination with silicone sealant to ensure all leak points—large and small—are properly sealed for better temperature control.
Get a more detailed walk-through for air-sealing electrical boxes and wiring components in this article.
- Seal around light fixtures and fansRecessed lights and exhaust fans are common sources of attic air leaks. Use IC-rated covers or airtight boxes to enclose these fixtures safely, especially if they generate heat. Once installed, seal the edges or spray foam to block air from escaping around the housing. Make sure insulation stays clear unless the fixture is rated for contact. This added barrier helps maintain airflow control while keeping your attic properly insulated and fire-safe.
- Inspect and seal ductworkLeaky attic ductwork can let cooled air escape before it ever reaches your living space. Inspect all visible duct joints for gaps or damage, especially near seams and bends. Seal small leaks using foil HVAC tape or GE Advanced Silicone. After sealing, wrap the ducts with insulation sleeves or fiberglass wrap to prevent heat transfer. Properly sealed and insulated ducts help your HVAC system run more efficiently and keep your home cooler in summer.
- Check ventilation to prevent moisture buildupWhile sealing air leaks is important, maintaining proper attic ventilation is equally crucial for preventing moisture buildup. Ensure the soffit, ridge, and gable vents are clear and unobstructed. Use baffles to keep insulation from blocking airflow at the eaves. Balanced ventilation allows hot, humid air to escape, reducing the risk of mold and structural damage, especially in sealed attics where trapped moisture can become a hidden problem.
- Block pest entry pointsTo keep pests out of your attic, seal entry points and cover openings with durable materials. You can use GE Pest Block Foam or Multipurpose Foam to fill gaps around pipes, cables, and framing where rodents or insects might squeeze through. Install metal mesh screens over vents to block larger pests without restricting airflow. Check these barriers seasonally as rodents can chew through weaker materials over time.
To get GE Sealants’ products for your home improvement project, visit these fine retailers in the U.S. or Canada.


