
Note: This DIY article is provided as a general guide only and is not intended to take the place of product-specific installation procedures; always follow applicable manufacturers’ instructions. Depending on your home’s age and condition, location within the home, and other potential factors, repairs and/or upgrades or other services may be necessary prior to the beginning and/or completion of your project that may involve the services of a home improvement professional. This article does not include advice pertaining to local building codes and/or any related inspections.
Even a perfect accent wall can look unfinished if you skip caulking. A paintable sealant hides seams, blocks drafts, and gives your project a polished, built-in look. This guide covers DIY accent wall tips, including timing, technique, and the best GE sealants to get the job done right.
Why every accent wall needs a clean caulk line
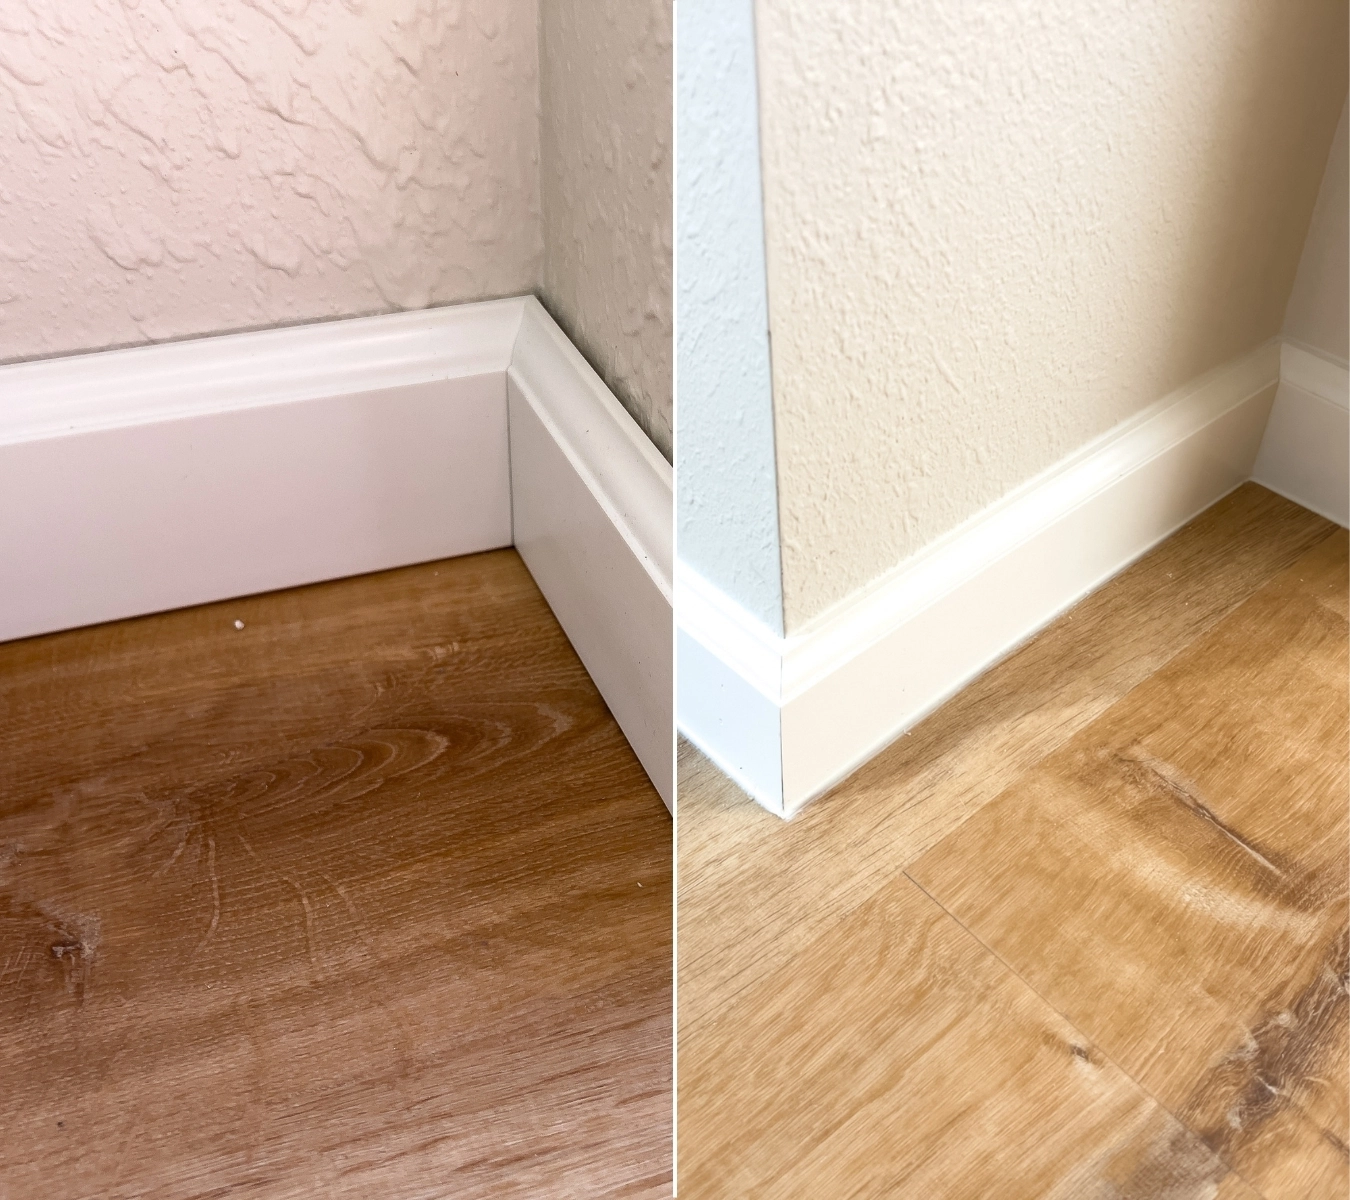
If you’ve ever noticed shadow lines where trim meets the wall, that’s a missed bead. Walls flex. Trim rarely sits flush. Even a gap as thin as a credit card can throw a shadow under raking light, making your accent wall look uneven, no matter how smooth the paint.
One of the most overlooked DIY accent wall tips—especially when caulking wood trim on shiplap or slat designs—is also one of the most transformative: caulking. A high-performance, paintable sealant bridges those seams and creates a smooth transition between trim and wall. It also seals out light drafts and everyday dust that can collect at unsealed edges. Because the right sealant flexes with seasonal movement, it keeps the joint sealed through winter shrinkage and summer expansion.
Pros always seal right after priming and before color. Skip this step, and you’re showing every flaw you worked to hide.
When to caulk in your project timeline
Choosing your DIY accent wall caulk
To caulk DIY accent wall seams like a pro, match the sealant to your movement needs, surface type, and room climate. Here’s a breakdown to match your project to the right GE product:
- Seal & Fill Multi-Purpose Kitchen & Bath Caulk: Use this low-odor acrylic when your accent wall sits in a dry, climate-controlled room—think MDF over drywall in a bedroom or living space. It smoothly goes on, is paint-ready in 30 minutes, resists cracks and shrinkage, and can be sanded flush after cure.
- Painter’s Pro Quick Dry Siliconized Acrylic Caulk: Reach for this siliconized formula when caulking wood trim or tackling transitions that need a slightly glossier, paint-ready finish. Also rated ASTM C834, it applies cleanly, skins fast, and accepts satin or semi-gloss paint in just 30 minutes. Cleanup is easy with soap and water, and the job-site packaging makes it a pro favorite.
- Pro Seal Max Window & Door Sealant: Reach for this hybrid when humidity, temperature swings, or wide gaps threaten your finish.. Immediate water-ready, paint-ready in 60 minutes, and permanently flexible (±35% for white, ±25% for clear, and ASTM C-920). It bonds to tile, primed MDF, or painted wood. This makes it perfect for accent walls in laundry rooms, bathrooms, or any spot where moisture meets movement.
Pro Seal Max Window & Door flexes ±35 % (white), dries in 60 minutes, and finishes smooth under any paint.
Step-by-step guide for a smooth, professional finish
Caulking your DIY accent wall doesn’t have to mean smears, gaps, or mess. Follow this 10-step guide to get a clean, professional finish.
What you’ll need:
- Your preferred caulk
- GE Sealant Removal Tool (for removing old caulk, if needed)
- GE Cartridge Opener and Smoothing Tool
- Caulk gun
- Painter’s tape
- Mild soap and water
- Isopropyl alcohol
- GE Sealant Smoothing Tool (if you don’t already have the GE Cartridge Opener and Smoothing Tool)
- Clean rags
- Raking light or flashlight
- Clean the surface Wipe with mild soap and water to remove dust. Then use isopropyl alcohol on non-porous materials like tile or painted wood. Let everything dry before moving on.
- Mask the edges Apply painter’s tape along both sides of each seam so the excess caulk lifts away cleanly when tooled.
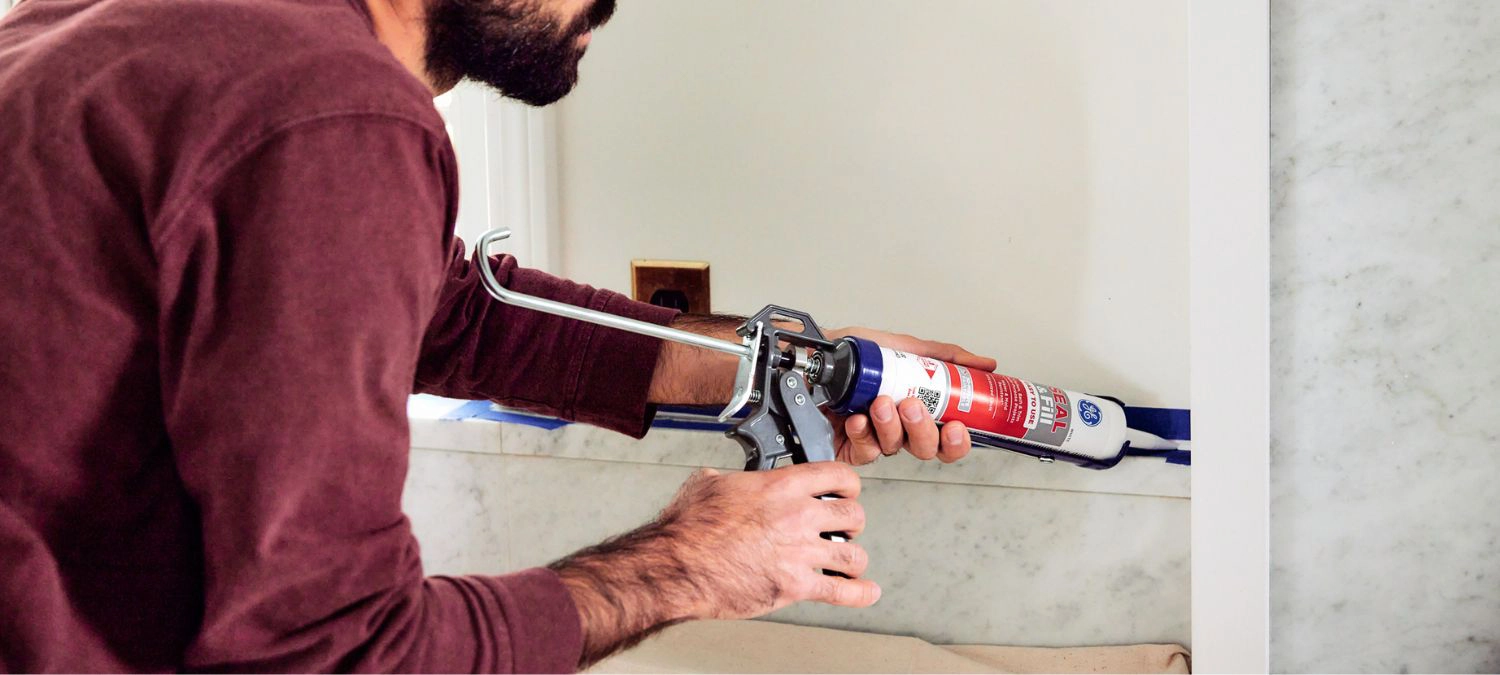
- Cut the nozzle right Slice the tip at a 45° angle. Match the size of the opening to the width of the seam. Use the GE Cartridge Opener for a clean, controlled cut.
- Test on scrap Practice a short bead on cardboard to dial in trigger pressure and flow before applying it to the wall.
- Run a steady bead Apply caulk in a smooth, continuous motion, joint to joint. This is especially important when caulking wood trim. Pausing midway can create ridges that show through paint.
- Tool immediately
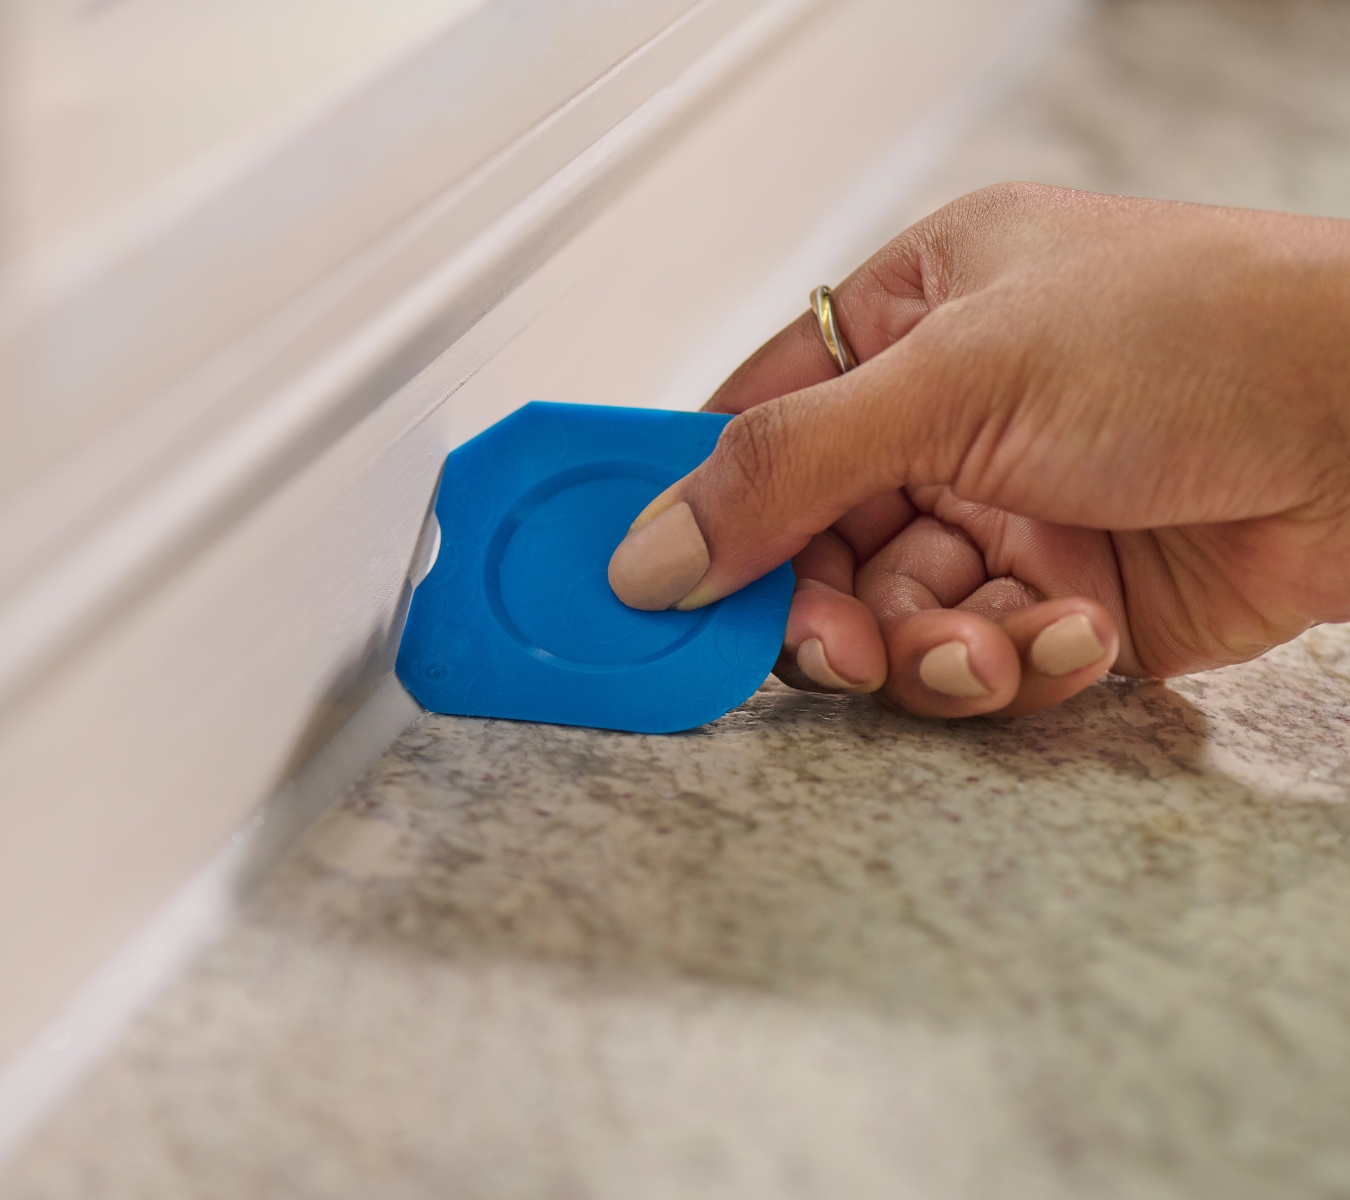
Smoothing paintable caulk bead on wood trim accent wall. Within 30 seconds, use the GE Sealant Smoothing Tool (or a gloved finger) to press the bead into the joint and shape a clean finish.
- Pull the tape Peel back the painter’s tape at a 45° angle while the bead is still wet. This leaves crisp, paint-ready edges.
- Wipe smears fast Use a damp rag for acrylics. For hybrids like Pro Seal Max Window & Door Sealant, wipe immediately with mineral spirits before the bead begins to skin. Ventilate well anytime you use a solvent.
- Wait for the full paint-ready window Seal & Fill, Painter’s Pro, and Pro Seal Max all accept paint between 30 and 60 minutes. Confirm on the label and wait for the full time.
- Final check Once the bead has skinned, shine a raking light across the wall to spot flaws. Touch up now—fully cured joints require cutting and redoing.Using an oil-based topcoat? Always prime first. Hybrid sealants like Pro Seal Max need a stain-blocking or bonding primer to ensure long-term paint adhesion.

Get the right GE paintable caulk at a store near you. Find a retailer near you in the U.S. or Canada.

