

Note: This DIY article is provided as a general guide only and is not intended to take the place of product-specific installation procedures; always follow applicable manufacturers’ instructions. Depending on your home’s age and condition, location within the home, and other potential factors, repairs and/or upgrades or other services may be necessary prior to the beginning and/or completion of your project that may involve the services of a home improvement professional. This article does not include advice pertaining to local building codes and/or any related inspections.
Failed caulk around sinks, tubs, or pipe penetrations is a leak waiting to happen. This guide shows you exactly how to reseal plumbing fixtures with GE sealants so your work lasts and looks professional.
Why resealing sinks and tubs matters: signs of failure and risks
Check the bead around your sink or tub.
If it’s cracked, pulling away, or dark with mildew, water might have already found a way in. Behind that failed line, moisture swells cabinets, stains drywall, and feeds mold you might not see until it’s too late. A plumbing sealant is only as strong as its bond. And once it lets go, the fixture is exposed.
Resealing your plumbing fixtures on time keeps damage from spreading and restores that watertight barrier your bathroom depends on.

Tools and materials checklist
Before you cut a nozzle, have everything you’ll need on hand:
- GE Sealant Remover Tool
- GE Smoothing Tool or GE Cartridge Opener and Smoothing Tool
- Caulk gun (steady trigger, no drips)
- Painter’s tape for crisp edges
- Isopropyl alcohol (IPA) and rags for cleanup
- Backer rod for gaps wider than 3/8 inch
- A tube of GE kitchen & bath plumbing sealant. Later, you’ll learn which sealant best fits your project.
Prep is 80% of the job. Remove every trace of the old caulk before resealing with plumbing sealant for a bond that lasts.
Remove the failed bead the right way
Old caulk has to come out as any residue can compromise how well your new sealant bonds.
Start by scoring both edges of the bead with your GE Sealant Remover Tool, then pull the strip free in long passes. Scrape away residue until the joint is bare. Be patient here: half-removed caulk is a common reason reseals fail early.
Once the bead is gone, wipe the joint with isopropyl alcohol and a lint-free rag. Don’t use household cleaners, as soap leaves residue that weakens adhesion.
If the gap is wider than 3/8 inch, press in a backer rod before resealing to control the joint depth.
Let every surface dry fully. This ensures your plumbing sealant bonds tightly and lasts.
Choose the right plumbing sealant
The sealant you choose makes or breaks the job. If you pick the wrong sealant, the joint can fail prematurely, no matter how steady your hand is. Around sinks, tubs, and penetrations, you need the right plumbing sealant to keep water out.
Here’s how to match the sealant to your project:
- Good: GE Tub & Tile Silicone Sealant – 100% silicone, waterproof, flexible, with 7-year mold-free product protection. Solid choice for resealing sinks, tubs, and showers.
- Better: GE Advanced Silicone Kitchen & Bath – 100% silicone, waterproof, more flexible than standard formulas, 10-year mold-free protection. Ideal for busy kitchens and baths.
- Best: GE Supreme Silicone Kitchen & Bath – 100% silicone with higher flexibility and a lifetime mold-free product protection (and lifetime guarantee). This is the ideal choice for long-term performance in wet zones.
- Paintable: GE Pro Seal Max Kitchen & Bath – Hybrid, waterproof, and paintable (with latex paint or primer). Use it where you need to seal against water but plan to paint, like backsplashes or countertop seams.
Knowing how to reseal plumbing fixtures with the right sealant means you’ll avoid a common DIY mistake: grabbing painter’s caulk for a wet area.
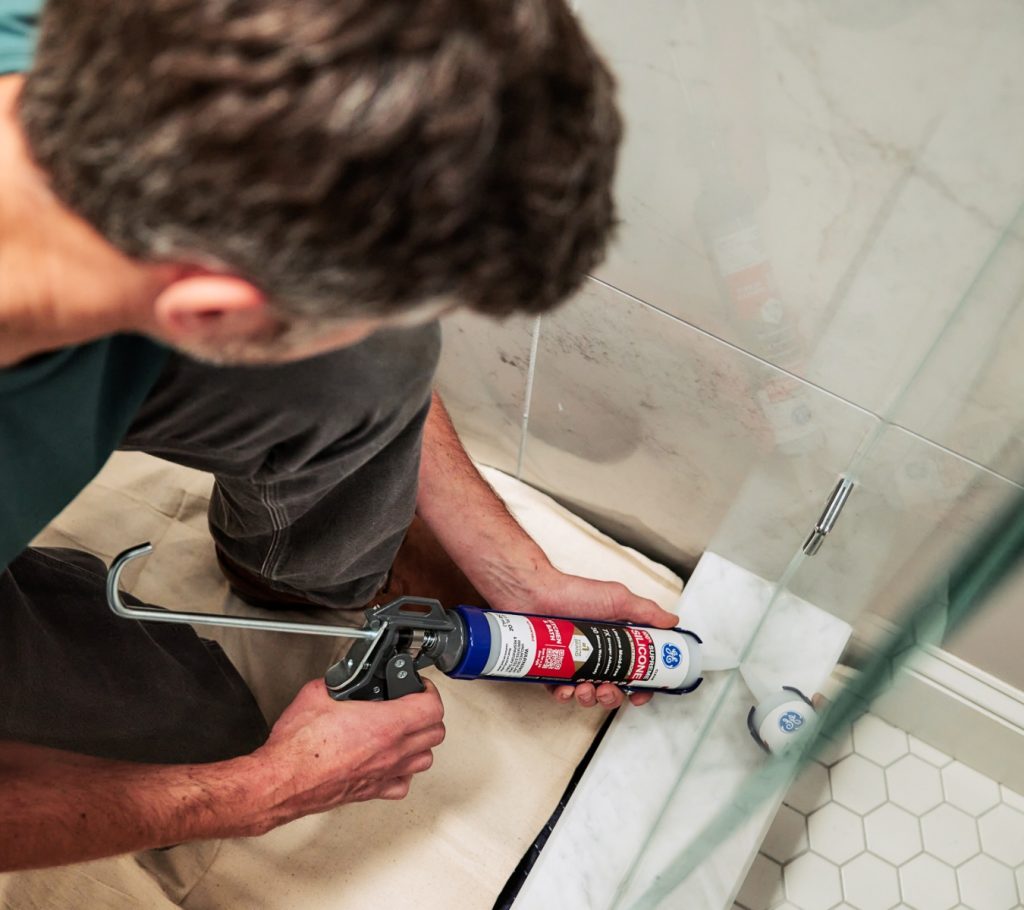
Resealing sinks and tubs: the pro finish in 6 steps
Once the old bead is gone and you’ve got the right GE plumbing sealant in hand, it’s time to lay a new joint.
Follow these six steps to get a bead that seals tight, looks sharp, and lasts.
-
Mask Accurately
Run painter’s tape along both sides of the joint. Leave the gap you want to fill fully exposed, nothing more. The tape keeps the bead straight and prevents smears onto tile or fixtures.
-
Cut the nozzle small
Trim the sealant nozzle at a 45° angle with an opening slightly smaller than the gap. A small cut gives you control and a smooth finish.
Applying a continuous bead of GE Supreme Silicone Kitchen & Bath sealant along a shower edge. -
Lay a continuous bead
Hold the gun at a 45° angle and pull smoothly along the joint. Keep pressure steady so the bead flows without breaks or blobs. Try not to stop mid-run—restart marks always show, one continuous pass is what gives you a professional, smooth finish.
-
Tool the bead
Within the product’s tooling window (often 5-10 minutes, but confirm on the product label), run the GE Smoothing Tool lightly over the line. This presses the plumbing sealant into the joint and helps to shape a clean finish.
-
Pull the tape
Remove the painter’s tape right after tooling. Pull it back over itself at a sharp angle for a clean edge. Waiting until the bead skins over will likely tear and ruin the line.
-
Let it cure
Leave the joint untouched until the sealant sets. Each GE sealant has its own cure window: some are water-ready in 30 minutes, others need a full day before heavy use. Check the label and stick to it.
Also, don’t scrub or stress the bead until it’s fully cured. A plumbing sealant that’s rushed will not bond right, and redoing the job is always harder than waiting.
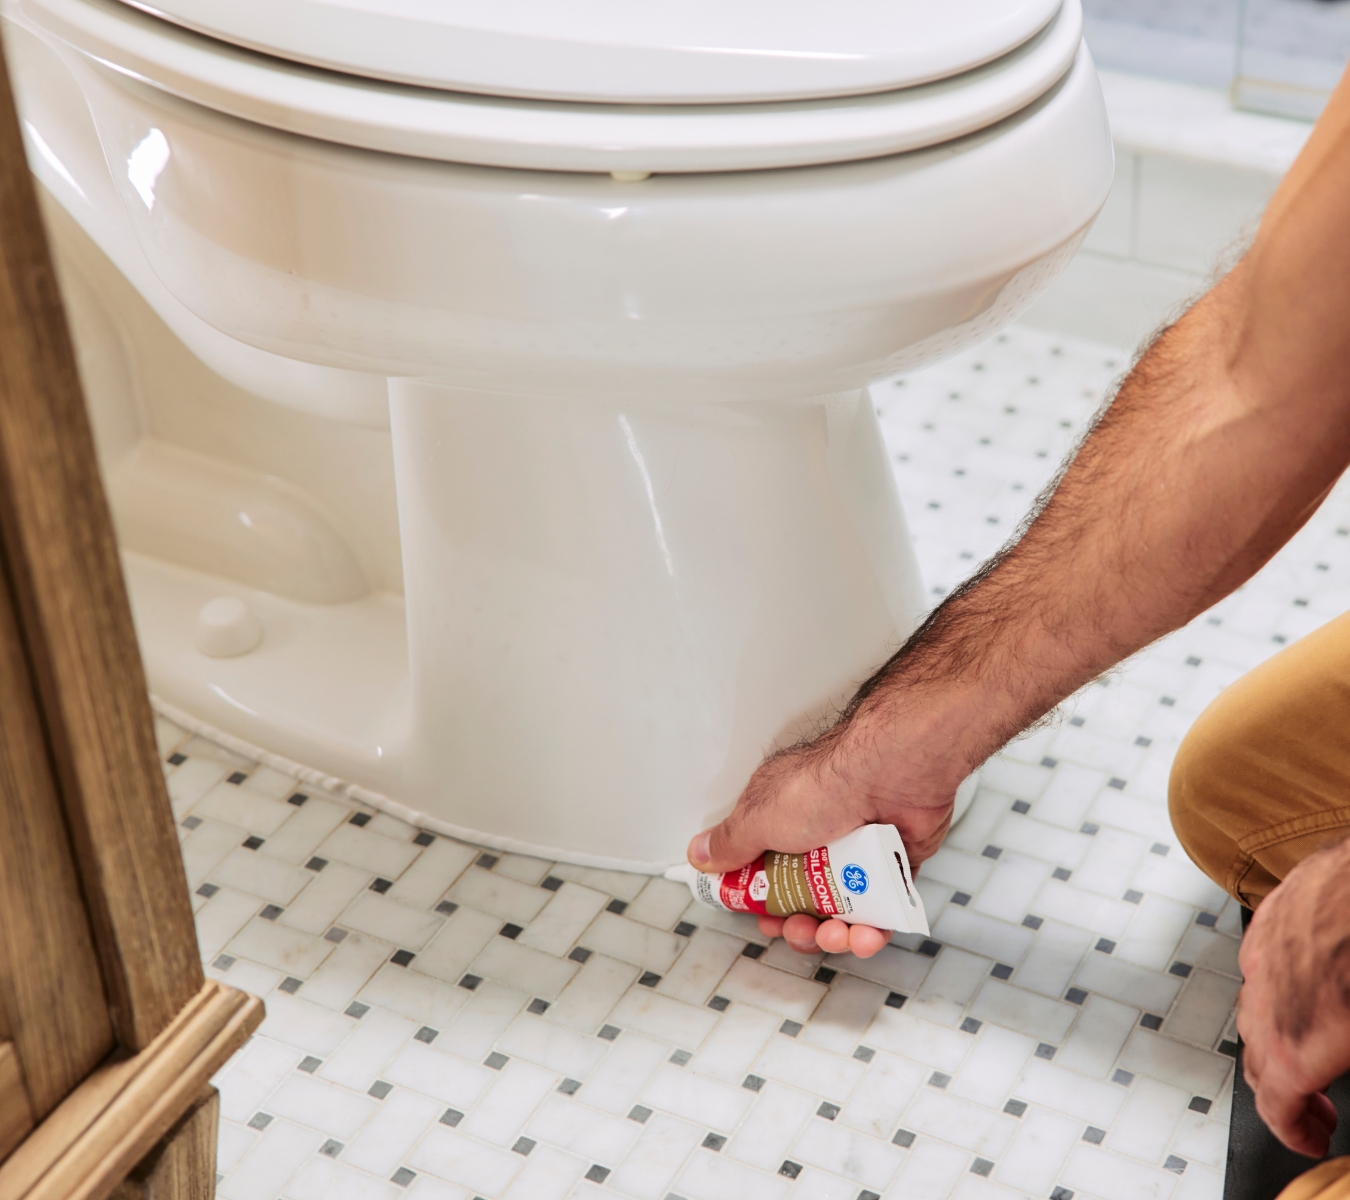
A DIYer sealing around a toilet base.


Penetrations and trim: spouts, escutcheons, toilet base
Not every joint gets sealed the same way. Fixtures that meet walls or floors need special treatment:
- Tub spouts and shower escutcheons: Seal the top and sides, but leave a small gap at the bottom. That gap works as a weep path, so any trapped water drains out instead of sitting behind the plate.
- Toilet base: Many inspectors require a perimeter seal. Run a continuous bead around the front and sides, but leave a gap at the back. That opening makes leaks visible before they rot your subfloor.
- Pipe penetrations through walls or vanities: If the opening is oversized, push in a backer rod first. Then apply your plumbing sealant in a smooth bead so it bonds to both the pipe and surface.
Resealing plumbing fixtures the right way also means handling these trim details correctly, because the right gaps can help prevent hidden damage.
Seal it once, seal it right. Choose GE Kitchen & Bath sealants today at a retailer near you in the U.S. or Canada for a watertight, mold-free finish.


