

Note: This DIY article is provided as a general guide only and is not intended to take the place of product-specific installation procedures; always follow applicable manufacturers’ instructions. Depending on your home’s age and condition, location within the home, and other potential factors, repairs and/or upgrades or other services may be necessary prior to the beginning and/or completion of your project that may involve the services of a home improvement professional. This article does not include advice pertaining to local building codes and/or any related inspections.
Spring is a good time to give your windows a closer look after months of cold, moisture, and seasonal movement. A smart window upgrade does not always mean replacing the window. In many cases, it means cleaning up old sealant, spotting cracks or discoloration, and reapplying a fresh bead where window sealing has started to fail.
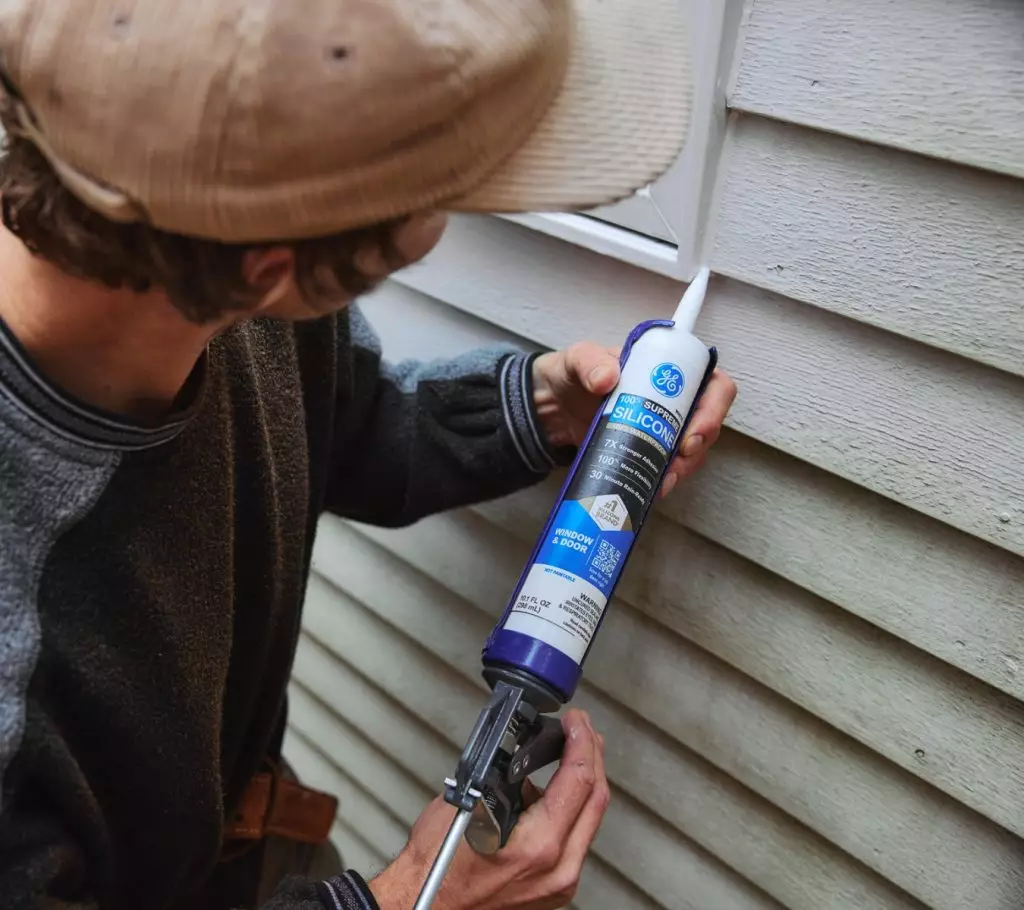
For highly weather-exposed exterior joints, GE Supreme Silicone Window & Door is the best choice for long-term flexibility and strong adhesion. It is recommended for sealing windows, doors, siding, trim, vents, and many common building materials and offers both 50% joint movement capability and UV resistance for exterior conditions.
What to check before you reseal windows
Before you reseal windows, start with a close visual inspection of the existing bead. Look for cracked, brittle, missing, or uneven sealant, especially at corners and along joints where trim meets the siding or window frame. Pay attention to any gaps where the old bead has pulled away from one side of the joint, since that usually means the seal is no longer doing its job.
You should also note discoloration, dirt staining, or mildew, which can indicate age, trapped moisture, or surface buildup that needs to be cleaned before any repair. This first inspection helps you decide whether you can touch up a small section or need to replace window sealant more completely.
How to tell whether you need a touch-up or a full replacement
A touch-up may be enough when most of the sealant is still well bonded and only small sections show minor wear. If the surrounding bead is intact, flexible, and firmly attached, a localized repair can sometimes restore the joint.
Full replacement is the better choice when the old bead has loose adhesion, visible cracking, missing sections, or gaps where water can get in. The same is true when the sealant has pulled away from one side of the joint or become brittle across a larger stretch. In those cases, patching over the surface usually does not last. Removing the failing material fully gives the new sealant a much better base.
Clean the joint before any repair
Before applying the new sealant, remove dirt, chalking, loose debris, and any failing residue from the joint. Even a good product will not bond well to a surface that is dusty, damp, or contaminated with old material. Start by lifting out loose or damaged sealant and clearing the joint carefully. GE’s Sealant Remover Tool can help make this step cleaner, especially in narrow exterior joints and corners. Once the old material is out, wipe away remaining dust and buildup, then let the area dry fully.
Step-by-step: how to replace window sealant in spring
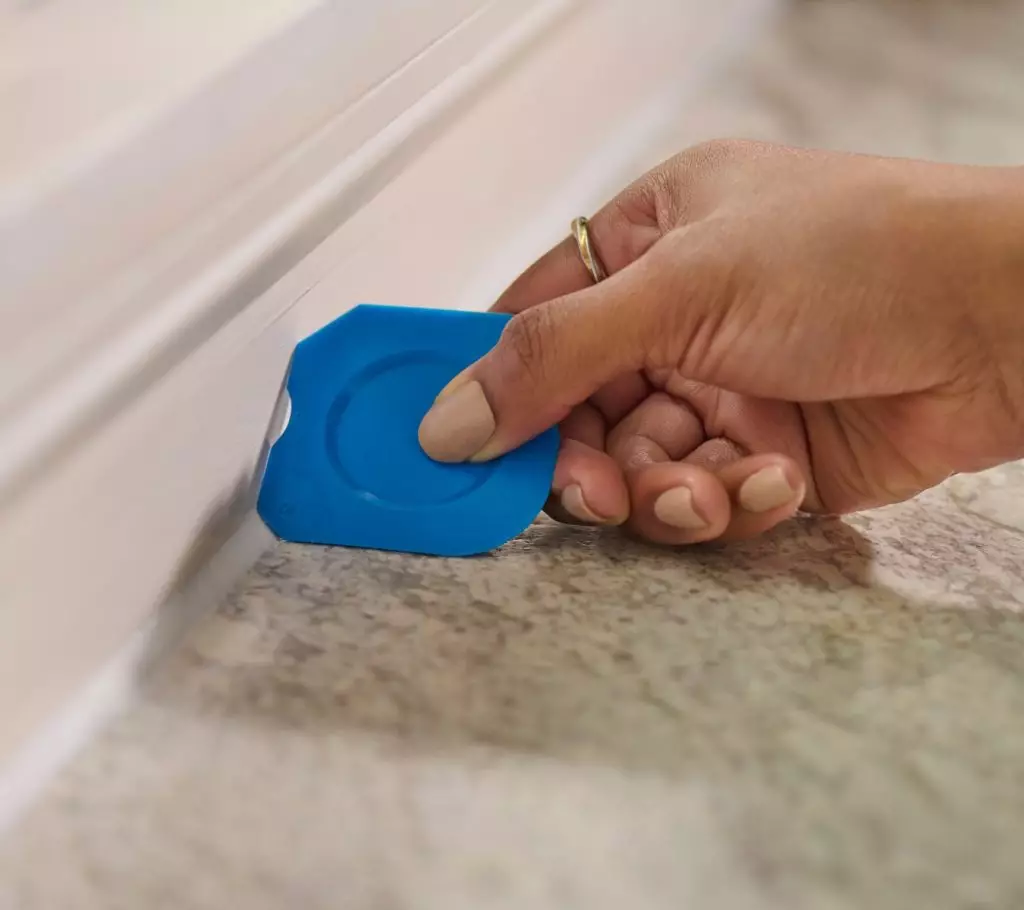
To reseal windows in spring, start by cutting the nozzle to match the width of the gap so the bead is easier to control. Once the joints are ready, apply new sealant to the prepped surfaces where you have already removed old sealant and cleaned away any dirt, grease, moisture, or soap residue. Try to apply the sealant in one steady pass with even pressure, then smooth it lightly with GE’s Sealant Smoothing Tool or a putty knife.
Avoid overworking the bead, since repeated passes can smear the line or pull material out of the joint. After smoothing the bead, check that the sealant fully bridges the joint with no gaps, skips, or thin spots. A clean, continuous line will do a better job of keeping out water than an uneven bead with weak points. Once the application looks even, leave it alone and let it cure before exposing the area to rain, washing, or other moisture.
Choosing the right GE Sealant for the repair
For highly weather-exposed exterior joints, GE Supreme Silicone Window & Door is the best choice for long-term flexibility and strong adhesion. It is recommended for sealing windows, doors, siding, trim, vents, and many common building materials and offers both 50% joint movement capability and UV resistance for harsh exterior conditions.
GE Advanced Silicone Window & Door is also a 100% silicone, 100% weatherproof exterior option designed for:
- Windows
- Doors
- Siding
- Trim
- Molding
- Baseboards
- Vents
- Basements
- Attics
- Areas around wires and pipes
With Class 35, UV resistance, and 30-minute rain readiness, it provides a strong option for weather-exposed window joints.
When deciding between them, think about the location and the level of exposure. Use GE Supreme Silicone Window & Door where the joint faces heavier weather, more movement, or a more visible exterior finish. Use GE Advanced Silicone Window & Door when you need a durable exterior seal around standard window and trim joints. In either case, the best result comes from matching the product to the conditions and applying it only after the joint has been cleaned and prepped properly.
For exterior work, GE sealants can also help match siding and other exterior projects more cleanly. Both GE Advanced Silicone Window & Door and GE Supreme Silicone Window & Door are available in eight colors, which makes them versatile, so that the finished joint will remain visible and blend with surrounding materials.
Common spring window sealing mistakes to avoid
A few common mistakes can shorten the life of a repair. Applying sealant over dirt, chalking, or damp surfaces weakens adhesion from the start. Using too much material can make the bead harder to control and more likely to smear.
Another common problem is trying to patch over failing sealant without removing the loose sections first. DIYers also run into trouble when the nozzle opening is too large for the joint. Finally, not every discolored bead needs full replacement. Some sections may only need cleaning.
How a simple spring window upgrade helps your exterior last longer
A simple spring window upgrade helps the exterior by keeping water out of small joints before damage spreads. It can also improve the appearance of trim lines, reduce the chance of recurring seal failure, and make future maintenance more manageable. Follow these steps, and your springtime window upgrade can be a good example of how small repairs done at the right time can prevent bigger exterior problems later.
To get GE Sealants’ products for your home improvement project, visit these fine retailers in the U.S. or Canada.


