Note: This DIY article is provided as a general guide only and is not intended to take the place of product-specific installation procedures; always follow applicable manufacturers’ instructions. Depending on your home’s age and condition, location within the home, and other potential factors, repairs and/or upgrades or other services may be necessary prior to the beginning and/or completion of your project that may involve the services of a home improvement professional. This article does not include advice pertaining to local building codes and/or any related inspections.
Caulking gaps and cracks prevent moisture damage. This blog will guide you through the reasons why caulking your DIY accent wall is crucial for achieving a flawless finish and long-lasting durability. Whether you’re a seasoned DIY enthusiast or a novice, you’ll be able to find something here to hone your skills.
4 reasons to caulk your DIY accent wall
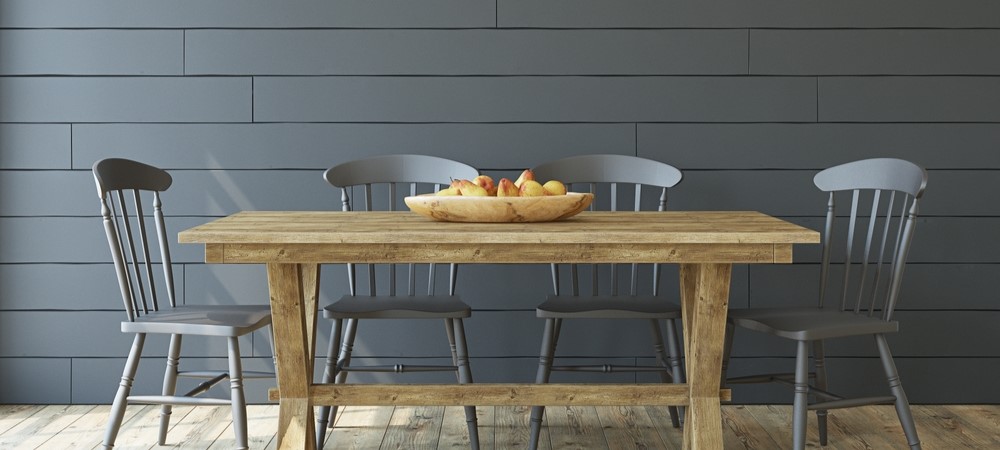
Accent walls are selected walls in a room painted or decorated differently from the others to create a focal point. Homeowners typically use accent walls to add visual interest and character to a space. Whether you’re going for shiplap, wood panel, or even good old-fashioned wainscoting, caulking is an essential step in any DIY accent wall project. When creating an accent wall, attention to the finer details can make the difference between a polished, professional look and a project you might wish to blame on your kids. Here are the top four reasons to caulk your DIY accent wall.
Beyond providing protection, caulking will significantly enhance the appearance and aesthetic appeal of your project. It hides gaps and seams between the wall and trim, creating a seamless and polished finish. Without caulk, even the most well-designed accent wall will likely look a bit unfinished and amateur.
-
Sealing gaps and cracks
Caulking is an essential part of sealing gaps and cracks between the wall and trim in your DIY accent wall. Gaps can occur due to uneven walls, trim misalignment, or natural settling of the foundation over time. By applying caulk, you can eliminate — or at least effectively conceal — these imperfections.
Sealing these gaps also prevents air leaks, which can reduce your home’s energy efficiency. Additionally, caulking creates a barrier that helps to keep dust and allergens from entering through the cracks, leaving you with a cleaner indoor environment.
-
Preventing moisture damage
Over time, moisture and humidity from the exterior or gaps between walls will pass through any unsealed areas. When moisture seeps into unsealed gaps, it causes mold, mildew, and wood rot. Bathrooms and kitchens tend to be particularly vulnerable to moisture damage.
By applying caulk, you create a watertight seal to protect your wall materials from moisture damage. This preserves the structural integrity of your accent wall and keeps mold and mildew out of your home.
-
Professional appearance
Beyond providing protection, caulking will significantly enhance the appearance and aesthetic appeal of your project. It hides gaps and seams between the wall and trim, creating a seamless and polished finish. Without caulk, even the most well-designed accent wall will likely look a bit unfinished and amateurish.
Properly applied caulk keeps lines clean and transitions smooth. Attention to detail in this area elevates the overall look of your space. Investing in this finishing touch will make your DIY project stand out and impress.
-
Insulating against temperature changes
Caulking helps insulate your accent wall against temperature changes. Gaps and cracks can allow cold air to enter during winter and warm air during summer, making it harder to maintain a consistent indoor temperature.
By sealing these openings with caulk, you minimize drafts and reduce the strain on your heating and cooling systems. Thus, in addition to making your living environment more comfortable, caulking your DIY accent wall may also lower your energy bills.
Step-by-step guide to caulking your DIY accent wall
Caulking your DIY accent wall is a straightforward process that enhances its appearance and longevity. Here’s a step-by-step guide to help you achieve professional results:
-
Gather the necessary materials
You will need:
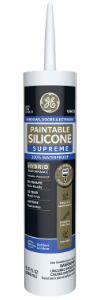
- Caulk — we recommend Paintable Silicone Supreme Window & Door Sealant
- Caulking gun
- Utility knife
- Painter’s tape
- Damp cloth
- Caulk smoothing tool or perhaps just your finger
-
Prepare the surface
Clean the wall and trim thoroughly to remove dust and debris. Make sure the surface is dry before you start caulking.
-
Apply painter’s tape
To leave clean lines, apply painter’s tape along the edges where the wall meets the trim. This helps create a neat finish and keeps the excess caulk from spreading onto unwanted areas.
-
Cut the caulk tube tip
Cut the tip of the caulk tube at a 45-degree angle with your utility knife. Try to match the size of the opening with the width of the gap you are sealing.
-
Pierce the inner foil/seal
Insert a sharp object like a long nail or wire into the nozzle and push it through the seal.
-
Load the caulking gun
Insert the caulk tube into the caulking gun and squeeze the trigger until the caulk starts to flow so that you have a sense of how much pressure to apply.
-
Apply the caulk
Starting at one end, apply a steady bead of caulk along the gap. Move the gun smoothly and steadily to ensure even application.
-
Smooth the caulk
Immediately after applying, smooth the caulk bead with a caulk smoothing tool or your finger dipped in water. Try to press the caulk into gaps to create a clean finish.
-
Remove painter’s tape
Carefully remove the painter’s tape before the caulk dries to ensure sharp, clean edges.
-
Clean up
Wipe away any excess caulk with a damp cloth and allow the caulk to dry as per the manufacturer’s instructions before painting or further decorating.
To get GE sealant products for your home improvement project, visit these fine retailers.


