
Neat, reliable door sealing and window sealing often seem straightforward during installation, but small mistakes can show up later as gaps, cracking, or uneven lines. These imperfections soon affect your work’s appearance and perceived quality. However, by understanding in advance where sealing jobs typically go wrong and how to avoid common mistakes, contractors can deliver high-quality workmanship with lasting results.
For exterior joints, a high-performance silicone is typically your best option. GE Supreme Silicone Window & Door Sealant provides long-term flexibility and weather resistance, making it more than capable for joints subject to significant expansion and contraction. However, for applications you expect to paint, GE Pro Seal Max Window & Door Sealant offers strong adhesion with a clean, paintable finish.
Why sealing mistakes show up after the job is done
Sealing mistakes around windows and doors often do not appear immediately. A bead can look clean on installation day, then develop gaps, shrinkage, or cracking after the material cures and the assembly goes through a few temperature cycles. Movement between substrates, exposure to UV and moisture, and normal expansion and contraction all put stress on the joint.
These conditions expose weak points in adhesion, inconsistent bead thickness, or incomplete contact with the joint walls. As the sealant settles, thin areas can pull back, and poorly tooled sections can separate, leaving visible gaps. Because these failures show up after the fact, they are more likely to result in callbacks. Getting prep, product selection, and application right from the start will ultimately get you fewer unsatisfied customers wanting touch-ups or discounts.
Common window and door sealing mistakes
Even among professional contractors, there are a variety of common mistakes to avoid when sealing windows and doors. These include:
-
Skipping surface prep
Surface prep is one of the most common causes of sealing failure around windows and doors. Dust, old sealant residue, moisture, or oils can all prevent new material from bonding properly. Even when the bead looks clean at first, poor adhesion soon leads to separation, shrinkage, or gaps once the joint is exposed to movement and weather.
Before applying the new sealant, remove all existing material completely. Use either the GE Sealant Remover Tool or a putty knife to lift old sealant cleanly without damaging surrounding surfaces. After removal, wipe the joint to eliminate remaining debris and ensure the area is fully dry.
-
Using the wrong sealant for the job
Products designed for interior, paintable applications do not always perform well in exterior door and window sealing, where joints are exposed to movement, moisture, and temperature changes. When the sealant cannot handle these conditions, it pulls away from the substrate and loses flexibility over time.
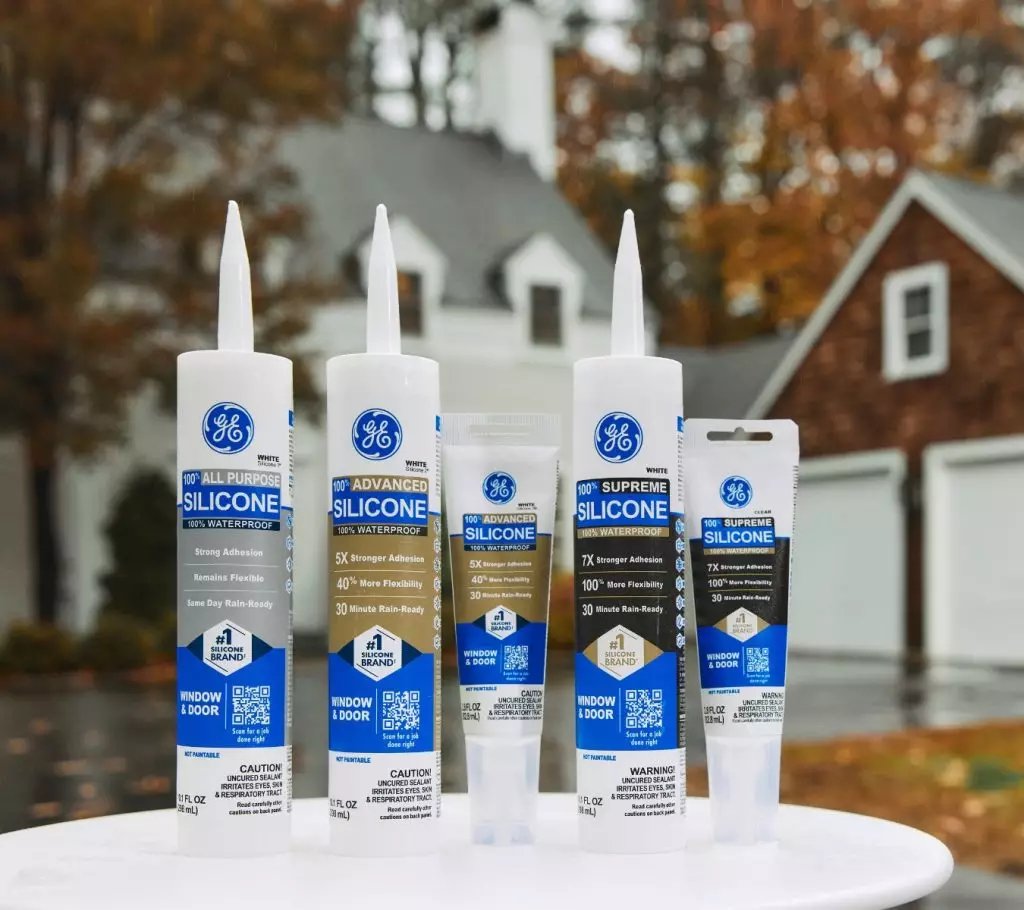
A lineup of GE Window & Door Silicone Sealant products For exterior joints, a high-performance silicone is typically your best option. GE Supreme Silicone Window & Door Sealant provides long-term flexibility and weather resistance, making it more than capable for joints subject to significant expansion and contraction. However, for applications you expect to paint, GE Pro Seal Max Window & Door Sealant offers strong adhesion with a clean, paintable finish.
-
Cutting the nozzle too large or applying too much material
Cutting the nozzle too large makes it difficult to control bead size and placement. Oversized openings lead to excess material, which can create uneven lines, require more cleanup, and increase the risk of poor adhesion along the edges. Thick beads also tend to cure inconsistently, causing shrinkage or surface defects over time.
A smaller, controlled opening allows for more precise application and better contact with both sides of the joint. Apply sealant in steady, consistent passes rather than trying to fill the gap in one heavy layer. Keeping the bead proportionate to the joint improves both appearance and performance, reducing the likelihood of callbacks related to visible defects or premature failure.
-
Poor tooling and uneven bead shaping
Tooling is where many sealing jobs succeed or fail. An uneven or poorly shaped bead can leave voids, thin spots, or incomplete contact with the joint surfaces. These weak points may not be obvious at first, but they often lead to gaps or separation once the sealant cures and the joint moves.
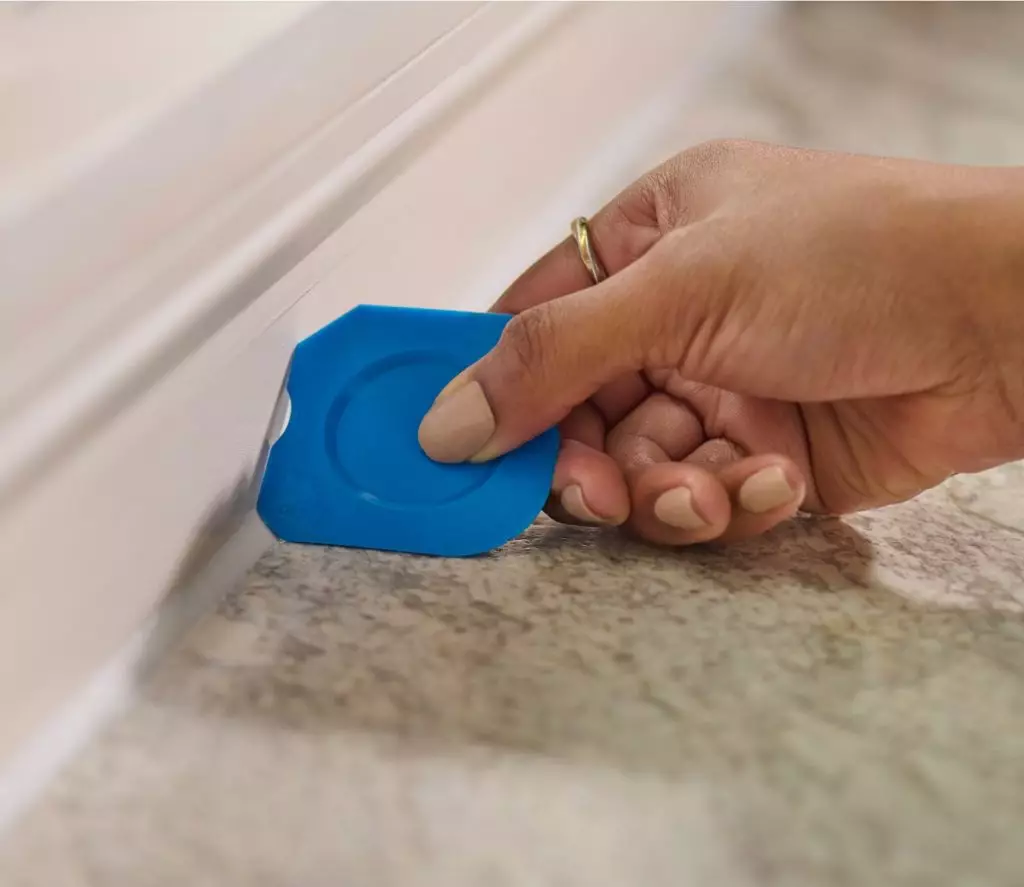
GE’s Sealant Smoothing Tool. Over-tooling can be just as problematic. Reworking the bead repeatedly can pull loose material out of the joint or thin it to the point where it no longer provides a reliable seal. The goal is a single, controlled pass that presses the sealant firmly into place while creating a smooth, consistent profile. An easy and reliable way to achieve such passes is to use the GE Sealant Smoothing Tool to maintain even pressure and shape, producing a cleaner finish and a more durable seal with less rework.
-
Sealing in the wrong conditions
Application conditions affect both adhesion and final appearance. Sealing on wet surfaces, in extreme cold, or under direct heat interferes with how the material bonds and cures.
Moisture can also prevent proper adhesion, while extreme temperatures can hinder both flow and working time. Whenever possible, apply sealant only to clean, dry surfaces within the recommended temperature range. Controlling site conditions will keep your work consistent and reduce the risk of early failures.
How to seal a door or window for better long-term results
Consistent results come from a repeatable process. Start by removing all old material and cleaning the joint so the new sealant bonds directly to the substrate. Choose a product suited to the conditions, defaulting to silicone sealant for exterior door and window sealing when movement and moisture are expected.
Cut the nozzle to match the joint size and apply a steady, continuous bead with even pressure. Work in manageable sections so you can tool the sealant while it is still workable. Use a single, controlled pass to press the bead into the joint and create a smooth, consistent profile. Lastly, allow proper cure time before exposing the joint to weather or movement.
To get GE Sealants’ products for your home improvement project, visit these fine retailers in the U.S. or Canada.


