
Good air control around a door opening depends on more than the slab, weatherstrip, or threshold alone. Pros know that better door air sealing comes from treating hidden frame gaps and exposed perimeter joints differently, then applying the right material cleanly. This guide covers where doors commonly leak, when to use foam vs. sealant, how to apply each properly, and which mistakes are most likely to compromise performance.
Foam and sealant are not interchangeable for door sealing purposes. Insulating foam is best for the concealed space between the door frame and the rough opening, where the gap is deeper and irregular, while sealant belongs at exposed perimeter joints where you need a finished, weather-resistant line.
Where doors commonly leak air
Door openings can leak at more than one layer, which is why a quick visual check is rarely enough. The concealed gap between the frame and the rough opening is often the biggest source of uncontrolled air movement, especially when the cavity is underfilled or the original foam has shrunk back. Exposed transitions can also underperform over time, including:
- Trim-to-wall joints
- Casing edges
- Side-jamb connections
- Threshold transitions where materials move differently or take on moisture
Other leak points show up around penetrations, irregular framing conditions, or the joints where exterior trim meets siding. When you need to seal gaps around doors effectively, the key is to identify whether the leak is coming from a deeper hidden void or from a visible exterior seam. That distinction determines both the right product and the right application method.
When to use insulating foam and when to use sealant
Foam and sealant are not interchangeable for door sealing purposes. Insulating foam is best for the concealed space between the door frame and the rough opening, where the gap is deeper, irregular, and not meant to stay visible. In that location, the goal is to fill the cavity without distorting the frame or forcing the jamb out of alignment.
Sealant belongs at exposed perimeter joints where you need a finished, weather-resistant line. This includes visible trim transitions, casing edges, and other narrow exterior seams where the material must bridge the joint cleanly while staying flexible over time. In practical terms, sealing doors well means using foam for hidden cavity control and sealant for exposed joint finishing, rather than asking one product to do both jobs.
How to air seal a door opening step-by-step
Start by inspecting the opening and marking the spots where air leakage is most likely. Remove loose debris, dust, failed sealant, and any visibly deteriorated filler so the new materials have a sound surface to bond to. Once the opening is clean, decide whether each gap is hidden or exposed. That step should happen before application, not after the cartridge or can is already in your hand.
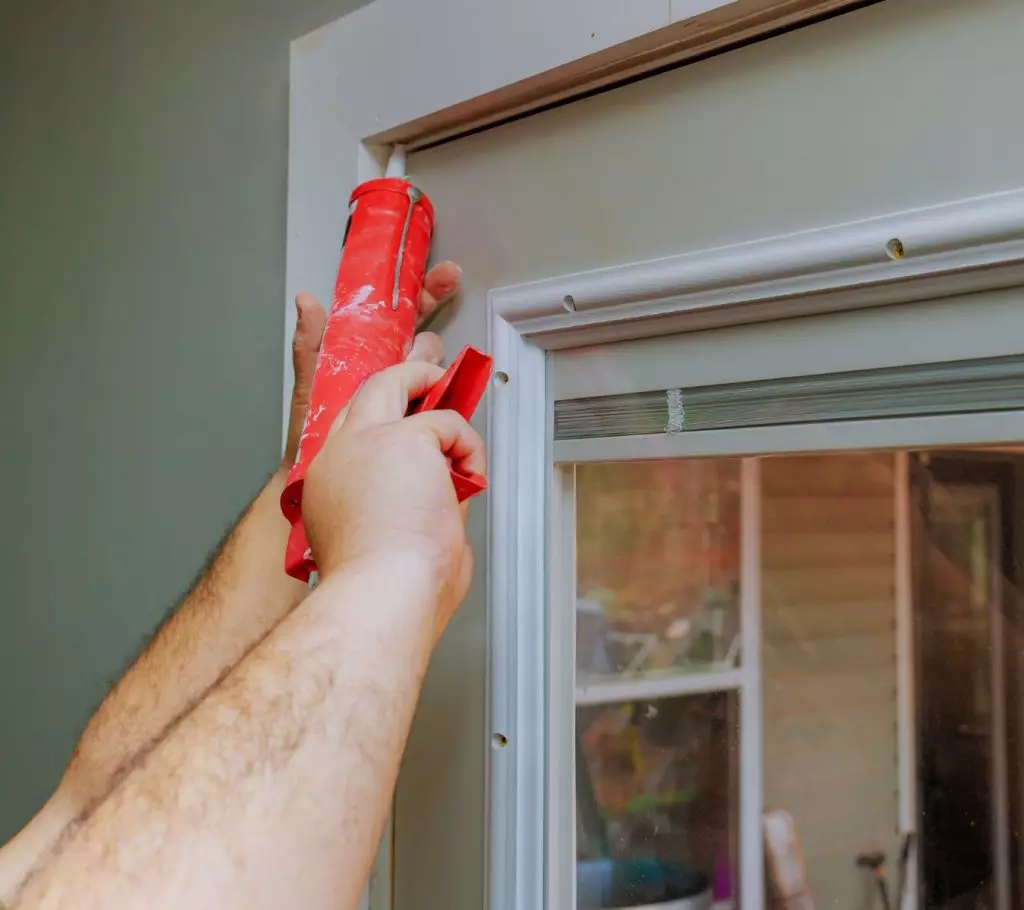
Apply foam only where deeper concealed gaps need to be filled, especially at the frame-to-rough-opening cavity. Use short, controlled passes and give the product room to expand rather than trying to fill the entire gap in one shot. At exposed perimeter joints, apply a continuous bead of sealant with even pressure and keep the bead size matched to the joint width.
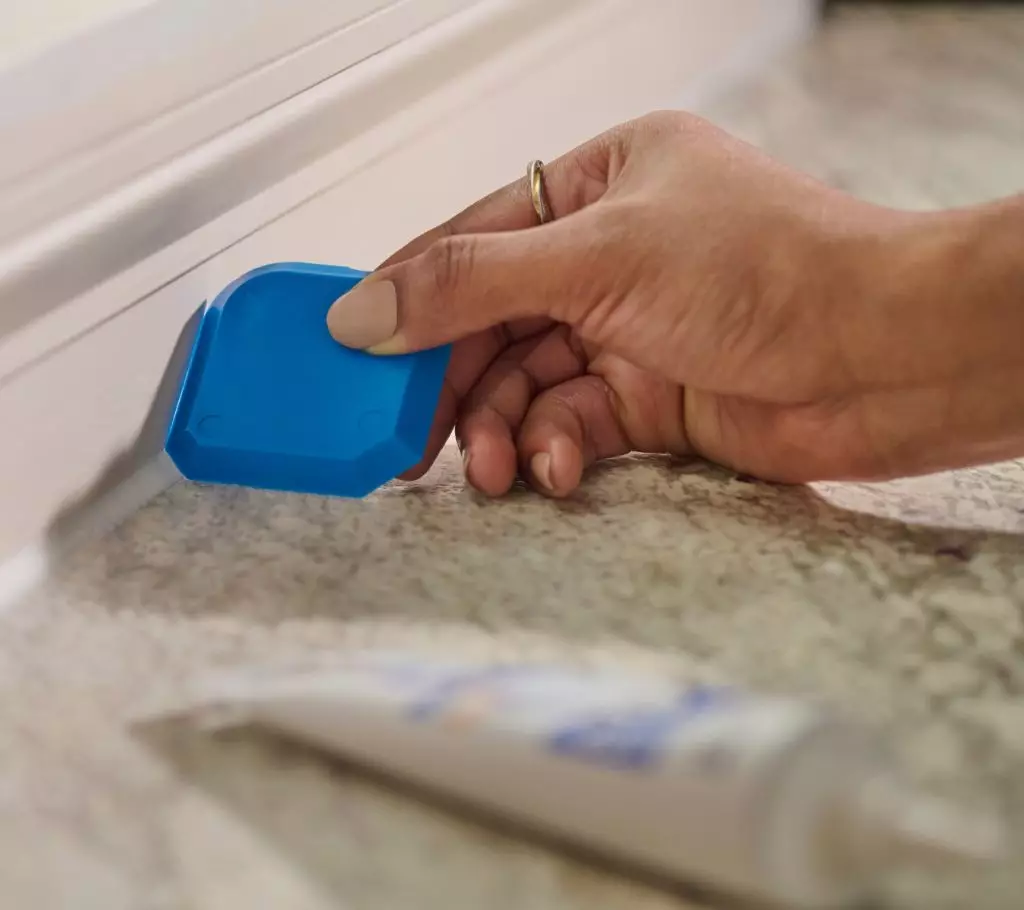
Finish by tooling the exposed bead lightly with the GE Sealant Smoothing Tool or GE Cartridge Opener and Smoothing Tool so the joint is bridged cleanly without excess buildup. Then allow the materials to cure as directed before exposing the area to heavy weather, washing, or repeated traffic.
Proper foam application around door frames
The most common foam mistake around a door opening is overfilling. Even a frame-specific product should be applied in short, controlled passes so the material can expand gradually instead of pushing against the jamb. At window and door frames, too much pressure can affect alignment or create extra trimming and cleanup work after cure.
Pros also get better results when they treat deep gaps in lifts rather than trying to fill the full depth at once. If the cavity is especially deep, let the first layer cure before adding more. That approach improves control, reduces waste, and produces a more consistent air seal without turning the opening into a cleanup problem.
Proper sealant application for exposed joints
Sealant performs best when the exposed perimeter joint is clean, dry, and sized correctly for the bead. Cut the nozzle to match the joint rather than flooding the seam with more material than it needs. Then apply one steady pass with consistent pressure so the bead fully bridges the joint without smearing across the surrounding surfaces.
Tool the bead once, lightly. Repeated passes can pull material out of the seam, leave thin spots, and make the finished joint look worse. For exposed exterior edges, air sealing doors is as much about clean finishing as gap closure. A continuous, well-shaped bead is more reliable than an oversized line that has been worked repeatedly.
Common air sealing mistakes around doors
A few errors show up repeatedly on door jobs. One is using the wrong product for the gap, such as applying general-purpose foam where a frame-safe foam is needed or trying to use sealant to fill a deep concealed cavity. Another is applying foam too aggressively and creating overfill, bowing risk, or unnecessary trimming.
Poor adhesion is also a common but avoidable problem. Dust, moisture, loose residue, and failed material all compromise bond strength. Patching over old failure without proper prep also shortens service life. On exposed joints, oversized nozzle cuts and overtooled beads can leave weak spots or ugly finish lines. The best way to seal gaps around doors is to slow down, identify the joint type, and match the application method to the condition.
GE products that fit the job
For the concealed frame gap, GE Window & Door Insulating Foam is the right fit because it is made specifically for window and door frames. It is a low-pressure, low-expansion foam that seals gaps and cracks around windows and doors without causing frames to bow, while also creating an airtight, water-resistant seal.
For exposed perimeter joints, GE Advanced Silicone Window & Door is the right choice when you need a 100% silicone, 100% weatherproof bead at visible exterior seams. Where heavier weather exposure, stronger movement capability, or a more premium exterior finish matter, GE Supreme Silicone Window & Door is the better upgrade.
To get GE Sealants’ products for your home improvement project, visit these fine retailers in the U.S. or Canada.


