

A narrow pipe gap and a rough utility opening are different sealing problems. This guide helps you read the opening before you choose GE insulating foam, sealant, or a combination of the two. The goal is a cleaner product choice before you seal around pipes and hoses.
Foam and sealant do different jobs around pipe and hose penetrations. Use GE insulating foam when the opening needs void fill, then use the right GE Sealant when the exposed face needs a finished air- or water-sealing bead.
How to seal pipe penetrations: start with the opening
Before you choose a product to seal pipe penetrations, read the opening.
A tight surface gap at a finished wall does not need the same treatment as a rough, oversized penetration through framing, siding, masonry, or a utility wall.
Start with width and depth.
Is the opening a surface joint, a deep void, or a combination of the two?
Then look at exposure. A dry utility chase is different from a laundry wall, a bath or kitchen penetration, an exterior wall, or an exterior hose connection that sees weather.
The surrounding material matters, too. Drywall, wood, tile, masonry, siding, metal, PVC, and fiberglass all create different working conditions around the pipe, hose, or fixture.
Decide whether the exposed bead will need paint, and account for movement where the penetration and surrounding surface may expand, contract, or shift at different rates.
For sealing plumbing penetrations, the first read keeps the product decision tied to the actual job instead of the nearest tube or can.
Once the opening tells you what the material needs to do, the next question gets simpler.
Foam vs. caulk for pipes: choose the material by function
The foam vs. caulk for pipes question usually points to a better field decision: does the penetration need void fill first, or does the exposed edge need a sealant bead?
Sometimes it needs both.
- Foam: Use foam when the penetration has an irregular void or a gap too deep for a surface bead. Foam belongs behind the face of the opening, where it can fill space a bead cannot reach. That makes it useful when drafts or pest entry are the concern.
- Sealant: Use sealant at the exposed edge. When you need to seal around pipes and hoses at the face of the penetration, the bead has to handle surface exposure and movement while leaving a cleaner finished line. Do not ask it to span a void it was never meant to fill.
For this job, if the opening needs filling first, size the void before you choose the foam.
Choose insulating foam for the size of the void
Start with the gap range. You need a different foam for a small pest or draft gap compared to a larger rough opening around a pipe, duct, or service penetration.
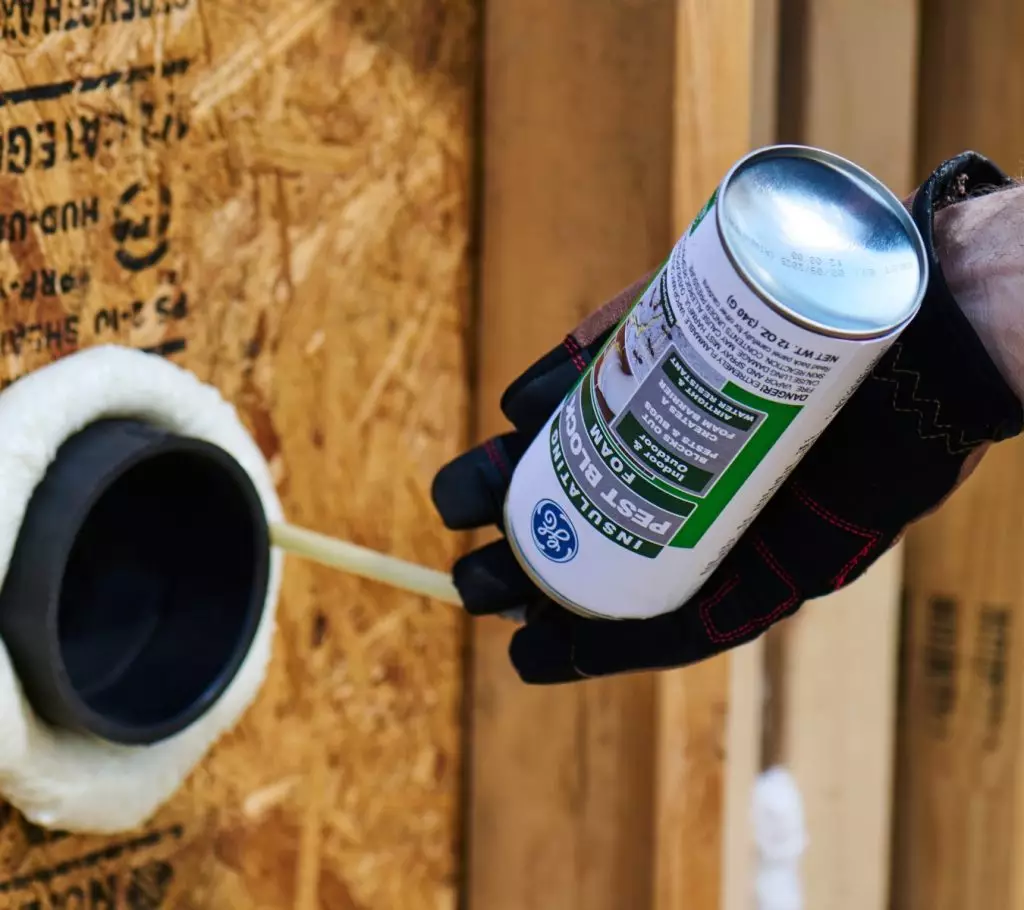
If your gap is up to 1 inch, use GE Pest Block Insulating Foam where pest entry or air movement is the concern. That includes common gaps around plumbing or wiring, near ductwork or sill plates, and in basement or attic areas. It is also a fit if you’re air-sealing plumbing penetrations when the opening is small enough for this gap range.
For larger voids from 1 inch to 3 inches, use GE Big Gaps & Cracks Insulating Foam. Choose it for rough openings around pipes or HVAC penetrations, especially in sill-plate and crawl-space conditions where a bead cannot handle the depth or size of the void.
After you trim cured foam, check what remains exposed.
Do not leave exterior-facing foam as the final exposed detail because cured foam must be protected from UV exposure. If the opening needs a visible finish, the surrounding surface sets the next requirement.
Let the surrounding surface set the sealant requirements
When you seal pipe penetrations at the finished edge, the material around the penetration affects what the bead needs to handle.
A painted wall or trim detail brings paintability into the decision. Tile, fiberglass, and other wet-area surfaces make water exposure the first question. Exterior siding, masonry, trim, and hose-bib areas add weather exposure.
Do not treat a rough cavity the same way you would a finished joint. Fill the void first, then evaluate the surface that remains exposed. Once that surface is clear, your sealant choice has a cleaner job.
Choose a sealant for exposure, water, and paintability
With the void handled and the surrounding surface understood, choose the sealant for the bead that remains exposed.
For interior wet-area beads that do not need paint
Choose GE Supreme Silicone Kitchen & Bath Sealant. This 100% silicone sealant fits wet-area plumbing penetrations (such as kitchens, baths, laundry rooms) where a paintable bead is not required.
It is 100% waterproof, water-ready in as little as 30 minutes, and rated Class 50.
For interior wet-area beads that need paint
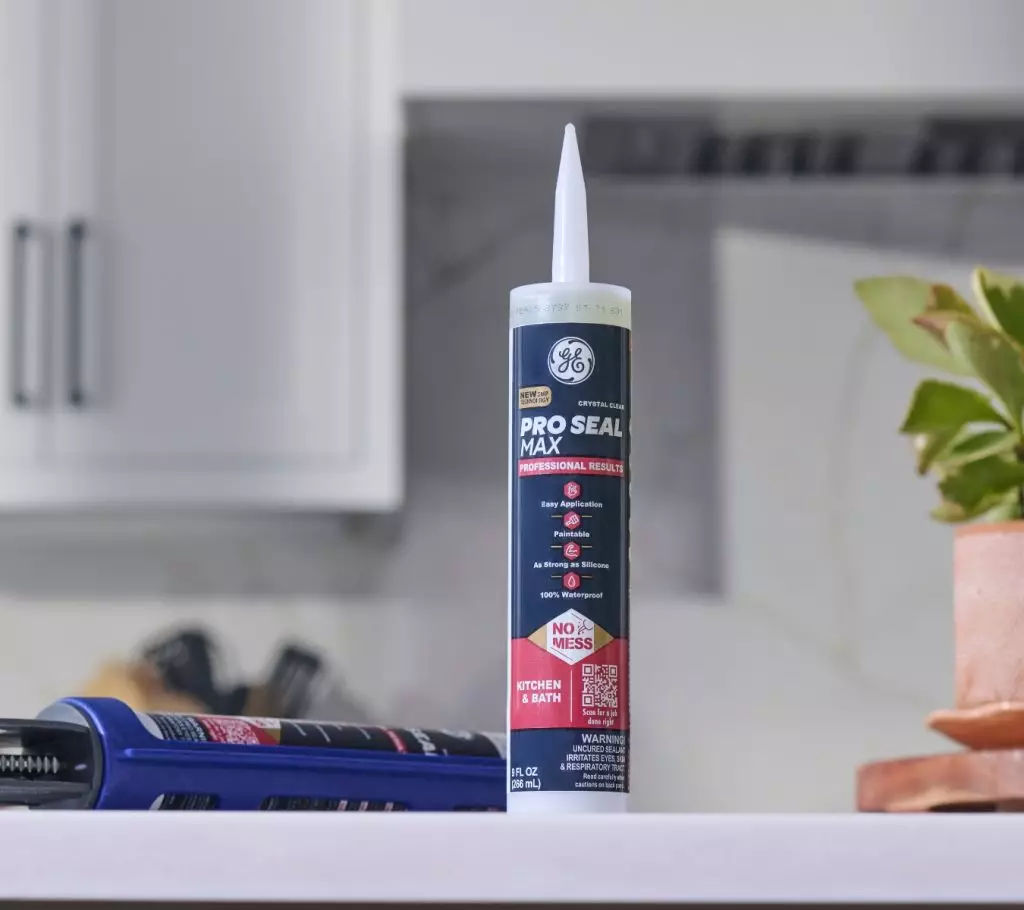
Choose GE Pro Seal Max Kitchen & Bath. Use this paintable sealant where the finished bead needs waterproof performance in a kitchen, bath, laundry, or other moisture-prone interior area.
It is a hybrid sealant, not 100% silicone, so it gives you a paintable option where 100% silicone is not the right finish.
For exterior finished beads
Choose GE Pro Seal Max Window & Door around exterior wall, siding, trim, or hose-bib penetrations where the finished bead needs paintability and weather exposure resistance. Keep it tied to the exposed bead, not the rough void behind it.
Avoid product mismatches when sealing around pipe and hose penetrations
Keep the details separate:
- For sealing plumbing penetrations, keep threaded connections separate from the seal around the penetration. Use thread tape or pipe dope on pipe threads, not GE Sealants. Use GE Sealants only around the outside of the pipe penetration when the surface and exposure fit.
- Do not treat insulating foam as a firestop.
- Do not leave exterior-facing foam exposed as the final detail. Cured foam must be protected from UV exposure.
- Do not use 100% silicone where the finished bead must be painted.
- Do not span a large rough opening with only a surface bead.
- Do not extend the detail into continuous-submersion, structural, load-bearing, aquarium, food-contact, or high-heat use unless the GE product supports that use.
Keep the thread seal separate from the penetration seal, and do not expect foam or sealant to cover conditions outside its role.
You’ve read the opening. Now match the job to the GE foam or sealant that fits the void, exposed bead, and surface conditions. Find GE products at a retailer near you in the U.S. or Canada.

