How to Seal Around the Exterior of a Door Properly

When left unsealed, the gaps between your door frame or trim and your home’s siding can let in water, drafts and pests, so it’s important to know how to seal a door frame properly. If you notice your old door sealant is cracked, degrading or damaged, then it’s time to replace it. A new, 100% silicone seal will help keep your home weatherproof, pest-resistant and potentially more energy-efficient.

Tools & Supplies for Sealing Doors

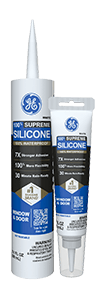
Picking the right sealant for your project can make all the difference. For sealing around the exterior of a door, or anywhere that could be exposed to water and harsh weather, choose a GE-branded 100% silicone sealant, like GE Supreme Silicone Window & Door sealant. This sealant is 100% weatherproof, permanently flexible and won’t crack or shrink with temperature changes. It also offers lifetime mold-free product protection1 so your door sealant will be protected against mold and mildew too.

 Pro Tip: 100% silicone sealants are not paintable so be sure to pick a color that matches your home’s exterior. ​​GE Supreme Silicone Window & Door sealant is available in six different colors: almond, black, brown, clear, light gray and white.

Besides a GE-branded 100% silicone sealant, you will also need:

  • Caulk gun
  • Painter’s tape
  • Latex gloves
  • Soapy water
  • Paper towels
  • Stiff bristle brush
  • Utility blade
  • Caulk tool
  • Mineral spirits
  • Isopropyl alcohol

Once you have your tools and GE-branded 100% silicone sealant, you’re ready to learn how to seal a door frame to keep out weather, drafts and pests:

  1. Start with a Clean Surface

    Whenever you start a new sealing project, make sure you have a clean work surface by wiping it down with isopropyl alcohol. If you’re replacing a seal, completely remove the old caulk or sealant, then wipe down the area with isopropyl alcohol. Let the surface dry before laying a new bead.

    Safety Tip: Make sure your work area is well ventilated when using isopropyl alcohol.

    Applying painter’s tape on either side of the area you’re sealing can help create a smoother bead and easier cleanup. However, depending on your home’s siding and how wide the gaps between it and the door are, it may be better to rely solely on your own steady hand.

  2. Carefully Cut the Sealant Cartridge

    Next, prepare your sealant by cutting the tip of the cartridge. Cut the cartridge tip at a 45-degree angle. Some caulk guns have a tool to cut the cartridge tip, but we recommend using a utility blade for consistently clean results. Cut off less than you think you’ll need because you can always cut more. Once cut, pierce the cartridge’s inner foil seal using the metal rod on your caulk gun or a long nail. Then load the cartridge into the caulk gun.

  3. Apply Sealant

    Now apply the sealant. Maintain a relaxed, confident grip and steady speed as you apply the sealant. Run a bead between the door frame and the home’s siding, starting from the top corner and working down to the bottom corner. If you can’t make it in one pass, it’s ok to readjust your grip and start where you left off.

    Repeat along the opposite side, and fill gaps with additional sealant as needed.

    Seal around everywhere there are gaps between the frame or casing of the door and the rest of the house, including the door sill.

  4. Tool the Bead

    Use a caulk tool or your finger to tool the sealant bead until it’s smooth. Because it’s important to tool the bead before the sealant starts to cure, it may be better to work in sections. Run a bead of sealant along one side of the door frame, tool the bead, then continue applying sealant on the next side.

  5. Remove Painter’s Tape & Let Sealant Cure Completely

    If you used painter’s tape, immediately remove it before the sealant has a chance to cure. Remove any excess or unwanted sealant with mineral spirits.

    Finally, allow the sealant to cure completely for the best performance. GE Supreme Silicone Window & Door sealant is water-ready in 30-minutes2 and fully cured in 24-hours, but check your product for specific curing instructions.

    Now your exterior door has a 100% weatherproof seal that’s made to last. For more step-by-step sealing tutorials with high-performing GE-branded sealants, check out our other How-To guides.

1Cured sealant is resistant to stain causing mold and mildew. Regular cleaning of the cured sealant is required, however, as soap and other residue can cause secondary mold and mildew growth.

2Exposure to water possible in as little as 30 minutes with bead size max 3/16””, temperature min 65oF and humidity min 50%. Otherwise, sealant should not be exposed to water for 8 hours. Do not touch or clean sealant for 24 hours.
 

How to Seal a Kitchen Sink for Long-Lasting Results

Between washing dishes, prepping food and cleaning, your kitchen sink has to stand up to a lot of daily wear and tear. That’s why it’s particularly important for your sink to have a durable, watertight seal. Old, damaged sealant or a sealant that isn’t 100% waterproof can let water and moisture seep between your sink and counters, which can create leaks in your cabinets or lead to problems like mold, mildew and rot. Knowing how to seal a kitchen sink properly with a 100% silicone sealant will prevent these problems before they start.

Tools & Supplies for Sealing Sinks

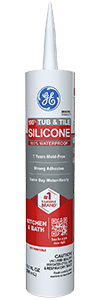
Picking the right sealant can make all the difference. For sealing a kitchen sink, or anywhere water could be present, choose a GE-branded 100% silicone sealant, like GE Tub & Tile Silicone 1® sealant. This sealant is 100% waterproof, permanently flexible and has 7-year mold-free product protection,1 so you can create a lasting, mold-resistant and watertight seal.

Whichever product you choose, check the packaging to ensure the sealant will adhere to your countertop material without staining it.

Pro Tip: 100% silicone sealants are not paintable so be sure to pick the appropriate color for your project.

Besides a GE-branded 100% silicone sealant, you will also need:

  • Caulk gun
  • Painter’s tape
  • Latex gloves
  • Soapy water
  • Paper towels
  • Utility blade
  • Caulk tool
  • Mineral spirits
  • Isopropyl alcohol

With all your tools and supplies ready, follow these steps to learn how to seal a kitchen sink so it has long-lasting, 100% waterproof protection:

  1. Start with a Clean Surface

    Whenever you start a new sealing project, make sure you have a clean work surface by wiping it down with isopropyl alcohol. If you’re replacing old caulk or sealant, completely remove it first, then wipe down the area with isopropyl alcohol. Let the surface dry before laying a new bead.

    Safety Tip: Make sure your work area is well ventilated when using isopropyl alcohol.

  2. Apply Painter’s Tape

    For a smoother bead and easier cleanup, apply painter’s tape on either side of the area you’re sealing.

  3. Carefully Cut the Sealant Cartridge

    Next, prepare your sealant by cutting the tip of the cartridge. Cut the cartridge tip at a 45-degree angle so the hole is about the same size as the area you’re sealing. Some caulk guns have a tool to cut the cartridge tip, but we recommend using a utility blade for consistently clean results. Cut off less than you think you’ll need because you can always cut more. Once cut, pierce the cartridge’s inner foil seal using the metal rod on your caulk gun or a long nail. Then load the sealant cartridge into the caulk gun.

  4. Apply Sealant

    After prepping your sealant and your work area, start running a bead of sealant around the entire sink where it meets the countertop. Start at one corner of the sink and work your way around. Pull the gun toward you and maintain a relaxed, confident grip and steady speed to apply the bead smoothly. If you can’t make it in one pass, it’s ok to readjust your grip and start where you left off. Fill gaps with additional sealant as needed.

  5. Tool the Bead & Remove the Painter’s Tape

    Use a caulk tool or your finger to tool the sealant bead until it’s smooth. It’s important to tool the bead before the sealant starts to cure, so if you need to, you can tool in sections. Run a bead of sealant in one manageable section, like along one edge of the sink, tool the bead, then continue applying more sealant.

  6. Let Sealant Cure Completely

    Finally, allow the sealant to cure completely for the best performance. GE Tub & Tile Silicone 1® sealant is same-day water-ready2 and fully cured in 24 hours, but check your product for specific curing instructions.Once the sealant has cured, your kitchen sink will be watertight and ready to use. For more step-by-step sealing tutorials with high-performing GE-branded sealants, check out our other How-To guides.

1Cured sealant is resistant to stain causing mold and mildew. Regular cleaning of the cured sealant is required, however, as soap and other residue can cause secondary mold and mildew growth.

2Exposure to water possible in as little as 12 hours with bead size max 3/16″, temperature min 65°F and humidity min 50%. Do not touch or clean sealant for 24 hours.

How to Seal a Baseboard in 6 Easy Steps

When installing new baseboards, there’s a small gap between the baseboard and the wall. You should seal this gap with caulk before painting the baseboards to create a clean, professional-looking finish. If you have shoe molding on your baseboards, you can also seal the joint where the molding meets the baseboard to create a smooth look over the entire feature.

Old, peeling or cracked caulking around your baseboards means it’s time to reseal them. Not only is the old caulk unsightly, the cracks in the seal can let in unwanted drafts from outdoors or your home’s crawl space or basement. Plus, if you’re repainting, you’ll find a new, in-tact seal much easier to paint.

Tools & Supplies for Sealing Baseboards

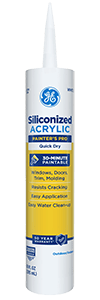
Picking the right caulk can make all the difference. For sealing a baseboard or any dry area you plan to paint after sealing, choose a GE-branded siliconized acrylic caulk, like GE Painter’s Quick Dry caulk. This caulk is paint-ready in as little as 30 minutes1 or immediately spray-paint-ready, and because it’s siliconized, it’s permanently flexible and will resist cracking even after being painted. GE Painter’s Quick Dry caulk also comes with a 50-year limited durability guarantee,2 so you won’t have to reseal your baseboards for a long time.

Besides a GE-branded caulk, you will also need:

  • Caulk gun
  • Painter’s tape
  • Latex gloves
  • Soapy water
  • Paper towels
  • Utility blade
  • Caulk tool
  • Isopropyl alcohol

Once you have your GE-branded caulk of choice and all your supplies, you’re ready to seal and prep your baseboards for a perfect paint job:

  1. Start with a Clean Surface

    Whenever you start a new sealing project, make sure you have a clean work surface by wiping it down with isopropyl alcohol. If you’re replacing old caulk or sealant, completely remove it first, then wipe down the area with isopropyl alcohol. Let the surface dry before laying a new bead.

  2. Apply Painter’s Tape

    For a smoother bead and easier cleanup, apply painter’s tape on either side of the area you’re caulking.

  3. Carefully Cut the Caulk Cartridge

    Next, prepare your caulk by cutting the tip of the cartridge. Cut the cartridge tip at a 45-degree angle. Some caulk guns have a tool to cut the cartridge tip, but we recommend using a utility blade for consistently clean results. Cut off less than you think you’ll need because you can always cut more. Once cut, pierce the cartridge’s inner foil seal using the metal rod on your caulk gun or a long nail. Then load the sealant cartridge into the caulk gun.

  4. Apply Caulk

    Now you’re ready to begin sealing. Start at one end of the baseboard and work your way to the other end. Pull the gun toward you and maintain a relaxed, confident grip and steady speed to apply the bead smoothly. If you can’t make it in one pass, it’s ok to readjust your grip and start where you left off. Fill in any additional gaps as needed.

    Repeat this process for the entire room that you’re sealing.

  5. Tool the Bead & Remove the Painter’s Tape

    Use a caulk tool or your finger to tool the caulk bead until it’s smooth. It’s important to tool the bead before the caulk starts to dry, so if you need to, you can tool in sections. Run a bead of caulk, tool the bead, then repeat as many times as needed.

  6. Let Caulk Dry Completely

    Finally, allow the caulk to dry completely for the best performance. GE Painter’s Quick Dry caulk is paint-ready in 30 minutes1 and fully dry in 24 hours, but check your product for specific drying and curing instructions.Now your baseboards have a long-lasting seal and are prepped for you to paint. For more step-by-step sealing tutorials with high-performing GE-branded caulks and sealants, check out our other How-To guides.

1Sealant can be spray-painted immediately and brush- and roller-painted in as little as 30 minutes with bead size max 3/16″, temperature minimum of 65°F, and humidity minimum 50 percent. Otherwise, sealant should not be painted for 30-minutes. Apply paint with reduced applicator pressure to avoid disturbing the sealant. Paintable Silicone Sealant works well with most water-based acrylic paints. Sealant is not recommended with oil-based paints. If oil-based paints are used, test apply an acrylic primer and paint in a small, inconspicuous area.

2Manufacturer warrants that this product, when used as directed, will meet the above specifications for as long as you own your home. If not satisfied, return proof of purchase for refund. This is the sole and exclusive remedy and Manufacturer shall not be liable for any damages in excess of the purchase price. This warranty is in lieu of all other warranties, express or implied, including any warranty of merchantability or fitness.

How to Remove Old Caulk or Sealant the Right Way

When tackling renovations or just replacing old sealant, you’ll need to first prepare your work surface. Over time, caulks and sealants can wear down, grow mold, discolor, and shrink. This creates cracks that water, weather and pests can get through. Unless you’re refreshing 100% silicone seals with GE Re-New, old caulk or sealant needs to be completely removed before you can apply new sealant.

To remove sealant, you’ll need: a utility blade, caulking tool, isopropyl alcohol and paper towels.

  1. Score Old Sealant

    First, carefully score the seam of the old sealant with a utility blade. Run the blade along the edge of the old sealant, being cautious not to scratch the surface of whatever you plan to re-seal.

  2. Remove Old Sealant

    After scoring the old sealant, try to remove as much of the old sealant as you can by hand. Use a caulking tool to remove any remaining material.

    For tight corners where your fingers or a caulking tool won’t fit, use the utility blade again to carefully scrape off the sealant.

  3. Clean Surface with Isopropyl Alcohol

    Once you’ve removed as much of the old sealant material as possible, clean up any remaining residue, dust and debris using isopropyl alcohol. Dampen a paper towel with the alcohol, then wipe down your entire work surface. This step is important for making sure the new sealant you apply will adhere properly.

    If the old sealant had mold, clean the area with a mold cleaning solution prior to wiping down with isopropyl alcohol.

    Safety Tip: Make sure your work area is well ventilated when using isopropyl alcohol.

  4. Allow Work Surface to Dry

    Finally, allow your work surface to dry completely before you apply any new sealant. After this step, you’re ready for a successful sealing project.

    To avoid removing old sealant again any time soon, create your next seal with a high-performing GE-branded silicone sealant that’s backed by a lifetime guarantee¹ like GE Advanced Silicone 2® or GE Supreme Silicone. Check out our other How-To Guides for more step-by-step tutorials that will help with your next sealing project.

1Manufacturer warrants that this product, when used as directed, will meet the above specifications for as long as you own your home. If not satisfied, return proof of purchase for refund. This is the sole and exclusive remedy and Manufacturer shall not be liable for any damages in excess of the purchase price. This warranty is in lieu of all other warranties, express or implied, including any warranty of merchantability or fitness.

How to Seal a Kitchen Counter for Long-Lasting Results

The gaps around the edges and joints of a kitchen counter are a perfect trap for crumbs, water and humidity. If these gaps are left unsealed or the sealant is old and cracked, you could experience problems like mold, mildew and rot in your walls or cabinets. Prevent these problems before they start by learning how to seal kitchen counters with silicone sealant for lasting protection against mold and water damage.

Tools & Supplies for Sealing Counters

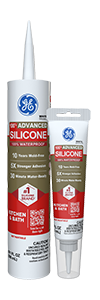
Picking the right sealant can make all the difference. For sealing a kitchen counter, bathroom counter or anywhere water could be present, choose a GE-branded 100% silicone sealant, like GE Advanced Silicone 2® Kitchen & Bath sealant. This sealant is 100% waterproof, permanently flexible and has 10-year mold-free product protection1 and strong adhesion to create a watertight, mold-resistant seal.

Whichever product you choose, check the packaging to ensure the sealant will adhere to your countertop material without staining it.

Pro Tip: 100% silicone sealants are not paintable so be sure to pick the appropriate color for your project.

Besides a GE-branded 100% silicone sealant, you will also need:

  • Caulk gun
  • Painter’s tape
  • Latex gloves
  • Soapy water
  • Paper towels
  • Utility blade
  • Caulk tool
  • Mineral spirits
  • Isopropyl alcohol

Once you have all the tools and supplies you need for this project, you’re ready to seal a counter with these six steps:

  1. Start with a Clean Surface

    Whenever you start a new sealing project, make sure you have a clean work surface by wiping it down with isopropyl alcohol. If you’re replacing old caulk or sealant, completely remove it first, then wipe down the area with isopropyl alcohol. Let the surface dry before laying a new bead.

    Safety Tip: Make sure your work area is well ventilated when using isopropyl alcohol.

  2. Apply Painter’s Tape

    For a smoother bead and easier cleanup, apply painter’s tape on either side of the area you’re sealing.

  3. Carefully Cut the Sealant Cartridge

    Next, prepare your sealant by cutting the tip of the cartridge. Cut the cartridge tip at a 45-degree angle so the hole is about the same size as the area you’re sealing. Some caulk guns have a tool to cut the cartridge tip, but we recommend using a utility blade for consistently clean results. Cut off less than you think you’ll need because you can always cut more. Once cut, pierce the cartridge’s inner foil seal using the metal rod on your caulk gun or a long nail. Then load the sealant cartridge into the caulk gun.

  4. Apply Sealant

    Now that your sealant and work area is prepped, apply sealant along the edge of the counter where it meets the wall or backsplash. As you work, pull the gun toward you and maintain a relaxed grip and steady speed. If you can’t make it in one pass, it’s ok to readjust your grip and start where you left off. Fill gaps with additional sealant as needed.

  5. Tool the Bead & Remove the Painter’s Tape

    Use a caulk tool or your finger to tool the sealant bead until it’s smooth. It’s important to tool the bead before the sealant starts to cure, so if you need to, you can tool in sections. Run a short bead of sealant, tool the bead, then repeat as many times as needed.

  6. Let Sealant Cure Completely

    Finally, allow the sealant to cure completely for the best performance. GE Advanced Silicone 2® Kitchen & Bath sealant is water-ready in 30 minutes2 and fully cured in 24 hours, but check your product for specific curing instructions.Now you have a 100% waterproof seal that will help keep your countertops protected from mold, mildew and more. For more step-by-step sealing tutorials with high-performing GE-branded sealants, check out our other How-To guides.

1Cured sealant is resistant to stain causing mold and mildew. Regular cleaning of the cured sealant is required, however, as soap and other residue can cause secondary mold and mildew growth.

2Exposure to water possible in as little as 30 minutes with bead size max 3/16””, temperature min 65oF and humidity min 50%. Otherwise, sealant should not be exposed to water for 8 hours. Do not touch or clean sealant for 24 hours. 
How to Caulk a Bathtub the Right Way to Prevent Mold & Leaks

A bathtub should be able to stand up to humidity, splashes and the occasional overflowing bubble bath, and to do that, it needs a durable seal. Not only does it look unpleasant, but old tub sealant that’s cracked or peeling can let water and moisture into your walls, creating serious problems like mold, mildew and rot. To prevent these problems, it’s important to replace old sealant with a new, 100% silicone seal.

Tools & Supplies for Sealing Bathtubs

Picking the right sealant can make all the difference. For sealing a bathtub, or anywhere water could be present, choose a GE-branded 100% silicone sealant, like GE Advanced Silicone 2® Kitchen and Bath sealant. This sealant is 100% waterproof, permanently flexible, has 10-year mold-free product protection1 and excellent adhesion for a watertight seal.

Pro Tip: 100% silicone sealants are not paintable so be sure to pick the appropriate color for your project.

Besides a GE-branded 100% silicone sealant, you will also need:

  • Caulk gun
  • Painter’s tape
  • Latex gloves
  • Soapy water
  • Paper towels
  • Utility blade
  • Caulk tool
  • Mineral spirits
  • Isopropyl alcohol

With the right tools and sealant for your project in hand, follow these steps to learn how to seal a bathtub so it’s completely waterproof and mold-resistant for years to come:

  1. Start with a Clean Surface

    Whenever you start a new sealing project, make sure you have a clean work surface by wiping it down with isopropyl alcohol. If you’re replacing a seal, completely remove the old caulk or sealant, then wipe down the area with isopropyl alcohol. Let the surface dry before laying a new bead.

    Safety Tip: Make sure your work area is well ventilated when using isopropyl alcohol.

  2. Apply Painter’s Tape

    For a smoother bead and easier cleanup, apply painter’s tape on either side of the area you’re sealing.

    Pro Tip: When sealing certain types of bathtubs, such as fiberglass tubs, you may want to fill it with water before applying sealant. Tubs will naturally sink and flex from the weight of the water, putting stress on the sealant joint. If you fill the tub before applying the sealant, you can account for this stress and ensure the finished seal will properly expand and contract when you fill and empty the tub in the future.

  3. Carefully Cut the Sealant Cartridge

    Next, prepare your sealant by cutting the tip of the cartridge. Cut the cartridge tip at a 45-degree angle. Some caulk guns have a tool to cut the cartridge tip, but we recommend using a utility blade for consistently clean results. Cut off less than you think you’ll need because you can always cut more. Once cut, pierce the cartridge’s inner foil seal using the metal rod on your caulk gun or a long nail. Then load the cartridge into the caulk gun.

  4. Apply Sealant

    Once your area is prepped and your sealant is ready, seal around the tub where it meets the wall. Start running a bead of sealant at the edge of the tub and work your way inward. Pull the gun toward you while maintaining a relaxed grip and steady speed. If you can’t make it in one pass, it’s ok to readjust your grip and start where you left off. Fill gaps with additional sealant as needed.

  5. Tool the Bead & Remove the Painter’s Tape

    Use a caulk tool or your finger to tool the sealant bead until it’s smooth. Because it’s important to tool the bead before the sealant starts to cure, it may be better to work in sections. Apply sealant along one side of the tub, tool the bead, then continue onto the next side.

  6. Let Sealant Cure Completely

    Finally, allow the sealant to cure completely for the best performance. GE Advanced Silicone 2® Kitchen & Bath sealant is water-ready in 30-minutes2 and fully cured in 24-hours, but check your product for specific curing instructions.Now you know how to seal a bathtub with the help of high-performing GE-branded sealants. For more step-by-step sealing tutorials, check out our other How-To guides.

1Cured sealant is resistant to stain causing mold and mildew. Regular cleaning of the cured sealant is required, however, as soap and other residue can cause secondary mold and mildew growth.

2Exposure to water possible in as little as 30 minutes with bead size max 3/16”, temperature min 65℉ and humidity min 50%. Otherwise, sealant should not be exposed to water for 8 hours. Do not touch or clean sealant for 24 hours. 
How to Seal Exterior Window Trim to Last

Knowing how to seal exterior window trim will help keep your home protected against rain, snow, drafts and more. When left unsealed or left with old degrading sealant, the gaps between your home’s window trim and siding can let leaks, humidity, airflow and even pests into your home. Sealing around windows is also one way to help keep your home energy efficient and maybe even lower your heating and cooling bills.

Tools & Supplies for Sealing Windows

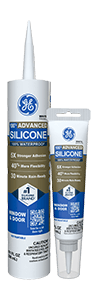
Picking the right sealant for your project can make all the difference. For sealing exterior window trim, or anywhere that could be exposed to water and harsh weather, choose a GE-branded 100% silicone sealant, like GE Advanced Silicone 2® Window & Door sealant or GE Supreme Silicone Window & Door sealant. Both sealants are 100% weatherproof, permanently flexible and won’t crack or shrink with temperature changes. Plus, they offer mold-free product protection1 so your windows are protected against mold and mildew too.

Pro Tip: 100% silicone sealants are not paintable so be sure to pick a color that matches your home’s exterior. ​​GE Advanced Silicone 2® Window & Door sealant and GE Supreme Silicone Window & Door sealant are available in six different colors: almond, black, brown, clear, light gray and white.

Besides a GE-branded 100% silicone sealant, you will also need:

  • Caulk gun
  • Painter’s tape
  • Latex gloves
  • Soapy water
  • Paper towels
  • Stiff bristle brush
  • Utility blade
  • Caulk tool
  • Mineral spirits
  • Isopropyl alcohol

With your tools and GE-branded 100% silicone sealant in hand, you’re ready to learn how to seal exterior window trim so it’s weatherproof and durable for seasons to come:

  1. Start with a Clean Surface

    Whenever you start a new sealing project, make sure you have a clean work surface by wiping it down with isopropyl alcohol. If you’re replacing a seal, completely remove the old caulk or sealant, then wipe down the area with isopropyl alcohol. Let the surface dry before laying a new bead.

    Safety Tip: Make sure your work area is well ventilated when using isopropyl alcohol.

    Applying painter’s tape on either side of the area you’re sealing can help create a smoother bead and easier cleanup. However, depending on your home’s siding and how wide the gaps between it and the trim are, it may be better to rely solely on your own steady hand.

  2. Carefully Cut the Sealant Cartridge

    Next, prepare your sealant by cutting the tip of the cartridge. Cut the cartridge tip at a 45-degree angle. Some caulk guns have a tool to cut the cartridge tip, but we recommend using a utility blade for consistently clean results. Cut off less than you think you’ll need because you can always cut more. Once cut, pierce the cartridge’s inner foil seal using the metal rod on your caulk gun or a long nail. Then load the cartridge into the caulk gun.

  3. Apply Sealant

    Now it’s time to start sealing. Maintain a relaxed, confident grip and steady speed as you apply the sealant. Run a bead between the window trim and the home’s siding, starting from the top corner and working down to the bottom corner. If you can’t make it in one pass, it’s ok to readjust your grip and start where you left off.

    Repeat along the opposite side, and fill gaps with additional sealant as needed.

    Remember to seal along the bottom of the window too.

  4. Tool the Bead

    Use a caulk tool or your finger to tool the sealant bead until it’s smooth. Because it’s important to tool the bead before the sealant starts to cure, it may be better to work in sections. Run a bead of sealant along one side of the trim, tool the bead, then continue applying sealant on the next side.

  5. Remove Painter’s Tape & Let Sealant Cure Completely

    If you used painter’s tape, immediately remove it before the sealant has a chance to cure. Remove any excess or unwanted sealant with mineral spirits.Then finally, allow the sealant to cure completely for the best performance. Both GE Advanced Silicone 2® Window & Door sealant and GE Supreme Silicone Window & Door sealant are water-ready in 30-minutes2 and fully cured in 24-hours, but check your product for specific curing instructions.

    Now your exterior windows are weatherproof and ready to weather the storm for years to come. For more step-by-step sealing tutorials with high-performing GE-branded sealants, check out our other How-To guides.

1 Cured sealant is resistant to stain causing mold and mildew. Regular cleaning of the cured sealant is required, however, as soap and other residue can cause secondary mold and mildew growth.

2 Exposure to water possible in as little as 30 minutes with bead size max 3/16””, temperature min 65oF and humidity min 50%. Otherwise, sealant should not be exposed to water for 8 hours. Do not touch or clean sealant for 24 hours. 
 

How to Load a Caulk Gun Quickly & Easily

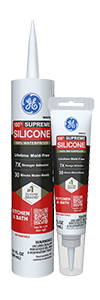
To create a great seal, you’ll want two things: a cartridge of high-performing GE-branded sealant, like GE Advanced Silicone 2® Kitchen & Bath sealant, and a caulk gun. A caulk gun is an essential sealing tool for large sealing projects that will help you more easily create clean, professional-looking seals. With a little bit of practice, loading a sealant cartridge into a caulk gun will become second nature. Follow these four steps to set up your caulk gun and start sealing right away.

Pro Tip: For tight spaces, smaller projects, or quick repairs try using a GE Sealants squeeze tube. Just cut the nozzle tip, then squeeze out the sealant—no caulk gun required.

  1. Carefully Cut the Sealant Cartridge

    First, cut the tip of the sealant cartridge at a 45-degree angle. There are two ways to do this: either with a utility blade or, if your caulk gun has it, with the caulk gun’s tip cutting tool. For better precision, we recommend using a utility blade.Cut off less than you think you’ll need because you can always cut more.

  2. Pierce Cartridge’s Inner Foil Seal

    Your sealant cartridges may have an inner foil seal that you’ll need to pierce. Most caulk guns have an attached metal rod for this purpose. Swivel the rod around and insert it into the cartridge nozzle until you feel it puncture the inner foil. If your caulk gun doesn’t have this rod, you can use a long nail instead.

  3. Insert the Cartridge

    Once you’ve cut the tip and pierced the inner seal, you’re ready to insert the sealant cartridge into the caulk gun. First, press the release trigger on the handle and pull the plunger all the way back. Then insert the cartridge heel-first into the caulk gun. Release the plunger so that it’s seated firmly against the end of the cartridge. When the cartridge is securely loaded into the caulk gun, squeeze the trigger a few times and run a test bead of sealant. Press the release trigger to remove any pressure and stop the flow of sealant. This will help you get a feel for the pressure and speed needed to apply the sealant.

    Refer to our other How-To videos for common how to applications.

  4. Remove the Cartridge

    Once you’re finished sealing, it’s time to unload the caulk gun. Press the release trigger again and pull back the plunger. Then simply remove the cartridge. Now you’re ready to seal like a pro with high-performing GE-branded sealants that you can always trust to get the job done right.

    For more step-by-step sealing tutorials, check out our other How-To guides.