Note: This DIY article is provided as a general guide only and is not intended to take the place of product-specific installation procedures; always follow applicable manufacturers’ instructions. Depending on your home’s age and condition, location within the home, and other potential factors, repairs and/or upgrades or other services may be necessary prior to the beginning and/or completion of your project that may involve the services of a home improvement professional. This article does not include advice pertaining to local building codes and/or any related inspections.
When the freeze starts, water can find every gap: under your doors, along wall joints, and behind trim. This guide shows how to moisture-proof your garage using GE sealants built for cold weather. They’ll stop leaks and protect the surfaces that take the winter’s worst.
Check the sealant tube label for application temperature and cure time before you start. Each formula has its own window for best adhesion.
Why you should moisture-proof your garage before the snow hits
When snow starts to melt, it can seep under doors and gather where your wall meets the floor. Over time, that moisture weakens concrete and stains anything you store near the ground. If you moisture-proof your garage now, before the freeze, you can prevent the damage.
Early prep gives you better weather windows for sealant to cure and fewer repeat fixes once the temperature drops. A clean, dry joint sealed at the right time is more likely to last through winter instead of failing mid-season.
That’s the difference between moisture-proofing garages and managing a recurring cleanup.
Quick inspection: where water finds its way in
Before you start sealing, look for signs of moisture. Most problems begin where two materials meet: concrete to wall, metal to wood, or door to slab.
Check these high-risk zones:
- Floor-to-wall cold joint and visible cracks
- Along the garage door’s bottom seal and side weatherstripping
- Around windows, entry doors, baseboards, and sill plates
- Around pipes, wires, or other wall penetrations
Here’s a simple field test: After a light rain or car wash, look for damp lines or puddles along edges and mark any spots you find.
Seal the floor-to-wall joint, baseboards, and slab cracks
Start at the floor to moisture-proof your garage. The joint where concrete meets the wall is the path water takes first. When meltwater settles there, it seeps into cracks and can lift paint or trim.
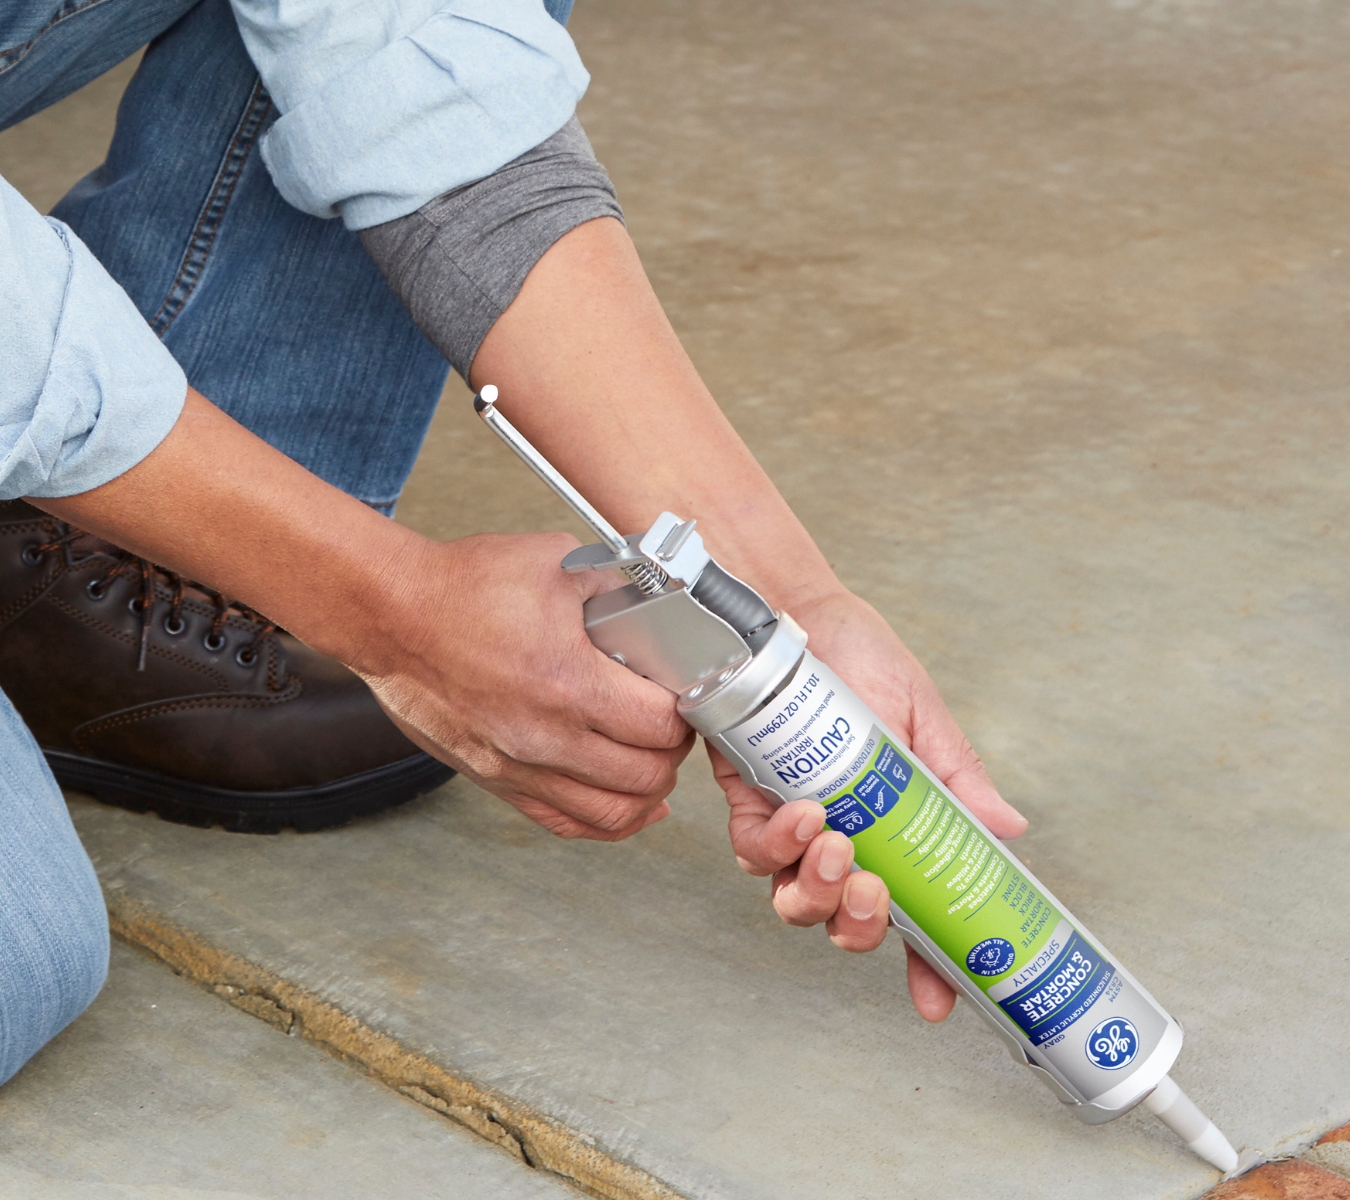
Use GE Concrete Silicone Sealant when one side of the joint is concrete or masonry and you don’t plan to paint over it. If the joint meets trim, drywall, or another finished surface (or you plan to paint), choose GE Pro Seal Max Window & Door or GE Siliconized Advanced Acrylic Window & Door instead.
Materials you’ll need
- GE Concrete Silicone: 100% silicone for unpainted concrete or masonry joints. It’s ready for water in about 30 minutes and stays flexible as the slab expands and contracts with temperature changes. Apply when it’s warmer than 32°F for the best bond.
- GE Sealant Remover Tool: Lifts and cleans away old or cracked sealant before rework.
- GE 2-in-1 Cartridge Opener and Smoothing Tool or GE Sealant Smoothing Tool: Allows you to tool the bead of sealant by moistening the smoothing end of the tool with water.
- Backer rod (for joints wider than 1/4 inch): Helps control the shape and depth of the bead.
- Caulk gun: Allows you to apply a steady, smooth, and even bead of sealant precisely where it’s needed.
- Utility knife (optional): For trimming backer rod.
- Masking tape: For clean paint edges.
- Cleaner: Use a lint-free cloth and a mild, label-approved cleaner such as isopropyl alcohol or mineral spirits for surface prep. Always check the product’s technical sheet or label for surface compatibility.

Steps for a lasting seal
Work in a ventilated space and wear gloves when handling mineral spirits or other cleaners. Follow these steps to apply the sealant:
- Remove the old bead: Use the GE Sealant Remover Tool to strip out cracked or loose caulk. Wipe the area clean and let it dry.
- Mask the joint: Run masking tape along both sides of the joint before sealing.
- Add a backer rod if needed: For wider joints, press in the backer rod to control depth.
- Test adhesion on mixed surfaces: If you’re sealing against treated wood, metal, or mixed surfaces, apply a small test bead first.
- Cut and apply: Cut the cartridge tip clean with the GE Cartridge Opener and Smoothing Tool or a utility knife. Load the gun and run a steady bead of the sealant along the joint.
- Tool the bead: Shape it with the GE Cartridge Opener and Smoothing Tool or the Sealant Smoothing Tool before it starts to set.
- Remove the tape: Peel it away while the sealant is still wet, pulling back at a slight angle.
- Let it set: Keep the area dry for at least 30 minutes before exposing it to water.
Baseboards and trim
Where drywall or wood trim meets the floor, use a paintable formula if you plan to finish it:
- GE Pro Seal Max Window & Door: This SMP hybrid handles moisture like silicone and can be painted in about an hour.
- GE Siliconized Advanced Acrylic Window & Door: Best for dry or low-splash areas.
Seal the garage door perimeter and add a threshold
Often, water finds its way in under the garage door. Tightening this area is key to moisture-proofing garages that stay dry through winter.
Seal the exterior frame and trim
Check where the door jamb (frame) meets the siding or wall trim. Seal that gap with the right product for your conditions:
- GE Advanced Silicone Window & Door: Best for mild conditions above 32°F. Rain-ready in about 30 minutes and stays flexible through everyday movement.
- GE Supreme Silicone Window & Door: Use this for harsher exposure or wider temperature changes. It tolerates more movement and sets firmly when applied above 40°F.
Replace worn weatherstripping and the bottom sweep
Close the door and look for daylight at the edges. If you can slide a sheet of paper through, the seal is weak. Replace any cracked or flattened strips to block drafts and meltwater.
Check the bottom sweep (the rubber strip at the base of the door) and swap it out if it’s brittle or torn.
Add a threshold for better drainage
A threshold helps redirect water back toward the driveway instead of letting it pool inside. Before you install it, use a straightedge or level board to check that the floor slopes slightly toward the driveway.
If the slab slopes inward or stays flat, drainage will be limited. The threshold will still tighten the seal, but pair it with a small water diverter or containment mat to manage runoff.
Next, set the threshold in place without adhesive to check the fit and be sure the door closes smoothly over it. Then follow these steps:
- Clean the concrete where the threshold will sit.
- Apply adhesive as directed on the package.
- Press the threshold firmly into place.
- After the adhesive sets, check that the safety sensors and auto-reverse function properly.
Painted interior jambs
If you plan to paint the inner frame, use GE Pro Seal Max Window & Door. It resists moisture like silicone but is paintable. Never paint over 100% silicone.
Block drafts and hidden pathways around penetrations
Small gaps can still pull in cold air and moisture. These often hide where pipes, vents, or cables pass through the wall. Closing those gaps is the next step to moisture-proofing your garage.

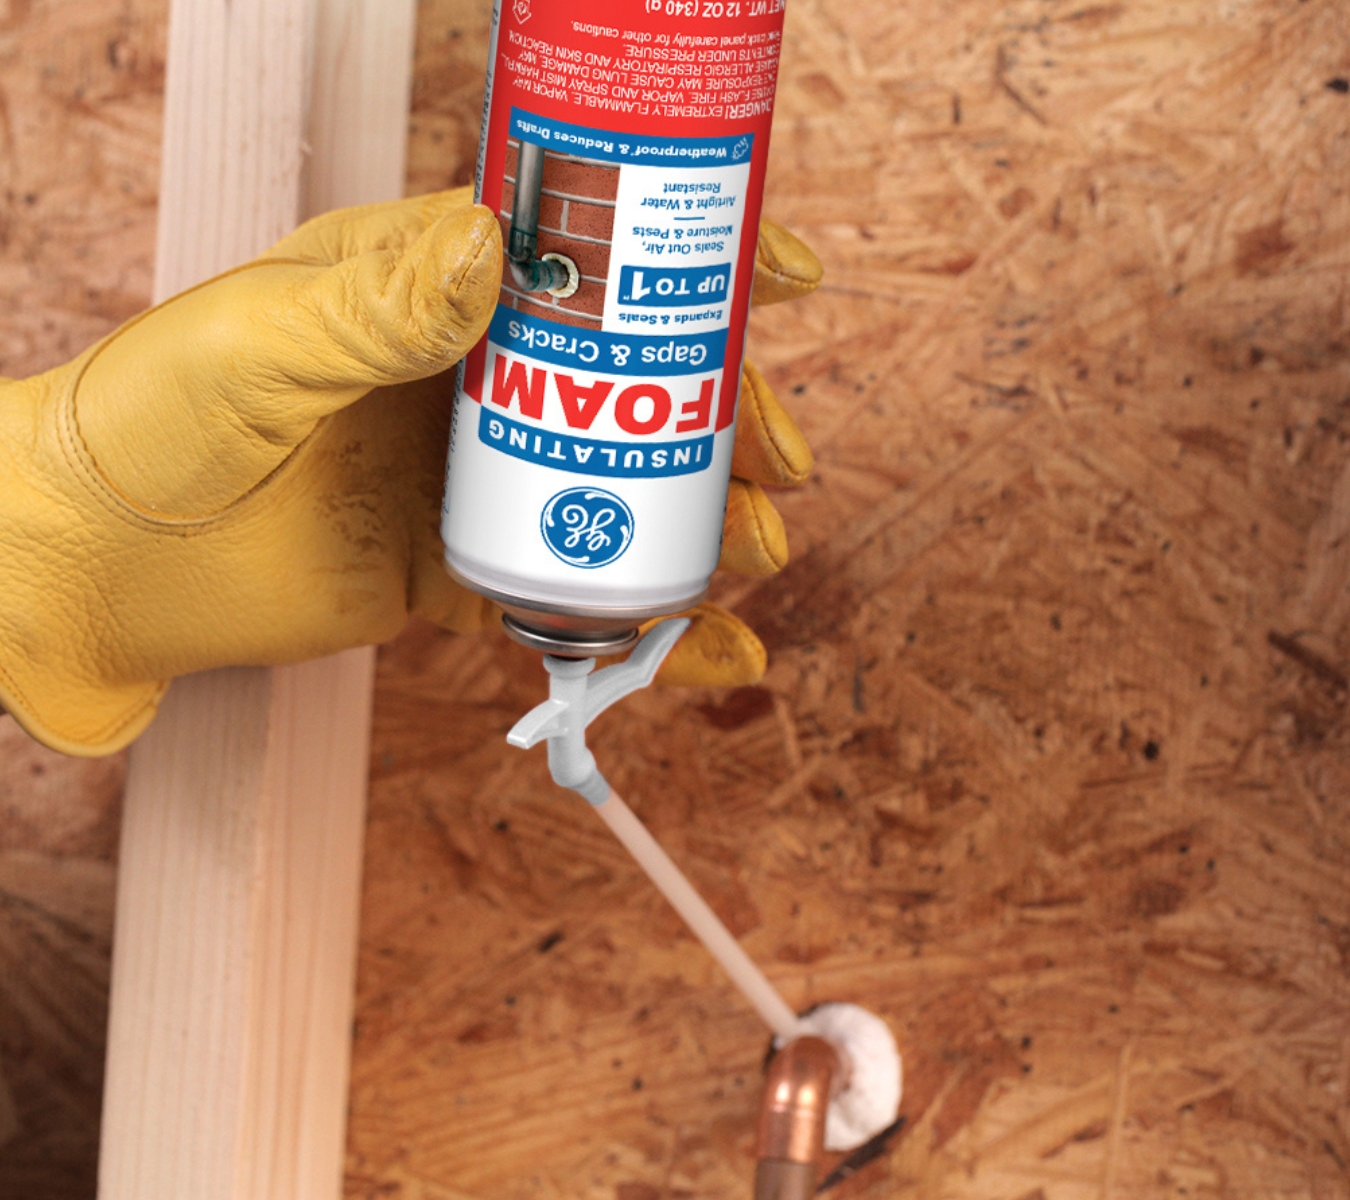
Foam the gaps you can’t caulk
Use an expanding foam to fill openings too wide or deep for sealant:
- GE Gaps & Cracks Insulating Foam: Fills gaps up to one inch. Apply between 41°F and 86°F.
- GE Pest Block Insulating Foam: Same seal, with added resistance to insects and rodents. Apply between 41 °F and 95 °F.
Apply a little at a time and let it expand. Overfilling can create bulges that need trimming later.
After the foam cures, cut it flush with a sharp blade. If it’s exposed to sunlight or weather, cover it with paint, trim, or a small sealant bead to prevent UV breakdown.
Seal before winter sets in. With the right prep and GE sealants built for cold weather, you can moisture-proof your garage and keep water out for good. Find them at a retailer near you in the U.S. or Canada.


