
A quick grout refresh can make tile look cleaner without replacing the grout How to use a grout whitener pen to effortlessly clean tile grout

Note: This DIY article is provided as a general guide only and is not intended to take the place of product-specific installation procedures; always follow applicable manufacturers’ instructions. Depending on your home’s age and condition, location within the home, and other potential factors, repairs and/or upgrades or other services may be necessary prior to the beginning and/or completion of your project that may involve the services of a home improvement professional. This article does not include advice pertaining to local building codes and/or any related inspections.

Dirty grout can make an otherwise clean kitchen or bathroom look older than it really is. If you want to clean your tile grout without regrouting, a grout whitener pen can be an easy way to brighten the lines and improve the overall look of the tile. This guide explains how to prep the surface, apply GE’s Grout Whitener Pen more cleanly, and maintain the results so grout whitening lasts longer.

Before you apply a grout whitener pen, make sure the grout is clean, dry, and free of anything that could interfere with the finish. Dirt, soap residue, grease, and lingering moisture can all affect how evenly the product goes on. If there is visible mold or mildew, deal with that first rather than trying to cover it up.

Why grout lines start to look dirty so quickly

Grout lines start to look dirty quickly because grout holds onto more moisture and residue than the surrounding tile. In kitchens and bathrooms, everyday splashing, soap film, cooking residue, and general surface grime can settle into the grout over time, especially in narrow joints that are harder to wipe clean. 

Once that buildup starts to collect, the grout can darken or discolor even when the tile still looks fairly clean. In many cases, the problem is cosmetic at first, but it still makes the whole tiled area look older and less cared for. That is why grout whitening can make such a noticeable difference with relatively little effort.

Where a grout whitener pen works best

A grout whitener pen works best on narrow grout lines that need a cosmetic refresh rather than a full repair. In kitchens, that often means backsplashes and sink areas where splashing and surface buildup leave the grout looking dull or stained. 

In bathrooms, it is especially useful on tile walls, tub surrounds, and shower walls where discoloration tends to show up quickly. Laundry rooms and other tiled utility spaces can also benefit when the grout has started to look older than the tile itself. In general, a grout whitener pen is most useful where the grout is still intact but no longer looks clean or bright.

What to do before you apply the pen

Before you apply a grout whitener pen, make sure the grout is clean, dry, and free of anything that could interfere with the finish. Dirt, soap residue, grease, and lingering moisture can all affect how evenly the product goes on. If there is visible mold or mildew, deal with that first rather than trying to cover it up. A whitening pen is meant to refresh the appearance of intact grout, rather than solve an active mold problem underneath it.

It also helps to work in smaller sections instead of trying to cover the whole area at once. That gives you time to keep the application even and wipe away any excess from the tile before it dries. Good prep takes a little longer up front, but it’s usually worthwhile in the long run.

Step-by-step: how to whiten tile grout with a grout whitener pen
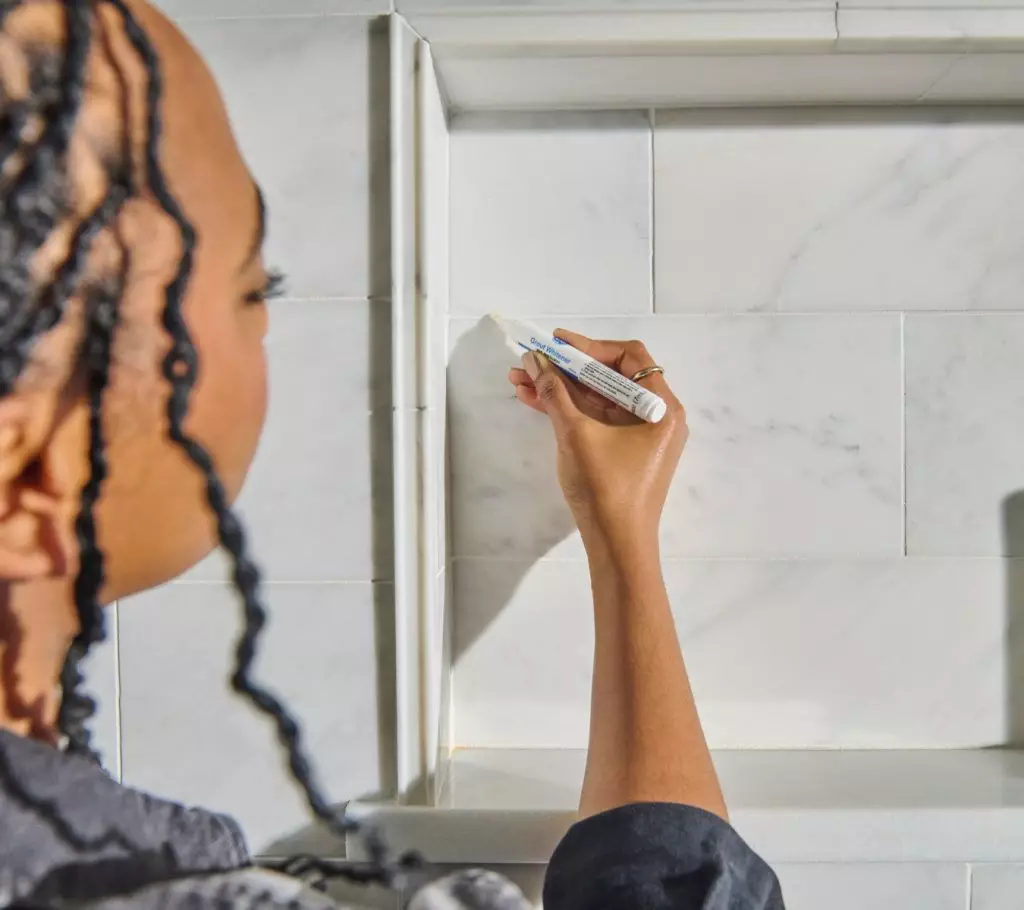
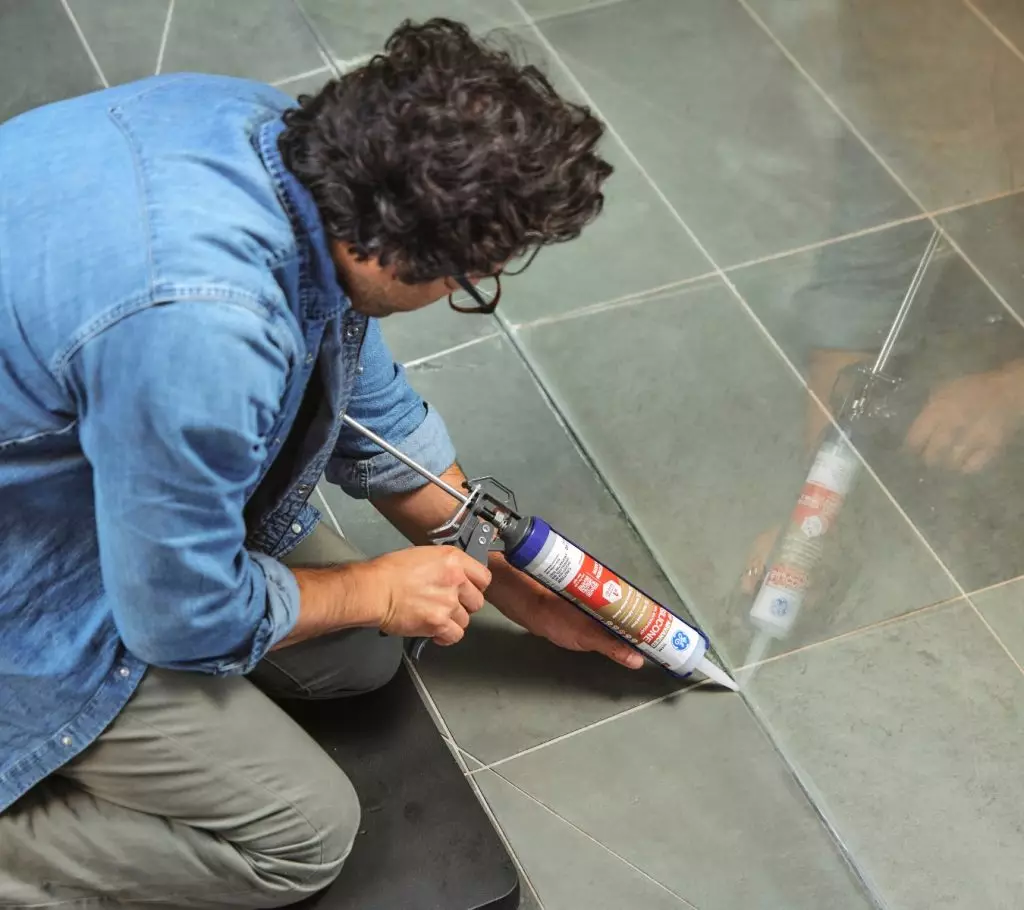
A photo of a homeowner applying GE’s Grout Whitening Pen.
A homeowner applies GE’s Grout Whitening Pen.

Start by uncapping the pen and depressing the nib until the product begins to flow. Take a moment to make sure the tip is fully activated before moving across the grout line. When you begin applying, use the pen sparingly and work in an even coat rather than flooding the joint with too much product at once.

If you are working on a wall application, it often helps to move vertically so you can follow the grout line more cleanly and keep the coverage controlled. As you go, wipe away any excess from the tile surface before it dries. This is one of the easiest ways to keep the finished result looking neat.

After the first coat, let the product dry and check the coverage. If the grout still looks uneven or needs more brightening, you can reapply after an hour. 

How to maintain brighter grout lines after application

Once the grout looks brighter, a few simple habits can help it stay that way. Wipe up splashing and standing moisture before it has time to settle into the grout lines again, especially around sinks, backsplashes, showers, and tub edges. Clean tiled areas regularly with non-abrasive methods so surface buildup does not dull the grout too quickly. 

It also helps to address stains early instead of waiting for heavy discoloration to build over time. In bathrooms, keep wet areas ventilated as much as possible so surfaces dry faster between uses. Small maintenance habits usually do more to preserve the look than another full refresh too soon.

Why this is a useful kitchen and bathroom refresh

A grout whitener pen is a useful kitchen and bathroom refresh because it improves the look of tiled surfaces quickly without turning the job into a full repair project. When the grout is intact but stained or dull, brightening the lines can make the whole area look cleaner and more defined. 

It is best understood as a fast cosmetic update, not a substitute for replacing failed grout. For many DIYers, that makes it a practical way to improve the look of a backsplash, shower wall, or tub surround with less mess and less time.

GE products that fit the job
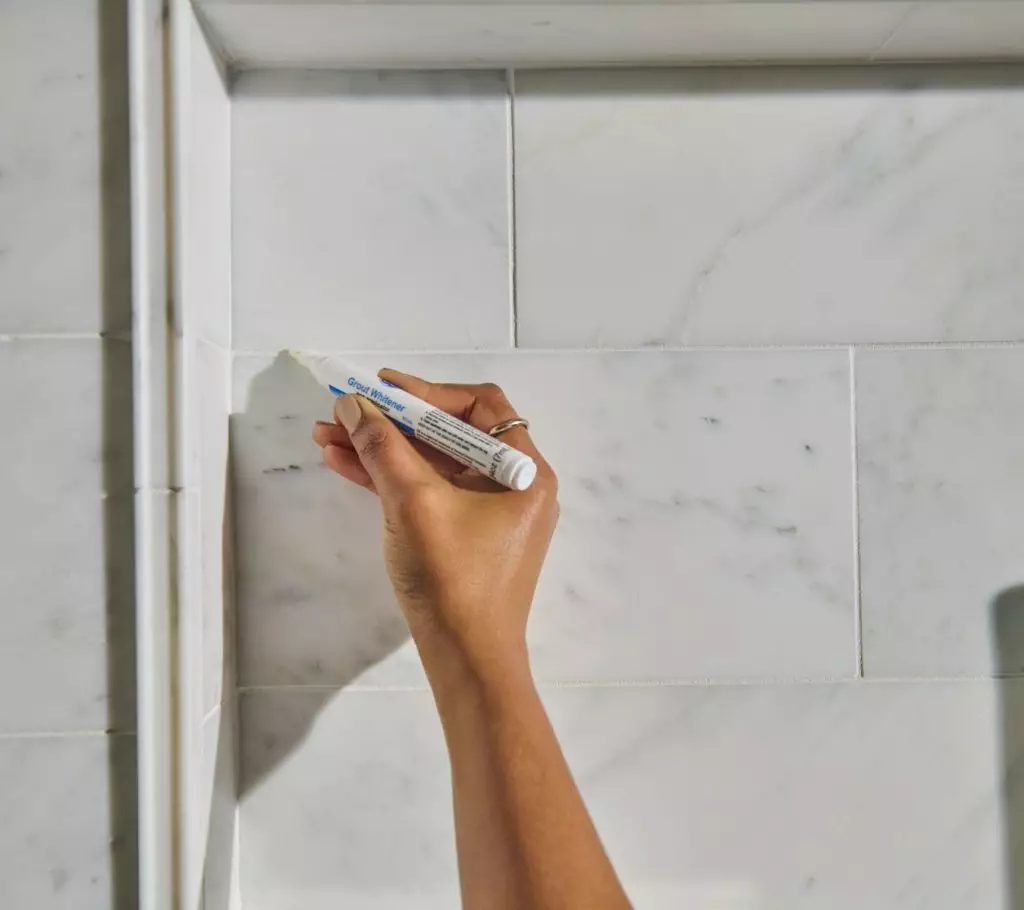
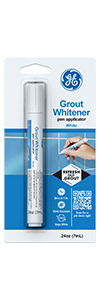
A photo of GE’s Grout Whitening Pen.
GE’s Grout Whitening Pen being applied.

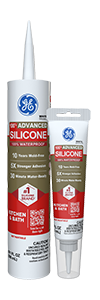
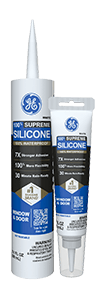
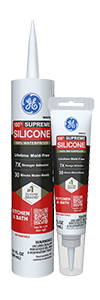
For a grout refresh, GE’s Grout Whitener Pen is the superior choice, though there are alternative grout whitening products. If the project also reveals failing sealant nearby, it can make sense to address those wet-area joints at the same time. GE Supreme Silicone Kitchen & Bath is a strong option where long-term flexibility and water resistance matter most, while GE Advanced Silicone Kitchen & Bath is another reliable choice for sealing around sinks, tubs, and backsplashes. To apply either sealant neatly and with ease, use GE’s Sealant Smoothing Tool.

To get GE Sealants’ products for your home improvement project, visit these fine retailers in the U.S. or Canada. 

Interior Seal Silicone Sealant

2.8 oz Squeeze Tube
 
Clear
White
White Clear
  • Easy to use
  • For all your interior projects
  • 100% waterproof
  • 30-minute water-ready†
  • Shrink & crack-proof
  • Lifetime mold-free product protection†
  • Use with GE’s trusted DIY tools for the perfect outcome
  • Lifetime guarantee†

†See Product Disclaimers page for important details

Interior Seal Silicone Sealant is a premium grade silicone sealant that simplifies all types of interior projects. Designed with DIYers in mind, it offers strong adhesion and is ideal for sinks, showers, baths, countertops, tile, backsplashes, and plumbing applications. With lifetime mold-free protection, it resists mold and mildew to maintain a clean, polished look. This formula allows for water exposure in as little as 30 minutes, which makes it a reliable choice for fast and easy project completion. Backed by a lifetime guarantee.

Adheres to: Common kitchen and bath materials including most metals, plastics and woods, glass, drywall, plaster, granite, cultured marble, ceramic and porcelain tile, some natural stones, cement board, laminate, fiberglass, aluminum, and many coated/painted surfaces, as well as metal finishes such as chrome, bronze & nickel.

For additional information, see product label.

Instructions

  1. Remove dirt, grease, moisture, soap residue, and old caulk from the area to be sealed.
  2. Use a backer rod for gaps larger than 3/8″ (W) x 3/8″ (D) (9.5mm x 9.5mm).
  3. Remove cap and cut nozzle with the GE Cartridge Opener and Smoothing tool to obtain desired bead size.
  4. Apply caulk then smooth into gap. Sealant beads should not be thicker than 1/2″ (12.7mm) or thinner than 1/8″ (3.2mm) using a width-to-depth ratio of 2:1.
  5. Sealant should be tooled within 5-10 minutes after application. Do not use soapy water or oil as a tooling aid.
  6. Wipe hands and tools thoroughly before washing. Clean tools and uncured sealant residue immediately with mineral spirits or paint thinner.

Meets ASTM C-920, Type S, Grade NS, Class 50, Use G & O test requirements

Federal Spec. TT-S-00230C; TT-S-001543A

For products produced by Henkel Corporation, please use the UPC Code. You can click on the corresponding UPC code below to access the SDS.. 

Color UPC Code
White 3019866
Clear 3019883

Reviews

Contractor productivity guide How the right caulking tools improve jobsite efficiency

Speed matters when you are moving from joint to joint, rushed prep or loose tooling can leave more work behind. The right caulking tools give you more control at the points that usually slow the job: old sealant, cartridge setup, and the finished bead. In this guide, you’ll see where a dedicated tool belongs in the workflow and where product directions should lead your technique.

On a professional caulking job, a tool earns its place by taking guesswork out of a repeat motion. A cleaner edge in the corner or a controlled nozzle cut can keep the job from turning into extra passes with a blade.

Use a caulk removal tool where old sealant slows the job

John Degirolamo, Sr. Consumer Technology Insights Manager, puts the GE Sealants application point plainly: “Recaulking is the tricky part because you really need to get all the old sealant out.” 

His point shows up in the corner. You can pull the visible bead free and still leave cured material packed where the two surfaces meet.

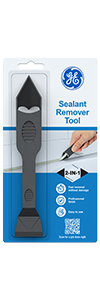
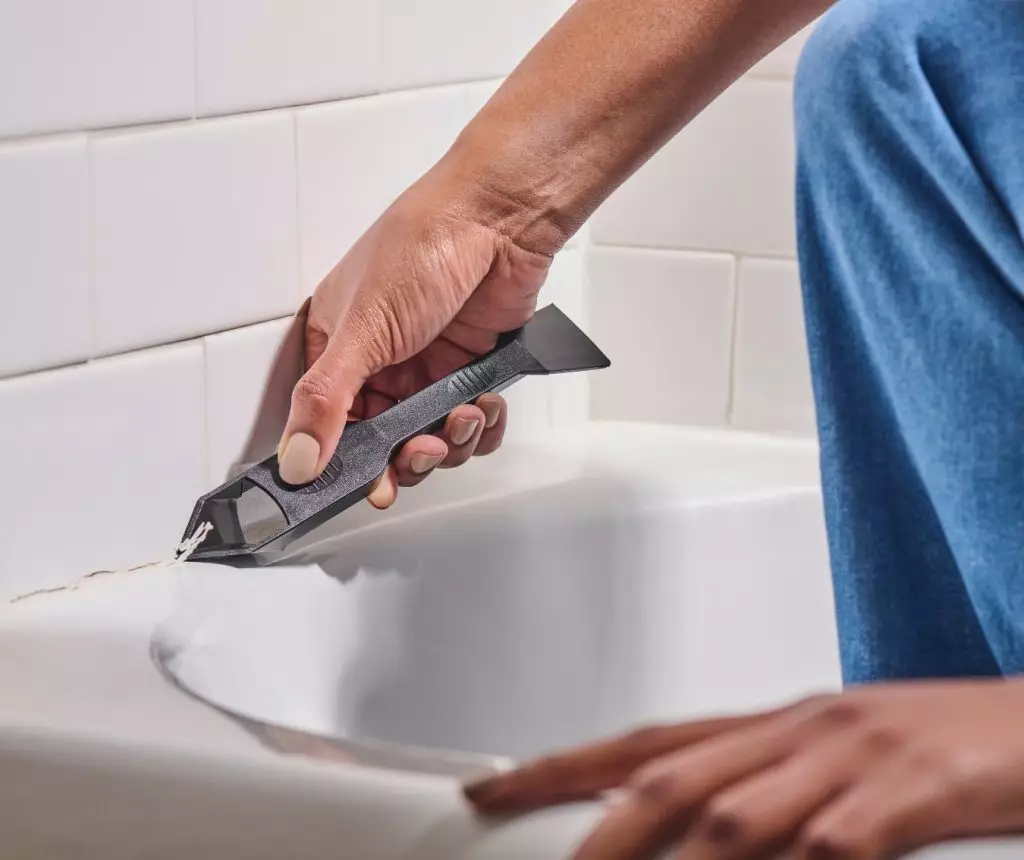
When that material stays in the joint, a caulk removal tool can help you lift and scrape with control. GE’s Sealant Remover Tool gives you a pointed end for getting under cured material in the corner. 

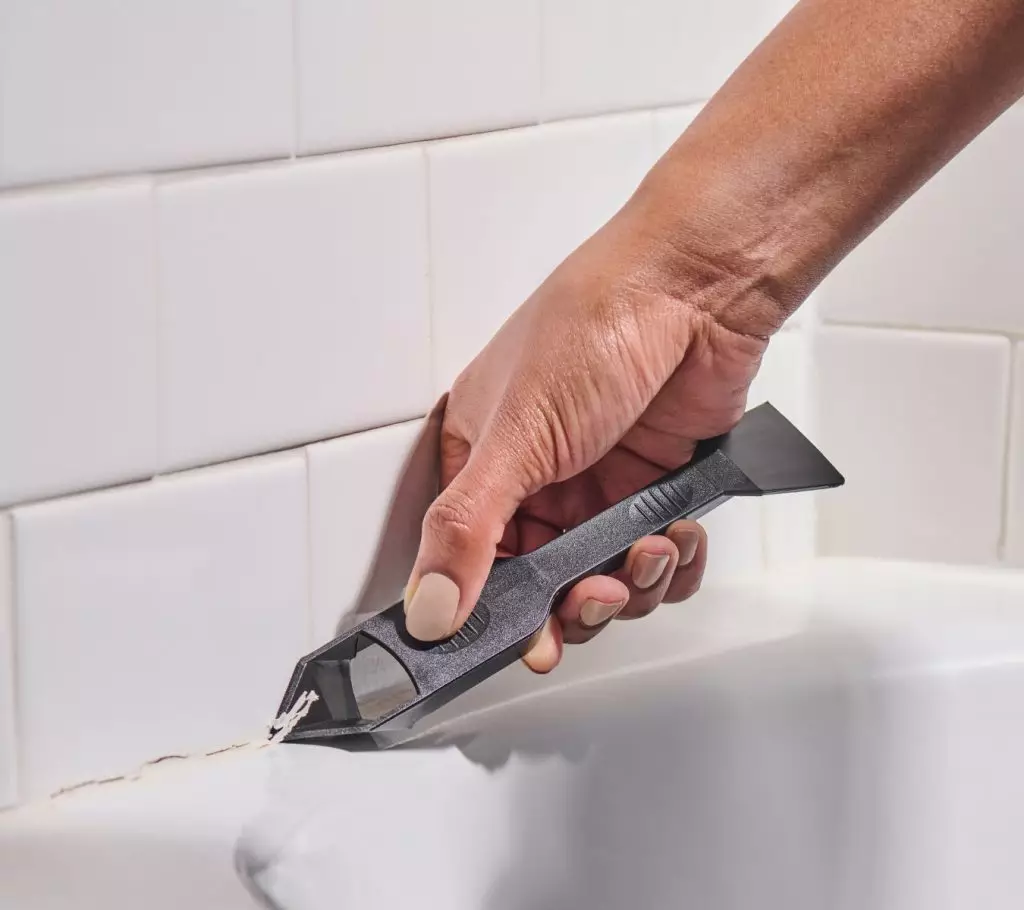
Close-up of the Sealant Remover Tool lifting old sealant.
GE Sealant Remover Tool removing old sealant from a bathroom joint.

Once you loosen the bulk, switch to the tool’s flat edge and scrape residue along the joint line. That sequence gives you a cleaner surface before you apply new sealant.

If a thin layer looks easy to cover and move on, remove it. Applying silicone sealant over old sealant leaves the new bead sitting on old material instead of a clean surface. 

After removal, clean the joint as directed on the sealant label. Use isopropyl alcohol only when the sealant label approves it for surface prep, then let the joint dry before you apply new sealant.

Cut the cartridge tip for the bead you need

Once the joint is ready, the cut you make at the cartridge tip starts setting the size of the bead. 

Cut too wide, and you can load the joint with more sealant than the bead needs. Make a rough cut, and you can start with a less predictable opening.

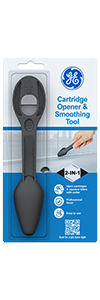
For setup, one of the contractor tools worth keeping close is GE’s Cartridge Opener and Smoothing Tool. You can use the cutter to open the tip to match the joint instead of using a blade. 

The tool gives you a cleaner cut and a steadier opening, so you can start with a bead that needs less correction after you apply it. 

Use a sealant smoothing tool to control the finished profile

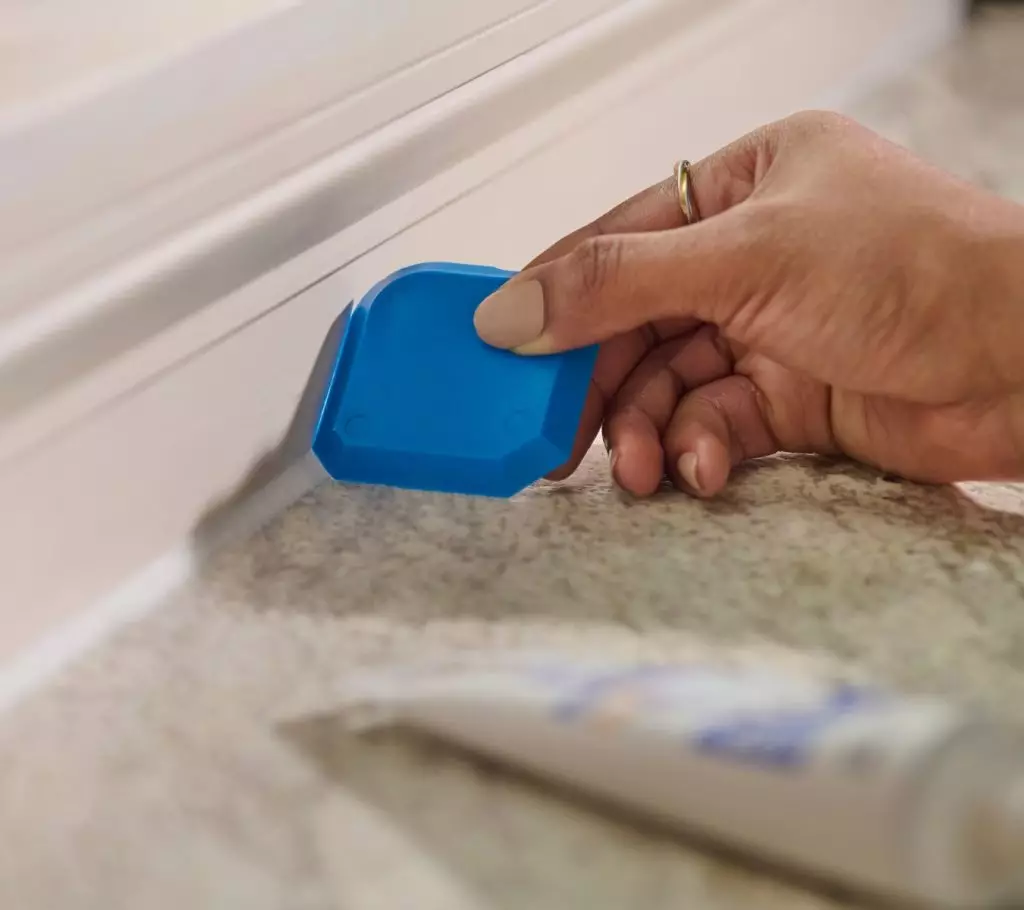
A close-up of a person using the Sealant Smoothing Tool on a fresh bead along trim edge
A hand using the Sealant Smoothing Tool to smooth sealant along a white trim edge.

After you apply the bead, choose the profile you want the joint to hold. 

Pull the edge that matches the gap with steady pressure. As the tool moves, the edge shapes the sealant and collects excess material instead of smearing it across the surface.

GE’s Sealant Smoothing Tool gives you multiple profile edges for that pass. 

On a tub or shower joint, the finished line gets seen up close, so a repeatable profile matters. 

Around a toilet base, the controlled edge can help keep the bead from widening as the surface changes direction. In a three-way corner, slow down and keep the profile seated only where the tool can stay flat against the joint.

If the bead needs another pass, wipe the edge of the sealant smoothing tool first and work while the sealant is still workable. Stop once the profile is clean, so you are not pulling excess material back across finished work.

Match tooling pressure to the joint and sealant

As you tool the bead with the Sealant Smoothing Tool, use enough pressure to bring the sealant against both sides of the joint without thinning the bead. 

For a wider gap, pull slower and keep firmer contact. In a tight inside corner, use a lighter touch so you do not flatten the bead or pull material away from the joint. 

The goal is controlled side contact, not force.

A properly tooled bead can help improve contact with the sides of the joint. 

Tooling pressure helps only after you prep the surface and choose the right sealant for the joint. 

Silicone sealants cure. Acrylic caulks dry. That cure-or-dry behavior can affect how the bead holds its shape after tooling, so stay within the product’s tooling time and label directions.

Keep cleaners and lubricants out of the bead

When the Sealant Smoothing Tool edge starts to drag, stop and wipe excess sealant from the edge with a dry cloth before your next pass. Do not wet the bead to make the tool slide.

Keep soapy water, oils, spray lubricants, and cleaners out of the sealant while you tool it. Those materials can get into or behind the bead while you work, even when the finished line looks clean. Keep the pass on the tool edge, not a wet finger.

Use isopropyl alcohol only for approved surface prep, not for smoothing the bead. Before you put anything on the bead to make tooling easier, check the sealant and tool package directions.

A caulking tool earns its spot when it solves the step that is slowing the work. Choose the tool for the condition in front of you, then let the sealant label set the limits.

Find GE Sealants and tools near you for your next job at a retailer near you in the U.S. or Canada.


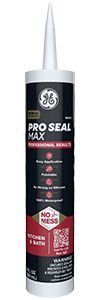
Pro Seal Max Kitchen & Bath

9 oz Cartridge
 
Clear
White
  • Easy & mess-free application
  • Paintable
  • As strong as silicone
  • 100% waterproof
  • Permanently flexible
  • Adheres to damp or dry surfaces†
  • 60-minute paint-ready†
  • Immediate water-ready†
  • Shrink & crack-proof
  • Resists mold and mildew growth†
  • Excellent for interior projects where moisture may be present
  • Low odor
  • Lifetime guarantee†

†See Product Disclaimers page for important details

Pro Seal Max Kitchen & Bath sealant is a premium, 100% waterproof sealant that combines the superior strength and performance of silicone sealant with the ease of use and paintability of an acrylic latex. An ideal choice for showers, tubs, countertops, backsplashes, fixtures, plumbing, sinks, and tile, this hybrid formula provides a reliable seal in moisture-prone areas that require painting. It offers permanent flexibility with long-lasting durability that resists mold and mildew growth. Backed by a lifetime guarantee.

Adheres to: Stone/marble, metal, wood, glass, porcelain, ceramic tile, drywall, plaster, PVC, fiberglass, aluminum, brick, masonry, cement board, and most architectural coatings/finishes.

For additional information, see product label.

  1. Remove dirt, grease, moisture, soap residue & old sealant from area to be sealed. Use backer rod for gaps larger than 1/2″ x 1/2″.
  2. Cut nozzle to obtain desired bead size.
  3. PIERCE INNER FOIL SEAL.
  4. Using caulk gun, apply sealant into gap. Smooth with a gloved finger or “tool” the caulk into gap.
  5. Wipe hands & tools thoroughly before washing.

Meets ASTM C-920 Class 35 specifications – white color

Meets ASTM C-920 Class 25 specifications – clear color

For products produced by Henkel Corporation, please use the UPC Code. You can click on the corresponding UPC code below to access the SDS.. 

Color UPC Code
White 3012017
Clear 3011997
Pro Seal Max Kitchen & Bath
1-hour
Lifetime Guarantee
100% Waterproof Water-resistant / Waterproof
Immediate Water-Ready Rain Ready Time
25% Joint Movement
Permanently flexible Flexibility
Paintable
Durability Guarantee
Low Odor
Will Not Blemish Most High-End Metals
Available in Squeeze Tube
GE Pro Seal Max KB White CTG Front
Pro Seal Max Kitchen & Bath
1 24 HEN 0053 Product Page Carousel Images 08
Supreme Silicone Kitchen & Bath Sealant
25 GE 0034 Advanced KB Package GraphicUS scaled
Advanced Silicone 2® Kitchen & Bath Sealant
Paintable
Water-ready Time Immediate Water-Ready30-minute30-minute
Low Odor


Swipe to scroll the table horizontally

Reviews

A clean bead now, saves touchups later Paintable silicone sealant: getting a beautiful finish around trim

Clean trim work often comes down to the details, and paintable caulk plays a bigger role than many contractors expect. When you use the right paintable sealant, you get smoother lines, better paint adhesion, and a finish that holds up over time. This guide breaks down how to choose and apply paintable sealant around windows and doors for sharp-looking, lasting results.

The GE Pro Seal Max range is designed specifically for applications where paintability and durability need to work together. Its hybrid formula delivers the strength and flexibility of silicone while remaining fully paintable, allowing contractors to achieve a clean, uniform finish without compromising performance.

Why finish quality around trim matters to clients

Trim work around windows and doors is one of the first details clients notice once a project is complete. Clean, straight lines and a smooth painted surface convey attention to detail, while uneven caulk lines or visible gaps can make even high-quality work look rushed. Because these areas sit at eye level and frame key features of a room, small imperfections tend to stand out.

The finish quality also affects how the project holds up over time. Poorly applied or mismatched sealant can shrink, crack, or separate, creating visible lines under paint. Using a consistent, well-applied paintable sealant helps create a uniform surface for painting and reduces the risk of defects showing through later. For contractors, getting this step right adds to both immediate presentation and long-term customer satisfaction.

Why standard sealants can create finish problems

A photo of sealant between a window frame and siding
Exterior window trim with sealant applied between the frame and siding

Not all sealants are intended for use in visible, paint-ready joints, and using the wrong product can lead to noticeable finish issues. Most standard silicone sealants are classified as non-paintable, which means paint will not adhere properly or will begin to peel. Afterward, previously neat work will show uneven coverage, visible lines, or areas where the paint has beaded up instead of forming a smooth surface.

Even when adhesion is not an issue, some sealants simply shrink or change shape as they cure. This can create slight depressions or edge lines that become more obvious once painted. Texture also matters. A bead that does not tool smoothly can leave ridges or inconsistencies showing through the topcoat. For trim work, these issues are hard to hide and often lead to touchups or callbacks. Choosing a paintable sealant helps create a cleaner base for finishing and leaves a more consistent final appearance.

What contractors should look for in a paintable sealant

The right paintable caulk for the job depends mostly on how it performs during application and how it looks after painting. A quality paintable sealant should accept paint evenly without beading or separating, allowing the finish to blend cleanly with surrounding trim. Smooth tooling is also important, since a consistent bead helps create straight, professional-looking lines before the first coat goes on.

Contractors should also consider shrinkage and flexibility. A sealant that holds its shape consistently as it cures helps prevent visible gaps or edge lines from forming under paint. At the same time, it needs enough flexibility to handle normal movement around windows and doors without cracking.

Strong adhesion across common trim materials is another key factor, especially in places where wood, drywall, and composite surfaces meet. The goal is a sealant that provides both immediate finish quality and long-term appearance, reducing the need for touchups after the job is complete.

Best uses for paintable caulk

Paintable caulk is best suited for interior trim areas where appearance matters as much as performance. Around window casings, it helps close small gaps between the trim and wall, creating a smooth transition that blends cleanly once painted. The same applies to door casings, where even slight inconsistencies often stand out after finishing.

It also works well at joints where different materials meet, such as wood trim against drywall or composite surfaces. These transitions benefit from a paintable sealant that can unify the surface and create a consistent look across the entire assembly.

In areas that will be fully painted, using a paintable caulk helps avoid visible lines or mismatched textures. For exterior joints or locations exposed to heavy moisture, a non-paintable silicone may still be the better choice. But for interior trim work, paintable caulk provides the cleanest, most professional-looking results.

GE Pro Seal Max and other paintable sealant options for trim work

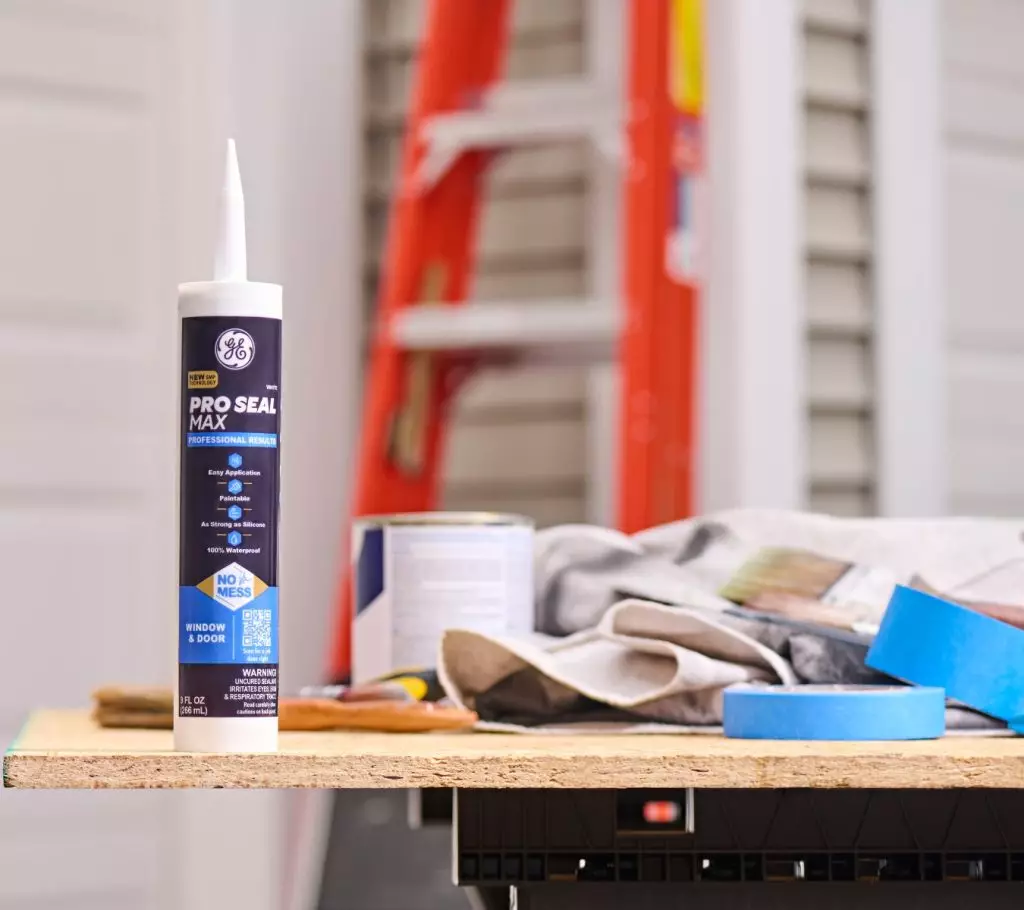
A photo of GE Pro Seal Max Window & Door.
GE Pro Seal Max Window & Door.

The GE Pro Seal Max range is designed specifically for applications where paintability and durability need to work together. Its hybrid formula delivers the strength and flexibility of silicone while remaining fully paintable, allowing contractors to achieve a clean, uniform finish without compromising performance. However, for projects where maximum weather resistance matters more than paintability, GE Supreme Silicone Window & Door Sealant is a strong companion option for exterior joints and other exposed areas.

Pro Seal Max also tools smoothly and holds its shape, which helps prevent shrinkage lines or edge definition from showing through paint. It bonds well across common trim materials and can be painted relatively quickly, supporting tighter project timelines.

Other paintable options can work for basic trim applications, but they may not offer the same balance of flexibility, adhesion, and long-term appearance. Some products are easier to paint but may shrink or crack over time, while others perform well structurally but do not finish as cleanly under paint.

Application tips for a cleaner painted finish

Clean results depend as much on technique as product choice. First, remove any old sealant from the area with the GE Sealant Remover Tool or a putty knife. Then apply paintable sealant in a steady, consistent bead sized to the joint, not larger. Overfilling creates more cleanup and increases the chance of visible edge lines after painting. Tool the bead once, lightly, with either your GE Sealant Smoothing Tool or a gloved finger to press it into the joint and create a uniform finish. Most importantly, allow the sealant to cure as directed before painting. Rushing that step can compromise adhesion, texture, and the final appearance of the finished trim.

To get GE Sealants’ products for your home improvement project, visit these fine retailers in the U.S. or Canada.
A properly opened sealant tube is easier to use and easier to save How to open a tube of caulk and save an open tube

Note: This DIY article is provided as a general guide only and is not intended to take the place of product-specific installation procedures; always follow applicable manufacturers’ instructions. Depending on your home’s age and condition, location within the home, and other potential factors, repairs and/or upgrades or other services may be necessary prior to the beginning and/or completion of your project that may involve the services of a home improvement professional. This article does not include advice pertaining to local building codes and/or any related inspections.

If you have ever struggled with how to open a tube of caulk, you are not alone. It seems simple, but cutting the nozzle incorrectly or missing the inner seal can quickly turn a quick project into a frustrating mess. With a few straightforward steps and a couple of practical tips, you can open, use, and store a tube of sealant properly so it works smoothly and stays usable for your next project.

Knowing how to open a tube of caulk or sealant the right way helps you use the right amount of product. A clean, controlled opening allows for smoother application and reduces excess buildup along joints.

Why it’s important to open a caulk tube correctly

Opening a caulk tube the right way will save you trouble down the road. A poorly cut nozzle can create an uneven bead that is difficult to control, leading to messy lines and extra cleanup. If the inner seal is not punctured properly, the sealant may not flow at all.

Getting this step right also helps you use the right amount of product. A clean, controlled opening allows for smoother application and reduces excess buildup along joints. It also makes it easier to apply steady pressure with a caulk gun or hand depending on the product you’re using, improving consistency from start to finish. Taking a few extra seconds to open the tube correctly will prevent these common mistakes and ensure better results on any sealing job.

Parts of a caulk tube explained

Before you open a tube, it helps to know what you are working with. A standard caulk tube has three main parts: 

  • Nozzle
  • Inner seal
  • Cartridge body

The nozzle is the tapered tip where the sealant comes out, and it is designed to be cut to control the bead size.

Inside the nozzle is a sealed barrier that keeps the product fresh before use. This inner seal must be punctured before the caulk will flow. The cartridge holds the sealant and is designed either to fit into a caulk gun or to be dispensed by hand-squeezing. Understanding these parts makes it easier to see why cutting and puncturing correctly matter, as each step works together to control flow and ensure smooth application.

Step-by-step: how to open a tube of sealant or caulk

Opening a tube of caulk takes just a few steps, but doing each one correctly makes application much easier.

  1. Cut the nozzle at an angle

    Use the cutter on your GE Cartridge Opener and Smoothing Tool to trim the tip of the nozzle at a 45-degree angle. This gives you a clean, controlled opening. If you do not have this tool, a utility knife or the cutter on a caulk gun also works. Start with a small opening to maintain better control during application.

  2. Choose the right opening size

    The farther down the nozzle you cut, the larger the bead will be. Begin with a smaller cut and increase it only if needed. A smaller opening makes it easier to apply a consistent bead and avoid excess sealant.

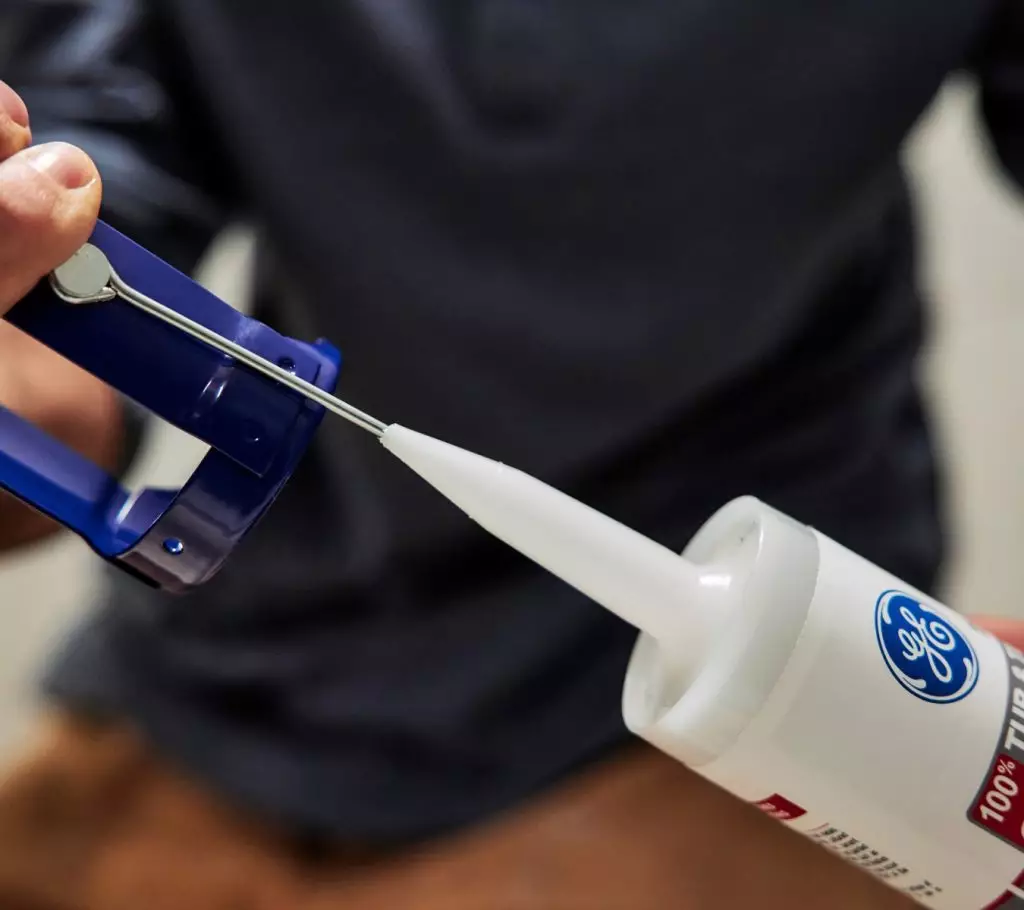
  3. Puncture the inner seal

    A photo of a homeowner using a nail to break the inner seal on a tube of caulk.
    A homeowner uses a nail to break the inner seal on a tube of caulk.

    Use the built-in puncture tool on your caulk gun or insert a long nail or wire through the nozzle to break the inner seal. This step is essential. If the seal is not fully punctured, the caulk will not flow properly.

  4. Load the tube into the caulk gun (if applicable)

    Sealants typically come in one of two package styles: a cartridge or a squeeze tube. A cartridge is the larger tube that fits into a caulk gun, while a squeeze tube is smaller and designed to be used by hand without a gun. 

    If you are using a cartridge, place it into the caulk gun and squeeze the trigger gently to build pressure. If you are using a squeeze tube, simply hold it by hand and apply steady pressure once the nozzle and inner seal are opened.

  5. Test the flow

    Before applying to your project, squeeze a small amount onto a scrap surface. This confirms the seal is fully punctured and helps you get a feel for the flow rate.

  6. Apply and smooth the bead

    Apply the caulk in a steady, continuous line along the joint. Then use the smoothing edge of your Cartridge Opener or the GE Sealant Smoothing Tool to shape the bead. If you do not have a specialized tool, you can use a gloved finger.

Choosing the right sealant and opening size

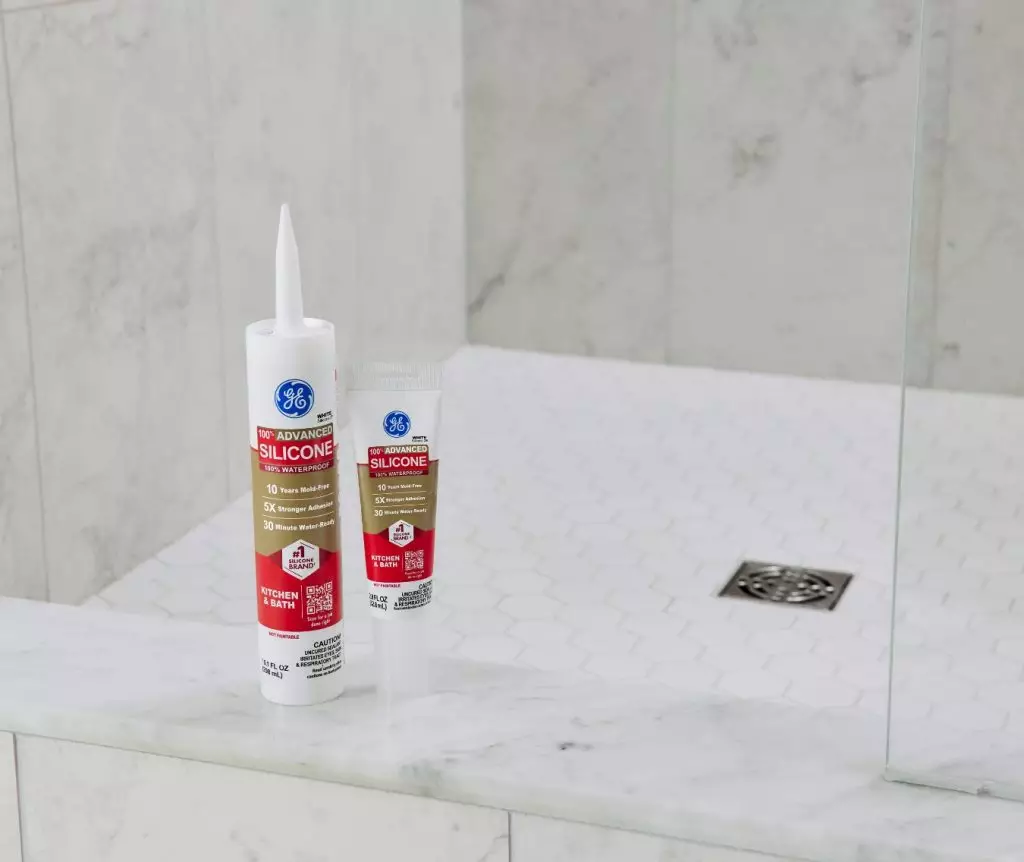
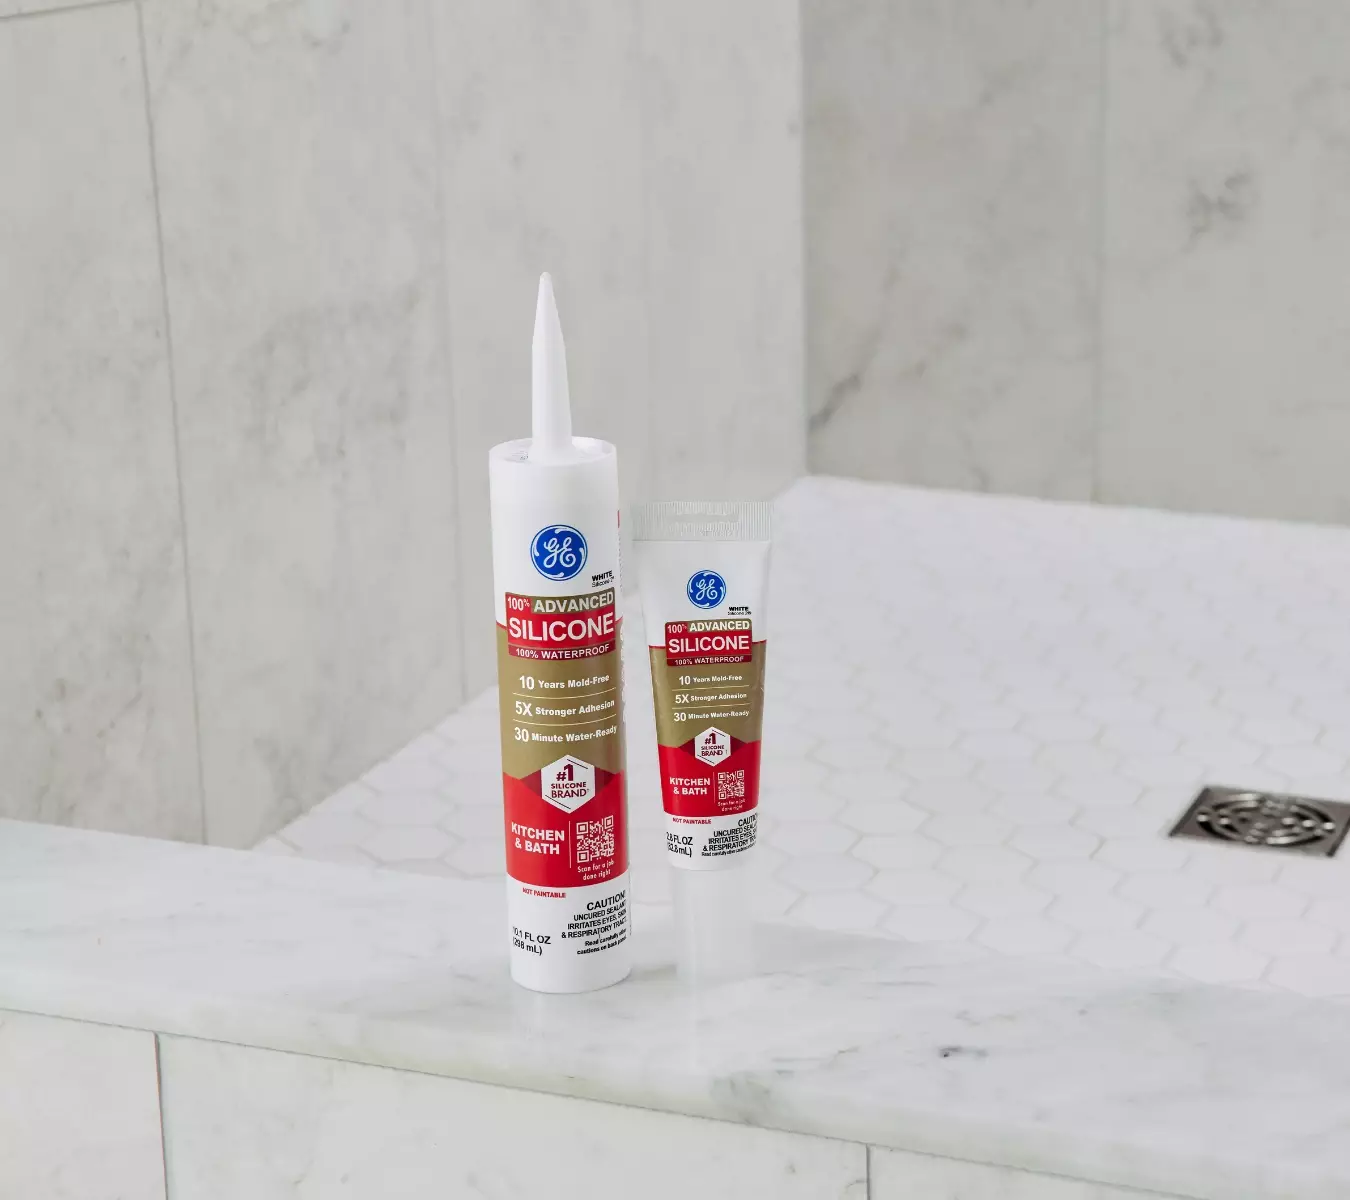
A photo of a cartridge and squeeze tube of GE Advanced Silicone Kitchen & Bath Sealant
Cartridge and squeeze tube of GE Advanced Silicone Kitchen & Bath Sealant in a shower

Not all sealants behave the same once the tube is opened, and choosing the right product helps ensure smoother application from the start. For indoor projects exposed to moisture, like kitchens and bathrooms, a silicone formula such as GE Advanced Silicone Kitchen & Bath Sealant offers a smooth flow and strong resistance to mold and mildew. For exterior work or areas exposed to temperature changes, GE Supreme Silicone Window & Door Sealant provides added durability and long-term performance.

The type of project should also guide how you cut the nozzle. Smaller joints, like trim or narrow seams, require a small opening for better control. Larger gaps need a slightly wider cut to fill the space properly. Starting small and adjusting as needed helps prevent over-application and keeps the bead consistent from start to finish.

How to save caulk after opening

Knowing how to save caulk after opening a tube can help you get more use out of it. The most important step is sealing the nozzle as soon as you finish. Inserting a nail or screw into the tip helps block air and slow down curing inside the tube. You can also wrap the nozzle with plastic wrap and secure it with a rubber band or tape to create an additional seal.

Store the tube upright in a cool, dry place to extend its usability. Avoid leaving it in areas with extreme temperatures, which can cause the sealant to harden more quickly. With proper storage, an opened tube can remain usable for future touch-ups and small repairs.

To get GE Sealants’ products for your home improvement project, visit these fine retailers in the U.S. or Canada.
The most expensive leak is usually the one you didn’t know was there The hidden places water damage starts (before you see a leak)

Note: This DIY article is provided as a general guide only and is not intended to take the place of product-specific installation procedures; always follow applicable manufacturers’ instructions. Depending on your home’s age and condition, location within the home, and other potential factors, repairs and/or upgrades or other services may be necessary prior to the beginning and/or completion of your project that may involve the services of a home improvement professional. This article does not include advice pertaining to local building codes and/or any related inspections.

Water damage rarely starts with a visible leak. In most homes, moisture builds quietly in hidden areas long before it becomes obvious, leading to stains, odors, and costly repairs. By knowing where to look and when to reseal problem spots with the right silicone sealant, you can catch hidden water damage early and prevent small issues from snowballing.

In bathrooms and other high-moisture areas, look for cracked, peeling, or discolored caulk, especially in corners and along horizontal joints where water tends to collect. Mildew buildup or persistent dampness can also indicate that moisture is getting past the seal. When these signs appear, removing the old material and applying a fresh bead of GE Advanced Silicone Kitchen & Bath Sealant helps restore a watertight barrier.

Why hidden water damage is so easy to miss

Hidden water damage often develops slowly in places that are out of sight and easy to overlook. Areas behind cabinets, beneath fixtures, or along exterior penetrations rarely get regular inspection, which allows small amounts of moisture to build over time. Unlike a burst pipe or obvious leak, these issues tend to spread gradually without drawing attention.

Early signs are usually subtle. You might notice a faint musty smell, slight discoloration, or a surface that feels softer than expected. By the time water damage becomes clearly visible, it has often already affected surrounding materials. That is why routine checks and early maintenance play an important role in preventing more extensive repairs later.

Under sinks and around supply lines

Under sinks, small drips from supply lines, loose connections, or slow leaks around shutoff valves can go unnoticed for long periods, especially in cabinets that are rarely emptied or inspected. Over time, even minor moisture can cause the cabinet base to swell, stain, or develop a musty odor.

When checking under sinks, look for damp spots, discoloration, or warped surfaces. Run your hand along pipe connections to feel for moisture, and inspect the areas where pipes pass through the cabinet walls. These openings are often left unsealed or can degrade over time. If you notice gaps or worn sealant around these penetrations, reseal them with a durable silicone sealant using either the GE Sealant Smoothing Tool or a gloved finger. 

Around toilets, tubs, and shower edges

A photo of a homeowner using GE Advanced Silicone Kitchen & Bath applied in a bathroom.
GE Advanced Silicone Kitchen & Bath being applied in a bathroom.

Bathrooms are high-moisture environments and one of the most common areas for hidden water damage. Water regularly splashes onto floors and surrounding surfaces, and even small gaps in caulk lines can allow moisture to seep beneath fixtures over time. Around toilet bases, tub edges, and shower seams, failing sealant often goes unnoticed until staining or soft flooring appears.

Look for cracked, peeling, or discolored caulk, especially in corners and along horizontal joints where water tends to collect. Mildew buildup or persistent dampness can also indicate that moisture is getting past the seal. When these signs appear, removing the old material and applying a fresh bead of GE Advanced Silicone Kitchen & Bath Sealant helps restore a watertight barrier. 

Exterior wall penetrations and utility entries

While easy to overlook, exterior wall penetrations are nevertheless common entry points for hidden water damage. These include:

  • Hose bibs
  • Dryer vents
  • Cable lines
  • Electrical conduits
  • Any pipes or fixtures passing through exterior walls

The sealant around these openings is exposed to weather, UV, and temperature changes, which can cause it to crack, shrink, or separate over time.

When inspecting these areas, look for gaps around the penetration, deteriorated sealant, or signs of moisture staining on the surrounding siding or interior walls. Even small openings can allow water to work its way behind the exterior surface, where it can spread before becoming visible. Reseal these exterior joints with a durable, weather-resistant product like GE Supreme Silicone Window & Door Sealant. 

Windows, trim, and siding joints

Over time, sealant on windows, trim, and siding joints can shrink, crack, or pull away, creating small gaps that allow moisture to enter behind the surface. Because these joints are exposed to both weather and temperature changes, they tend to wear faster than interior seals.

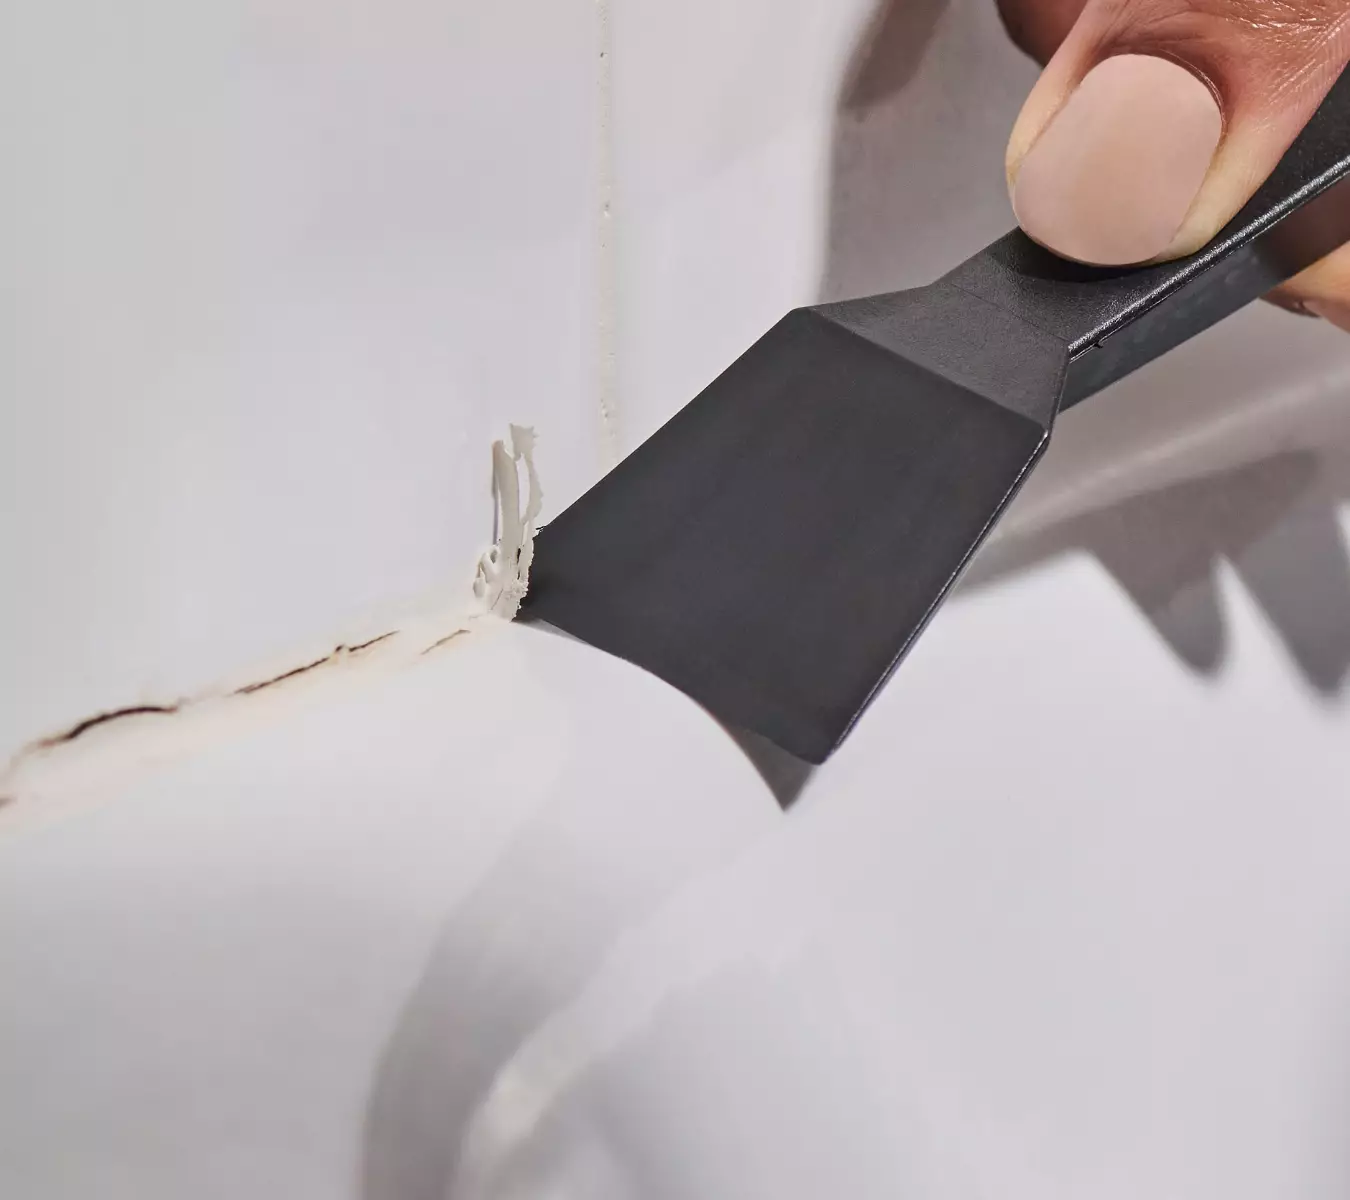
A photo of old sealant being removed by the GE sealant Remover Tool
Old sealant being removed by the GE sealant Remover Tool

During inspection, look for bubbling paint, soft spots in wood trim, or visible separation along seams. Pay close attention to window corners and horizontal trim, where water can collect and sit longer. If you find failing sealant, remove it with GE’s Sealant Remover Tool or a putty knife and apply a fresh bead of a durable silicone product to restore protection and maintain a tight seal against moisture intrusion.

What to look for during seasonal moisture checks to prevent water damage

A quick seasonal walkthrough can help you catch early warning signs and prevent water damage before it spreads. Focus on areas where moisture tends to collect or go unnoticed. Look for discoloration on walls or ceilings, peeling paint, soft or warped surfaces, and any signs of mildew or musty odors. 

Check around fixtures, along trim lines, and near exterior entry points for gaps or failing sealant. Running your hand along these areas can also help detect dampness that is not immediately visible. Catching these small issues early makes repairs simpler and helps protect surrounding materials.

When resealing can prevent bigger repairs

Resealing is most effective when you catch issues early, before moisture has had time to damage surrounding materials. If you notice small gaps, cracked sealant, or minor separation along joints, this is the ideal time to act. At this stage, surfaces are usually still sound, and a fresh bead of silicone sealant can restore protection without the need for more extensive repairs.

Once water has penetrated behind walls, flooring, or trim, the problem often requires more than just new sealant. Soft wood, persistent odors, or visible staining may indicate more serious damage that needs to be addressed first. Regular inspection and timely resealing help you stay ahead of these issues and keep small maintenance tasks from turning into larger, more costly projects.

To get GE Sealants’ products for your home improvement project, visit these fine retailers in the U.S. or Canada.
A fresh bead of caulk can make the whole bathroom look cleaner How to recaulk a toilet: a simple guide for professional results

Note: This DIY article is provided as a general guide only and is not intended to take the place of product-specific installation procedures; always follow applicable manufacturers’ instructions. Depending on your home’s age and condition, location within the home, and other potential factors, repairs and/or upgrades or other services may be necessary prior to the beginning and/or completion of your project that may involve the services of a home improvement professional. This article does not include advice pertaining to local building codes and/or any related inspections.

If you have been wondering how to recaulk a toilet, the good news is that this is a small bathroom project with a big visual payoff. Fresh caulk around the toilet base helps create a cleaner finished look and can keep water and grime from collecting in the gap below. With the right prep and a steady hand, you can get neat, professional-looking results.

Toilet caulking does not last forever, and knowing when to replace it can prevent bigger issues later. One of the most obvious signs is visible cracking, peeling, or shrinking along the bead. As caulk ages, it tends to pull away from the floor or the toilet base, creating gaps where water and debris can collect.

Should you caulk around a toilet?

In most cases, yes, you should caulk around a toilet. A proper bead of caulk at the base helps seal the gap where the toilet meets the floor, preventing water, dirt, and debris from collecting underneath. This both improves the overall appearance of your bathroom and helps reduce odors.

Caulking also adds a small amount of stability, helping limit minor movement that can stress the toilet’s connection over time. Some professionals leave a small gap at the back of the base so that any hidden leaks become visible rather than trapped. If you are learning how to recaulk around a toilet, the key is applying a clean, consistent seal while allowing for easy maintenance down the line.

Signs it’s time to replace toilet caulking

Toilet caulking does not last forever, and knowing when to replace it can prevent bigger issues later. One of the most obvious signs is visible cracking, peeling, or shrinking along the bead. As caulk ages, it tends to pull away from the floor or the toilet base, creating gaps where water and debris can collect.

Discoloration is another indicator. Yellowing, dark spots, or mold buildup often mean the seal has broken down and is no longer protecting the joint. You may also notice persistent odors around the base of the toilet, which can point to trapped moisture or buildup beneath the fixture. If the toilet feels slightly loose or you can see gaps forming, it is a good time to inspect the caulk and replace it if needed.

Where to apply caulk around a toilet

When learning how to recaulk around a toilet, the key is knowing exactly where the seal belongs. Caulk should be applied along the base of the toilet where it meets the floor, creating a continuous bead around the front and sides. This seals the joint, prevents debris buildup, and gives the installation a clean, finished appearance.  Avoid applying caulk between the tank and bowl or around internal components. Focus only on the floor-to-base joint to ensure proper sealing and easy maintenance.

Tools and materials you’ll need

A photo of GE Advanced Silicone Kitchen & Bath Sealant.
GE Advanced Silicone Kitchen & Bath Sealant.

Before you start, gather everything in one place so the project goes smoothly from removal to cleanup. The main item you’ll need is a silicone sealant designed for bathroom use, like GE Advanced Silicone Kitchen & Bath Sealant. For projects where you need added durability and long-term performance, GE Supreme Silicone Kitchen & Bath Sealant is another strong option, offering extended resistance to mold and mildew in frequently used bathrooms.

You’ll also want GE’s Sealant Remover Tool or a utility knife to remove the old bead, paper towels or clean cloths for wiping the area, and a bathroom-safe cleaner or rubbing alcohol to prep the surface. Painter’s tape is optional, but it can help guide a neater line if you want a more controlled finish. Having these basics ready before you begin makes the actual recaulk job much quicker and much less messy.

Step-by-step: how to recaulk a toilet

Once you have your tools ready, the process of recaulking a toilet is straightforward and can usually be completed in under an hour.

  1. Remove the old caulk

    A photo of a homeowner removing old sealant with GE’s Sealant Remover Tool.
    A homeowner removes old sealant with GE’s Sealant Remover Tool.

    Start by cutting along both edges of the existing bead with GE’s Sealant Remover Tool or a utility knife. Then use it to lift and remove the old caulk completely. Take your time, as leftover material can prevent the new seal from bonding properly.

  2. Clean and dry the area

    Wipe the joint thoroughly to remove dust, residue, and moisture. A clean, dry surface is essential for good adhesion. Let the area sit for a few minutes to ensure no moisture remains.

  3. Prep the area (optional)

    If you want a crisp, straight line, apply painter’s tape along both sides of the joint. This helps guide the bead and keeps excess sealant off the floor and toilet base.

  4. Apply the new caulk

    Cut the tip of the sealant tube at a slight angle and apply a steady, continuous bead along the base of the toilet. Move slowly and maintain even pressure to avoid gaps or uneven spots.

  5. Smooth the bead

    Use a smoothing tool or your finger to press the caulk into the joint and create a clean, uniform finish. Wipe away excess sealant as you go.

Tips for a clean, professional finish

Work slowly and maintain steady pressure on the sealant tube to keep the bead consistent from start to finish. Focus on one section at a time so the caulk stays workable while you smooth it. A single, light pass with a smoothing tool is usually enough to shape the bead without pulling material out of the joint. Keep a damp cloth nearby to wipe excess sealant immediately and prevent buildup along the edges.

Common mistakes to avoid

One of the most common mistakes is applying new caulk over old material, which prevents proper adhesion. Skipping surface prep or working on a damp area can also lead to early failure. Avoid applying too much sealant, as thick beads are harder to control and finish cleanly. Finally, do not rush the curing process, as using the toilet too soon can disrupt the seal before it fully sets.

To get GE Sealants’ products for your home improvement project, visit these fine retailers in the U.S. or Canada.
Supreme Silicone Kitchen & Bath Sealant

10.1 oz Cartridge
 
White Clear
  • 100% silicone
  • 100% waterproof
  • Lifetime mold-free product protection†
  • Meets ASTM C-920, Class 50
  • 100% more flexibility than Class 25 sealants†
  • 7X stronger adhesion†
  • 30-minute water-ready†
  • Shrink & crack-proof
  • Won’t blemish most high-end metal finishes like chrome, bronze & nickel
  • Lifetime guarantee†
  • Neutral curing with low odor
  • Non-paintable

†See Product Disclaimers page for important details

Supreme Silicone Kitchen & Bath sealant is a premium, 100% silicone and 100% waterproof sealant ideal for areas constantly exposed to moisture. This 30-minute water-ready formula has 100% more flexibility than Class 25 sealants and has 7X stronger adhesion than Silicone 1* sealant. It offers 50% joint movement capability for a shrink and crack-proof seal. This sealant also resists mold and mildew growth with lifetime mold-free product protection. Backed by a lifetime guarantee.

Adheres to: most metals, plastics & woods, glass, drywall, plaster, granite, cultured marble, ceramic & porcelain tile, natural stone, cement board, composites, Formica, fiberglass, aluminum & painted surfaces

For additional information, see product label.

  1. Remove dirt, grease, moisture, soap residue & old sealant from area to be sealed. Use backer rod for gaps larger than 1/2″ x 1/2″.
  2. Cut nozzle to obtain desired bead size.
  3. PIERCE INNER FOIL SEAL.
  4. Using caulk gun, apply sealant into gap. Smooth with a gloved finger or “tool” the caulk into gap.
  5. Wipe hands & tools thoroughly before washing.
  6. Allow 30 minutes before exposing sealant to water.

Meets ASTM C-920, Type-S, NS, Class 50, Use A, G & O test requirements
Fed Spec TT-S-00230C; TT-S-001543A

For products produced by Henkel Corporation, please use the UPC Code. You can click on the corresponding UPC code below to access the SDS.. 

Color UPC Code
White 28756956594
Clear 28756956587
Almond 28756956600
Supreme Silicone Kitchen & Bath Sealant
Scellant Suprême Silicone Cuisine et Salle De Bain - Cartouche
Select - N/A
100% Waterproof Water-resistant / Waterproof
30-minute Rain Ready Time
Lifetime Mold-Free Product Protections
50% Joint Movement
••• Flexibility
Paintable
Durability Guarantee
Low Odor
Will Not Blemish Most High-End Metals
Available in Squeeze Tube
1 24 HEN 0053 Product Page Carousel Images 08
Supreme Silicone Kitchen & Bath Sealant
1 Henkel GE Sil1 KB White 40Inch
Tub & Tile Silicone 1® Sealant
25 GE 0034 Advanced KB Package GraphicUS scaled
Advanced Silicone 2® Kitchen & Bath Sealant
Image of Paintable Silicone Supreme for kitchen and bath, waterproof and mold-free with a lifetime guarantee.
Paintable Silicone Supreme Kitchen & Bath Sealant
Water-ready Time 30-minute24 Hours30-minute30-minute
Mold-Free Product Protections Lifetime7-year10-year10-year
Joint Movement 50%25%35%50%
Low Odor
Will Not Blemish Most High-End Metals
Available in Squeeze Tube


Swipe to scroll the table horizontally

Reviews

Advanced Silicone 2® Kitchen & Bath Sealant

10.1 oz Cartridge
 
White Clear Almond
  • 100% silicone
  • 100% waterproof
  • 10-year mold-free product protection†
  • Meets ASTM C-920, Class 35
  • 40% more flexibility than Class 25 sealants†
  • 5X stronger adhesion†
  • 30-minute water-ready†
  • Shrink & crack-proof
  • Won’t blemish most high-end metal finishes like chrome, bronze & nickel
  • Lifetime guarantee†
  • Neutral curing with low odor
  • Non-paintable

†See Product Disclaimers page for important details

Advanced Silicone 2 Kitchen & Bath sealant is a high-performance, 100% silicone and 100% waterproof sealant ideal for areas prone to water exposure. Advanced Silicone 2 Kitchen & Bath sealant is permanently flexible with 40% more flexibility than Class 25 sealants and has 5X stronger adhesion than Silicone 1* sealant. Its 30-minute water-ready formula offers 10-year mold-free product protection to protect against mold and mildew growth. Backed by a lifetime guarantee.

Adheres to: most metals, plastics & woods, glass, drywall, plaster, granite, cultured marble, ceramic & porcelain tile, natural stone, cement board, composites, Formica, fiberglass, aluminum & painted surfaces

For additional information, see product label.

  1. Remove dirt, grease, moisture, soap residue & old sealant from area to be sealed.  Use backer rod for gaps larger than 1/2″ x 1/2″.
  2. Cut nozzle to obtain desired bead size.
  3. PIERCE INNER FOIL SEAL.
  4. Using caulk gun, apply sealant into gap. Smooth with a gloved finger or “tool” the caulk into gap.
  5. Wipe hands & tools thoroughly before washing.
  6. Allow 30 minutes before exposing sealant to water.

Meets ASTM C-920, Type-S, NS, Class 35 Use G test requirements
Meets ASTM C-920, Type-S, Class 25, Use NT, M, A & O test requirements
Fed Spec TT-S-00230C; TT-S-001543A

For products produced by Henkel Corporation, please use the UPC Code. You can click on the corresponding UPC code below to access the SDS.. 

Color UPC Code
White 28756956822
Clear 28756956839
Almond 28756956815
Advanced Silicone 2® Kitchen & Bath Sealant
Scellant Avancé Silicone 2* Cuisine et Salle De Bain - Cartouche
Select - N/A
100% Waterproof Water-resistant / Waterproof
30-minute Rain Ready Time
10-year Mold-Free Product Protections
35% Joint Movement
••• Flexibility
Paintable
Durability Guarantee
Low Odor
Will Not Blemish Most High-End Metals
Available in Squeeze Tube
25 GE 0034 Advanced KB Package GraphicUS scaled
Advanced Silicone 2® Kitchen & Bath Sealant
1 Henkel GE Sil1 KB White 40Inch
Tub & Tile Silicone 1® Sealant
1 24 HEN 0053 Product Page Carousel Images 08
Supreme Silicone Kitchen & Bath Sealant
Image of Paintable Silicone Supreme for kitchen and bath, waterproof and mold-free with a lifetime guarantee.
Paintable Silicone Supreme Kitchen & Bath Sealant
Water-ready Time 30-minute24 Hours30-minute30-minute
Mold-Free Product Protections 10-year7-yearLifetime10-year
Joint Movement 35%25%50%50%
Low Odor
Will Not Blemish Most High-End Metals
Available in Squeeze Tube


Swipe to scroll the table horizontally

Reviews