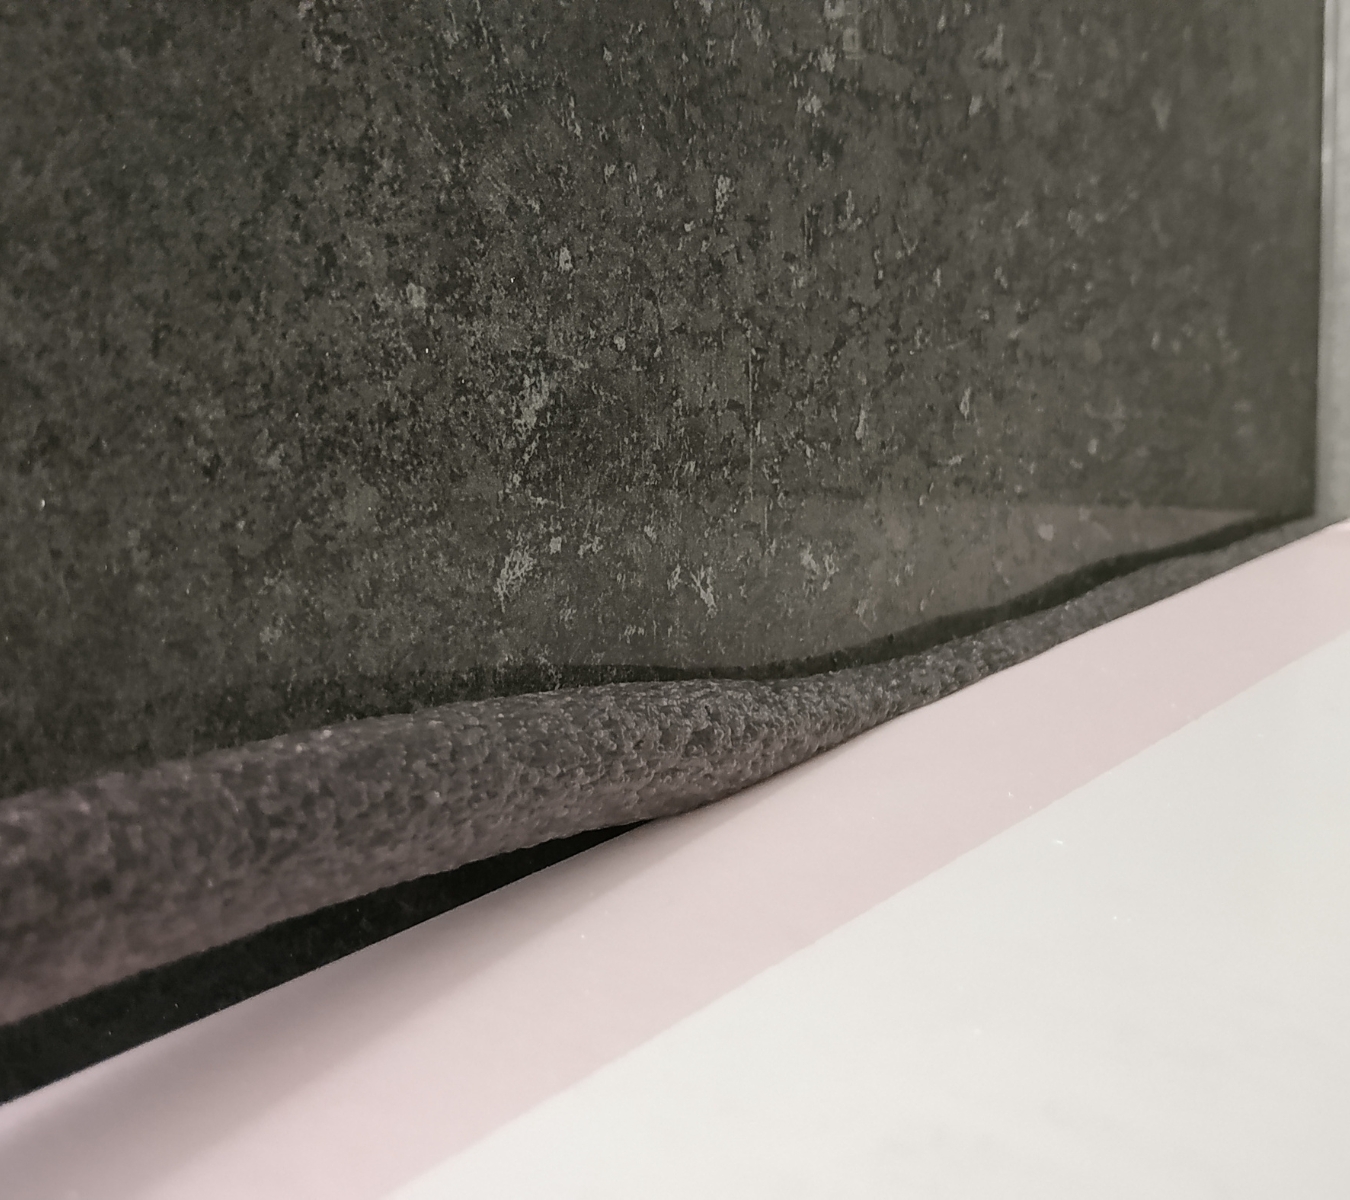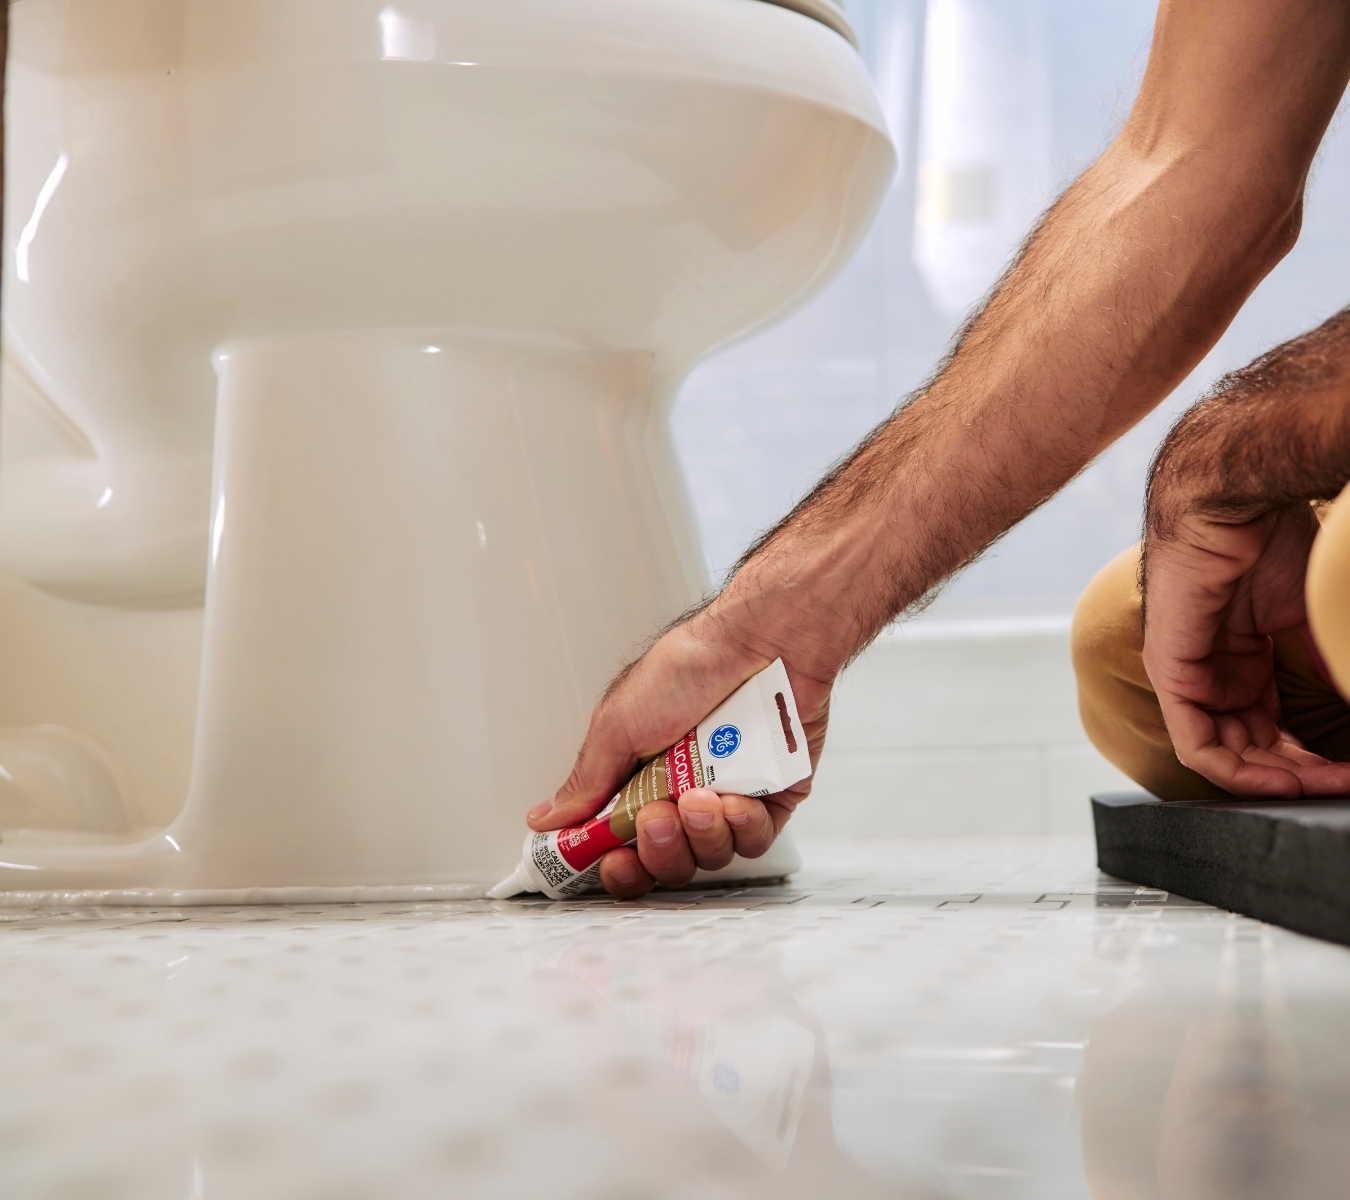
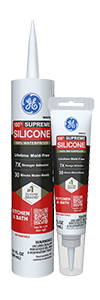
Tub & Tile Silicone 1® Sealant

10.1 oz Cartridge
 
Clear
White
  • 100% silicone
  • 100% waterproof 
  • 7-year mold-free product protection†
  • Meets ASTM C-920, Class 25
  • Permanently flexible
  • Strong adhesion & durability
  • Same-day water-ready†
  • Shrink & crack-proof 
  • Lifetime guarantee†
  • Non-paintable
  • NSF Certified for foodzone areas in kitchens
  • Certified by NSF to NSF/ANSI Standard #51, it is safe for incidental food contact. When cured and washed, the product meets FDA Reg 21, CFR 177.2600

†See Product Disclaimers page for important details

Tub & Tile Silicone 1 sealant is a 100% silicone and 100% waterproof sealant ideal for areas susceptible to moisture like sinks, tubs, showers, fixtures, countertops, backsplashes and plumbing projects. Tub & Tile Silicone 1 sealant is flexible with strong adhesion and resistant to stain-causing mold and mildew growth with 7-year mold-free product protection. Backed by a lifetime guarantee.

Adheres to: most metals, plastics & woods, glass, drywall, plaster, granite, cultured marble, ceramic & porcelain tile, natural stone, cement board, composites, Formica, fiberglass, aluminum & painted surfaces

For additional information, see product label

  1. Remove dirt, grease, moisture, soap residue & old sealant from area to be sealed. Use backer rod for gaps larger than 1/2″ x 1/2″.
  2. Cut nozzle to obtain desired bead size.
  3. PIERCE INNER FOIL SEAL.
  4. Using caulk gun, apply sealant into gap. Smooth with a gloved finger or “tool” the caulk into gap.
  5. Wipe hands & tools thoroughly before washing.
  6. Allow 12 hours before exposing sealant to water.

Meets ASTM C-920, Type-S, NS, Class 25 use NT, M, G, A & O test requirements
Fed Spec TT-S-00230C; TT-S-001543A

For products produced by Henkel Corporation, please use the UPC Code. You can click on the corresponding UPC code below to access the SDS.. 

Color UPC Code
White 28756957331
Clear 28756957324
Tub & Tile Silicone 1® Sealant
Scellant Bain et Tuiles Silicone 1* - Cartouche
Select - N/A
100% Waterproof Water-resistant / Waterproof
Same-day Rain Ready Time
7-year Mold-Free Product Protections
25% Joint Movement
••• Flexibility
Paintable
Durability Guarantee
Low Odor
Will Not Blemish Most High-End Metals
Available in Squeeze Tube
1 Henkel GE Sil1 KB White 40Inch
Tub & Tile Silicone 1® Sealant
25 GE 0034 Advanced KB Package GraphicUS scaled
Advanced Silicone 2® Kitchen & Bath Sealant
1 24 HEN 0053 Product Page Carousel Images 08
Supreme Silicone Kitchen & Bath Sealant
Water-ready Time 24 Hours30-minute30-minute
Mold-Free Product Protections 7-year10-yearLifetime
Joint Movement 25%35%50%
Low Odor
Will Not Blemish Most High-End Metals
Available in Squeeze Tube


Swipe to scroll the table horizontally

Reviews

Stop repeating mildew stains Using silicone sealant to reduce mold, mildew, and grime

Note: This DIY article is provided as a general guide only and is not intended to take the place of product-specific installation procedures; always follow applicable manufacturers’ instructions. Depending on your home’s age and condition, location within the home, and other potential factors, repairs and/or upgrades or other services may be necessary prior to the beginning and/or completion of your project that may involve the services of a home improvement professional. This article does not include advice pertaining to local building codes and/or any related inspections.

Black spots and mildew stains at a tub seam or sink edge usually mean moisture and residue are lingering where your wipe-down can’t reach. This guide helps you decide on whether to clean or replace the caulk, then reseal with silicone sealant in a smooth profile that sheds water and is easier to clean.

Why seams turn black again, starting at the corners

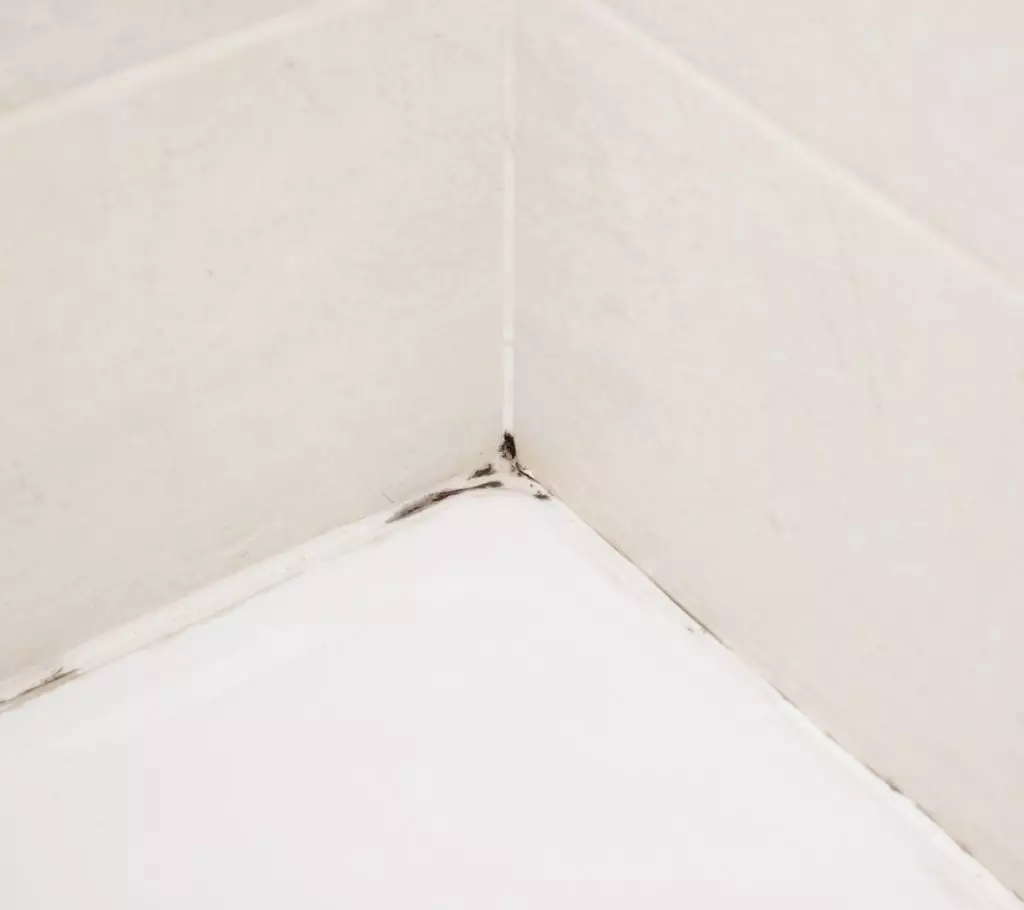
Tight corner shot of a shower or tub corner where black mildew is visible along the seam.
Black mildew in a shower corner seam where moisture and residue collect.

You scrub the seam clean, then the dark mildew spots show up again. In many homes, the cause is wet time. A seam usually stays damp longer than a flat tile or countertop, and that gives residue time to take hold. 

In your bathroom, soap scum and skin oils leave a film that traps moisture and feeds mildew. In the kitchen, cooking grease and dust settle into a sticky line near sinks and backsplashes, then splashes deepen the grime. 

Corners and transitions dry last because water collects there, and there isn’t a lot of airflow. Mold-resistant caulk helps, but an effective bathroom mildew prevention strategy still depends on keeping that surface film from building up.

Mold-resistant caulk vs. silicone sealant: pick by location and finish

Mold-resistant caulk is a label you will see on many sealant tubes. It usually means it can slow growth on the bead, but the result you get depends on where you use it and how clean the surface stays. 

For joints in your home that often see water, GE silicone sealant is built to stay flexible and waterproof. Note that 100% silicone is not paintable, so choose a paintable hybrid, like GE Pro Seal Max Kitchen & Bath, when the seam needs paint.

Start with the location:

  • Tubs and showers: choose a silicone-first approach.
  • Sink rims and backsplashes: decide based on paint plans and the material finish.

Clean it or replace it: a 2-minute check before you recaulk

Clean it when the bead stays bonded and the line stays intact. In this case, the discoloration should wipe off the surface, and the bead should feel firm. 

Conversely, replace the bead if you look closely and see lifting edges, gaps at the tub or tile, corner cracks, soft spots, or black mildew stains under the seal. 

If you remove the mildew and the spots return not long after, there’s a good chance moisture has found its way under the bead. 

How to remove mold and reseal without creating a grime ledge

If you find that the bead is failing, start fresh for a strong bond.

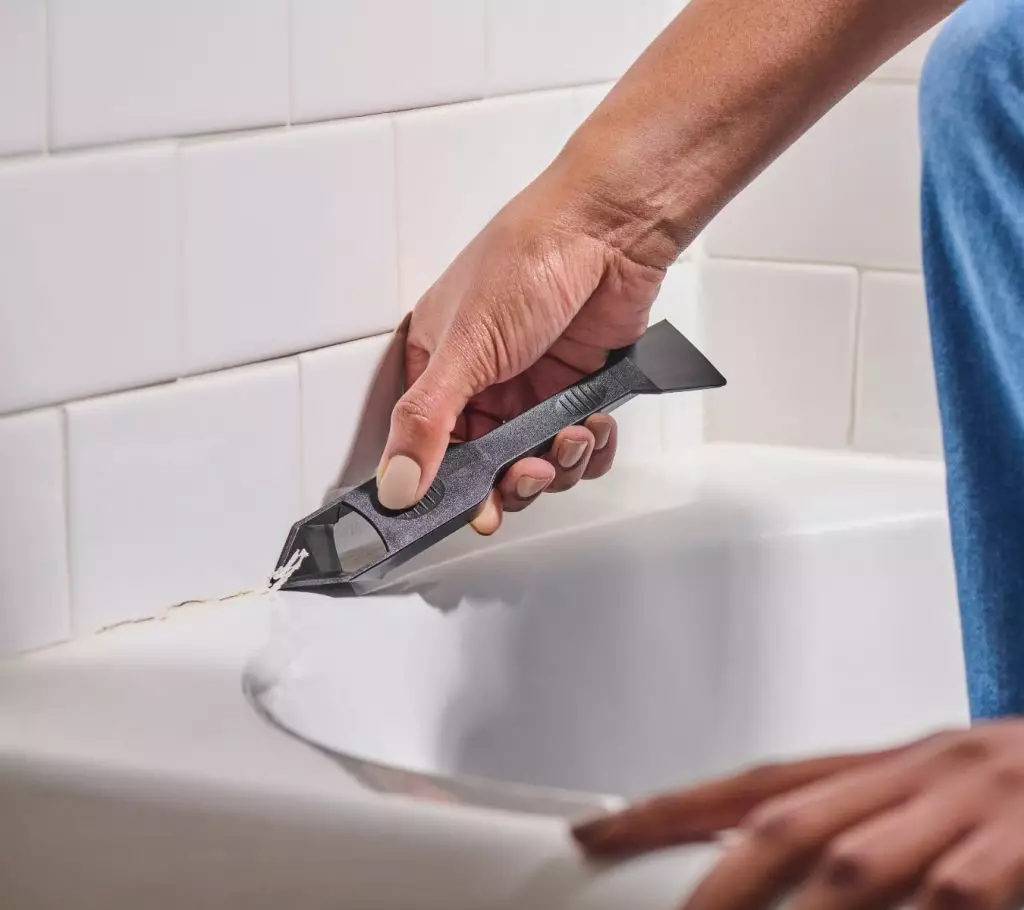
Hand using the GE Sealant Remover Tool to lift a failed bead from a tub
DIYer using GE Sealant Remover Tool to lift old sealant from a wet-area seam before resealing.

Step 1: Remove the failing bead completely

New sealant often fails to bond to old silicone. Instead, use a caulk removal tool and place it under the bead and lift it in strips to avoid scratching the surrounding surfaces. The GE Sealant Remover Tool helps you cut and lift with more control in tight corners. 

For more on how to remove a failed bead, see our guide on how to remove silicone sealant the right way.

Step 2: Prep the joint for adhesion

Remove mold and scrub off surface film, then rinse well. Don’t use detergent or soap if it leaves residue. Silicone can have trouble bonding when soap scum stays behind. 

Before moving to step 3, let the joint dry fully.

Step 3: Apply silicone sealant bead 

Cut the nozzle to match the joint width, then run one steady pass. Apply the silicone sealant in a continuous line, then tool it right away into a smooth profile. 

The GE Cartridge Opener & Smoothing Tool helps you open the cartridge cleanly and shape the bead. Aim for a slightly concave bead that helps water run off instead of pooling on the edge. 

Follow the label for water-ready and cure timing.

Choose a silicone sealant that matches your job

Choose based on three factors: water exposure, joint movement, and whether the bead needs paint. Use this quick picker:

  • Standard wet-area sealing, no paint plan: GE Advanced Silicone Kitchen & Bath Sealant. It’s 100% waterproof, water-ready in as little as 30 minutes, and comes with 10-year mold-free product protection. Meets ASTM C920 Class 35.
  • More movement at the joint, still no paint plan: GE Supreme Silicone Kitchen & Bath Sealant. It’s also 100% waterproof, water-ready in as little as 30 minutes, and designed with lifetime mold-free product protection. Meets ASTM C920 Class 50 and is rated for 50% joint movement.

GE Advanced Silicone Kitchen & Bath is a strong all-around pick. Supreme Silicone Kitchen & Bath Sealant is the step-up when your seam flexes more. The higher-class rating (class 35 vs. 50) tells you the latter has more movement capability before the bead gets stressed.

  • You need paintability with wet-area performance: GE Pro Seal Max Kitchen & Bath Sealant. This SMP hybrid sealant is paintable, immediately water-ready, and paint-ready in 60 minutes. It can also adhere to damp or dry surfaces and resists mold and mildew growth.
  • Small touch-up without a caulk gun: GE Interior Seal Silicone Sealant. It comes in a squeeze tube and can be exposed to water within 30 minutes. Interior Seal Silicone Sealant also meets ASTM C920 Class 50 and has mold-free product protection.

For bathroom mildew prevention, go with a 100% silicone sealant when the bead will not be painted. If you need a mold-resistant caulk that you can paint, use a paintable hybrid.

Bathroom mildew prevention and kitchen grime control

You do not need a heavy cleaning routine to protect a fresh bead. However, you need to shorten the wet time and remove the film that feeds staining.

After a shower or bath, run the bathroom exhaust fan if you have one, then pull water off the seam with a quick wipe or squeegee. If there is no fan, open the windows or keep the door open until the room dries.

In the kitchen, wipe the sink rim and backsplash seam after dishes. Grease and detergent mist can settle into a sticky line that turns dark over time.

Once a week, clean the seam with a non-abrasive cleaner and a soft cloth. Focus on removing film, not scrubbing the sealant.

Once a month, scan corners and the sink edge for early lift or pinholes. A small fix now beats another full removal later.

When sealing is not the fix, check this first

Sealant helps at the seam. But it will not solve a leak or spot that stays wet behind the bead line. If the bead keeps turning dark under the edge, or it fails again soon after you reseal, you need to look for the source. 

Start with the obvious leak points near the seam, like a loose faucet base or shower trim. Then check the surface right around the joint for a grout gap or a low spot where water sits. Fix that path first, then reseal after the area stays dry.

FAQs on mold, mildew, and silicone sealant

Why does mold come back after cleaning? 

Because moisture and residue film rebuild at the seam after the surface looks clean. Corners usually show it first since they dry last.

Should I remove and replace the caulk or just clean it? 

Clean it if the bead stays bonded and feels firm, and the discoloration wipes off. Replace it if an edge is lifting or the staining sits under the bead.

What’s the difference between mold-resistant caulk and silicone sealant?

“Mold-resistant” is a feature claim on the sealant tube that can apply to different products, including silicone. Silicone sealant is a material choice for wet areas where flexibility matters. 

How long should bathroom or kitchen sealant last?

In many homes, a properly applied bead can last for years. Early failure often points to moisture getting under an edge or a seam that moves more than the bead can handle.

A smooth bead that bonds well and stays easy to wipe helps seams look cleaner between cleanings. Ready to reseal? Find GE sealants at a retailer near you in the U.S. or Canada. 

Paintable Silicone Supreme Kitchen & Bath Sealant

10.1 oz Cartridge
 
White
  • 100% waterproof
  • 10-year mold-free product protection†
  • Permanently flexible
  • Excellent adhesion
  • 60-minute paint-ready†
  • 30-minute water-ready†
  • Shrink & crack-proof
  • Excellent for interior projects where moisture may be present
  • Low odor
  • Lifetime guarantee†

†See Product Disclaimers page for important details

Paintable Silicone Supreme Kitchen & Bath sealant is a premium, 100% waterproof sealant with a hybrid formula that combines the outstanding waterproof performance you would expect from a silicone sealant with the ease of use and paintability of an acrylic latex. This formula provides a reliable seal in areas that are prone to moisture and require painting. It offers permanent flexibility with long-lasting durability that can withstand scrubbing and has 10-year mold-free product protection that helps resist mold and mildew growth. Backed by a lifetime guarantee.

Adheres to: most metals, plastics & woods, glass, drywall, plaster, granite, cultured marble, ceramic & porcelain tile, natural stone, cement board, composites, Formica, fiberglass, aluminum & painted surfaces

For additional information, see product label.

  1. Remove dirt, grease, moisture, soap residue & old sealant from area to be sealed. Use backer rod for gaps larger than 1/2″ x 1/2″.
  2. Cut nozzle to obtain desired bead size.
  3. PIERCE INNER FOIL SEAL.
  4. Using caulk gun, apply sealant into gap. Smooth with a gloved finger or “tool” the caulk into gap.
  5. Wipe hands & tools thoroughly before washing.
  6. Allow 30 minutes before exposing sealant to water.

Meets ASTM C-920, Type-S, NS, Class 50, Use A, G & O test requirements
Fed Spec TT-S-00230C; TT-S-001543A

For products produced by Henkel Corporation, please use the UPC Code. You can click on the corresponding UPC code below to access the SDS.. 

Color UPC Code
White 61083642501
Paintable Silicone Supreme Kitchen & Bath Sealant
Scellant Silicone Peinturable Suprême Cuisine et Salle De Bain
Select - N/A
100% Waterproof Water-resistant / Waterproof
30-minute Rain Ready Time
10-year Mold-Free Product Protections
50% Joint Movement
Paintable
Durability Guarantee
Low Odor
Will Not Blemish Most High-End Metals
Available in Squeeze Tube
Image of Paintable Silicone Supreme for kitchen and bath, waterproof and mold-free with a lifetime guarantee.
Paintable Silicone Supreme Kitchen & Bath Sealant
1 Henkel GE Sil1 KB White 40Inch
Tub & Tile Silicone 1® Sealant
1 24 HEN 0053 Product Page Carousel Images 08
Supreme Silicone Kitchen & Bath Sealant
Water-ready Time 30-minute24 Hours30-minute
Mold-Free Product Protections 10-year7-yearLifetime
Joint Movement 50%25%50%
Paintable
Low Odor
Will Not Blemish Most High-End Metals
Available in Squeeze Tube


Swipe to scroll the table horizontally

Reviews

Siliconized Advanced Acrylic Kitchen & Bath Sealant

10 oz Cartridge
 
Clear
White
  • Paintable
  • Waterproof
  • 30-minute paint-ready†
  • Mold-resistant
  • Excellent flexibility for for durable, crack-resistant seals†
  • Easy to apply
  • Enhanced durability
  • Exceeds ASTM C-920
  • Low odor

†See Product Disclaimers page for important details

GE Siliconized Advanced Acrylic is a premium sealant ideal for painting projects susceptible to humidity and moisture. This sealant is waterproof, and offers exceptional flexibility, excellent adhesion to a wide variety of common kitchen and bath surfaces, and has lasting mold and mildew resistance. This paintable sealant resists cracking, has no solvent odor, guns out effortlessly, tools smoothly, and cleans up easily with soap and water. Durable and scrubbable, this premium sealant creates seals that retain their original clean look for long lasting, professional results.

Adheres to: most metals, plastics and woods, glass, drywall, plaster, granite, cultured marble, ceramic and porcelain tile, natural stone, cement board, composites, formica, fiberglass, aluminum, and painted surfaces.

For additional information, see product label.

  1. Remove dirt, grease, moisture, soap residue & old sealant from area to be sealed. Use backer rod for gaps larger than 1/4″ x 3/8″. A width to depth ration of 2:1 should be maintained.
  2. Cut nozzle to obtain desired bead size.
  3. Using a caulk gun, apply sealant into gap. Apply above 40oF (5oC).
  4. Smooth or “tools” the sealant into gap within 15 minutes.
  5. Clean up excess wet sealant with a damp sponge before it skins over. Excess dried sealant must be cut or scraped away. Clean hands and tolls with warm water and soap.
  6. Allow to dry 30 minutes before painting with latex paint or 24 hours if using oil-based paints. Allow a minimum of 24 hours before exposing to water.

Exceeds ASTM C-920, Type-S, NS, Class 25, Use NT, A test requirements.

For products produced by Henkel Corporation, please use the UPC Code. You can click on the corresponding UPC code below to access the SDS.. 

Color UPC Code
White 28756955146
Clear 028756955122
Siliconized Advanced Acrylic Kitchen & Bath Sealant
Select - N/A
100% Waterproof Water-resistant / Waterproof
Same-day Rain Ready Time
Mold-resistant1 Mold-Free Product Protections
25% Joint Movement
Paintable
Durability Guarantee
Low Odor
Will Not Blemish Most High-End Metals
Available in Squeeze Tube
Image of siliconized acrylic advanced sealant tube for kitchen and bath, highlighting waterproof and mold-resistant features.
Siliconized Advanced Acrylic Kitchen & Bath Sealant
Image of two silicone acrylic caulk products comparing a 10 oz cartridge and a 5.5 oz squeeze tube.
Siliconized Multi-Purpose Acrylic Kitchen & Bath Caulk
25 GE 0034 Advanced KB Package GraphicUS scaled
Advanced Silicone 2® Kitchen & Bath Sealant
1 24 HEN 0053 Product Page Carousel Images 08
Supreme Silicone Kitchen & Bath Sealant
Water-ready Time 24 Hours48 hours30-minute30-minute
Mold-Free Product Protections Mold-resistant1Mold-resistant110-yearLifetime
Joint Movement 25%35%50%
Low Odor
Will Not Blemish Most High-End Metals
Available in Squeeze Tube


Swipe to scroll the table horizontally

Reviews

Siliconized Multi-Purpose Acrylic Kitchen & Bath Caulk

10.0 oz Cartridge
 
White
  • Paintable
  • Water-resistant
  • Mold-resistant†
  • Durable
  • Easy to apply
  • Exceeds ASTM C-834, Type-OP, NS, Grade -18°C requirement
  • Low odor
  • Easy soap and water cleanup
  • 30-minute paint-ready†

†See Product Disclaimers page for important details

GE Siliconized Multi-Purpose Acrylic Kitchen & Bath is an advanced grade caulk ideal for decorative and paintable kitchen and bathroom projects. GE Multi-Purpose Siliconized Acrylic caulk offers durable flexibility and excellent adhesion to a wide variety of household materials. It guns out effortlessly, tools smoothly, and cleans-up easily with soap and water. Paint-friendly caulk resists cracking with most latex and oil paints. GE Siliconized Multi-Purpose Acrylic caulk creates cured seals that are durable to withstand frequent cleanings, and retain their original fresh look for long-lasting, professional results.

Adheres to: Common kitchen and bath materials including most metals, plastics and woods,
glass, drywall, plaster, granite, cultured marble, ceramic and porcelain tile, natural stone, cement board, formica, fiberglass, aluminum, and painted surfaces.

For additional information, see product label.

  1. Remove dirt, grease, moisture, soap residue & old caulk from area to be sealed. Use backer rod for gaps larger than 3/8″ (W) x 1/4″ (D). A width to depth ratio of 2:1 should be maintained.
  2. Cut nozzle to obtain desired bead size.
  3. PIERCE INNER FOIL SEAL.
  4. Using caulk gun, apply caulk into gap. Apply above 40°F (5°C).
  5. Smooth or “tool” the caulk into gap within 15 minutes.
  6. Clean up excess wet caulk with a damp sponge before it skins over. Excess dried caulk must be cut or scraped away. Clean hands and tools with warm water and soap.
  7. Allow to dry 30 minutes before painting with latex paint or 24 hours if using oil-based paints. Allow a minimum of 24 hours before exposing to water.

Exceeds ASTM C-834, Type-OP, NS, Grade -18°C requirement


For products produced by Henkel Corporation, please use the UPC Code. You can click on the corresponding UPC code below to access the SDS.

Color UPC
White Cartridge 028756954378
Clear Cartridge 028756954293
White Squeeze Tube 028756954200
Siliconized Multi-Purpose Acrylic Kitchen & Bath Caulk
Select - N/A
Water-Resistant Water-resistant / Waterproof
48 hours Rain Ready Time
Mold-resistant1 Mold-Free Product Protections
Paintable
Durability Guarantee
Low Odor
Will Not Blemish Most High-End Metals
Available in Squeeze Tube
Image of two silicone acrylic caulk products comparing a 10 oz cartridge and a 5.5 oz squeeze tube.
Siliconized Multi-Purpose Acrylic Kitchen & Bath Caulk
Image of siliconized acrylic advanced sealant tube for kitchen and bath, highlighting waterproof and mold-resistant features.
Siliconized Advanced Acrylic Kitchen & Bath Sealant
1 Henkel GE Sil1 KB White 40Inch
Tub & Tile Silicone 1® Sealant
25 GE 0034 Advanced KB Package GraphicUS scaled
Advanced Silicone 2® Kitchen & Bath Sealant
Water-resistant / Waterproof Water-Resistant100% Waterproof100% Waterproof100% Waterproof
Mold-Free Product Protections Mold-resistant1Mold-resistant17-year10-year
Water-ready Time 48 hours24 Hours24 Hours30-minute
Low Odor
Will Not Blemish Most High-End Metals
Available in Squeeze Tube


Swipe to scroll the table horizontally

Reviews

Seal & Fill Multi-Purpose Kitchen & Bath Caulk

10 oz Cartridge
 
White
  • Paintable caulk for trim, molding, countertops & more
  • Easy to apply
  • Simple soap and water cleanup
  • Paint-ready in just 30 minutes†
  • Water-resistant
  • Mold-resistant†
  • Low odor
  • Bonds to metals, plastics, woods, glass & more

†See Product Disclaimers page for important details

Perfect for decorative and paintable applications, GE Seal & Fill Multi-Purpose Kitchen & Bath Caulk is paint-friendly, low odor, and dries in just 30 minutes. It applies easily, tools smoothly, and cleans up with just soap and water. Ideal for sealing trim, molding, baseboards, countertops and more, it bonds to most metals, plastics, woods, and glass. Enjoy a water- and mold-resistant seal that keeps its fresh look despite frequent cleanings.

For additional information, see product label.

For products produced by Henkel Corporation, please use the UPC Code. You can click on the corresponding UPC code below to access the SDS.. 

Color UPC Code
White 28756954378
Clear 28756954293
Seal & Fill Multi-Purpose Kitchen & Bath Caulk
Select - N/A
Water-Resistant Water-resistant / Waterproof
48 hours Rain Ready Time
Mold-resistant1 Mold-Free Product Protections
• Flexibility
Paintable
Durability Guarantee
Low Odor
Will Not Blemish Most High-End Metals
Available in Squeeze Tube
0001048127 GE Sealants Seal Fill MP KB USP Product Page Carousel Image 24
Seal & Fill Multi-Purpose Kitchen & Bath Caulk
25 GE 0034 Advanced KB Package GraphicUS scaled
Advanced Silicone 2® Kitchen & Bath Sealant
1 24 HEN 0053 Product Page Carousel Images 08
Supreme Silicone Kitchen & Bath Sealant
Water-ready Time 48 hours30-minute30-minute
Water-resistant / Waterproof Water-Resistant100% Waterproof100% Waterproof
Mold-Free Product Protections Mold-resistant110-yearLifetime
Paintable
Low Odor
Will Not Blemish Most High-End Metals
Available in Squeeze Tube


Swipe to scroll the table horizontally

Reviews

Get your house ready Annual home maintenance checklist: preparing for next year

Note: This DIY article is provided as a general guide only and is not intended to take the place of product-specific installation procedures; always follow applicable manufacturers’ instructions. Depending on your home’s age and condition, location within the home, and other potential factors, repairs and/or upgrades or other services may be necessary prior to the beginning and/or completion of your project that may involve the services of a home improvement professional. This article does not include advice pertaining to local building codes and/or any related inspections.

The end of the year is a natural checkpoint for your home’s systems. Before the year turns, use this home maintenance checklist to catch moisture, airflow, and electrical issues before they grow. Each check strengthens your home’s safety, durability, and energy balance.

The work you do now shapes how your home performs next year. Every inspection, seal, and small repair adds up to a season ready to handle what comes.

How to use this home maintenance checklist

The goal of this annual home maintenance checklist is simple: prevent small problems from becoming costly ones. 

Start by separating what needs attention now from what can wait a few weeks. 

Outside, move from the roofline down to the foundation. Indoors, take it room by room to stay organized and avoid missed spots.

Safety first: alarms, wiring protection, and dryer-vent fire checks

Start your home maintenance checklist with safety checks that prevent common hazards. Work through these steps before you move on to exterior work. 

Each one helps reduce risks you can’t always see but can easily prevent:

  • Smoke alarms: Test each unit monthly to confirm it still responds. You usually want to replace alarms at the 10-year mark. 
  • Carbon monoxide alarms: Test (and repeat monthly) and replace on the manufacturer’s schedule. Have these alarms on each level and near any combustion appliances or an attached garage.
  • GFCI/AFCI outlets: These provide shock and arc-fault protection. Press the test button, then confirm the outlet clicks off and resets. If it doesn’t, replace the device or call a licensed electrician.
  • Check fire extinguishers: Ensure the gauge is in the green, the pin is secure, the nozzle is clear, and it’s mounted where you can reach it quickly.
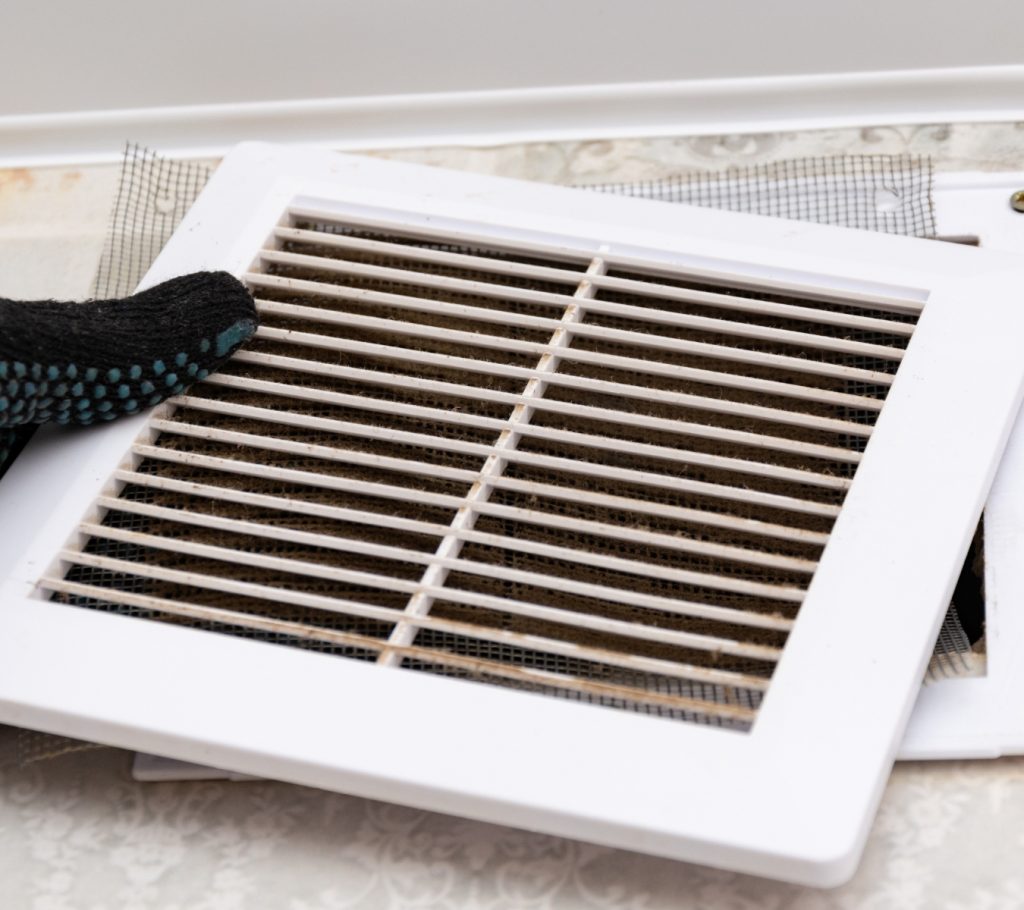
  • Dryer vent: Clean the lint screen after every load, then vacuum the duct and exterior hood to clear lint and nests. Confirm that the exterior flap moves freely.

Inspect the roof and gutters to keep water moving

The roof and gutters manage every drop that lands on your house. When they stay clear, water drains away from walls, windows, and the foundation. Check both systems before heavy rain or cold weather. Work from the ground or a stable ladder, never from the roof itself.

Focus on these key points:

  • Gutters and downspouts: Clean them at least twice a year and after major storms. Make sure downspouts carry water several feet away from the foundation. Add splash blocks or extensions if needed.
  • Roof scan: From a safe position, look for missing or curled shingles, lifted edges, or dark patches where granules have worn away. Watch for debris in valleys or along flashing where water can back up.
  • Flashing and penetrations: Inspect the metal around chimneys, vents, and skylights. Look for gaps or rust that could let water in. If anything shifts or separates, note it for a roofing professional.
  • Debris and moss: Clear branches and leaves that trap moisture. Avoid scraping or harsh cleaners. You may want to call a licensed contractor for moss or heavy buildup removal.

Use ladders safely, keep three points of contact, and stay off steep or fragile surfaces.

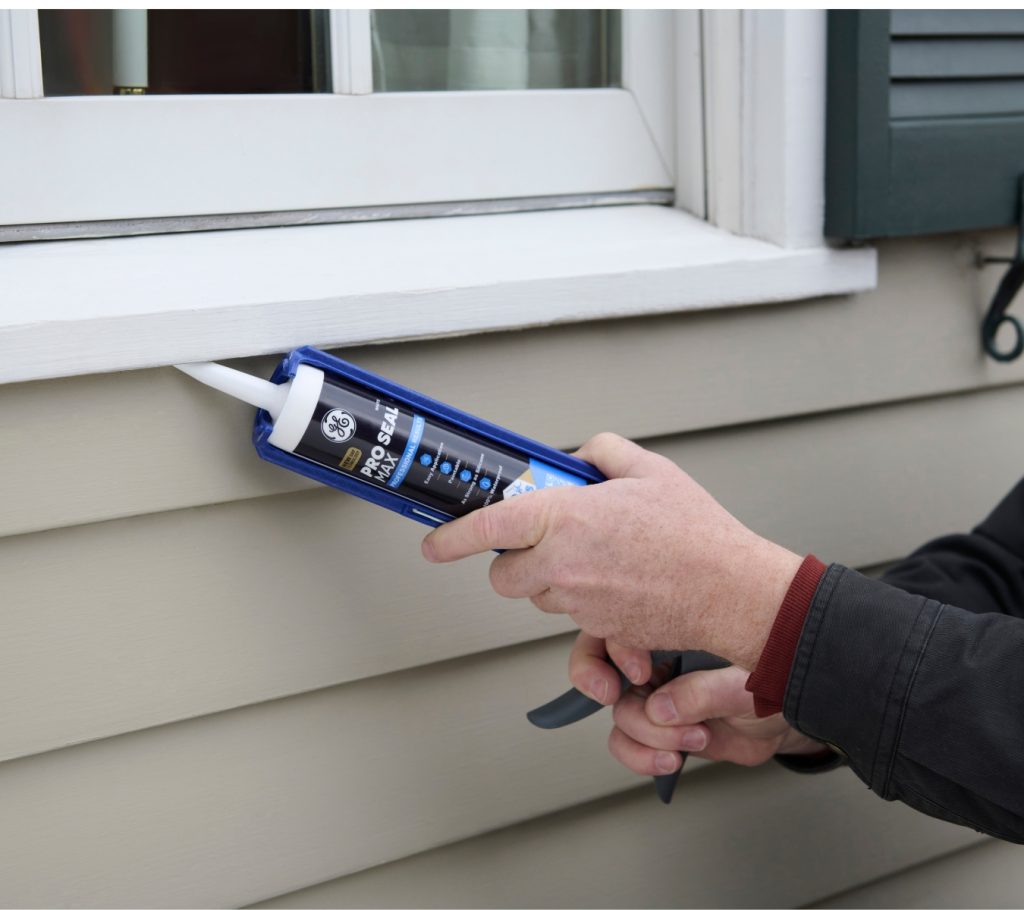
Homeowner resealing exterior window frame with GE Pro Seal Max Window & Door sealant to prevent drafts and prepare for next year’s maintenance season.

Seal windows, doors, and gaps to save energy

Unsealed joints around your windows, doors, and service lines are a common path for heat loss and drafts. Sealing them helps tighten the building envelope and reduce wasted heating and cooling. 

Work the exterior first, where the weather hits the hardest, then move around your house. Add this step to your home maintenance checklist to lock in comfort through the seasons. 

Here are areas you want to focus on: 

  • Perimeter joints: Inspect exterior window and door perimeters. Look for cracked, loose, or missing sealant beads. Remove any failed caulk you find, clean the joint, and reseal.
  • Weatherstripping: Check door sweeps and window sashes. If light or air can pass through, it’s time to replace the strip to help reduce drafts and keep conditioned air inside.
  • Service penetrations: Seal around pipes, vents, and cable entries where they pass through walls. Even small gaps here can become major energy leaks and pest entry points.

Be sure to use the right window and door sealant when sealing:

For larger voids: use GE Pest Block Insulating Foam for small pest-entry gaps or GE Big Gaps & Cracks for spaces up to three inches.

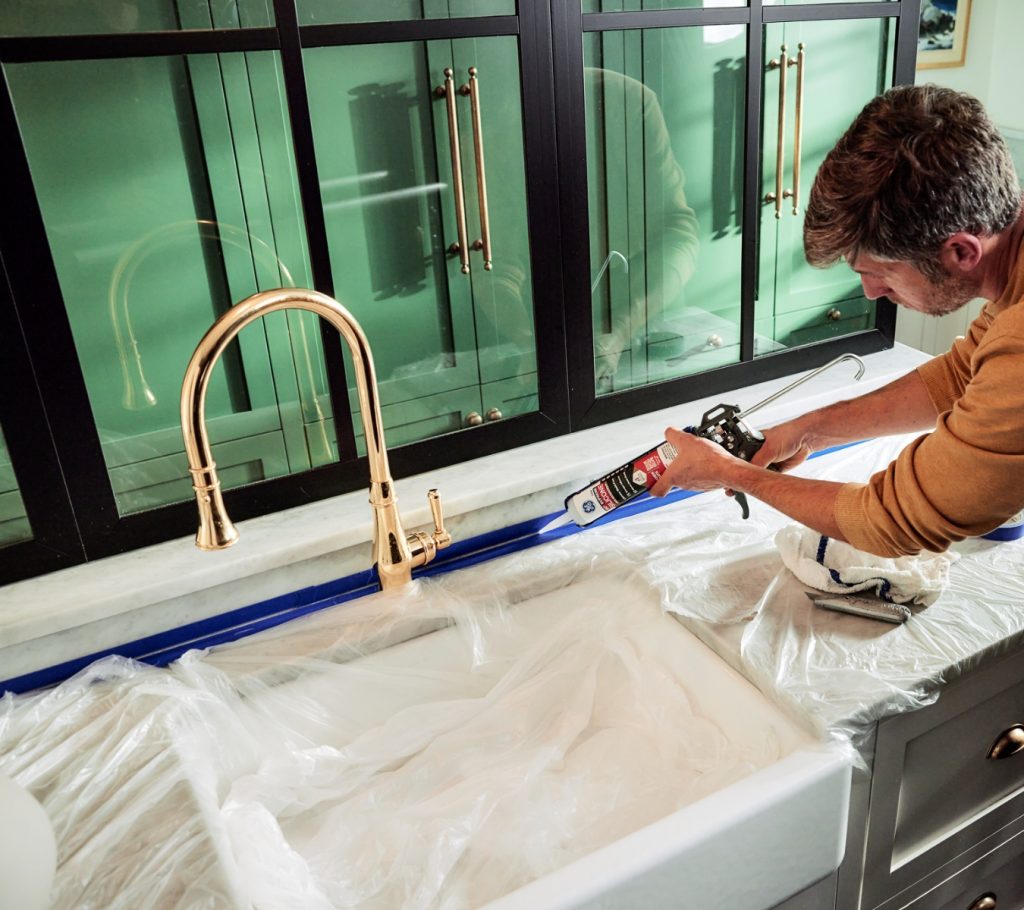
Homeowner applying GE Supreme Silicone Kitchen & Bath Sealant along a kitchen sink to protect wet areas from leaks as part of their annual home maintenance checklist.

Seal wet areas in bathrooms and kitchens

Moisture spreads quietly behind failed beads. When this happens, it softens drywall, feeds mold, and stains tile joints before you can see it. Getting in front of this helps protect finishes and framing alike. 

Include this inspection and reseal tasks in your annual home maintenance checklist to prevent damage. Focus on these areas:

  • Tubs and showers: Check the joints where tile, tub, or surround meets the wall. Cut out cracked or separated sealant, clean thoroughly, let it dry, and reseal.
  • Sinks and backsplashes: Look along countertop edges and faucet bases. If the bead shows gaps or discoloration, replace it. Clean edges with isopropyl alcohol before resealing to promote adhesion, then reseal.

Mask both sides of the joint for clean lines. Then, tool the new bead with the GE Sealant Smoothing Tool. Follow the cure guidance on the GE sealant’s label before exposing the joint to water.

Choose your GE sealant: 

Homeowner replacing a home air filter to improve HVAC efficiency and indoor air quality as part of annual maintenance.

Check airflow and comfort systems for efficient performance

Airflow keeps your home’s temperature and air quality steady. When dust builds up on filters and coils, systems work longer to move the same air, wasting energy and raising wear. 

Checks these areas to help maintain comfort and efficiency:

  • HVAC filter: Check the filter every month. Replace it about every three months, or sooner with pets, allergies, or heavy use. A clean filter keeps air moving freely and helps the system run efficiently.
  • Appliance efficiency: Vacuum the refrigerator’s condenser coils (usually at the back or underneath the unit) and clean the range hood filter. These areas collect grease and dust that trap heat and slow cooling, which is why you want to remove them.
  • Draft audit: Stand near doors or windows on a windy day. If you feel air movement, review the sealing we covered earlier and refresh weatherstripping where needed.

Each task is a valuable addition to your annual home maintenance checklist. They also take minutes and help maintain air quality, system life, and comfort year-round.

Seasonal plumbing and basement systems

Cold weather can strain your plumbing and flood-prevention systems. 

Include these plumbing steps in your home maintenance checklist so they don’t get missed next year:

  • Exterior hose bibs: Shut off the interior valve feeding each of your outdoor faucets. Open the exterior spigots to drain remaining water, remove hoses, and attach insulated covers if exposed.
  • Sump pump test: Pour a bucket of water into the pit. Watch for the float to rise and the pump to discharge properly. Verify that the outlet hose drains clear of the foundation and the pump stops once the pit is empty.

Each step helps confirm that water systems can handle freeze and thaw cycles without strain.

Carry your annual home maintenance checklist into next year

Review your notes from this year and turn them into next year’s plan. 

Set reminders on your phone, perhaps, for routine checks, like filters, alarms, and seasonal inspections, and spread them out so no single month feels overloaded. 

Handle outdoor work like gutter cleaning and perimeter sealing in the spring or fall when temperatures are steady and access is safe. Save your indoor maintenance tasks for the winter months: resealing joints, cleaning vents, or replacing filters when outdoor projects slow down.

Consider recording each sealing job you do. Note details like location, date, and product used for reference. Keeping that record up to date helps you plan inspections efficiently.

With your annual home maintenance checklist as your guide, you can start every season prepared and every project on schedule.

Ready to seal, reseal, or weatherproof your home ahead of next year? Find GE products at a retailer near you in the U.S. or Canada.
Year-end maintenance that keeps out cold. Why you should redo silicone sealant before the year ends

Note: This DIY article is provided as a general guide only and is not intended to take the place of product-specific installation procedures; always follow applicable manufacturers’ instructions. Depending on your home’s age and condition, location within the home, and other potential factors, repairs and/or upgrades or other services may be necessary prior to the beginning and/or completion of your project that may involve the services of a home improvement professional. This article does not include advice pertaining to local building codes and/or any related inspections.

When warm air meets cold surfaces, every joint moves. Old sealant strains and cracks, letting moisture in and heat escape. Check your silicone sealant now, and reseal once for a cleaner, tighter finish that lasts through winter.

Why year-end is the ideal time to act

Cold weather often reveals what warm months hide. When indoor heat meets cold tile or glass, joints in your kitchen and bath begin to flex. Humidity rises, surfaces sweat, and older beads start to pull away. This is when weak silicone sealant shows its age: edges lift, mold shadows appear, and water creeps beneath.

The freeze–thaw cycle adds stress. Daily temperature swings in your home expand and contract surfaces, testing how well the joints move. High-grade silicones rated Class 50 (built to handle wide expansion and contraction) can stretch and recover. However, older material often can’t.

Moisture and use both tend to peak late in the year. More cooking, more showers, more steam. Even small gaps can quickly turn into damp corners. Doing silicone sealant maintenance before the end of the year holds back moisture and drafts and helps protect your home through the season ahead.

Most seals start to fail where you can’t see them. A short inspection now can stop moisture and cold air before they spread.

Inspection checklist: how to tell when to replace sealant

Sealant failure doesn’t happen all at once. It starts small, then spreads quietly over time. Use this short inspection to spot early signs before damage sets in:

  • Visual checks: Look for hairline cracks or missing sections where water can enter. If the bead feels chalky, shows stains that reappear soon after cleaning, or has mold showing through, it’s reached the end of its useful life. 
  • Tactile checks: Run a gloved finger or lightly press the edge, and feel for movement or brittleness. A sound bead feels flexible and slightly firm. A failing one feels dry to the touch and may flake or lift when you test the edge. Pinholes or tiny voids that hold moisture are another warning. 
  • Functional signs: A musty odor, damp drywall, or any draft at trim lines means the seal has opened or air is finding a way in. 

If you see any of these signs, especially cracks, lifting edges, or recurring mold, the silicone sealant has reached its limit. Knowing when to replace sealant helps prevent moisture damage and keeps your surfaces protected year-round.

Kitchen and bath: high-moisture joints that fail first

In most homes, the kitchen and bath take the heaviest use. They see frequent water, steam, cleaning, and temperature swings, so weak joints usually show up here first. As part of your silicone sealant maintenance routine, a quick check in these spaces now can catch small issues before they mark grout or soften drywall.

DIYer laying silicone sealant at a bathroom sink after testing for cracks or edge lift.

Where to look

Start at the tub-to-tile joints in your shower, then scan inside corners and along shower door frames. Check around your faucets and sinks, along the backsplash, and at the base of the toilet where mop water or condensation can sit. These edges see regular splash and standing moisture.

Why year-end matters 

Cooler air outside and warm, moist air inside make these joints move more and stay damp longer. Heavier cooking and longer showers through the colder months raise humidity, so loose or lifted beads tend to show up faster.

What a good seal looks like

The bead runs smoothly and evenly, bonded at both edges with no breaks, gaps, or pulled edges. If a joint no longer looks like this, go back to the inspection checklist to decide when to replace the sealant in that area.

Windows and doors: where heat loss and moisture show up

Windows and doors are often where comfort leaks first. A weak bead here can let in cold air and push warm air out.

Where to look

Inspect interior trim perimeters, exterior casing joints, sill ends, and spots where materials meet, including metal to wood, vinyl to drywall, or brick to trim. Check for light, gaps, or movement that signal an open joint.

Why year-end matters

Cooler weather makes it easier to feel drafts. When warm indoor air meets cold outdoor air, condensation can highlight or stain areas where seals have failed, marking trim and dulling finishes. Prolonged dampness tends to weaken adhesion over time, so early repair keeps edges sound.

What a good seal looks like

A continuous perimeter bead bonded cleanly on both edges with no cracks or voids. If the seal feels loose or moisture keeps returning, revisit the inspection checklist to confirm when to replace the sealant.

How to choose the right GE silicone sealant for maintenance

Before you reseal, match each joint to the sealant built for its conditions. Wet areas, paintable trim, and exterior frames do not face the same load, so one product will not cover every job.

Wet, unpainted areas: your tubs, showers, and sinks

If the surface faces constant water and doesn’t need painting, use Supreme Silicone Kitchen & Bath Sealant. It’s a 100% silicone rated for high movement. It’s 100% waterproof, provides lifetime mold-free protection when used as directed, and is water-ready in about 30 minutes.

Near moisture but must paint: trim by your backsplash or sink

If the surface is close to splash but needs painting, choose Pro Seal Max Kitchen & Bath. This paintable hybrid sealant flexes in humid conditions and maintains a tight, long-lasting seal.

Weather-exposed joints: around your exterior windows and doors

For outdoor exposure to temperature shifts or wind-driven rain, use Supreme Silicone Window & Door Sealant. This 100% silicone sealant can stand up to weather without shrinking or pulling away.

Painted trim: interior or exterior in non-wet zones

For painted or composite trim that expands and contracts with temperature, use Pro Seal Max Window & Door. It is designed to remain flexible and weatherproof on moving, paintable trim

Remove, prepare, and reseal silicone sealant correctly

Once you’ve identified where to reseal, execution is straightforward. A clean surface, the right product, and time for proper cure are instrumental in how long your new seal will last.

Homeowner using the GE Sealant Remover Tool to lift old silicone bead from tile surface.

1. Remove fully

Cut and lift away every strip of old material using the GE Sealant Remover Tool. It’s shaped to lift silicone without scratching tile, glass, or metal. Avoid knives or sharp blades that can damage the surface or leave residue. A clean edge ensures a stronger bond for the new sealant.

2. Dry out and clean

Allow the joint to dry completely before resealing. Disinfect the area, then wipe with isopropyl alcohol to remove soap film, oils, or dust. Any film left behind can weaken adhesion and shorten the seal’s life.

3. Apply the new bead

Cut the nozzle to match the joint width. If you’re using a cartridge, the 2-in-1 GE Cartridge Opener & Smoothing Tool can safely open the tip for a precise bead size. Hold the caulk gun at a steady angle and apply a continuous, even line of silicone sealant. Keep the bead balanced so it cures evenly and bonds along both edges.

4. Tool the bead

Smooth the bead immediately with the GE Sealant Smoothing Tool (or the 2-in-1 opener and smoothing tool above if you already have it). The tool’s curved edges shape the bead evenly and help avoid air pockets. 

5. Allow full cure

Check the product label for readiness. For Supreme Silicone Kitchen & Bath, water contact is safe in about 30 minutes, but waiting longer before full use ensures top performance.

After curing, inspect the bead for uniform contact and remove any stray film. Regular silicone sealant maintenance, such as checking and cleaning the bead every few months, helps keep joints flexible, clean, and watertight through the seasons.

Ready to reseal before year-end? Keep your kitchen, bath, and windows sealed tight with GE silicone products built for lasting performance. Find GE sealants at a retailer near you in the U.S. or Canada.

Pro-level guidance to reduce callbacks and moisture failures The most common plumbing sealant mistakes experts still make, and how to fix them

Most plumbing leaks start at the joint, not the hardware. This guide explains the plumbing sealant mistakes that still slow down experienced crews and how you can correct them with methods that respect code, conditions, and schedule pressure.

Mistake #1: plumbing sealant chemistry in wet zones

Failures in wet zones commonly start with using acrylic or other low movement chemistry, where you need a 100% silicone plumbing sealant.

Shower walls, tub surrounds, toilet bases, sink decks, and laundry areas all carry moisture and temperature shifts that will punish a joint. These loads expose the limits of low movement chemistry and lead to early separation or washout. 

To address this, use this hierarchy when sorting chemistry in wet zones:

Early micro-cracking or washout in corners often traces back to the wrong chemistry, which is one of the common caulking mistakes that shows up in wet zones.

Wrong chemistry, poor joint design, and rushed cure can make a new fixture look like it leaks. In most cases, fixing the joint solves the problem before the hardware ever needs replacing.

Mistake #2: new bead over residue or old sealant

You can spot this mistake by watching how a bead ages. 

A black line that forms near the edges often points to contamination trapped under the sealant. If the new sealant refuses to bond to the surface during application, the joint most likely carries a thin film of old material that stayed behind after the first scrape. These patterns are common plumbing sealant mistakes in service work.

The root cause is the same. 

A surface that looks clean can still hold soap film, biofilm, or small traces of cured silicone sealant or caulk. In some cases, the new bead rides on top of an intact or partly intact old profile. These layers, ridges, and shadow lines from the previous bead sit on shower walls, sink decks, and trim near valves. They create a barrier that blocks adhesion and leads to early edge staining.

To correct it, remove the entire bead. Cut it out and clean the edges until the surface feels uniform. When residue is stubborn, the GE Sealant Remover Tool helps you clear the joint without cutting into the substrate. Wipe the area with isopropyl alcohol and let it dry before applying the new sealant bead. Avoid general cleaners that leave a surfactant layer.

Backer rod installed in a wall joint before applying silicone.

Mistake #3: poor joint design and missing backer rod

Ever seen a corner joint that looked fine on install day but showed a split through the center a few weeks later? Or opened up a tub or shower edge and found the bead pulled back from one side? 

These patterns often trace to a joint that was bonded on three sides or set deeper than the material can handle.

A plumbing sealant needs room to flex. When the bead locks to the sides and the base, movement has nowhere to go, and the stress pushes into the silicone until it fails. This common caulking mistake shows up in wide joints around tubs, shower trays, sink rims, and long runs that shift through daily and seasonal temperature changes.

What you need here is depth control. 

Set a closed-cell backer rod that measures about a quarter larger than the joint width. The rod controls how deep the bead can sit and keeps it from bonding to the joint base. That separation gives the material the space it needs to move through its body instead of stretching until it tears.

Shape the bead to a shallow concave profile with the GE Sealant Smoothing Tool. This profile absorbs movement and keeps strain away from the edges. 

High movement locations benefit from a Class 50 sealant. A backer rod paired with the right geometry is a plumbing sealant tip that reduces edge pull and centerline cracking in high-stress areas.

Mistake #4: sealing a toilet base without a leak path

You have likely stepped into a bath where the bead around the toilet looked clean, but the floor felt soft or carried a musty smell. This often develops when the base is sealed on every side. Water from a failed wax ring or rubber gasket has no route to show itself and moves under the flooring instead.

Model plumbing codes call for the joint between a fixture and the floor to be sealed for sanitary reasons. How that rule is enforced shifts by jurisdiction, so check the expectations in your area. Many plumbers finish the front and sides for a clean look and leave a small gap at the rear to give leaked water a way to escape. We support that approach when code and inspector preferences allow it. The final choice sits with you.

If you use this method, keep the sequence simple:

  • Work on a clean and dry surface
  • Run a uniform plumbing sealant bead around the front and sides
  • Leave a two- to three-inch gap at the back to signal a failed ring before the damage spreads

Match the color to the floor or the fixture. This layout helps avoid plumbing sealant mistakes that hide moisture under the footprint and protects the floor from extended saturation.

An expert sealing a toilet base with GE Advanced Silicone Kitchen and Bath Sealant.

Mistake #5: sealing over weep features on trims and doors

A shower door track that never dries or an escutcheon that leaves a damp ring on the wall often points to the same issue: the lower weep opening has been sealed. 

Those gaps are designed to drain spray and condensation. When a plumbing sealant bead covers them, the water backs up and finds its way behind the finish.

Follow the hardware design to address this:

  • Seal the top and sides of the trim to control splash
  • Keep the lower weep holes open

Shower door tracks, valve escutcheons, and accessory trims all rely on this layout. When you are working around mirrors, chrome, or other sensitive finishes, use a GE neutral cure plumbing silicone sealant to limit the chance of staining.

Water collecting in a track or damp spots under trims often points to a blocked weep. Keeping those paths open and sealing only where the hardware is designed to be closed helps you prevent a common caulking mistake and supports long-term performance. 

Mistake #6: using sealant on pipe threads

A threaded joint that stays damp after each use may indicate that silicone sealant was used as a thread sealant. Kitchen and bath sealants are built to form a bead between surfaces, not to fill the voids in tapered threads. When they are pushed into that role, the material shifts under pressure and leaves micro-paths for water to move.

Treat threaded work with products meant for it. Wrap the male threads with PTFE tape or use an approved thread compound, and keep the first thread bare to avoid shred-in that can load the valve or aerator. 

Reserve kitchen and bath sealants for fixture-to-surface joints and for penetrations where a bead belongs.

Plumbing sealant mistake #7: rushing water exposure before the bead is ready

A bead that looks set on the surface can still lose adhesion if water hits it too soon. 

You may have seen a joint that held its shape but wiped away during cleaning. This tends to happen when you reopen the work before the sealant reaches the water-ready point listed on the label. 

Early exposure pushes water behind the material and sets up washout, edge staining, or slow mildew growth. Treat cure time as part of the job schedule. Protect the bead from water and from scrubbing until it reaches the listed window on the plumbing sealant’s technical data sheet or label. 

Find the GE sealants that match your next job’s movement, schedule, and finish requirements. The full lineup is at a retailer near you in the U.S. or Canada.
Small gifts, big upgrades for every home toolbox Affordable stocking stuffer guide: DIY tools every homeowner needs

Note: This DIY article is provided as a general guide only and is not intended to take the place of product-specific installation procedures; always follow applicable manufacturers’ instructions. Depending on your home’s age and condition, location within the home, and other potential factors, repairs and/or upgrades or other services may be necessary prior to the beginning and/or completion of your project that may involve the services of a home improvement professional. This article does not include advice pertaining to local building codes and/or any related inspections.

Holiday stockings are more fun when they’re filled with something useful, and DIY tools are the perfect mix of practical and budget-friendly. Whether you’re shopping for a new homeowner or the resident fixer-upper in your life, small tools can make everyday projects easier. With a few clever picks, you can give gifts that actually get used long after the holiday lights come down.

Mini tools, specialty gadgets, and clever accessories take up very little space, yet they tackle big jobs when needed. Whether you’re surprising a first-time homeowner or rounding out a seasoned DIYer’s kit, DIY tools and other compact homeowner essentials pack plenty of value into small, stocking-sized packages.

Why DIY tools for stocking stuffers?

DIY tools might not jingle like ornaments, but they make some of the most appreciated stocking stuffers of the season. They’re practical, affordable, and useful for just about anyone who owns a home, rents an apartment, or likes the satisfaction of fixing something themselves. Unlike novelty gifts that disappear into a drawer by January, small, practical tools get real mileage, helping with everything from tightening loose hardware to refreshing worn-out sealant.

They’re also budget-friendly, which means you can put together a thoughtful bundle without breaking the bank. Mini tools, specialty gadgets, and clever accessories take up very little space, yet they tackle big jobs when needed. Whether you’re surprising a first-time homeowner or rounding out a seasoned DIYer’s kit, these compact essentials pack plenty of value into a small package. And the best part? They’re gifts people will actually use throughout the year.

The must-have smoothing tool for perfect sealant and caulk lines

The GE Sealant Smoothing Tool.

If there’s one stocking stuffer that instantly upgrades a homeowner’s DIY game, it’s a good smoothing tool. The GE Sealant Smoothing Tool is small enough to slip into a stocking but handy enough to deliver neat caulk lines around sinks, tubs, windows, and backsplashes. Instead of relying on a fingertip and hoping for the best, this tool helps create clean, even beads that look professional and last longer.

It’s especially handy for anyone tackling quick weekend refreshes, like replacing old caulk or sealant gaps before winter weather hits. The tool glides smoothly along joints, helping the sealant settle into place for better adhesion and a stronger final bond. Even beginners can get tidy, consistent results without much practice. For a gift that’s practical, the smoothing tool is a true homeowner essential.

Grout whitening pen: the magic wand of fast bathroom refreshes

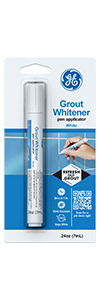
The GE Grout Whitener Pen may be one of the simplest tools on this list, but it delivers one of the biggest visual payoffs. With just a few quick strokes, dingy grout lines suddenly look bright and clean again, giving an entire bathroom a refreshed feel without scrubbing or regrouting. It is the kind of tool homeowners don’t think to buy for themselves, which makes it an ideal handyman stocking stuffer.

Because the pen applies color directly onto existing grout, it is perfect for touching up high-traffic spots like shower corners, backsplash edges, or around the sink. The narrow tip offers great control, so even tight areas are easy to reach. It is also a budget-friendly way to extend the life of older tile work when a full renovation is not in your immediate plans. For anyone who loves quick, satisfying improvements, a grout whitening pen is as close to a magic wand as DIY gets.

GE Sealant Remover Tool: the hero of cleanup jobs

For every neat sealant line, there’s usually an old, stubborn bead that needs to come off first, which is why the GE Sealant Remover Tool earns a spot among the best tools for homeowners. This compact helper makes short work of peeling, cracking, or hardened sealant that refuses to budge with a putty knife alone. Its angled edges are designed to lift old material cleanly without damaging tile, countertops, or window frames, turning what used to be a frustrating chore into a quick, satisfying step.

Pair it with a smoothing tool, and you’ve got a perfect one-two combo for removing old beads and laying down flawless new ones. Easy to store and simple to use, the Sealant Remover Tool is a handyman stocking stuffer that keeps earning its keep long after the holidays.

Mini screwdrivers and precision repair kits

Mini screwdrivers and precision repair kits are another choice that proves the best gifts often come in small packages. These compact tools are perfect for tightening cabinet hardware, fixing loose eyeglasses, opening battery compartments, or making quick repairs on electronics. Homeowners are often surprised by how often they reach for them, especially since the tiny screws on everyday items never seem to stay put for long.

A good precision kit usually comes with multiple interchangeable bits, which makes it adaptable to all kinds of small projects. It is the kind of tool that quietly becomes a household favorite because it solves little annoyances before they turn into bigger frustrations. 

Tape measures, levels, and other tiny helpers

A pocket-sized tape measure.

Small measuring tools earn their keep all year long. A pocket-sized tape measure is perfect for quick furniture checks, hanging wall décor, or planning small projects. Mini levels are equally handy for keeping shelves straight or aligning picture frames. These tiny helpers take up almost no space but save homeowners from crooked installs and guesswork, making them thoughtful, practical, and always-welcome gifts.

To get GE Sealants’ products for your home improvement project, visit these fine retailers in the U.S. or Canada.