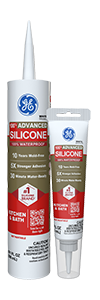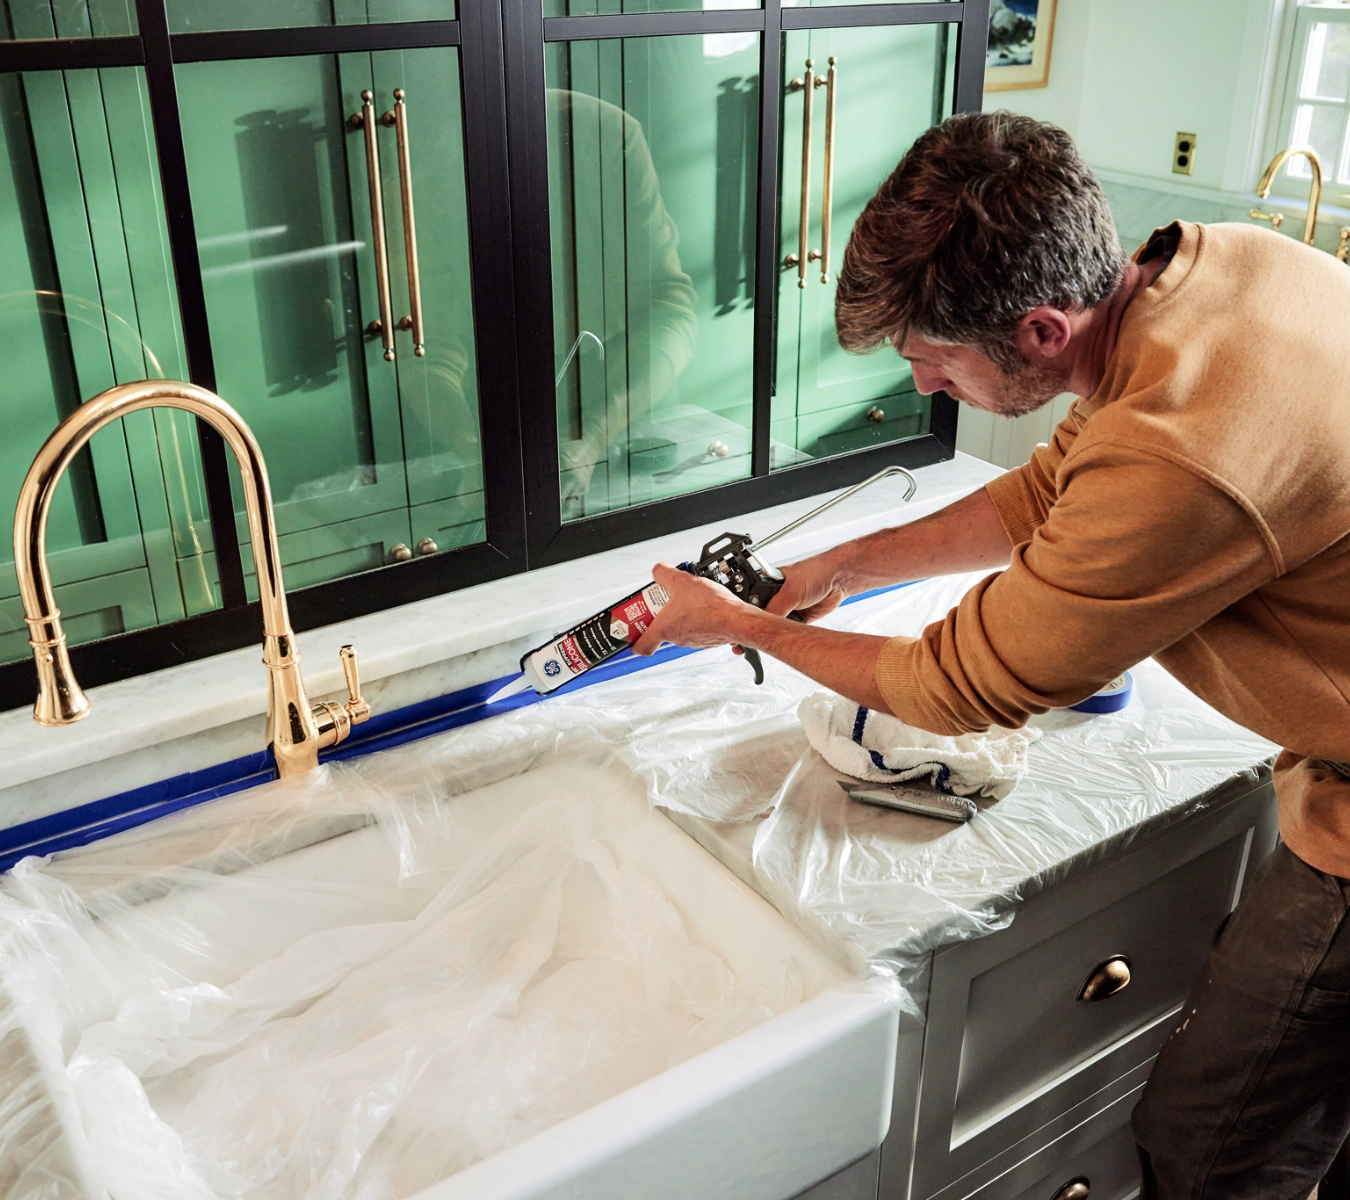
Not all pipe leaks mean major repairs—some just need a smart seal How to seal leaking pipes without replacing them

Note: This DIY article is provided as a general guide only and is not intended to take the place of product-specific installation procedures; always follow applicable manufacturers’ instructions. Depending on your home’s age and condition, location within the home, and other potential factors, repairs and/or upgrades or other services may be necessary prior to the beginning and/or completion of your project that may involve the services of a home improvement professional. This article does not include advice pertaining to local building codes and/or any related inspections.

Not every pipe leak calls for a full replacement. With the right materials and approach, many small leaks—especially at joints or in copper and PVC lines—can be sealed safely by a DIYer. This guide explains how and when to seal leaking pipes and when it’s best to call a professional.

Hairline cracks, slow drips, and leaks around pipe penetrations often occur under sinks, behind toilets, or where pipes enter walls. If the pipe isn’t corroded or cracked through, sealing with tape, thread compound, or silicone is usually effective.

When can you safely seal a leaking pipe?

You can safely seal a leaking pipe when the leak is minor and the pipe is structurally sound. Common cases include:

  • Hairline cracks in copper or PVC
  • Slow drips at threaded joints
  • Leaks around pipe penetrations in low-pressure indoor systems

These issues often occur under sinks, behind toilets, or where pipes enter walls. If the pipe isn’t corroded or cracked through, sealing with tape, thread compound, or silicone is usually effective. However, sealing is not a permanent solution for damaged or failing pipes. Avoid DIY repairs if the pipe is visibly deteriorated, the leak is forceful, or there’s evidence of past failed fixes. For high-pressure systems, gas lines, or leaks hidden inside walls, always call a licensed plumber instead of attempting a patch.

Tools and materials you’ll need

Before sealing a leaking pipe, gather the right tools and materials. In older homes with threaded copper or PVC fittings, you’ll need PTFE thread-sealing tape and pipe thread sealant—AKA pipe dope. A wire brush and a clean rag help prep the surface.
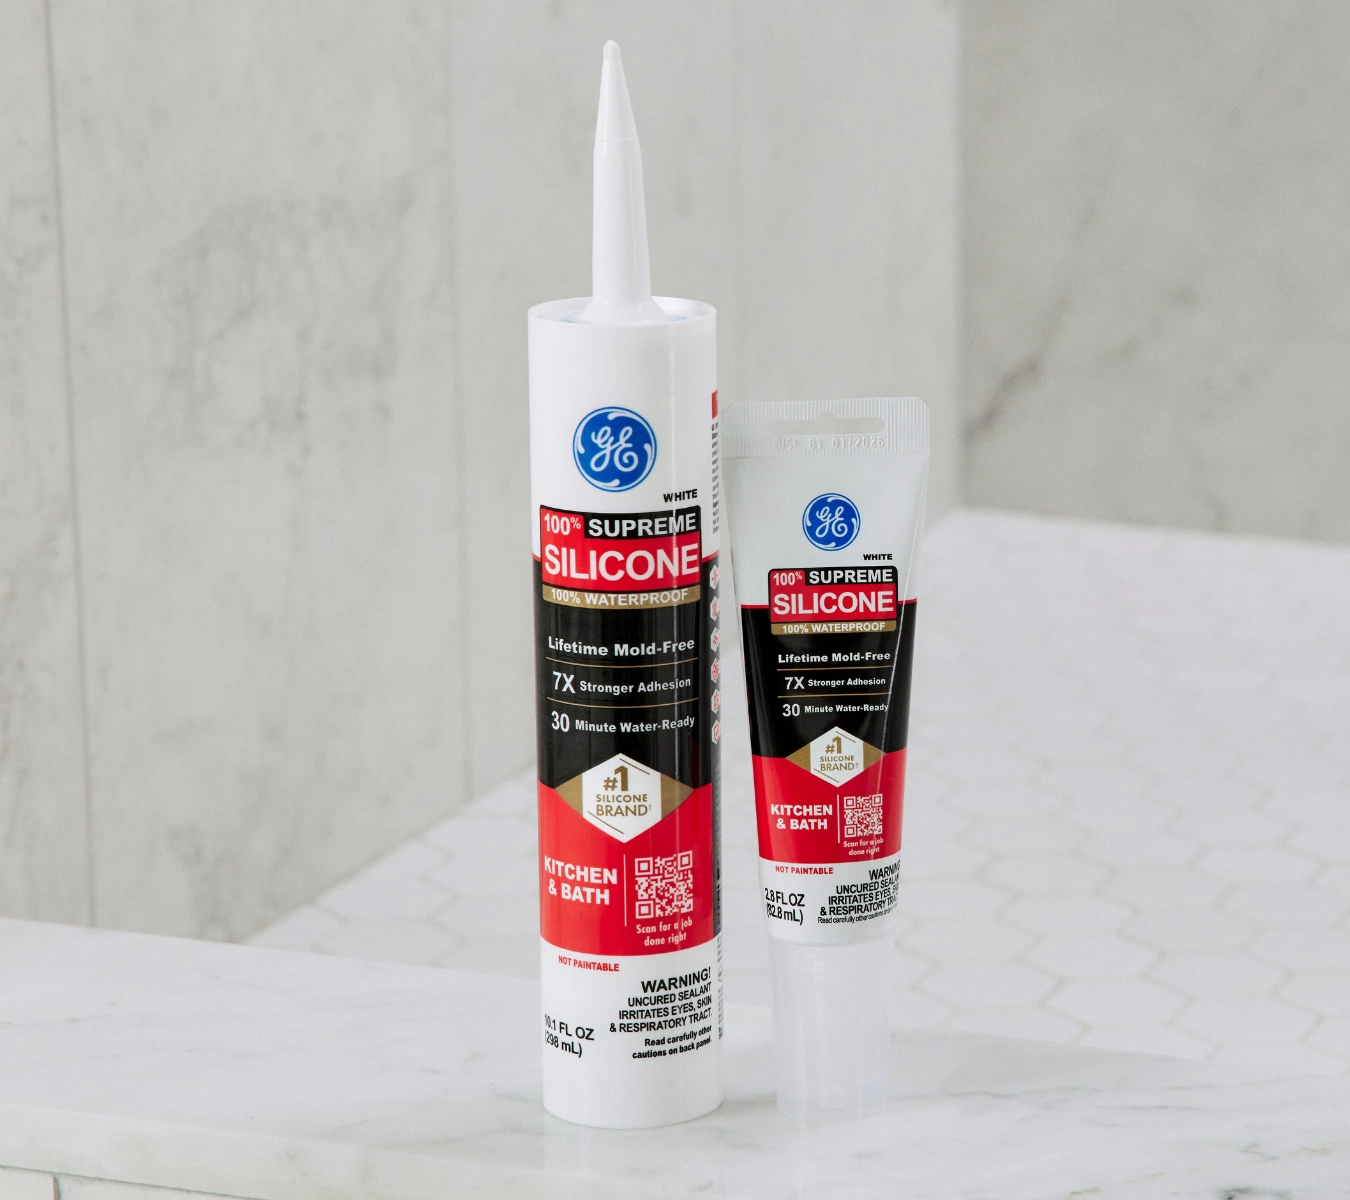
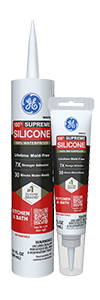
A photo of GE Supreme Silicone Kitchen & Bath.
GE Supreme Silicone Kitchen & Bath.

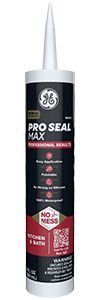
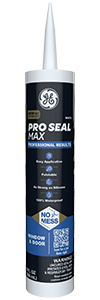
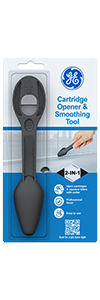
Keep an adjustable wrench on hand for tightening fittings without damaging them. For structural cracks that are not active leaks, use epoxy putty or a silicone-based sealant like GE Supreme Silicone Kitchen & Bath. In outdoor or utility areas, GE Pro Seal Max Window & Door is a better fit. You may also need compression fittings for temporary repairs, especially in hard-to-reach areas or emergencies. While homeowners commonly apply sealant with a gloved finger, consider getting a smoother application with GE’s Sealant Smoothing Tool or Cartridge Opener and Smoothing Tool.

Learn more about choosing the right silicone sealant for your DIY home repairs.

Step-by-step: how to seal a leaking pipe

  1. Clean the pipe thoroughly Before applying any sealant, remove dirt, rust, old tape, or debris. Use a clean rag and a wire brush to scrub the area. A smooth, dry surface helps sealants adhere to the pipe.
  2. Choose the right transition fitting If you’re connecting copper to PVC or replacing a leaking joint, ensure to use a specialty transition fitting designed for dissimilar materials. Copper and PVC expand at different rates and have incompatible chemical properties; a standard fitting won’t hold reliably over time. Use a male-threaded PVC adapter approved for copper connections, and confirm it matches your pipe size and is pressure-rated for household plumbing. Failing to use the right transition can lead to leaks or premature joint failure.
  3. Wrap with PTFE tape or Apply Pipe thread Sealant

    Use high-quality PTFE thread-sealing tape only on threaded connections and not on joints intended for soldering. Wrap the tape around the male threads 6 to 10 times in the direction of the threading to prevent unwrapping during tightening. Avoid using thin or inexpensive tape, which may tear or compress under pressure.Instead, choose professional-grade, thicker PTFE tape for a more secure and long-lasting seal. For soldered copper joints, skip the tape entirely and follow proper soldering procedures.

    You can also apply pipe dope over the threads on its own or in combination with tape. The combination of tape and dope provides both coverage and flexibility under pressure. For pipes leading to drinking water outlets, you must use an NSF-certified sealant approved for potable water.

  4. Don’t overtighten Tighten the joint with an adjustable wrench just until snug. PVC is softer than metal and can crack if overtightened. Let the sealants do the work, not brute force.
  5. Use schedule 40 PVC unless otherwise needed Schedule 40 PVC is sufficient for most residential water lines and easier to work with than schedule 80. Unless you’re sealing a high-pressure or commercial line, schedule 40 is the standard.
  6. Thread the pipes together carefully First, line up the male and female fittings and hand-tighten. Make sure the threads catch evenly—cross-threading can ruin the joint and lead to future leaks.
  7. Let sealants cure Follow the manufacturer’s instructions for cure time. Many sealants are set in 30 minutes, but a full cure may take longer depending on temperature and humidity. Don’t pressure-test the line until the seal is fully set.
  8. Pressurize and check for leaks Once cured, slowly turn the water back on and inspect the area. Look for dripping, seepage, or movement in the joint. If dry after a few minutes under pressure, your seal is likely good.
  9. Consider temporary or backup solutions If you’re short on time or need a stopgap fix, epoxy putty, mechanical pipe clamps, or push fittings can provide a fast, tool-free seal—just make sure to monitor the area regularly.

When to use epoxy putty or compression couplings

Epoxy putty and compression couplings are useful when you need a quick or low-tool solution. Epoxy putty works well for sealing pinhole leaks or hairline cracks, especially in hard-to-reach areas or when shutting off the water isn’t practical. It molds around the pipe and hardens in place, creating a waterproof barrier.

Push fittings are ideal for joining copper, CPVC, or PEX pipes without soldering or gluing. They’re especially helpful for emergency fixes or temporary repairs. Both options can hold up well but should be checked regularly and are not substitutes for addressing major pipe damage.

When to call a plumber

Call a licensed plumber if the leak is anything more than a slow drip, the pipe is cracked or corroded through, or repairs have failed in the past. Professional help is also necessary for high-pressure lines, gas pipes, or leaks inside walls or foundations. If you see signs of water damage, mold, or structural wear near the pipe, don’t risk a temporary fix. A plumber can assess the full extent of the issue and recommend a lasting solution.

To get GE Sealants’ products for your home improvement project, visit these fine retailers in the U.S. or Canada.
A single crack in your tub’s seal can lead to rot, mold, and full bathroom teardown What happens if you don’t reseal your bathtub?

Note: This DIY article is provided as a general guide only and is not intended to take the place of product-specific installation procedures; always follow applicable manufacturers’ instructions. Depending on your home’s age and condition, location within the home, and other potential factors, repairs and/or upgrades or other services may be necessary prior to the beginning and/or completion of your project that may involve the services of a home improvement professional. This article does not include advice pertaining to local building codes and/or any related inspections.

When a bathtub seal fails, water moves into drywall, behind tile, and under flooring. Because it hides, most damage grows unnoticed until your grout’s popping or your trim is swelling. This guide breaks down what your bathtub silicone sealant is protecting, how fast water damage escalates, and how to stop it early, with a simple reseal and the right GE sealant.

Just 1/8″ of missing sealant around your tub can allow enough water to grow mold in the drywall within 72 hours.

The seal around your bathtub is your first line of defense

The seal around your tub may be small, but it’s your first barrier against water reaching drywall, insulation, and subflooring.

To reseal your bathtub means removing the old, deteriorated sealant completely using a sealant removal tool or utility blade and then applying a fresh, continuous bead of waterproof sealant along every exposed joint where your tub meets the wall, tile, or trim.

A quality bathtub silicone sealant has to do three things:

  • Flex with movement and tub usage
  • Adhere to slick, nonporous surfaces like tile, glass, and fiberglass
  • Completely block water out, even in steamy conditions

If your sealant can’t do all three, it won’t last long in a bathroom. That’s why acrylic caulks fall short because they shrink, crack, and trap moisture.

We’ll break down how GE Supreme Silicone Kitchen & Bath and GE Pro Seal Max Kitchen & Bath each fit different use cases later in this guide, so you can match the right sealant to your bathroom’s demands.

Cracked vs. resealed bathtub corner demonstrating water protection.
Tub corner with visible cracking, next to the same corner resealed cleanly.

Early warning signs your sealant has failed

Most bathroom water damage doesn’t start with a flood. It starts with a failed seal you didn’t notice. If that thin bead around your tub is cracked, pulling away, or holding moisture, water is already looking for a way in. Spot these early signs, and you can reseal your bathtub before damage spreads to drywall, tile, or subfloor.

Five ways to tell your tub needs resealing

1. Sealant that looks cloudy or harbors mold inside: Clear silicone that darkens or grows mold from within (even after cleaning) has been breached.

2. Gaps or pulling away at the tub-to-wall joint: Shrinkage or separation, even a millimeter-wide, can direct water behind the wallboard.

3. Musty odors at the base of the tub or trim: Persistent damp smells are signs of trapped water and early mold activity.

4. Bubbling paint, soft drywall, or flaking grout nearby: These cosmetic issues often mark where moisture is degrading internal materials.

5. Brittle, dry, or cracking caulk texture: Try the press-and-pull test—if it flakes, it’s past its lifespan and no longer protecting.

If you see any of these signs, it’s time to reseal your bathtub with a high-performance bathtub silicone sealant. Early action helps prevent long-term bathroom water damage and saves you from costly repairs.

What happens after a failed seal: from a hairline crack to system failure

In a failed bathtub seal, water follows gravity, bypassing your bathtub silicone sealant and infiltrating everything beneath.

What starts as a small gap can spiral into tile damage, air quality issues, and full subfloor replacement in just weeks.

Week 1-2: Water gets in

  • Micro-gaps let water bypass your sealant. Even a millimeter-wide separation allows moisture to slip behind tile or trim, especially when sealant has dried out or pulled away from the surface.
  • Dark spots form under clear silicone caulk. Discoloration signals that moisture has been trapped long enough to support early-stage mold bloom.
  • Mold colonizes grout lines and wall cavities. Without airflow or light, mold spreads behind baseboards, tile, and joints—far beyond what you can see or clean.

Most mold-related bathroom water damage isn’t covered by insurance making prevention a must.

Bathtub sealant showing mold and cracking
Black mold hidden behind panel in the bathroom

Week 3-4: Hidden damage gains momentum

  • Grout weakens and begins to flake. Soaked seams lose their bond, crumble under pressure, and open up new leak paths.
  • Insulation and framing start retaining moisture. Wet insulation loses its R-value. Swollen framing feeds mold and slowly degrades wall integrity.
  • Indoor air quality worsens. Mold spores begin circulating through HVAC returns and vents, triggering respiratory symptoms or allergic responses.

Month 2-3: Your structure pays the price

  • Subfloors absorb and hold moisture. Waterlogged OSB or plywood below the tub swells, softens, and begins to rot, compromising everything above.
  • Tiles loosen as the backer board deteriorates. The substrate loses strength, causing tiles to crack, shift, or fully detach from the wall or floor.
  • Damage spreads beyond the tub zone. On second floors, ceiling stains and sagging drywall below often signal a failing subfloor. Trim lifts, paint bubbles, and materials separate at the seams.
  • Repairs multiply quickly. What could’ve been fixed with a high-performance bathtub silicone sealant now demands tear-out, retiling, and structural repair.

That’s why we recommend resealing with GE Supreme Silicone Kitchen & Bath—a mold-resistant, Class 50 flexible bathroom sealant engineered for permanent water contact and daily expansion stress.

You don’t need a remodel to stop bathroom water damage. Most reseals take under an hour, and when done right, they deliver lasting protection with minimal cost.

Which bathtub silicone sealant protects best against bathroom water damage?

Not all bathroom sealants are built for the wettest zones. Whether your joint meets bare tile or painted trim, GE has two proven performers, each engineered to deliver watertight protection.

GE Supreme Silicone Kitchen & Bath

Our highest-performance formula for unpainted, high-moisture areas like tubs, showers, and backsplashes:

  • 100% waterproof silicone sealant
  • ASTM C920 Class 50: industry-best joint flexibility
  • Water-ready in just 30 minutes
  • Mold-free protection backed by a lifetime guarantee
  • Available in clear, almond, and white
  • Not paintable—ideal for tile, glass, acrylic, and fiberglass

GE Pro Seal Max Kitchen & Bath

A paintable hybrid powered by advanced SMP technology:

  • Silane-Modified Polymer formula for superior flexibility
  • Paintable in 1 hour, water-ready immediately
  • Class 35 (White) and Class 25 (Clear) flexibility ratings
  • Ideal where tubs meet painted baseboards or trim

Note that paintable doesn’t mean water-vulnerable. GE Pro Seal Max resists cracking, shrinking, and mold where acrylic caulks fail, especially in wet corners and high-humidity zones.

A tube of GE Supreme Silicone Kitchen & Bath or GE Pro Seal Max Kitchen & Bath costs less than replacing damaged subflooring or tile and helps prevent major bathroom water damage before it starts.

Find GE silicone sealants at a store near you in the U.S. or Canada.

Equip your toolbox with GE’s pro-grade line of sealants for contractors to get durable results that meet your standards The best silicone sealants for contractors: what you need in your toolbox

Contractors need sealants that perform under pressure—on every surface, in any condition. From high-moisture interiors to harsh exterior environments, the right silicone sealant ensures lasting results and fewer callbacks. This guide introduces the best silicone sealants for contractors from GE—built for the jobsite, tested for performance.

Key qualities contractors need in sealants

Professional-grade results start with choosing a sealant to meet the demands of tough job site conditions. Contractors need products offering:

  • Long-term durability
  • Quick readiness
  • Broad surface compatibility
  • High flexibility for areas prone to movement or temperature shifts

Strong adhesion also ensures reliable bonding to substrates like concrete, tile, glass, and metal. Water resistance, mold protection, and the ability to maintain integrity in extreme temperatures are also must-haves.

Speed matters too—fast curing times allow for efficient workflows and fewer return visits. Products with low odor and easy tooling support indoor applications and tight timelines. The visual finish also plays a role. Smooth, paintable—when needed—or color-matched sealants help deliver a clean, professional appearance.

In short, the best silicone sealants for contractors strike a balance between performance, workability, and reliability. GE’s advanced formulations in the Pro Seal Max series are engineered with these priorities in mind, making them a practical choice across a range of building and remodeling jobs.

Professional-grade results start with choosing a sealant to meet the demands of tough job site conditions. Contractors need products offering long-term durability, quick readiness, and high flexibility.

GE Pro Seal Max: Kitchen & Bath and Window & Door

GE Pro Seal Max Kitchen & Bath.

GE Pro Seal Max Kitchen & Bath is engineered for demanding wet-area applications where moisture, movement, and mold are constant threats. This sealant offers strong adhesion to nonporous surfaces like tile, porcelain, glass, metal, and laminate—ideal for high-use environments like bathrooms, kitchens, and utility rooms. It provides long-term performance with lifetime mold-free product protection, making it a go-to for contractors working in health-sensitive or high-humidity spaces.

Water-ready in just 30 minutes, Pro Seal Max reduces downtime on jobs where fast turnaround matters. It’s also Class 50 flexible—meaning it can stretch or compress up to 50% of its original joint width—which helps it stay intact around fixtures, trim, and joints subject to expansion and contraction.

The sealant is low odor, easy to apply, and comes in both clear and white finishes to suit a range of installations. Whether you’re sealing a new undermount sink or replacing aging caulk in a commercial bath, this product delivers reliable, professional-grade results built to last in wet zones.

GE Pro Seal Max Window & Door excels in tough exterior applications where flexibility, adhesion, and weatherproofing are critical. This sealant forms a durable, watertight barrier around windows, doors, siding, trim, and other exterior penetrations—making it a go-to product for contractors tackling residential or light commercial work.

It’s similarly rated for Class 50 movement, making it ideal for sealing joints and gaps exposed to seasonal temperature shifts, wind, and UV rays. GE Pro Seal Max Window & Door adheres to wood, vinyl, aluminum, glass, fiber cement, and composite materials—offering versatility across a range of exterior finishes.

Unlike many hybrid or acrylic alternatives, it remains permanently flexible, won’t shrink, and is water-ready in just 30 minutes. Its advanced formula also includes lifetime mold-free product protection, making it a reliable choice for high-humidity or damp climates.

With low-odor varieties in both clear and white, GE Pro Seal Max Window & Door blends well with most common exterior color schemes. For pros who need long-term performance with minimal maintenance, this exceptional sealant for contractors delivers reliable results on the first pass.

100% silicone sealants

GE All Purpose Silicone.

GE All Purpose Silicone is a versatile, pro-trusted sealant for contractors designed for general interior and exterior applications. It’s a toolbox must for contractors who need one reliable product to handle a wide variety of sealing tasks—from kitchens and bathrooms to siding, trim, and utility penetrations.

This 100% silicone formula offers permanent weatherproofing and remains flexible after curing, so it won’t shrink, crack, or degrade over time. It adheres well to nonporous materials like metal, glass, ceramic, laminate, and plastic, and also performs reliably on surfaces like vinyl, wood, and composite.

GE All Purpose Silicone is water-ready in 30 minutes and mold-resistant, making it suitable for damp areas or outdoor environments with shifting temperatures. The equally low-odor formula is easy to apply and clean up, and it’s available in both clear and white finishes to match most surfaces.

For specialty applications that require higher stretch and movement capability, consider keeping GE’s Advanced Silicone Kitchen & Bath and Advanced Silicone 2 Window & Door on hand. They are 100% silicone and rated for ±35% joint movement, making them a strong choice for sealing around kitchen and bathroom water fixtures and windows and doors with high moisture exposure.

For day-to-day sealing work that demands consistency, GE All Purpose Silicone is a durable, dependable addition to any contractor’s toolkit. Of course, no contractor’s sealant kit is complete without the tools to apply and remove it. For sealing jobs of all varieties, GE’s Sealant Smoothing Tool and Sealant Remover Tool will keep you ready for what the day demands.

Choosing the right sealant for the job

Contractors know that no two sealing jobs are exactly alike—what works for a kitchen backsplash won’t hold up to outdoor expansion joints or utility penetrations. That’s why pros keep multiple sealant formulas on hand, each tailored to different conditions. For example, GE Pro Seal Max Kitchen & Bath is ideal for sinks, tubs, and shower trim thanks to its mold protection and wet-area durability. Pro Seal Max Window & Door is built for weather exposure and movement, making it the go-to for exterior joints, window framing, and siding connections. For everything else—general interior or exterior applications—GE All Purpose Silicone provides a flexible, weatherproof seal that covers gaps around baseboards, vents, and utility lines.

To get GE Sealants’ products for your home improvement project, visit these fine retailers in the U.S. or Canada.
Learn what makes a sealant truly pro-grade—and why it pays to use the best Comparing pro-grade sealants: what really makes one better than another?

Not all sealants are created equal—especially when long-term performance is on the line. For professional contractors, selecting a pro-grade sealant can mean fewer callbacks, faster turnaround, and a cleaner finish that holds up under real-world conditions. This guide explains what sets premium options like GE’s Pro Seal Max series apart, from superior adhesion and flexibility to mold resistance and curing speed.

What defines a pro-grade sealant?

Pro-grade sealants are formulated to meet the performance demands of professional contractors who rely on durability, adhesion, and ease of use to achieve high project quality and customer satisfaction. Unlike consumer-grade products, these sealants are designed for high-stress environments, offering better long-term resistance to moisture, UV exposure, and temperature extremes. One of the key differentiators is flexibility, typically rated by ASTM International Class standards.

Professional-grade sealants also deliver faster cure times and superior mold resistance, minimizing downtime and ensuring a cleaner, healthier finish in kitchens, baths, and outdoor installations. They’re formulated to adhere strongly to a wide range of materials, including tile, glass, metal, and nonporous surfaces, reducing the need for surface priming.

Pro-grade sealants are formulated to meet the performance demands of professional contractors who rely on durability, adhesion, and ease of use to achieve high project quality and customer satisfaction. Unlike consumer-grade products, these sealants are designed for high-stress environments, offering better long-term resistance to moisture, UV exposure, and temperature extremes.

Adhesion strength and surface compatibility

A photo of GE Pro Seal Max Window & Door.
GE Pro Seal Max Window & Door.

A pro-grade sealant must form a strong, lasting bond to a wide variety of substrates, even in challenging environments. Adhesion strength determines how well the sealant sticks to surfaces such as tile, glass, metal, plastic, wood, and masonry. In the field, that versatility matters—contractors don’t have time to switch products for every surface type. Pro-grade sealants like GE Pro Seal Max Window & Door are formulated to deliver excellent adhesion to both porous and nonporous materials without the need for a primer.

Surface compatibility also ensures the sealant doesn’t stain, degrade, or separate from common construction materials over time. This is particularly important in wet zones where sealants must resist constant moisture, such as kitchens, baths, and exterior joints. A high-performing sealant needs to maintain adhesion through temperature swings, surface movement, and cleaning routines. Products meeting ASTM C920 (Class 50 or higher) offer proven flexibility and adhesion that professionals can rely on for long-term jobs.

Flexibility and joint movement

In dynamic environments, joints expand and contract due to thermal shifts, humidity changes, and structural movement. A pro-grade sealant must be able to move with the materials it’s bonded to without cracking or pulling away. Flexibility is typically rated by ASTM C920 classifications—Class 25, 35, or 50—indicating the percentage of movement a sealant can handle. GE Pro Seal Max Window & Door, for example, offers Class 50 flexibility, meaning it can stretch or compress up to 50% of the joint width and still maintain a watertight seal.

This level of performance is essential in kitchens, bathrooms, windows, doors, and exteriors where movement or moisture is expected. Lower-grade acrylic caulks may harden or crack over time, especially in high-moisture or temperature-variable areas. As for acrylic caulk vs silicone, most acrylic caulks have an ASTM rating of only 12.5. Silicone sealants with a Class 50 rating stay permanently flexible, adapting to joint movement while preserving adhesion. For contractors, choosing a sealant with high flexibility ensures fewer callbacks, longer-lasting installs, and better performance across a wider range of applications.

Moisture resistance and mold defense

In high-humidity environments like kitchens, baths, and exteriors, moisture defense sets pro-grade sealants apart from the competition. A 100% silicone pro-grade sealant should always be your first choice for such areas. These sealants are designed to resist mold and mildew growth, even after years of exposure to water and cleaning agents. GE Pro Seal Max Kitchen & Bath, for instance, offers lifetime mold-free product protection, making it ideal for areas where health standards and aesthetics are non-negotiable.

Cheaper acrylic-based options may initially resist moisture, but they often break down over time, allowing water to intrude and mold to develop beneath the surface. However, silicone sealants create a watertight bond that remains intact even under frequent cleaning and repeated wetting. For professionals working in code-sensitive or client-facing installations, selecting a sealant with proven mold resistance is part of delivering a durable, hygienic, and low-maintenance final product.

Curing time and workability

Pro-grade sealants like GE’s Pro Seal Max series are water-ready in just 30 minutes, reducing delays and allowing faster project turnover—especially in high-traffic or multi-phase builds. This quick set time doesn’t compromise long-term performance, offering both speed and durability in one product.

A photo of GE’s Sealant Smoothing Tool.
GE’s Sealant Smoothing Tool.

Workability also matters, particularly when sealing complex or vertical joints. Pro-grade silicone sealants typically have a smoother flow and better tooling characteristics—especially when applied with GE’s Sealant Smoothing Tool—allowing clean beads and precise finishes. They’re less prone to sagging or dragging, even in warm conditions. In contrast, lower-tier products may cure too slowly or lack the viscosity needed for a clean application, increasing cleanup. For professionals balancing quality with deadlines, using a sealant that cures quickly and applies smoothly is essential to staying on schedule while maintaining high standards.

Pro Seal Max series vs the other guys: product snapshot

What sets the GE Pro Seal Max series of sealants apart from other pro-grade sealants is real-world consistency across specialized formulations. Both Kitchen & Bath and Window & Door versions are engineered for professional use, but each is optimized for distinct environments. The Kitchen & Bath formula is designed to bond tightly to glossy surfaces like porcelain and glass without losing adhesion to wet substrates—ideal for sink perimeters and shower trim. Window & Door, on the other hand, excels in temperature extremes and is resistant to UV exposure, making it reliable for seasonal movement in outdoor joints.

Contractors also benefit from formulation consistency across both lines. Whether you’re working in high-humidity bathrooms or sealing exterior trim in freezing conditions, Pro Seal Max behaves predictably from tube to tube, minimizing callbacks. Cheaper alternatives often fail at the margin—pulling away from substrates, discoloring, or breaking down under cleaners or weather. Pro Seal Max, by contrast, gives pros a high-performance silicone option that meets the varying demands of different job types without compromising application quality or curing reliability.

To get GE Sealants’ products for your home improvement project, visit these fine retailers in the U.S. or Canada.
Protect your kitchen against water damage, mold, and mildew by using proper sealing techniques 8 important places to use silicone sealant in the kitchen

Note: This DIY article is provided as a general guide only and is not intended to take the place of product-specific installation procedures; always follow applicable manufacturers’ instructions. Depending on your home’s age and condition, location within the home, and other potential factors, repairs and/or upgrades or other services may be necessary prior to the beginning and/or completion of your project that may involve the services of a home improvement professional. This article does not include advice pertaining to local building codes and/or any related inspections.

Whether you’re installing a brand-new kitchen or making some much-needed updates, sealing certain areas properly is a critical step in preserving your hard work. Water damage, mold growth, and grime buildup can all result from unsealed or poorly sealed surfaces. That’s why understanding the most important places to use silicone sealant in the kitchen is a must for every homeowner.

Be sure to use kitchen-grade silicone sealant (often labeled as mildew-resistant or kitchen and bath formula) for the best results.

Why use silicone sealant in the kitchen?

Silicone sealant is both waterproof and flexible, making it an ideal choice for the kitchen. Compared to other types of caulk, silicone sealant for kitchen projects offers superior adhesion and long-lasting protection around moisture-prone areas. Just be sure to use kitchen-grade silicone sealant (often labeled as mildew-resistant or kitchen and bath formula) for the best results.

8 important places to use silicone sealant in the kitchen

Here are the eight most important places to use silicone sealant in the kitchen, whether you’re doing a significant renovation or looking for a quick kitchen refresh.

1. Around the sink installation

Arguably, the most critical place to seal in your kitchen is around the sink. This includes the outer edge where the sink meets the countertop (for drop-in models) or the seam beneath the counter (for under-mount sinks). Don’t forget to seal around accessories like soap dispensers or filtered water taps.

Water splashes and spills are unavoidable at the sink, and even the smallest gap can let water seep underneath. Over time, this moisture can damage cabinetry, encourage mold growth, and lead to warped countertops or swelling wood.

2. Where the faucet meets the countertop

While it may not seem like an obvious area to seal, applying silicone sealant around the base of the kitchen faucet is a small task that provides significant benefits. Faucets typically come with a gasket, but this alone doesn’t always create a perfect seal.

Water can collect around the faucet base, slowly leaking into the countertop and the cabinet below. This moisture may go unnoticed for a while, but it can damage particleboard, cause musty odors, and even lead to mold problems.

3. Countertop to backsplash joint

This is one of the most frequently overlooked, yet essential, locations when sealing a kitchen. The seam where the backsplash meets the countertop tends to trap food splatters, grease, and water from cleaning or cooking.

An unsealed joint allows moisture to seep behind the backsplash, potentially loosening tiles or damaging drywall. Sealing this gap with kitchen-grade silicone caulk protects the wall while giving your backsplash a clean, finished appearance.

4. Countertop seams

Larger countertops are typically installed in sections, meaning seams are inevitable. This is especially common with laminate, stone, and some other materials. If left unsealed, these tiny seams can collect dirt, crumbs, and moisture. They’re also prone to bacterial buildup. Over time, even invisible cracks can harbor mold or food residue. Sealing with silicone sealant makes cleanup easier and keeps your countertops looking seamless.

5. Backsplash edges and corners

You may have sealed the bottom of your backsplash, but don’t forget the edges and corners. Backsplash sealing is essential because these areas are prone to water splashes, particularly near the stove or sink, and can be challenging to clean. Over time, water and cooking residue can sneak behind the tiles at the edges and in vertical corners. This can loosen adhesive or cause staining on the walls.

Kitchen backsplash seam by a sink, showing where to seal.
Image of a kitchen backsplash seam getting sealed near a sink.

6. Under-mount sink lip

For kitchens with an undermount sink, sealing beneath the lip is crucial. Since these sinks are mounted below the countertop, there’s a narrow gap between the sink and the underside of the counter surface. Water and soap suds from dishwashing can collect in this seam and seep down into the cabinet below. This could compromise the adhesive holding the sink or even damage the countertop.

7. Around appliances

While not always necessary, sealing between the edge of a countertop and nearby appliances (such as a range or dishwasher) can help create a clean look and block crumbs and liquids from falling into hard-to-reach gaps. Plus, they’re breeding grounds for food debris and grease buildup. If your appliance doesn’t need to be moved often, sealing these gaps can help maintain a cleaner kitchen.

8. Around the base of the kitchen island or cabinets

If your cabinets or island sit on a tile or hardwood floor, applying a bead of silicone sealant along the base adds protection. Spills, mopping water, and food debris can easily get underneath unsealed cabinet bases. Once moisture seeps under the cabinets, it isn’t easy to dry and clean. This can lead to swelling, warping, or mildew on the cabinet baseboards or flooring.

Kitchen caulking tips for a professional-looking finish

Now that you know where to seal in the kitchen, the product you choose matters just as much as the application. If you’re looking for a solution that combines strength, flexibility, and ease of use, GE Pro Seal Max Kitchen & Bath is a top-tier option worth having in your toolkit.

This 100% waterproof sealant blends the best of both worlds: the long-lasting performance of silicone sealant with the smooth application and paintability of acrylic latex. That means you get a tough, mold-resistant seal in moisture-prone areas without sacrificing the ability to match your finishes or decor.

Alternatively, if you’re looking for a 100% silicone sealant, the GE Supreme Silicone Kitchen & Bath is another fantastic choice. It offers strong adhesion and moisture protection to ensure a tight seal that lasts. Since it’s not paintable, it comes in a variety of colors to complement your kitchen décor.

Here’s why both of these options are great:

  • Mold and mildew resistant for cleaner, longer-lasting results
  • Flexible so they won’t crack, shrink, or break down over time
  • Backed by a lifetime guarantee for added peace of mind
Image of someone applying silicone sealant in the kitchen.
A person applying silicone sealant in the kitchen.

Kitchen caulking tips for a professional-looking finish

Whether you’re a seasoned DIYer or this is your first time tackling a home project like this, it’s essential to make sure the job goes smoothly. Here are a few kitchen caulking tips to keep in mind:

  • Use the GE Cartridge Opener and Smoothing Tool to easily open cartridges and squeeze tubes with one end and smooth sealant beads with the other.
  • Apply painter’s tape on either side of a joint for crisp edges when applying silicone sealant.
  • Don’t rush the process. Take your time to achieve a professional application.
  • Allow at least 24 hours for the area to cure fully before exposing it to water.

By implementing these tips, you’re sure to get a sealant application you’ll be proud of.

Looking for the best silicone sealant for your next project? Locate a store near you in the U.S. or Canada.

Sealing kitchen windows and trim protects your home from moisture, drafts, and pests Best practices for sealing kitchen windows and trim

Note: This DIY article is provided as a general guide only and is not intended to take the place of product-specific installation procedures; always follow applicable manufacturers’ instructions. Depending on your home’s age and condition, location within the home, and other potential factors, repairs and/or upgrades or other services may be necessary prior to the beginning and/or completion of your project that may involve the services of a home improvement professional. This article does not include advice pertaining to local building codes and/or any related inspections.

Properly sealing kitchen windows and trim is one of the most crucial yet often overlooked steps in maintaining an energy-efficient and moisture-resistant kitchen. Windows are common entry points for drafts, water, and even pests, especially in kitchens where humidity and temperature fluctuations are frequent. Whether you’re renovating, replacing old windows, or just performing seasonal maintenance, this window caulking guide shares all the basics.

Sealing isn’t a one-and-done job. To maintain the benefits, inspect your kitchen window sealant annually. Seasonal changes, temperature fluctuations, and everyday wear and tear can weaken the seal.

Why sealing kitchen windows matters

Kitchens generate more moisture than many other rooms, primarily due to cooking, dishwashing, and inadequate ventilation. If your kitchen window sealant is cracked, missing, or improperly applied, it can lead to:

  • Moisture damage to window frames and nearby trim
  • Mold and mildew growth
  • Drafts that increase energy bills
  • Pest entry points
  • Reduced overall comfort in the kitchen

In addition to protection, proper sealing also enhances the overall appearance of your kitchen. Clean, well-caulked window frames and trim give your space a polished, finished look by eliminating unsightly gaps, rough edges, or old, discolored caulk that can distract from your kitchen’s design.

Window caulking guide: sealing kitchen windows and trim

Picture of a kitchen window where kitchen window sealant has been applied.

To ensure you’re successfully applying kitchen window sealant, follow this step-by-step guide.

1. Inspect the window frame and trim

Begin by taking a close look at the window and the surrounding trim. Look for cracked or brittle old sealant, dark spots from moisture, or gaps where the trim has separated from the wall. Run your hand along the edges to feel for drafts.

Even if nothing appears wrong visually, drafts and moisture penetration can still be present. Use a flashlight to inspect corners and look for signs of rot or mildew. Mark any problem areas so you can target them during the sealing process.

2. Remove old sealant

Before applying the new sealant, the old material must be removed entirely to ensure proper adhesion. Use a caulk removal tool to pry away the existing bead of caulk or sealant gently. The GE Sealant Removal Tool is perfect for this, allowing you to remove all types of sealant without damage.

This step may take time, especially if the old sealant is stubborn or brittle. After scraping it off, wipe the surface down with a mild cleanser to remove any residue. Ensure all particles and grime are removed before proceeding. Let the area dry thoroughly to ensure a clean, moisture-free surface.

3. Choose the proper sealant for the job

Your choice of sealant is critical. For kitchen environments where moisture is present and aesthetics are essential, we recommend GE Pro Seal Max Kitchen & Bath. This hybrid formula combines the superior durability of silicone sealant with the flexibility and paintability of acrylic latex. If you need to paint over the sealed area to ensure it complements your kitchen aesthetics, this is the ideal sealant.

GE Pro Seal Max Kitchen & Bath is waterproof, mildew-resistant, and ideal for sealing kitchen windows and trim. It bonds securely to a wide variety of materials, including wood, metal, drywall, tile, and more. This product ensures long-lasting protection while maintaining a clean finish that blends seamlessly into your décor. It’s also backed by a lifetime guarantee, giving DIYers peace of mind.

If paintability isn’t an essential feature for you and you’re more focused on moisture protection, we’d recommend a 100% silicone product. The GE Supreme Silicone Window & Door Sealant is a great choice, offering weatherproof protection that’s 100% more flexible than Class 25 sealants. It’s also shrink and crack-proof and has lifetime mold-free protection.

4. Apply painter’s tape for clean lines

Painter’s tape may seem like an extra step, but it creates a clean, professional look and prevents mess. Apply the tape along both sides of the seams you intend to seal. This includes the edge of the trim and the meeting point between the wall and the window frame.

Make sure the tape is pressed down firmly to prevent seepage under the edges. Leave a small gap for the sealant to fill. This barrier will help guide your bead and keep excess sealant off surrounding surfaces, saving time during cleanup.

Person applying kitchen window sealant around a kitchen window.

5. Apply the sealant

Load your kitchen window sealant into a caulking gun and cut the nozzle to the desired size. The GE Cartridge Opener and Smoothing Tool makes opening cartridges and squeeze tubes a breeze.

Start in one corner and apply a smooth, steady bead along the joint. Maintain consistent pressure and pace to achieve an even application. Fill the entire gap in one pass if possible. Once applied, use the GE Sealant Smoothing Tool or a wet fingertip to smooth the bead. This not only improves the appearance but ensures the sealant is fully pressed into the gap for optimal performance. Immediately remove the painter’s tape while the sealant is still wet to avoid peeling or jagged lines.

6. Don’t forget the trim

While most people focus on sealing the window itself, sealing trim in the kitchen is equally important. Look for gaps where the trim meets the wall, counter, or backsplash. These joints can collect moisture, which can eventually lead to damage or mold.

Apply a bead of silicone caulk or hybrid sealant to these edges, again using painter’s tape to guide your application if needed. Smooth the bead with the GE Sealant Smoothing Tool or a wet fingertip for a seamless look. Don’t neglect the bottom of the trim, especially if it’s close to the sink or a food prep area, where water and spills are more frequent.

7. Paint, if needed

If your trim or wall is painted, you’ll likely want to paint over the sealant once it cures. GE Pro Seal Max Kitchen & Bath’s hybrid formula is paintable, making it easy to achieve a uniform finish with the rest of your space when sealing kitchen windows.

Allow the sealant to fully cure (usually 24 hours, but check the label) before applying paint. Use a quality primer and topcoat to match the surrounding surfaces. Painting not only enhances the look but also adds an extra layer of protection to the sealed area.

8. Perform regular maintenance

Sealing isn’t a one-and-done job. To maintain the benefits, inspect your kitchen window sealant annually. Seasonal changes, temperature fluctuations, and everyday wear and tear can weaken the seal.

If you notice any cracks, gaps, or discoloration, remove the compromised sealant and reapply. Keeping a tube of GE Pro Seal Max Kitchen & Bath on hand ensures you’re always prepared for quick touch-ups. Routine maintenance extends the life of your windows and trim, prevents costly damage, and keeps your kitchen energy-efficient year-round.

FAQ

How often should I reseal kitchen windows?

You typically don’t need to reseal unless the existing seal is damaged. Check every few years for signs like cracks, peeling, or drafts, and reseal only if needed—many of our sealants are designed to last and even come with lifetime guarantees.

Can I use regular caulk for the kitchen window trim?

For best results, use a waterproof, mildew-resistant product, such as GE Supreme Silicone Window & Door Sealant, especially in areas prone to moisture.

What if I need to paint over the sealant? 

Use a paintable hybrid like GE Pro Seal Max Kitchen & Bath. Always let it fully cure before painting.

Do I need to seal both inside and outside the window?

Yes, outside sealing keeps out rain and wind, while inside sealing helps control moisture and air. We created a guide on how to seal exterior window trim if you’d like more information.

Looking for the best silicone sealant for your next project? Locate a store near you in the U.S. or Canada.

A clean, well-shaped bead helps keep water and mold out of bathroom joints An expert guide to mastering bathroom caulking in one weekend

Note: This DIY article is provided as a general guide only and is not intended to take the place of product-specific installation procedures; always follow applicable manufacturers’ instructions. Depending on your home’s age and condition, location within the home, and other potential factors, repairs and/or upgrades or other services may be necessary prior to the beginning and/or completion of your project that may involve the services of a home improvement professional. This article does not include advice pertaining to local building codes and/or any related inspections.

Cracked or peeling caulk around tubs, showers, and sinks gives water a way into joints that are supposed to stay protected. Good bathroom caulking is a process of removal, cleaning, application, and curing, not just squeezing out a fresh bead of sealant and hoping it holds. This guide shows how to recaulk bathroom joints in one weekend and get a smoother, more durable shower and tub caulk finish.

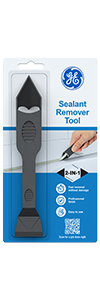
GE’s Sealant Remover Tool can help strip out old material cleanly, especially in corners and narrow joints. Additionally, GE’s Sealant Smoothing Tool is useful for finishing a clean final line in a single pass.

Why bathroom caulking fails in the first place

Bathroom caulking fails because the joints are exposed to stress every day. Steam, splashing water, and regular cleaning all put pressure on the bead, especially around tubs, showers, and sink edges. Soap residue and mildew buildup can also collect on the surface and around the edges, which makes it easier for the seal to break down over time. 

Corners and seams are especially vulnerable because those areas tend to move slightly as materials expand, contract, or flex with use. Older acrylic products and poorly applied beads usually fail faster in wet zones because they are more likely to shrink, crack, or pull away. This is why shower and tub caulk needs to be selected and applied with bathroom conditions in mind.

What to gather before you start

Before you start, get all your tools and materials within easy reach so the job stays organized from the first cut to the final pass. You will need a caulk gun, gloves, rags or paper towels, painter’s tape, isopropyl alcohol, and GE’s Sealant Remover Tool or a utility knife if the old bead is stubborn or difficult to lift cleanly. 

A photo of a homeowner applying GE’s Sealant Remover Tool.
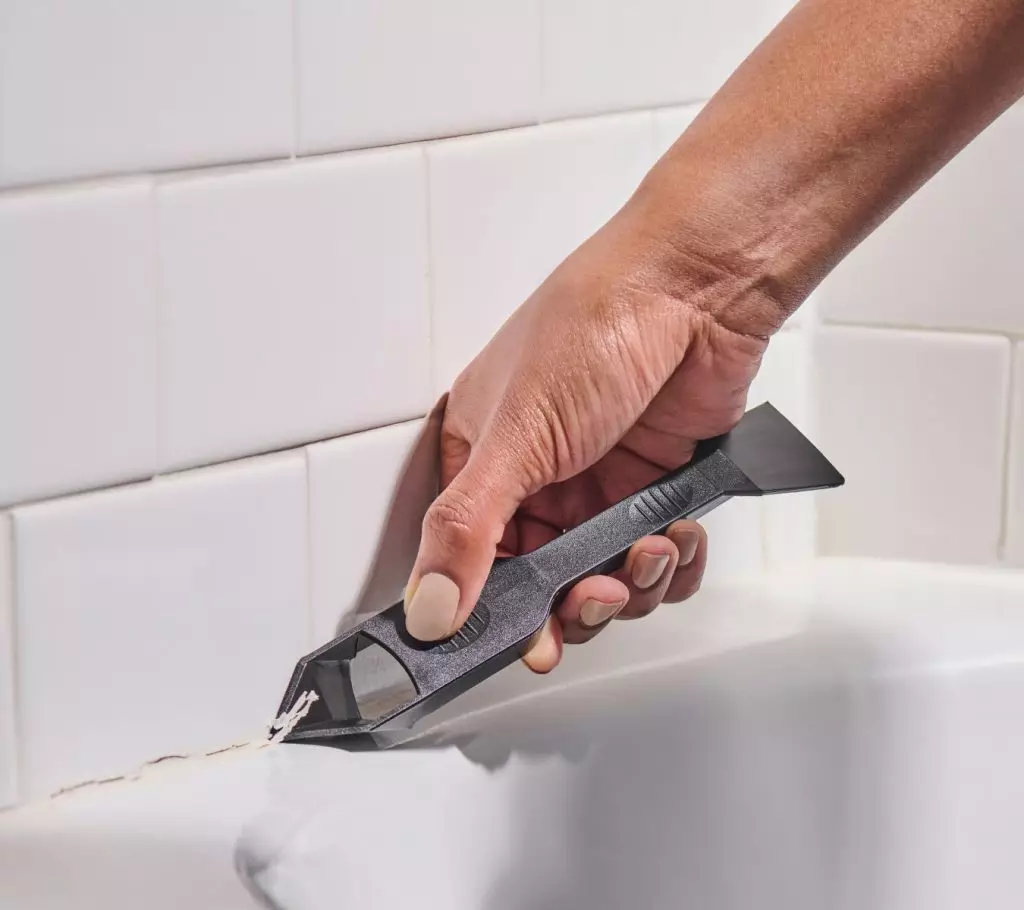
Close-up of the Sealant Remover Tool lifting old sealant.

This is also the right time to set out the tools that make removal and finishing easier. GE’s Sealant Remover Tool helps strip out old material more cleanly, especially in corners and narrow joints. Additionally, GE’s Sealant Smoothing Tool is useful for finishing a cleaner final line.

Phase 1: remove the old caulk completely

The first step in any weekend bathroom recaulking project is getting the old bead out fully, not just trimming the loose edge and hoping the rest will hold. Start by cutting or lifting the existing caulk carefully so you can pull it free without gouging the surrounding tile, tub, or fixture surface. Work slowly at corners, wall transitions, and tub or shower seams, since those are usually the tightest and most failure-prone areas.

Once the main bead is gone, go back and remove the leftover residue, too. Thin traces of old material can keep the new bead from bonding evenly. It is also the stage where soap buildup, mildew staining, and trapped grime often show up. If you stop after removing only the bulk of the bead, the job will look done before the surface is actually ready for new sealant.

Phase 2: clean and dry the joint

Once the old caulk is out, clean the joint thoroughly and let it dry fully before moving on. The new sealant will not bond well over soap film, moisture, dust, or leftover residue, so this step is not optional. Wipe the area down carefully and make sure the seam is fully dry before application. If the joint is highly visible, painter’s tape can help control the bead and keep the final line cleaner. 

Phase 3: apply new bathroom sealant

Once the joint is clean and dry, cut the nozzle to match the width of the seam you are sealing. A smaller opening usually gives you better control, especially around tubs, shower corners, sink edges, and backsplash transitions where the bead needs to stay neat and consistent. 

Load the cartridge, then apply one steady bead with even pressure from start to finish. Try not to stop and restart unless the joint changes direction sharply, because breaks in the pass can leave weak spots or uneven buildup.

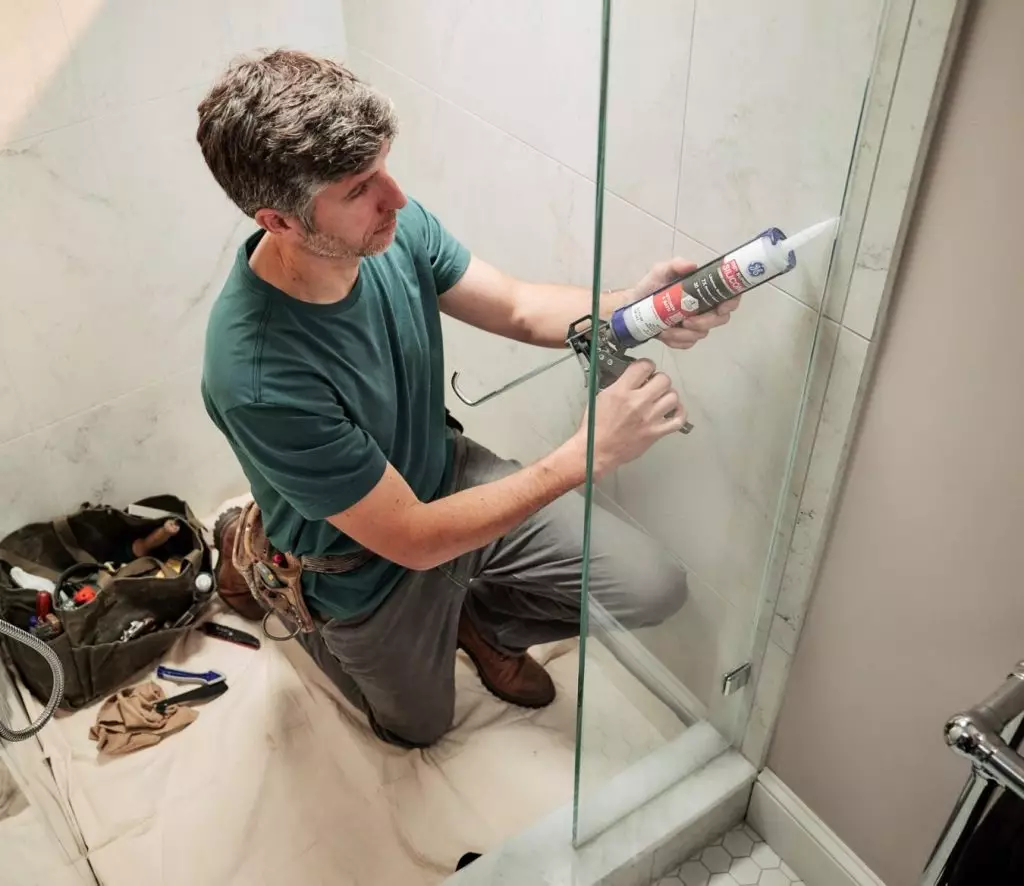
A photo of a homeowner applying GE Supreme Silicone Kitchen & Bath Sealant.
A photo of a homeowner applying GE Supreme Silicone Kitchen & Bath in a glass shower

For wet, high-humidity bathroom areas, GE Supreme Silicone Kitchen & Bath Sealant is the lead choice when you want a mold-resistant finish and a strong, long-term performance. It is especially well-suited to the joints that stay exposed to frequent moisture and movement. GE Advanced Silicone Kitchen & Bath Sealant is another strong option for common bathroom joints where you need a durable, waterproof seal around sinks, tubs, and backsplashes.

In either case, the main goal is control. Keep the bead sized to the joint, avoid overapplying material, and focus on creating one continuous line that fully bridges the seam without flooding the surrounding surfaces.

Phase 4: let the new seal cure properly

After the new sealant is in place, the main job is to protect it while it sets. This is the stage where a lot of otherwise solid bathroom caulking jobs get compromised. Do not expose the joint to shower use, splashing, wiping, or cleaning too early. Keep the area as dry and undisturbed as possible for the full cure period so the bead can develop into a stable waterproof seal. If the joint gets wet too soon, the surface may look acceptable at first, but fail earlier than expected.

What a finished bathroom caulking job should look like

A finished bead should look continuous, evenly sized, and fully seated in the joint from one end to the other. Corners should look complete, not thin or broken, and the sealant should stay confined to the seam instead of spreading broadly across the surrounding tile or fixture surface. 

This is also the right time to check for mistakes, such as pinholes, skipped sections, or places where the bead did not actually bridge the gap. A good result should look deliberate, neat, and suited to a wet bathroom environment.

To get GE Sealants products for your home improvement project, visit these fine retailers in the U.S. or Canada.

Fix gaps, block grime, and stop leaks for good 4 common kitchen problems you can fix with silicone sealant

Note: This DIY article is provided as a general guide only and is not intended to take the place of product-specific installation procedures; always follow applicable manufacturers’ instructions. Depending on your home’s age and condition, location within the home, and other potential factors, repairs and/or upgrades or other services may be necessary prior to the beginning and/or completion of your project that may involve the services of a home improvement professional. This article does not include advice pertaining to local building codes and/or any related inspections.

Leaks in kitchens don’t always show up fast. They start slow, at the sink edge, where a bead of sealant cracked. Or behind your tile, where old sealant lets steam slip through. Ignore them, and you’ll be dealing with mold, rot, and costly repairs. Catch them early; most take 30 minutes or less to fix. This DIY kitchen maintenance guide walks you through four common kitchen sealing problems and how to fix each with GE silicone sealants.

Even in low-traffic zones, unsealed joints can trap steam and lead to softening wood, mold, and costly cabinet damage. A properly applied silicone sealant stops moisture before it seeps in.

Fix a leaky sink rim with silicone sealant

You want to start with the sink. It’s the most-used surface in your kitchen and one of the first places a sealant can break down from use.

Symptom check

You have water pooling around the edge. Or there’s a dark, soft line where the sink meets the counter.

What’s going wrong?

The sealant around your sink wears out with time and use, especially in high-splash zones. Once it cracks or pulls away, water seeps in and damages the counter beneath.

Your fix

A person seals the edge of a kitchen backsplash with silicone sealant to prevent leaks.
A DIYer applying a bead of silicone sealant along the edge of a kitchen backsplash using a caulking gun.

Why it works

This GE sealant is 100% waterproof and flexes with your sink, so it won’t crack from movement or daily use. It’s mold-resistant and built for DIY kitchen maintenance that holds up in wet areas.

Stop grime trapped behind the backsplash tile

Grease and steam seep into the joint where the tile meets the wall, especially when the old sealant shrinks or pulls away. That open seam will quickly invite water, bacteria, and buildup.

Symptom check

You’re seeing a dark, cracked line at the wall-tile seam—or crumbs and gunk that keeps showing up after every wipe.

What’s going wrong?

Backslashes need a sealed joint. But over time, steam, scrubbing, and movement can break down low-grade caulk. Once the seal fails, moisture finds its way behind the tile and feeds the grime you can’t clean.

Your fix

Why it works

This GE silicone sealant for the kitchen is made for steam zones. It flexes with your wall and tile, bonds tightly to tile and drywall, and resists mold, bacteria, and yellowing. With proper prep, this seal can hold for years.

Seal countertop end gaps to block bugs and drafts with silicone sealant

Those hairline seams where your counter meets the wall do more than trap crumbs. If left open, they invite ants, cold air, and moisture—all things that don’t belong near your kitchen prep space.

Symptom check

You’re spotting ant trails along the backsplash or feeling a draft where the counter meets the wall.

What’s going wrong?

As cabinets settle or temperatures shift, fine gaps can form at the edge seams. If those joints were sealed with acrylic caulk, they likely dried out, cracked, or peeled, leaving an open path for pests and drafts.

Your fix

  • Vacuum out any dust or debris.
  • Wipe the surface dry.
  • Run a tight bead of GE Supreme Silicone Kitchen & Bath across the gap.
  • Smooth it with light pressure for a clean, pressed-in finish.

Why it works

This silicone sealant for kitchen seams flexes with seasonal movement (Class 50), seals out bugs and air, and won’t shrink or crack. Ideal for DIY kitchen maintenance, it bonds securely and stays hidden in high-use zones.

Reseal the base of your faucet to stop cabinet leaks

When the seal around your faucet base wears down, even small drips can soak the cabinet below. That’s often where that musty smell starts.

Symptom check

You’ve cleaned under the sink, but it still smells musty, or the cabinet base feels damp with no visible leak.

What’s going wrong?

The faucet base is a high-splash zone. Standard sealants often fail here—they peel or crack with repeated exposure. Once the seal breaks, water seeps through, softens the wood, and invites mold.

Your fix

  • Wipe the faucet base dry.
  • Run a clean bead of GE Advanced Silicone Kitchen & Bath—water-ready in 30 minutes under typical indoor conditions.
  • Or use GE Pro Seal Max Kitchen & Bath for instant water exposure or damp installs.
  • Smooth the line using the GE Smoothing Tool to press the seal tight around the faucet curves.

Why it works

Both GE silicone sealants bond to metal and ceramic, flex with movement, and hold in splash zones. Advanced Silicone is a strong choice for same-day DIY kitchen maintenance. GE Pro Seal Max sets instantly, making it ideal for wet installs or quick turnarounds.

Ready to fix leaks, gaps, and grime for good?
Find GE silicone sealants near you in the U.S. or Canada.

The right sealant protects your countertops and your peace of mind The best countertop sealant for seams and backsplashes

Note: This DIY article is provided as a general guide only and is not intended to take the place of product-specific installation procedures; always follow applicable manufacturers’ instructions. Depending on your home’s age and condition, location within the home, and other potential factors, repairs and/or upgrades or other services may be necessary prior to the beginning and/or completion of your project that may involve the services of a home improvement professional. This article does not include advice pertaining to local building codes and/or any related inspections.

Choosing the right countertop sealant is key to a clean, durable finish in your kitchen. Whether you’re sealing granite, tile, or painted drywall, GE offers silicone and hybrid options to match your material and style.

Why sealing your backsplash and countertop seams matters

The joint where your countertop meets the backsplash might look small, but it’s one of the most leak-prone areas in your kitchen. Without the right countertop sealant, it can let in water, steam, and food debris that quickly lead to mold growth, laminate swelling, or stained stone.

If you’re sealing a backsplash made of tile or glass, or working around materials like granite or painted drywall, the wrong product can do more harm than good. Some sealants shrink, crack, or discolor premium surfaces over time.

Using the right sealant for your countertop creates a watertight barrier that keeps grease and grime out, and gives your kitchen a clean, professional-grade finish that lasts.

The seam between your countertop and backsplash is a high-risk zone for leaks, stains, and mold. Using the right GE countertop sealant (waterproof, flexible, and mold-resistant) protects your surfaces and preserves a clean, finished look.

Applying GE Supreme Silicone Kitchen & Bath Sealant along a backsplash seam using a caulk gun. Painter’s tape is visible on both sides of the joint.
Applying GE Supreme Silicone to a countertop backsplash seam with painter’s tape.

What makes a great countertop sealant?

Your countertop sees daily water spray, temperature swings, and constant cleanup. A reliable countertop sealant does more than just fill a gap. It seals tight, stays put, and works with your surfaces, not against them.

Here’s what to look for:

  • 100% waterproof: This seam is inches from your sink. Choose a sealant rated for wet zones (not just damp areas) to avoid swelling, staining, or failure over time.
  • Mold and mildew resistance: Moisture builds quickly behind your backsplash. A mold-resistant formula keeps bacteria from growing where you can’t see or scrub.
  • Neutral-cure chemistry: If you’re working with granite, marble, or stainless trim, steer clear of sealants that release acetic acid. Neutral-cure silicone won’t corrode metal or stain natural stone.
  • ASTM-rated flexibility (Class 50 or 35): Homes move. So do countertops. A flexible sealant adapts to seasonal changes, so seams don’t crack, split, or peel.
  • Non-sag application: For vertical seams like backsplash joints, pick a formula that stays put during application and tooling.
  • Cure speed that fits your schedule: Some silicone for backsplash applications is water-ready in 30 minutes. If you plan to paint over joints (especially along drywall or trim), hybrids like GE’s SMP technology are paintable in just one hour.

Which countertop sealant is right for your surface and finish?

Whether you’re working with granite, painted drywall, tile, or trim, GE has a formula designed for your finish goals and installation needs.

If you’re sealing natural stone (granite, marble, or quartz)

Use: Supreme Silicone Kitchen & Bath Sealant

Natural stone needs extra care. Some sealants can stain or etch sensitive materials. Supreme Silicone is a neutral cure, so it won’t react with granite or marble. You get Class 50 flexibility to handle seasonal shifts, and it’s water-ready in 30 minutes.

If your seam meets painted drywall, cabinetry, or trim

Use: Pro Seal Max Kitchen & Bath Sealant (SMP Hybrid)

You need paintability for backsplash joints that run into painted walls or trim. This hybrid formula is ready for painting in just one hour, bonds to damp surfaces, and moves with your home. This means seams won’t crack as things shift. This SMP hybrid is ideal during remodels when time and color matching count.

If you’re sealing tile or glass backsplashes

Use: Advanced Silicone Kitchen & Bath Sealant

Backsplash seams are vertical and often exposed to steam, splatter, and daily wipe-downs. This neutral-cure silicone for backsplash holds its shape during application, so it won’t sag or slump as you use it. It resists mold in damp environments and is water-ready in just 30 minutes, making it a reliable pick for clean lines and fast finishes.

Note: For natural stone or high-movement seams, step up to a Class 50 sealant like Supreme Silicone for added flexibility and stain resistance.

If you’re doing a touch-up or sealing a small seam

Use: Interior Seal Silicone Sealant (2.8 oz squeeze tube)

For quick jobs or tight spaces, this compact 100% silicone sealant delivers pro-grade results. It’s precise, clean to apply, and ideal for minor gaps. That said, this formula isn’t rated for wide joints or areas with frequent movement—use a full-performance sealant for those.

How to apply countertop sealant like a pro

Use this five-step method to get a countertop bead that bonds tightly, tools clean, and lasts:

  1. Remove the old sealant and prep the surface Start with the GE Sealant Remover Tool—it scrapes out old material without gouging your countertop. Then wipe the joint with isopropyl alcohol to eliminate residue. Soap-based cleaners leave a film that breaks bonds, so don’t use them.
  2. Mask both sides of the joint Use painter’s tape to create a crisp line and protect nearby surfaces. You’ll get a cleaner finish with less cleanup.
  3. Cut the nozzle and apply a smooth bead Use the GE Cartridge Opener & Smoothing Tool for a clean, angled cut. For long seams, use a caulk gun. For tight areas, a squeeze tube offers better control. Keep the bead steady and consistent.
  4. Tool the bead within 5–10 minutes Press the sealant into the joint using a gloved finger or your countertop sealant smoothing tool to shape a uniform bead.
  5. Let it cure completely Even quick-set formulas need time to fully bond. Most GE silicone and hybrid sealants reach full cure in 24 hours. Don’t scrub or stress the joint until then.

Cure tips and timing

Each GE formula cures on a different timeline. Here’s how to stay on schedule:

  • Most GE silicone sealants are water-ready in 30 minutes. This means water exposure, not cleaning. Wait the full 24 hours for a fully cured, durable seal.
  • Pro Seal Max is paintable in one hour. This hybrid formula also tolerates early moisture, making it ideal when conditions aren’t perfect.
  • Always check the label. Temperature, humidity, and joint size affect cure times. Plan around these to avoid premature failure.

Frequently asked questions

What’s the difference between acrylic and silicone for backsplashes?

Silicone sealant is 100% waterproof and stays permanently flexible, making it ideal for wet zones like your backsplash. Acrylic caulks, on the other hand, shrink, crack, or break down in damp environments.

Can I paint over the countertop sealant?

Only GE hybrid formulas, like Pro Seal Max Kitchen & Bath Sealant, are paintable. Silicone sealants (including those rated for kitchen and bath) are not.

How long should I wait before using the sink?

Most GE silicone for backsplash and countertop applications is water-ready in 30 minutes. But for heavy water exposure or scrubbing, wait 24 hours to ensure a fully cured, long-lasting seal.

Need the best sealant for your backsplash project? Find a store near you in the U.S. or Canada.

Ordinary bathroom sealant won’t cut it in high humidity, so you need waterproof protection. The best sealant for bathrooms and other high-humidity areas

Note: This DIY article is provided as a general guide only and is not intended to take the place of product-specific installation procedures; always follow applicable manufacturers’ instructions. Depending on your home’s age and condition, location within the home, and other potential factors, repairs and/or upgrades or other services may be necessary prior to the beginning and/or completion of your project that may involve the services of a home improvement professional. This article does not include advice pertaining to local building codes and/or any related inspections.

If you’ve ever noticed peeling, cracking, or moldy silicone sealant around your sink, tub, or shower, you’re not alone. Bathrooms are among the most demanding environments in your home in terms of moisture and temperature fluctuations, making it crucial to find the right products if you want long-lasting protection. Whether you’re replacing old caulk, sealing a new installation, or touching up problem spots, this guide breaks down how to find the best sealant for bathrooms.

If you’re using anything other than a mold-resistant silicone sealant specifically designed for wet environments, you’re likely to run into trouble sooner rather than later.

Old, moldy bathroom sealant.
An image of dirty or moldy sealant in the bathroom.

Why regular sealants fail in bathrooms

Not all sealants are created equal. Some are formulated for general indoor use and can’t handle the steam, water spray, and temperature changes that define a typical bathroom environment.

Common problems with the wrong type of sealant include:

  • Mold and mildew growth: Non-specialized sealants can become breeding grounds for mold and mildew.
  • Cracking or shrinking: In high-humidity areas, lower-quality caulks dry out and break apart.
  • Poor adhesion: Standard silicone sealant may not adhere well to slick surfaces, such as glazed tile, glass, or acrylic tubs.

If you’re using anything other than a mold-resistant silicone sealant specifically designed for wet environments, you’re likely to run into trouble sooner rather than later.

What to look for in the best sealant for bathrooms

When shopping for the best bathroom sealant, make sure it checks the following boxes.

1. Waterproof protection

A bathroom sealant must withstand daily water exposure without breaking down. This is where waterproof silicone caulk outshines alternatives that may absorb water over time. Waterproof silicone creates a tight, long-lasting seal that prevents water from seeping behind tiles or into drywall, helping prevent rot and structural damage. It remains intact even in areas with constant splashes, such as around sinks, tubs, and shower doors.

2. Mold and mildew resistance

Bathrooms are naturally prone to mold because of the regular humidity they face. That’s why a mold-resistant caulk is essential. These products contain specialized additives that inhibit the growth of mold, helping keep your bathroom looking and smelling fresh.

Without these additives, the sealant can quickly discolor or develop black spots, even if the seal hasn’t failed. Mold-resistant properties are essential in areas such as corners and horizontal surfaces where water tends to accumulate.

3. Flexible and durable

In a bathroom, surfaces expand and contract due to changes in temperature and humidity. For example, a daily cycle includes hot showers followed by cool-down periods. Sealants that dry hard and brittle are likely to crack and pull away from surfaces over time.

Silicone sealant remains flexible after curing, allowing it to move with the building materials and maintain a watertight barrier. This flexibility helps them resist the kind of fractures that lead to slow leaks and hidden damage.

4. Adheres to nonporous surfaces

Glass, porcelain, and many types of tile are considered non-porous, meaning they don’t absorb moisture or adhesives easily. A high-performance silicone caulk is formulated to bond tightly to these kinds of slick surfaces. A high-quality silicone bathroom sealant will adhere to the surface and remain in place, even in steamy, wet conditions. This strong adhesion ensures that your caulk line doesn’t lift or develop gaps over time.

Silicone sealant loaded into caulking gun for easy application.
An image of sealant loaded into a caulk gun.

5. Ease of application and cleanup

Ultimately, ease of use is crucial, especially for DIY enthusiasts. The best sealant for bathrooms is one that’s designed for smooth application with minimal mess. They may come in squeeze tubes or be dispensed through a standard caulk gun. Many modern formulas are low-odor and water-resistant shortly after application. Some silicone caulks are also labeled as paintable or quick-drying, which helps speed up your bathroom project without sacrificing quality.

Introducing GE Pro Seal Max Kitchen & Bath

When it comes to sealing tubs, showers, backsplashes, and sinks, GE Pro Seal Max Kitchen & Bath stands out as a top performer. Explicitly designed for high-moisture areas, this bathroom sealant offers:

  • Superior mold and mildew resistance
  • Excellent adhesion to tile, glass, and metal
  • Flexible, waterproof formula as strong as silicone
  • Fast curing with long-term durability
  • Paintable for a seamless finish

Whether you’re looking for the best tub caulk or a reliable sealant for around the sink, GE Pro Seal Max Kitchen & Bath delivers consistent results that DIYers and professionals can trust.

Application tips for shower caulking and bathroom sealant projects

Want your next sink or shower project to last? Follow these expert tips.

1. Start with a clean surface before applying waterproof silicone caulk

Use the GE Sealant Remover Tool to scrape out old silicone sealant. It’s designed to remove all types of sealant and can be used on various surfaces, including tile. Removing old caulk is essential for a proper application. Afterward, clean the area with a mildew remover and allow it to dry completely before applying the new product.

2. Cut the cartridge or tube to the desired size

Use the GE Cartridge Opener and Smoothing Tool to open the cartridge or tube. This tool will help you snip the nozzle to the desired size, allowing for better control during application. For narrow joints, start small. You can always widen the cut if needed.

3. Apply mold-resistant caulk in a continuous bead

Work slowly and apply steady pressure for a consistent bead. Smooth it with the GE Sealant Smoothing Tool to achieve a clean, professional finish. Alternatively, you can use a gloved finger if you don’t have our tool on hand.

4. Let it cure fully

Avoid using the shower or sink for at least 24 hours (or as directed on the product packaging) to allow the product to cure fully.

FAQ

What’s the best sealant for bathrooms?

Choose a mold-resistant, waterproof product, such as GE Pro Seal Max Kitchen & Bath. It provides long-lasting protection in wet environments and adheres to slick surfaces, such as tile and glass.

How often should I replace bathroom caulk?

Caulk can last several years, but it’s best to inspect it regularly and replace it if you see cracking, mold, or peeling. Catching issues early can help you prevent water damage and maintain a clean finish.

Can I apply fresh silicone sealant over the old bathroom sealant?

It’s not recommended. For best adhesion and mold prevention, use the GE Sealant Remover Tool to strip the old material before applying fresh sealant.

Is there a difference between tub caulk and shower caulk?

No. The most important thing is to ensure the product used is mold-resistant and waterproof. GE Pro Seal Max Kitchen & Bath can handle both applications.

Looking for the best sealant for bathrooms? Find a store near you in the U.S. or Canada that carries GE products.