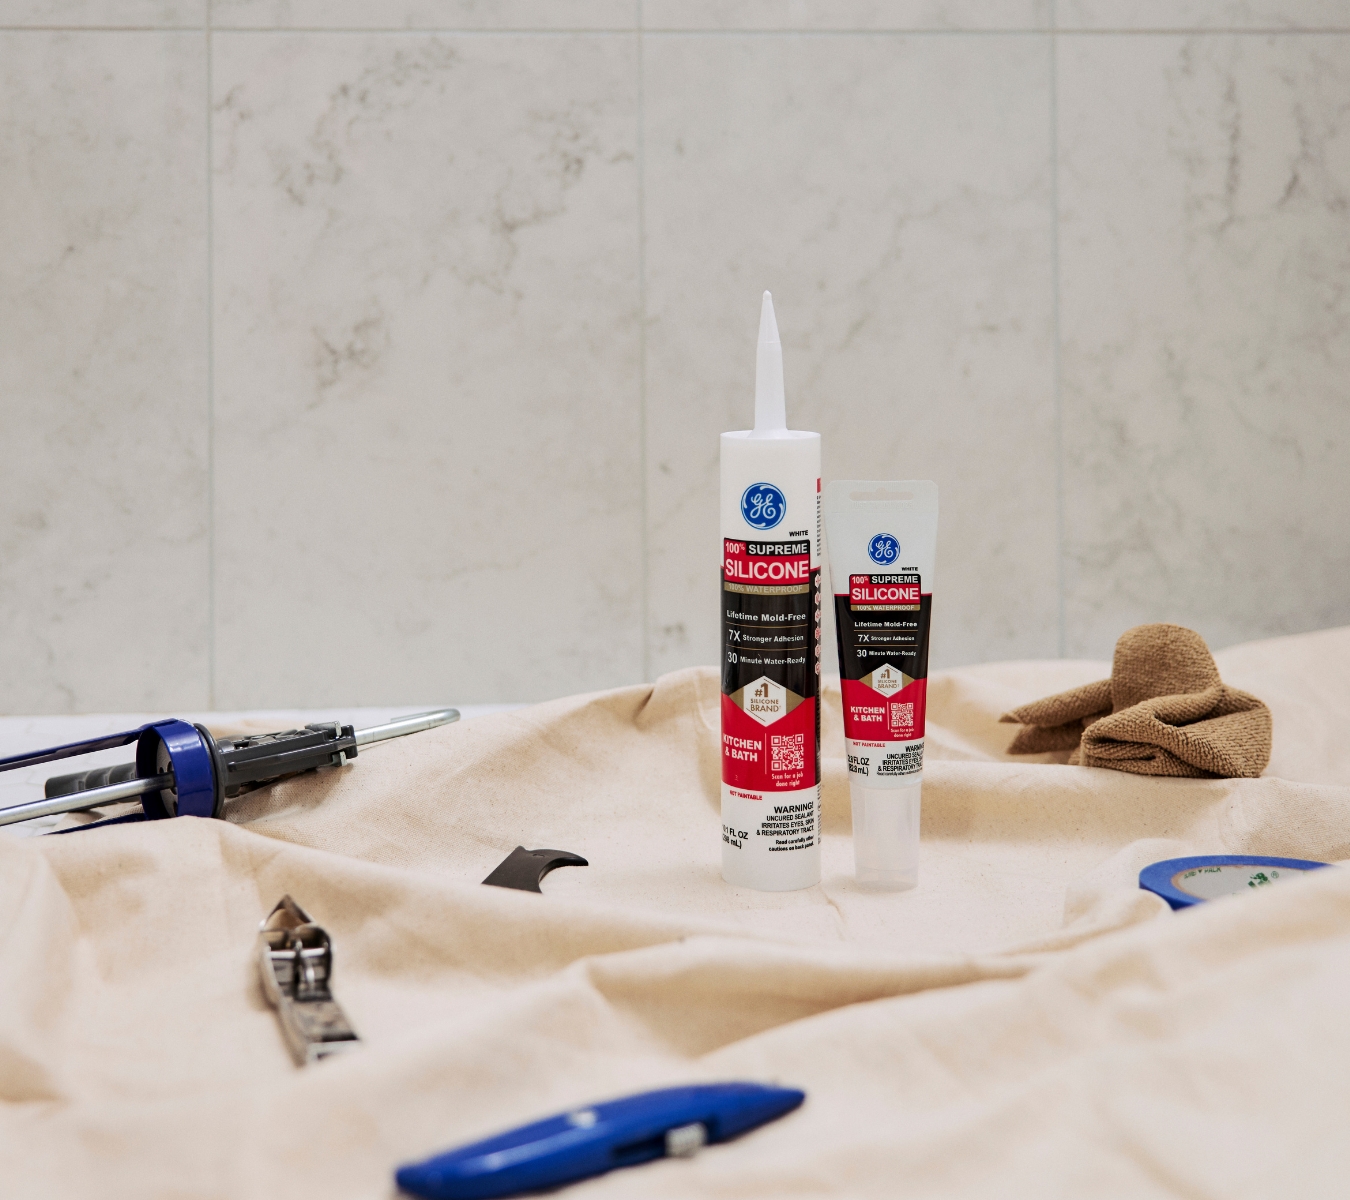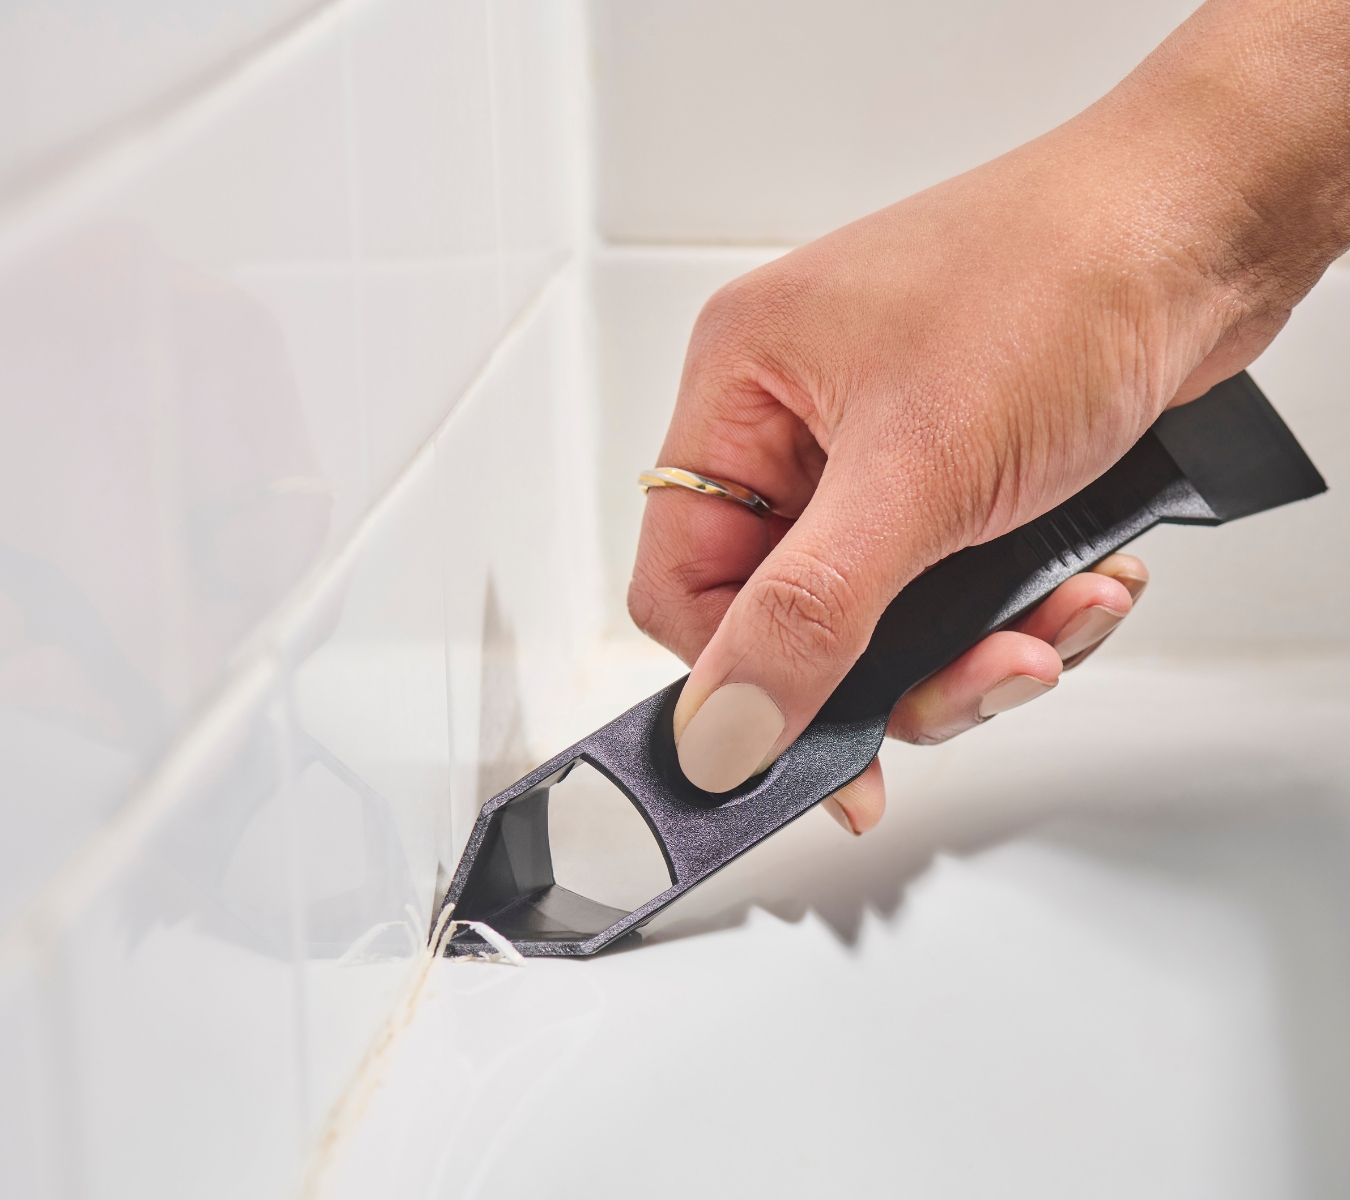
Choose the right silicone sealant with confidence Choosing the right silicone sealant by application: a quick reference for contractors

Each faulty sealant bead comes at a double cost—corrective labor to fix it, and loss of professional credibility. Here’s the quick reference that shows which silicone sealant holds up in kitchens, baths, windows, and exteriors.

Quick reference

When the job demands speed and certainty, here’s the at-a-glance map for choosing the right silicone sealant:

  • Kitchen and bath: Use mildew-resistant, neutral-cure, 100% silicone. Choose a paintable hybrid only if the bead must be painted on the trim.
  • Windows and doors: Select ASTM C920 Class 35–50 sealants for perimeter joints. 
  • Concrete joints: Pick 100% silicone rated for exterior work. 
  • Gutters: Choose UV-stable 100% silicone built for wet exposure. 
  • Metal and flashing: Use neutral-cure silicone to prevent corrosion and staining.
  • Interior trim: On trim that takes paint, choose a hybrid or acrylic. Don’t waste silicone where you’ll need a topcoat.

This grid keeps the application and spec aligned so you don’t waste labor fixing the wrong bead.

Most exterior perimeter joints see enough movement to call for ASTM C920 Class 35 or 50 sealants. Class 25 only works when joint design limits movement.

How to choose silicone sealant: the 6 criteria that matter

Before you pick a bead, check these six factors. This is how to choose a silicone sealant that performs to spec and avoids callbacks:

1. Movement class (ASTM C920): Match joint width and expected movement. Classes 35 to 50 are common for exteriors.

2. Chemistry:

    • 100% silicone for maximum durability. Non-paintable.
    • Paintable hybrid (SMP “paintable silicone”) when paint coverage is required.
    • Siliconized acrylic for low-exposure interior trim.

3. Paintability vs. performance: Don’t trade durability for paint unless required.

4. Water or rain-ready and temperature: Specs range from 30-minute rain-ready to cold-weather rated.

5. Substrate compatibility: Verify adhesion to vinyl, fiber cement, masonry, natural stone, metals, etc.

6. Spec constraints: Some jobs need ASTM C920 silicone only.

Silicone sealant applications: interior vs. exterior demands

Inside and out, joints face different pressures: mildew inside, weather outside. The bead has to match the conditions:

  • Interior: Pick mold-free, neutral-cure silicone sealant with low VOCs so cleaning cycles don’t break it down.
  • Exterior: Match the movement class to the joint. 
  • Scheduling: On tight schedules, rain-ready sealants keep you from losing a day to weather.

When you match your sealant of choice to the environment, you avoid mildew callbacks inside or cracked joints outside.

Application deep dives and GE silicone sealant picks

Every job has its own failure traps. Kitchens breed mildew, windows fight movement, and trim demands paint. The right silicone sealant applications come down to matching the problem, spec, and product. 

Kitchen and bath

Moisture and cleaning cycles punish joints in kitchens and baths. Mildew grows fast, and harsh cleaners break down weak beads. Natural stone and metal finishes can also stain if you use the wrong sealant chemistry. The right silicone sealant here is 100% silicone, neutral-cure, and mold-resistant:

You can expect a higher risk of mildew return or surface damage if an acrylic or a non-neutral chemistry product is used in kitchen and bath areas.
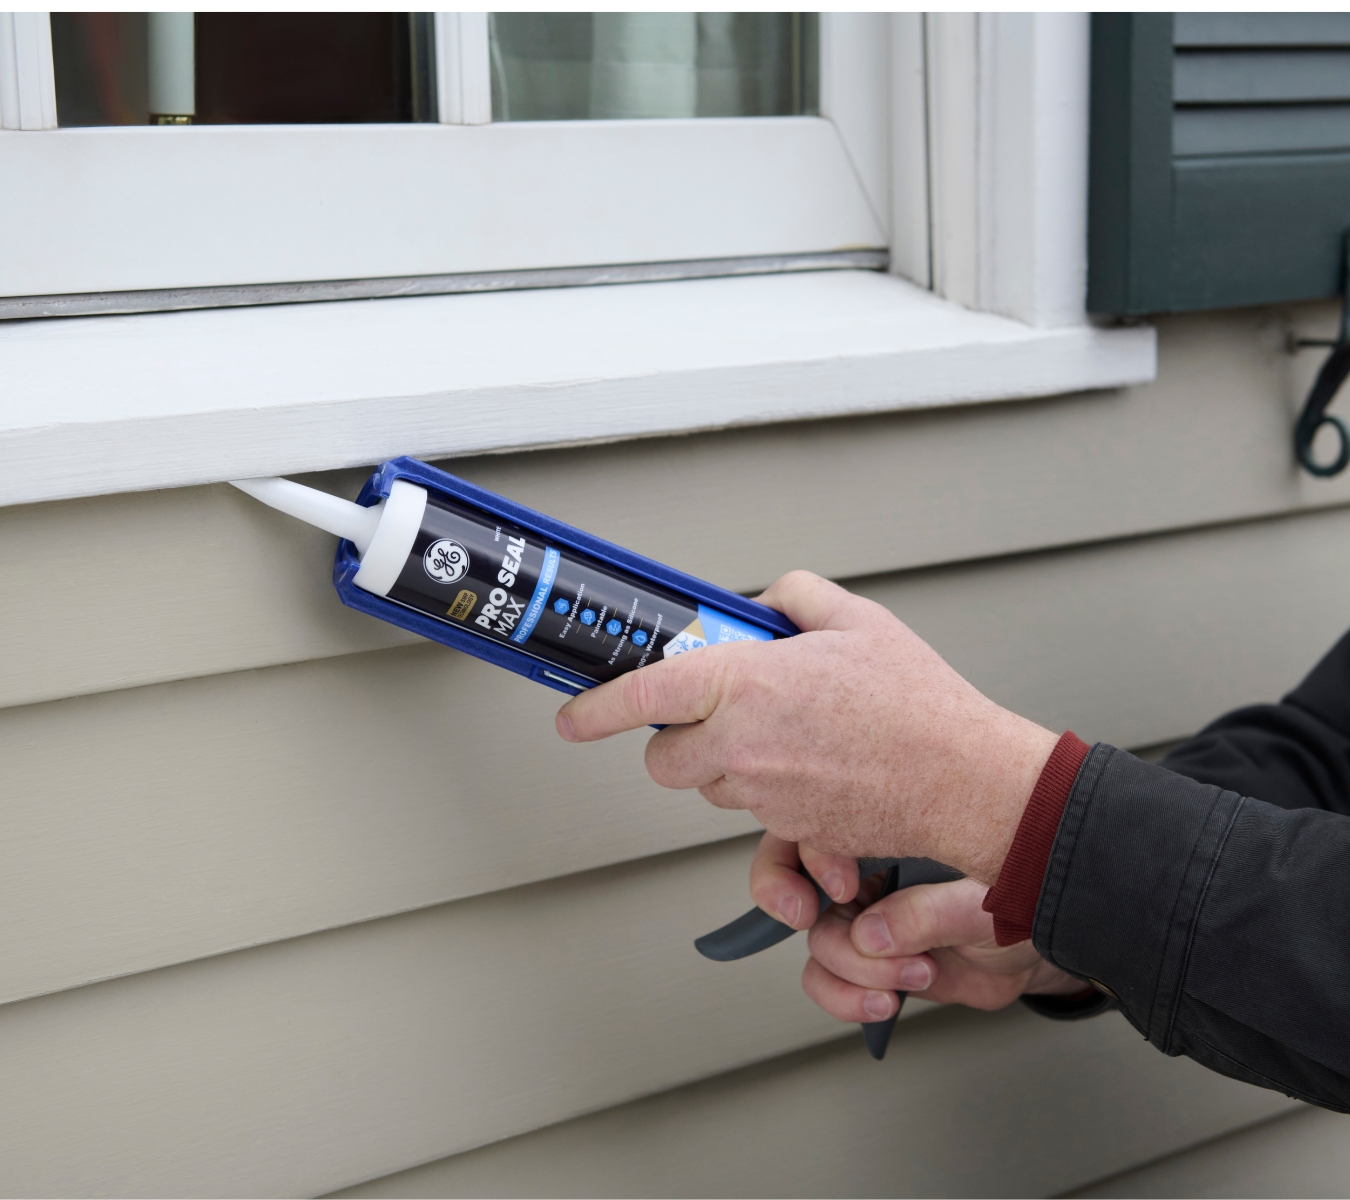
Contractor applying GE Pro Seal Max Window & Door to an exterior window frame to prevent leaks.

Windows and doors

Perimeter joints take more abuse than almost any bead: thermal swing, dissimilar materials, and wind-driven rain push them hard. 

There are two places you want to watch for here: blocked weep holes and undersized joints. Keep the drainage paths open, then size the joint right with a backer rod and a 2:1 geometry. From there, match the movement class to the load. For most exteriors, Class 35–50 keeps joints flexing through the seasons. Class 25 is only safe on low-movement spans designed tightly: 

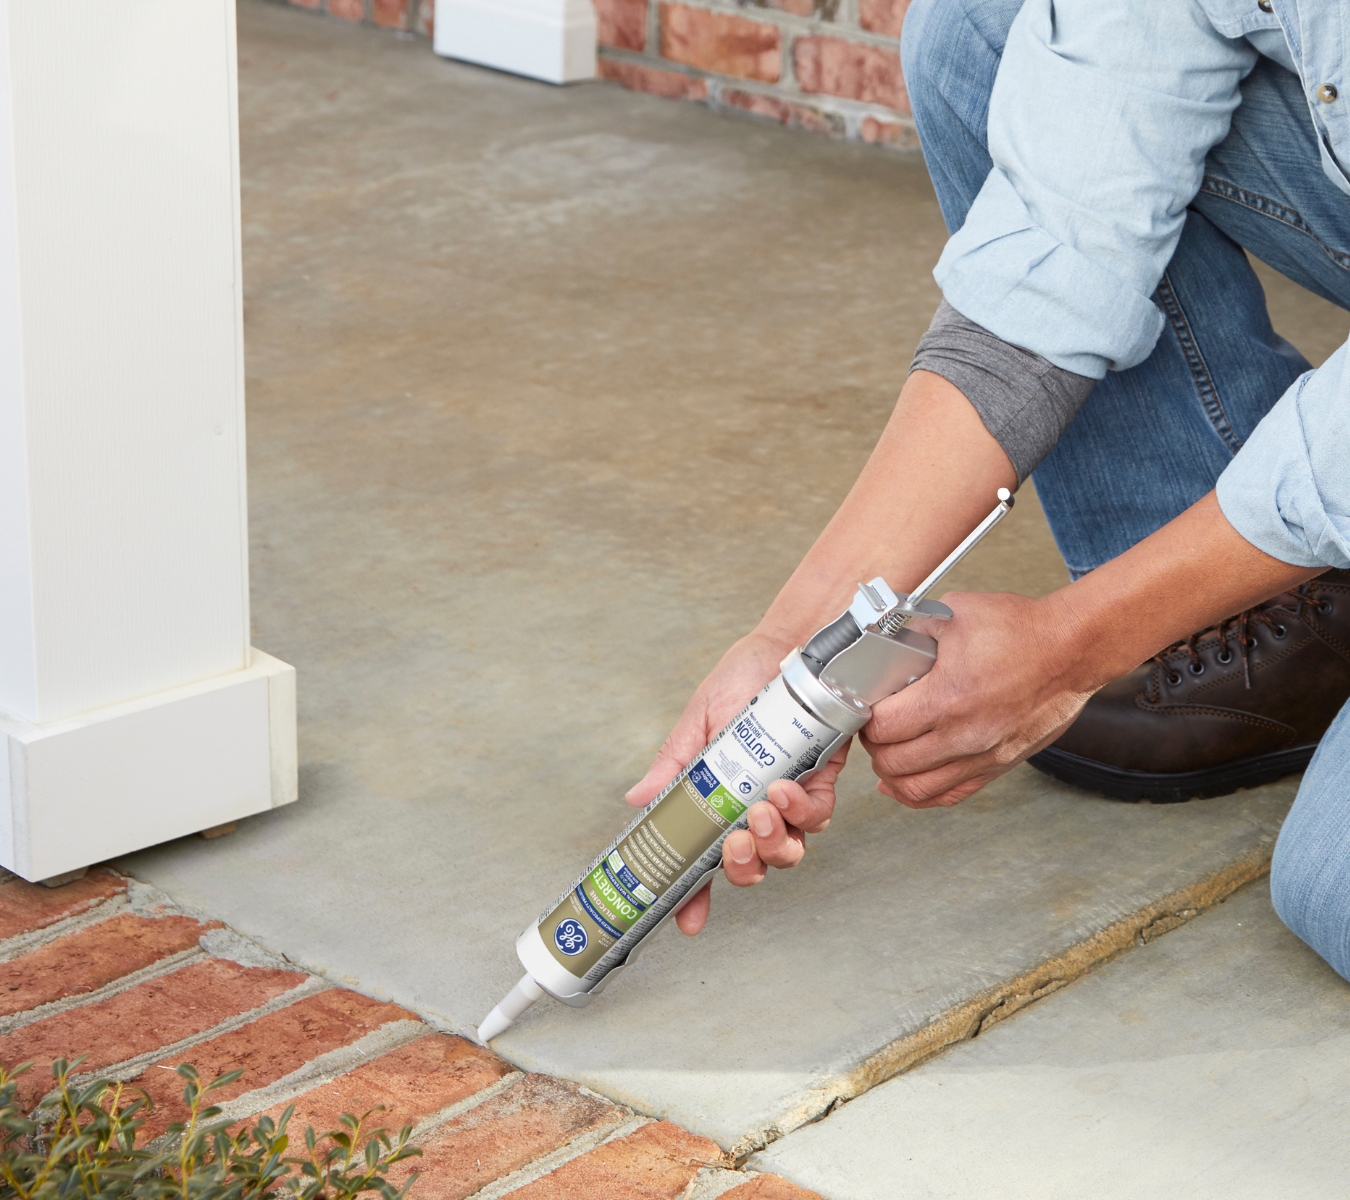
GE Concrete Silicone sealant applied to an outdoor concrete joint to handle freeze–thaw cycles.

Specialty exteriors: concrete, gutters, metal

Concrete shifts, gutters battle constant wet, and metals stain if the chemistry is wrong. Each needs its own bead, or it turns into a leak path:

  • Concrete: GE Concrete Silicone – Class 35, 30-minute rain-ready, and built to ride out freeze–thaw cycles.
  • Gutters: GE Gutter Silicone – Class 25, UV-stable, handles wet exposure (not for continuous immersion).
  • Metal & flashing: GE Metal Silicone – Class 35, neutral-cure, safe on most metals; test sensitive finishes.

Miss the match and you’ll see chalking on metal, leaks in gutters, or freeze–thaw cracks in concrete.

Interior paint-grade trim

Trim joints aren’t wet zones. They’re finish lines. Baseboards, casing, crown: low movement, low exposure, but high visibility. Here, the bead has to take paint and vanish:

Application of silicone sealant: joint design and prep essentials

Even the right bead will fail if the joint isn’t properly prepped. These four field essentials ensure your sealant performs to spec:

  • Backer rod: Use a backer rod on wide or deep joints to hold the 2:1 width-to-depth ratio and stop three-sided adhesion. 
  • Substrate prep: Clean, dry, dust-free. Remove all old silicone. 
  • Tooling: Lay a continuous bead and tool within open time to secure adhesion at both flanks.
  • Conditions: Follow the cold-weather and damp-install rules specific to each product.

These steps protect the bead’s movement class and keep the application of silicone sealant performing to spec in the field.

Troubleshooting: why the wrong silicone sealant fails

Failures aren’t random. The wrong silicone sealant leaves signs you can spot at a glance.

  • Movement mismatch: On wide perimeter joints, a Class 25 bead splits at corners when the wall flexes.
  • Wrong chemistry: Acid-cure marks bare aluminum, and acrylic turns chalky in a season and cracks on siding.
  • Paint over silicone: Paint flashes glossy over the bead, breaking the trim line.
  • Sealed weep holes: Joints look clean until trapped water pushes inside the frame.
  • Early water exposure: A rain hit before the sealant cured will likely leave streaks and gaps down the wall.

Every one of these failures costs labor, margin, or reputation. Get the spec right and those problems to never walk back onto your job.

Keep this silicone sealant by application reference close. The right bead saves labor, protects margins, and keeps jobs closed. For specs, TDS, and job-matched picks, see GE Sealants product pages, connect with GE tech support, or find the right silicone sealant product at a retailer near you in the U.S. or Canada.
Setting the finish standard Finishing touches that stand out: using a sealant smoothing tool for a professional result

The line you leave shows how much you care about the work. A sealant smoothing tool makes that line uniform from corner to corner. This guide shows you how to keep control with less time on rework.

Why your finish quality determines pro results

Finish quality starts with how the bead seats into the joint. 

Firm pressure sets the silicone sealant against both sides so it bonds well and moves with the surface. When you control that contact, the joint stays tight even under daily flex. Then the details show: tile lines stay true and corners close clean. Light runs smoothly along the edge instead of catching on ridges. 

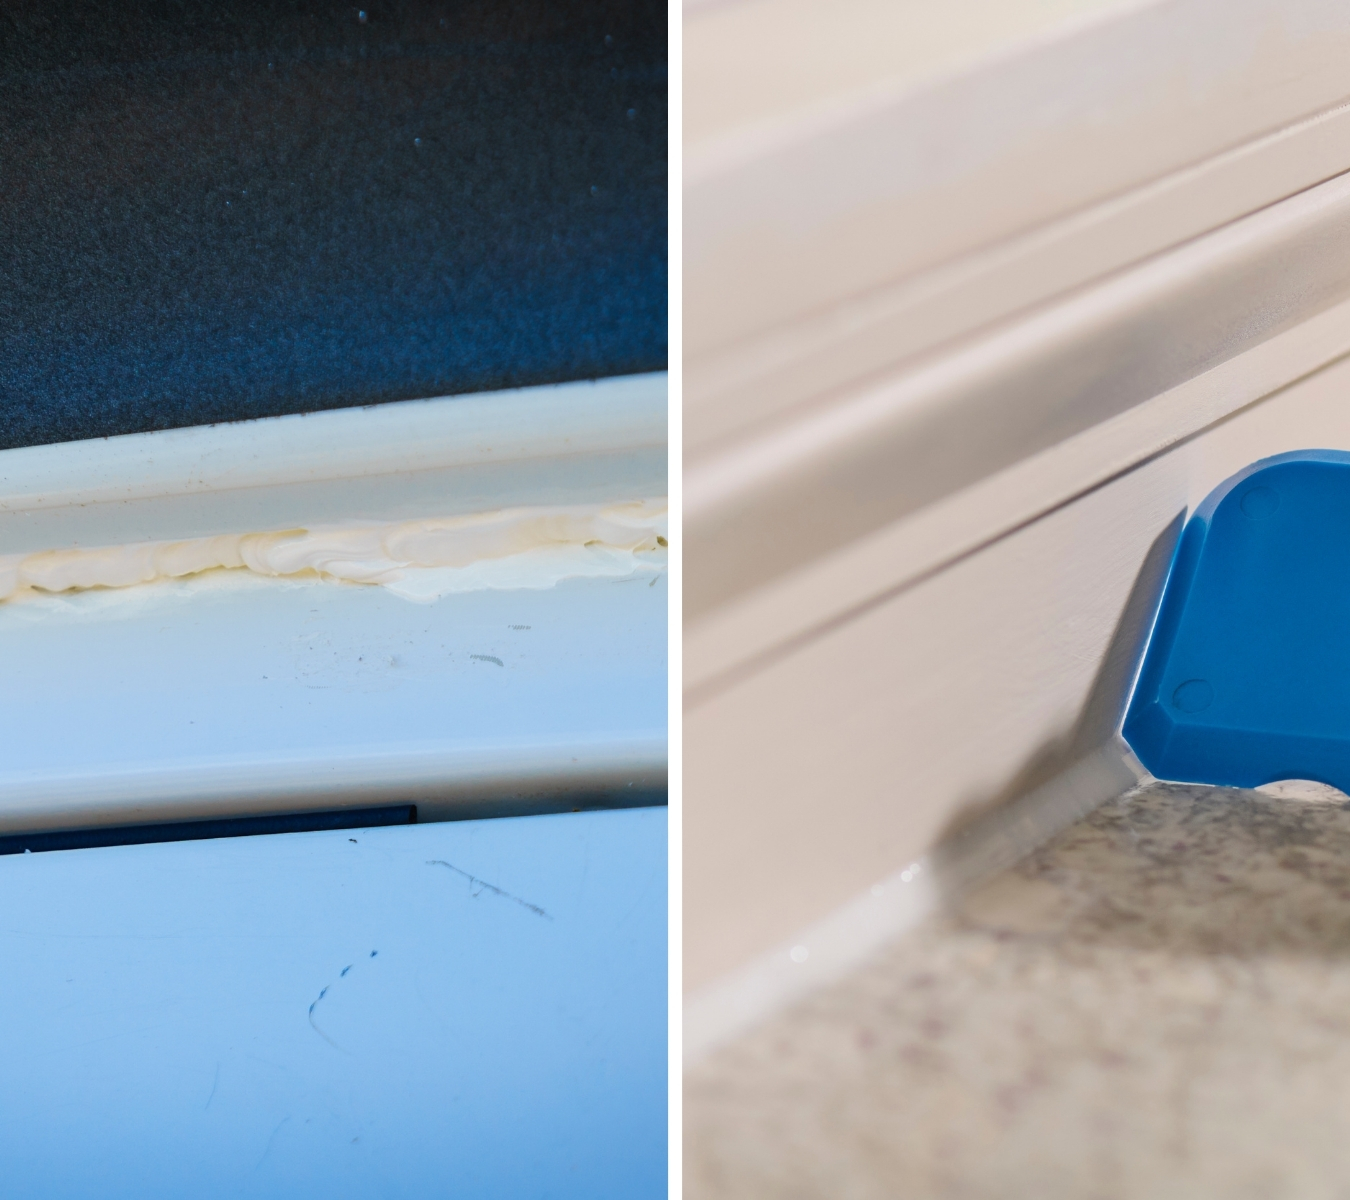
A consistent radius proves the joint was tooled right, not rushed. You see it, and the client does too. 

Comparison of uneven and properly tooled silicone sealant lines showing professional finish quality under light.

Where the sealant smoothing tool beats finger methods

You’ve likely seen how a fingertip can drag sealant off an edge or leave uneven shine in the light. 

In visible wet seams around sinks, tubs, and showers, that small variation can stick out. 

A sealant smoothing tool fixes the geometry. Its profiled edge keeps the radius steady and pressure even. On long runs, the line stays continuous instead of widening when hand fatigue sets in. 

Across surfaces (tile, glass, acrylic, or metal), the tool keeps contact where a finger can skip or smear. And because every installer uses the same edge, the finish looks identical from one crew to the next. 

Pro workflow: how to smooth sealant with the GE Sealant Smoothing Tool

Every clean joint follows the same rhythm: prep, apply, tool, inspect. The GE Sealant Smoothing Tool gives you control only when every step supports it.

Proper surface prep, the right chemistry, then the GE Sealant Smoothing Tool. This sequence keeps the finish predictable.

Prep

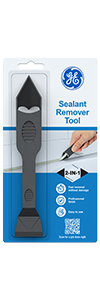
Cut out failed material with the GE Sealant Remover Tool, then wipe the joint dry so the bead bonds clean. 

Mask when the surface demands a sharp line or when the substrate won’t forgive a slip: glass, polished stone, and tight color transitions. On smooth, easy-wipe surfaces, steady hand control can replace tape without risk.

Tip sizing and application

Cut the nozzle to match the joint width and angle the tip at a 45-degree angle. That angle controls how the bead fills corners and keeps the flow consistent. Use the cutter built into the GE Cartridge Opener & Smoothing Tool for a clean, even cut that keeps flow predictable. 

A cut that’s too wide can flood corners, while one that’s too narrow may leave voids that weaken the seal. Keep a steady pull on the gun so the bead runs continuously and the tooling stage stays predictable.

Lubrication by chemistry

For silicone sealant, moisten the GE tool lightly (not the bead) and follow the product TDS for approved lubricants. Acrylic or hybrid sealants may take a mild water-based mist. Again, confirm in the product’s TDS. 

Always test first on stone or coated metal, since certain finishes can mark or cloud under moisture. Your goal here is to reduce drag without changing how the material bonds.

One-pass tooling

Hold the tool at its working angle and pull in a smooth, single motion so the bead seats and profiles evenly. Collect excess on the edge and wipe the blade as needed between passes. 

Plan to do this in minimal passes to define the line. Too many passes can disturb the surface and lift the finish. 

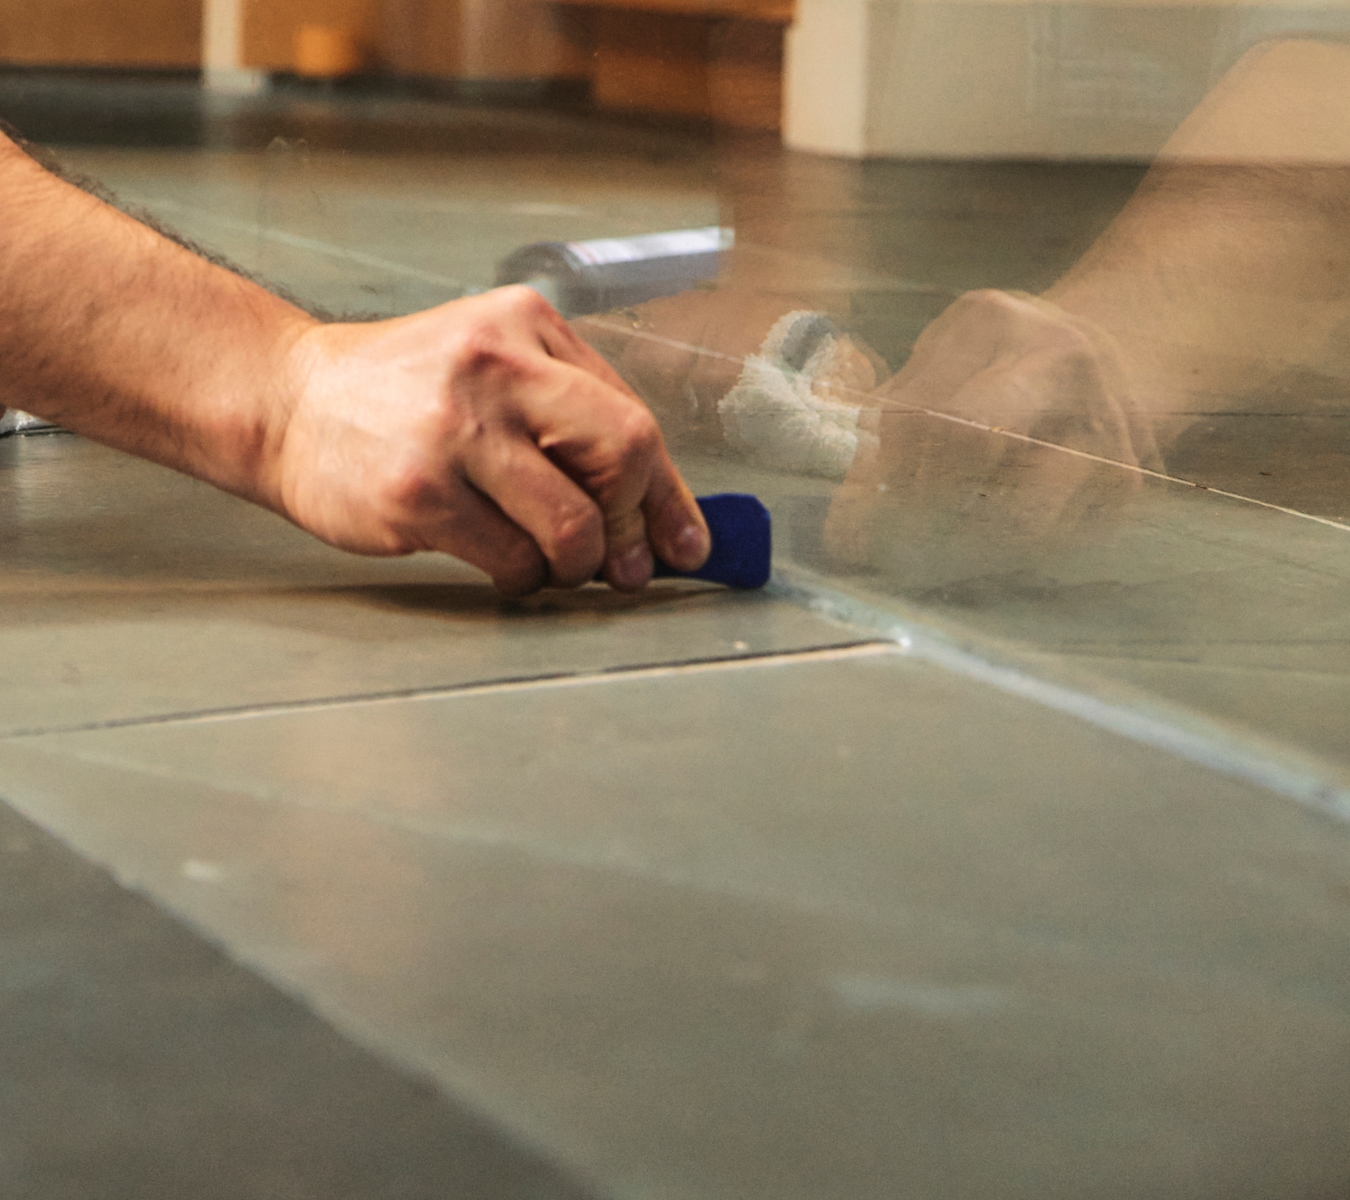
Applying and smoothing a bead with the GE Sealant Smoothing Tool along a shower tile seam for a clean, even finish.

Corners and terminations

Tooling corners can be a bit tricky, so rely more on control than speed here. Roll the tool slightly through each turn to keep the radius continuous and aligned. 

At fixtures, taper off with a clean pull instead of building excess at the stop. The bead should finish as cleanly as it starts.

Cleanup and inspection

If you used tape, pull it immediately after tooling to prevent tearing the edge, then wipe once with a clean rag. Check the line under some light to confirm one continuous radius with no ridges or breaks. The joint should appear even from any angle.

Tool care

Rinse the tool before the sealant cures and keep the working edge free of nicks or buildup. Then store it flat or in its pouch between jobs. 

Before your next use, inspect the edge because any damage will likely transfer to the bead. 

Prevent rework by spotting defects early

Before the sealant cures, check for these signs: 

  • Wavy lines or ridges: Come from uneven pressure or a tilted angle. The tool’s profiled edge can lock the pull path so the bead tracks straight and holds a uniform curve.
  • Smeared margins: Happens when a fingertip drags residue across tile or tub faces. The tool channels excess back into the joint instead of spreading it where it doesn’t belong.
  • Voids or shallow spots: Shows up when the bead skims over the surface instead of bonding to it. Even pressure along the smoothing tool’s face can help drive the sealant deep into both sides of the joint for full contact. 
  • Stop marks: Appears where a pass restarts or the pull hesitates. One continuous draw with the GE Sealant Smoothing Tool’s curved edge can remove that flattened spot and leave the line smooth from end to end. 

The GE Sealant Smoothing Tool helps correct these issues before they set. When the light hits right, you should see one clean radius and tight contact along the entire seam. 

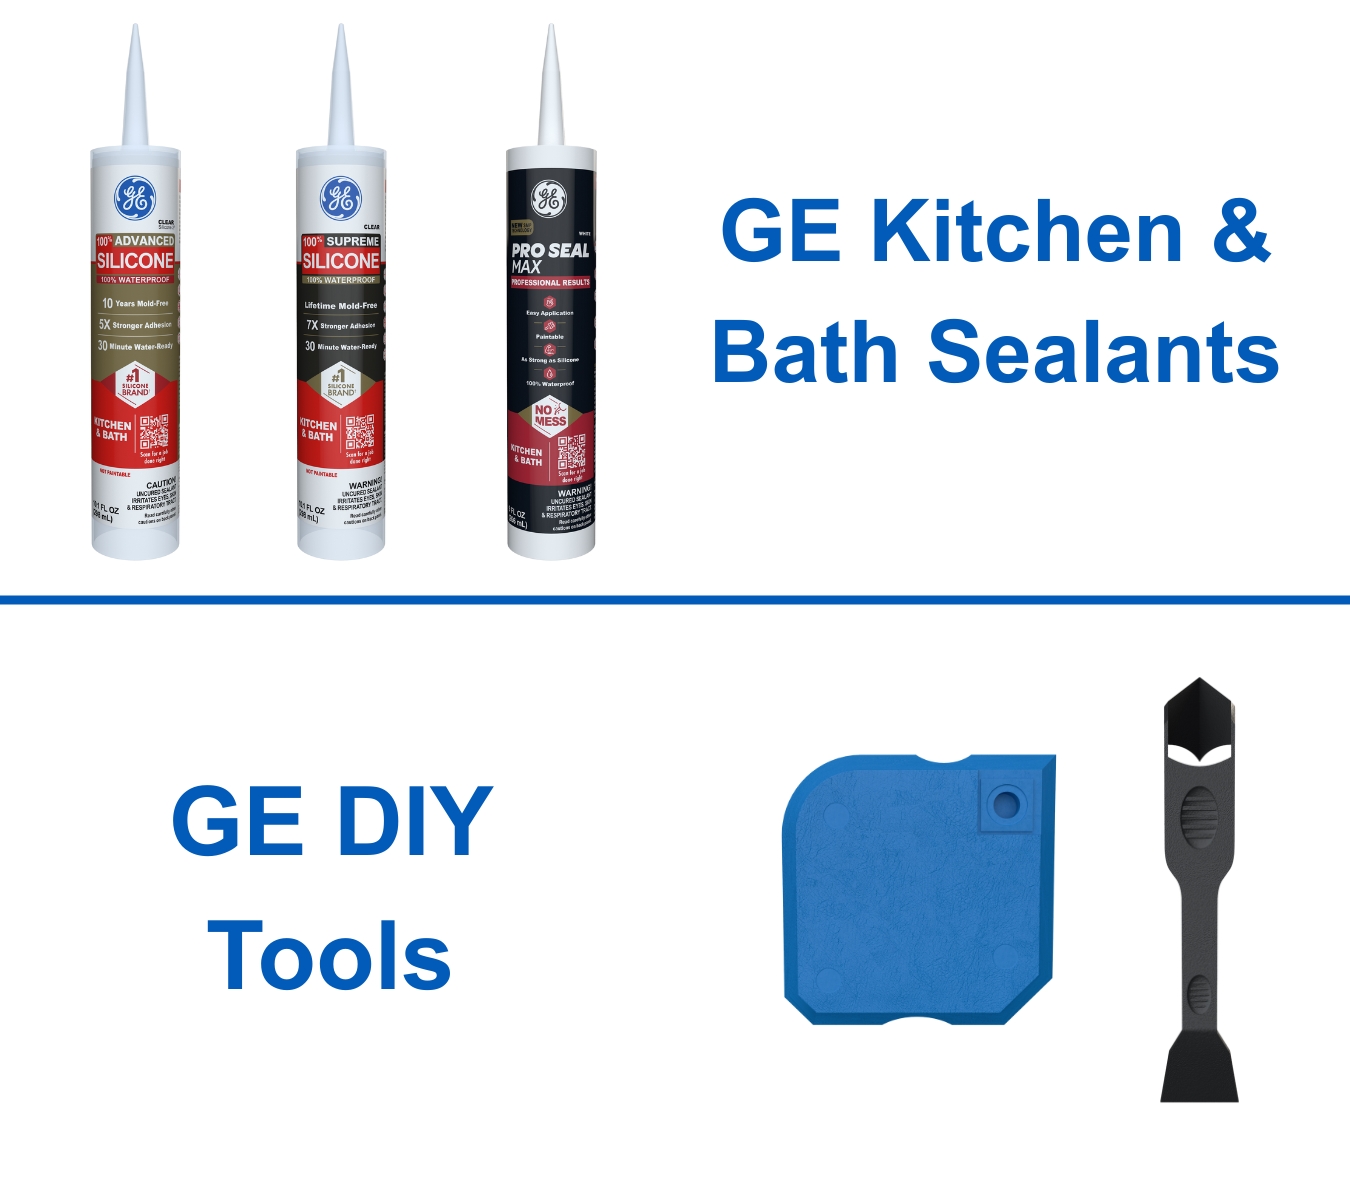
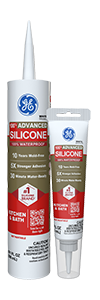
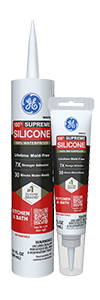
GE Advanced Silicone Kitchen & Bath, Supreme Silicone Kitchen & Bath, and Pro Seal Max Kitchen & Bath with the GE Sealant Smoothing Tool and Sealant Remover Tool that will be used on a jobsite.

Match the sealant smoothing tool with the right GE Kitchen & Bath silicone sealant

Choose the sealant that matches where the joint lives and how you need it to perform.

Good: GE Advanced Silicone Kitchen & Bath

This 100% silicone is built for the joints that never stay dry. Advanced Silicone Kitchen & Bath bonds tightly to tile, glass, and metal, forming a flexible seal that moves without breaking. It’s water-ready in 30 minutes under normal room conditions.

Better: GE Supreme Silicone Kitchen & Bath

This is a premium 100% silicone sealant made for heavy-use areas. Supreme Silicone Kitchen & Bath holds its color and elasticity through daily cleaning and resists mold where moisture lingers. It’s also water-ready in 30 minutes, giving you reliable turnover on back-to-back jobs.

Best: GE Pro Seal Max Kitchen & Bath

Pro Seal Max Kitchen & Bath is a silane-modified hybrid that works where wet meets paint. It bonds to more surfaces than silicone alone and cures fast. It’s water-ready immediately and paint-ready in 60 minutes for latex coatings.

Check each product’s Technical Data Sheet for full cure details and humidity factors before you start.
The right chemistry locks the bead you tool today so it still looks sharp months later.

A clean line pays for itself. When every crew uses the same smoothing tool, jobs can finish faster and look consistent across installs. The uniform bead means fewer punch-list notes and no callbacks for uneven joints or smeared edges. Find the GE Sealant Smoothing Tool and sealants at a retailer near you in the U.S. or Canada.
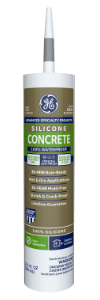
A few sealing kitchen refresh DIY tips Holiday kitchen refresh on a budget: sealing fixes that make a big difference

Note: This DIY article is provided as a general guide only and is not intended to take the place of product-specific installation procedures; always follow applicable manufacturers’ instructions. Depending on your home’s age and condition, location within the home, and other potential factors, repairs and/or upgrades or other services may be necessary prior to the beginning and/or completion of your project that may involve the services of a home improvement professional. This article does not include advice pertaining to local building codes and/or any related inspections.

The holidays are right around the corner, and your kitchen is about to become the busiest room in the house. Before the cooking, baking, and hosting begin, a few simple sealing touch-ups can make the whole space feel brighter and more polished. With just a little time and a few affordable materials, you can refresh your kitchen on a budget and make it look guest-ready for the season.

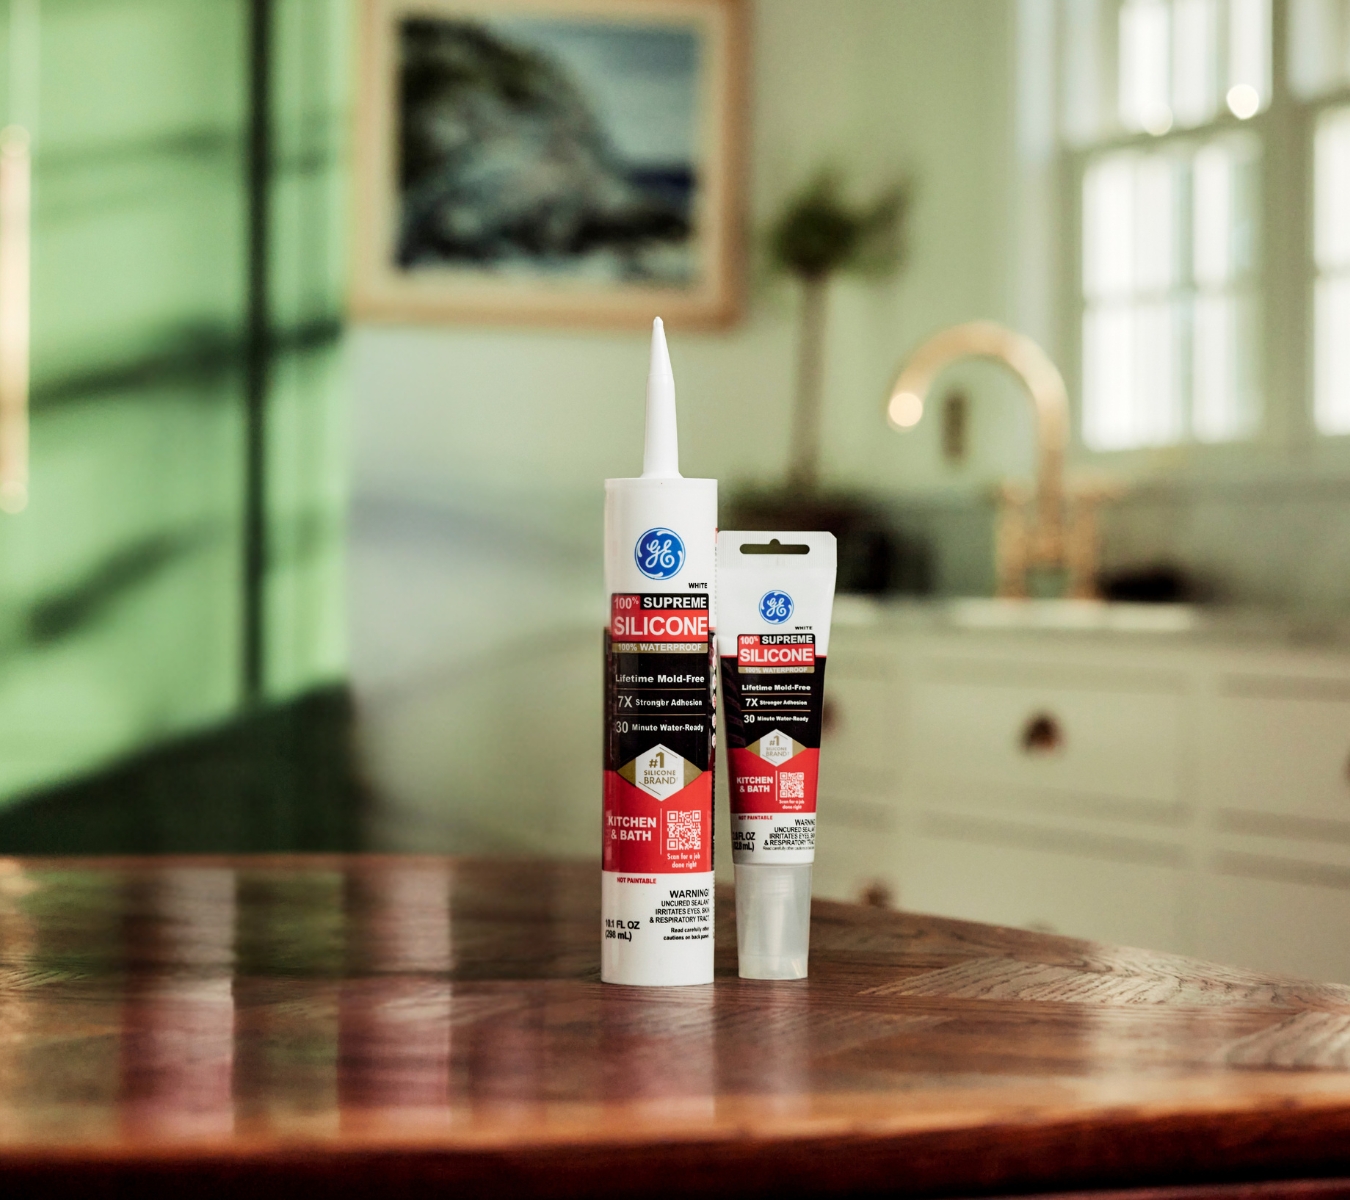
The right sealant can make all the difference between a kitchen that holds a freshly updated appearance and one that needs another round of repairs in a few months. For wet areas such as sinks, faucet bases, or tiled backsplashes, GE Supreme Silicone Kitchen & Bath Sealant is your best option.

Why sealing is the simplest way to refresh your kitchen on a budget

When your kitchen starts looking a little worn, resealing is one of the easiest and most cost-effective ways to give it a quick facelift. Over time, sealant around sinks, countertops, and backsplashes can discolor, crack, or peel, making even a clean kitchen rough around the edges. Replacing those old lines of caulk instantly brightens the space, giving surfaces a cleaner, newer appearance without the cost of replacement. 

Fresh sealant also protects your kitchen from moisture damage, one of the leading causes of warping, mold, and countertop separation. By keeping water out of joints and gaps, you preserve your finishes and extend the life of your kitchen materials. Best of all, resealing is a simple DIY task that can be done in an afternoon with just a few tools and a tube of sealant. For homeowners preparing for the holiday season, sealing is typically a small project with a big payoff.

Where to reseal for the biggest visual payoff

If your goal is to make your kitchen look refreshed before guests arrive, start by resealing the areas that catch the most light and attention. The first place to check is around the sink, where moisture exposure and frequent cleaning often cause sealant to crack or discolor. A clean, bright bead here instantly makes the countertop look newer. Next, inspect the joint between the countertop and backsplash, a high-visibility spot where old caulk can collect grime or separate from the wall. Resealing this seam smooths the transition and gives your counters a seamless, finished look.

Don’t overlook edges along countertops and cabinetry, especially near corners or appliances where crumbs and grease tend to gather. A quick reseal makes these areas easier to clean and more polished. Finally, check around windowsills and under-sink plumbing connections for gaps or peeling sealant. Focusing on these key areas delivers the greatest visual return for your kitchen refreshing efforts.

Choosing the right sealant for kitchen refresh projects

GE Supreme Silicone Kitchen & Bath Sealant

The right sealant can make all the difference between a kitchen that holds a freshly updated appearance and one that needs another round of repairs in a few months. For wet areas such as sinks, faucet bases, or tiled backsplashes, GE Supreme Silicone Kitchen & Bath Sealant is your best option. This 100% silicone sealant creates a permanently waterproof barrier that stays flexible and resists mold, mildew, and cracking, even with daily cleaning. It’s ideal for areas that come into frequent contact with water and need long-term protection.

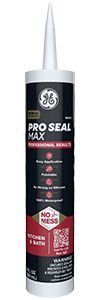
For areas where appearance matters most, like between countertops and backsplashes or along cabinet edges, GE Pro Seal Max Kitchen & Bath provides a paintable alternative to 100% silicone sealants. It offers the strong adhesion and durability of silicone while being paintable once cured, making it easy to blend with surrounding surfaces. Pro Seal Max also resists shrinking and maintains a smooth finish that keeps kitchens looking polished.

How to remove and replace old sealant

Your kitchen refresh begins with the proper removal of old sealant and surface preparation. Start by using either a putty knife or the GE Sealant Remover Tool to lift out old or cracked material. This tool helps scrape away hardened caulk without damaging nearby surfaces like tile, laminate, or metal. Once the old bead is gone, clean the area with a mild household cleaner to remove any soap scum, grease, or residue that could interfere with adhesion. Let the surface dry completely before applying new sealant.

Next, cut the nozzle of your sealant tube at a 45-degree angle to match the joint width. Then apply a smooth, continuous bead along the seam. Keep steady pressure to avoid gaps or air bubbles. Immediately tool the bead using an edged hand tool or the GE Sealant Smoothing Tool to press it into the joint and create a clean, professional finish. Wipe away any excess before it sets.

A homeowner applies sealant to a countertop joint with the GE Sealant Smoothing Tool.

Allow the sealant to cure as directed, typically 24 hours for silicone, before exposing it to water or cleaning. With the right tools and a bit of patience, you can remove and replace old sealant in just a few hours for an overall cleaner, newer-looking kitchen.

Finishing touches for a refreshed holiday kitchen

Once your new sealant is cured and the joints look smooth, a few finishing touches can make your kitchen truly shine for the holidays. Start by giving countertops, backsplash tiles, and fixtures a thorough polish to highlight the fresh, clean sealant lines. Replace worn dish towels, add a new soap dispenser, or switch out cabinet hardware for small but noticeable upgrades. You can also brighten the space with under-cabinet lighting or a few festive accents to create a warm, inviting feel for guests.

Keeping up with sealant maintenance is another easy way to extend the life of your kitchen surfaces. Wipe joints regularly and check them once or twice a year for signs of wear or discoloration. Touching up these areas as needed keeps your kitchen looking crisp and prevents moisture damage down the road. These few simple details can turn your everyday kitchen into a refreshed, holiday-ready space.

To get GE Sealants’ products for your home improvement project, visit these fine retailers in the U.S. or Canada.

Smart sealing for landlords How to prevent water damage in rental units with the right silicone sealant

This guide provides general maintenance information for rental properties. Always follow the instructions and limitations on the GE product label and TDS. Conditions vary by building and location. Comply with local codes and inspection requirements. For structural issues, electrical or gas penetrations, suspected mold, or hidden water damage, consult a licensed professional. Water-ready times and cure times differ. Apply only within the stated temperature range and use appropriate PPE.

Most leaks begin at seams, where water should never stand. A failed bead around a tub, sink, or window can turn into a real loss. Learn how to prevent water damage in your rental units by choosing and applying the right silicone sealant.

Water damage costs landlords thousands each year, yet most claims trace back to a small, unsealed joint.

A landlord’s quick guide on how to prevent water damage with silicone

Water damage rarely begins with a burst pipe. Sometimes, it starts with a small gap that lets moisture seep behind a surface. In a single unit, that gap might go unnoticed. Across a portfolio, it can lead to thousands of dollars in repairs and lost rent. The average claim for water damage is about $12,000, and most begin at failed seams around tubs, sinks, windows, and toilets. Most of these failures are preventable with proper sealing and the right sealant. 

GE 100% silicone sealant forms a waterproof, flexible joint that keeps its seal through normal use and cleaning. It stays intact as your building moves and cures fast enough for tenants to use again in about 30 minutes (see the tube’s instructions). 

The water damage prevention plan is simple. Seal the high-use areas first—bathrooms, kitchens, windows, and utility penetrations. A $10 tube of silicone can stop repairs costing ten times more.

Bathrooms: the highest-risk joints and the right silicone sealant

Most interior water damage starts in the bathroom, often at edges that didn’t look urgent yesterday. Constant moisture, seasonal expansion, and flex around tubs and surrounds make this the hardest room to keep sealed. A small gap can send water under the flooring. But you can control it with a simple routine you repeat on every turn. These steps are the foundation of water damage prevention in bathrooms.

Where to inspect and seal

Start with the joints that fail first and cost the most when they do:

  • Tub and shower perimeters
  • Vanity backsplashes and sink edges
  • Faucet bases and escutcheons
  • Toilet base perimeter 
A person using the GE Sealant Smoothing Tool to create a watertight silicone seal along a countertop.

Step-by-step plan

Follow this process, as it holds up in occupied units and saves you from repeat trips:

1. Remove any loose or cracked material. Use the GE Sealant Remover Tool to clear failed joints cleanly without scratching tile or fixtures.

2. Clean and dry the surface completely.

3. Apply between 40°F and 100°F in a smooth, continuous bead.

4. Tool immediately using the GE Sealant Smoothing Tool for an even, watertight finish. This prevents thin spots that leak early.

5. Allow 30 minutes before light water contact and 24 hours before heavy cleaning. Water-ready in 30 minutes does not mean fully cured. That early protection helps your tenants use the space without disrupting the curing time.

Choose the right product for each surface

Choose the tier that fits your surface and schedule:

Use neutral-cure silicone on natural stone to prevent surface etching.

When to reseal

Cracked beads, pulled edges, or stains mean the seal has failed. Replace the bead immediately after spotting these signs to prevent water damage.

Bathrooms move more than they appear. Watch corners and vertical seams. When you see a dark edge or mildew creeping along a joint, scrape it, clean it, and reseal the same day.

Tell tenants they can use it lightly after 30 minutes. Have them wait a full day before cleaning. That one-day buffer keeps the bead intact and avoids callbacks.

When your joints stay sealed, you avoid service calls, protect finishes, and keep tenants satisfied.

Kitchens: high-use joints that need fast turnaround and lasting flex

Kitchens are second only to bathrooms for hidden leaks. Seams around sinks, counters, and backsplashes take constant splashing, cleaning, and movement. Each joint you seal here saves you a counter, cabinet base, or repair bill later.

Start with the seams that fail first: sink perimeter, backsplash edges, counter seams, dishwasher air gap, and under-sink valves.

Choose the product that fits your kitchen surfaces and turnover schedule:

  • Good: GE Advanced Silicone 2 Kitchen & Bath – Use where water meets work, like along sink rims, faucet bases, and counter seams. It stands up to detergents, daily wipe-downs, and constant moisture, keeping those edges sealed through every turnover. 
  • Better: GE Supreme Silicone Kitchen & Bath – For joints that shift or carry high-value finishes, including undermount sinks, stone counters, and stainless edges that flex with temperature and use. The Class 50 rating keeps the bead tight and the surface protected. 
  • Best (paintable): GE Pro Seal Max Kitchen & Bath – For trim or backsplash areas that need paint before move-in, this hybrid is water-ready right away, cutting downtime between tenants.

Prep cleanly with the GE Sealant Remover Tool, then finish with the GE Sealant Smoothing Tool for a tight, even bead. Fifteen minutes here can prevent costly counter or cabinet repairs and cut tenant calls. That’s how to prevent water damage that starts in kitchens.

Exteriors and utilities: where water sneaks in first

Most water damage starts outside, around window frames, door casings, and utility cutouts that have aged a little too long. So, your water damage prevention strategy needs to look outdoors as well.

Weather shifts make those joints flex, dry, and separate. Once a seam opens, rainwater follows gravity inward, often showing up weeks later as a soft baseboard or a swollen sill. By that point, you’re not fixing a leak anymore. You’re fixing drywall, flooring, and tenant trust.

During every turnover, consider checking the exterior joints and resealing anything starting to separate. A few minutes outside can keep your maintenance calls and insurance claims lower throughout the year. 

Property maintenance worker applying GE Supreme Silicone Window & Door around an exterior window frame to stop water intrusion.

Start with windowsills, door frames, and trim. And then choose the right product for each area:

You will want to check your utility penetrations, too. Washer boxes, vent cutouts, and pipe chases are common culprits. Fill larger gaps with GE Pest Block Insulating Foam, Gaps & Cracks, or Big Gaps & Cracks foam, then finish with a silicone layer to lock out moisture. 

Those small seals can help you prevent water damage in your rental units by stopping humid air from condensing behind drywall and causing hidden rot. 

Standardize your sealing routine for long-term water damage prevention

During every turnover, inspect high-use seams, remove failed material, clean and dry, then apply the right GE silicone sealant. 

Log each application with a bead photo, date, and lot number for recordkeeping. 

Use GE Advanced Silicone for standard joints, Supreme Silicone for natural stone or high-movement surfaces, and Pro Seal Max when paint and turnaround speed matter. 

If a bead cracks, pulls, or stains, reseal it before it spreads. Record the cure and return-to-service time so tenants know when it’s safe to use again. 

This routine protects finishes, prevents callbacks, and keeps your rental schedule steady.

Ready to reseal? Find GE silicone sealants for lasting water damage prevention in your rental units at a retailer near you in the U.S. or Canada.
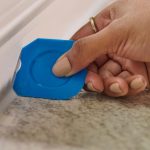
Choose the right plumbing sealant and save time, money, and callbacks The best plumbing sealant for bathroom installs

Bathrooms are among the toughest environments for sealants because every joint is exposed to water, cleaning products, and daily use. While acrylic caulk may be inexpensive and easy to apply, it’s not designed to handle constant moisture or movement. For long-lasting performance, the preferred plumbing sealant is silicone, which stays flexible, waterproof, and mold-resistant even in areas constantly exposed to moisture and movement.

For professionals, the right plumbing sealant can mean the difference between a reliable, watertight installation and callbacks to unsatisfied customers. For wet-area performance, GE Supreme Silicone Kitchen & Bath Sealant is the top choice.

Comparing silicone vs. acrylic caulk: key differences

When evaluating sealants for plumbing and bathroom work, the performance contrast between silicone and acrylic caulk is significant. 

As a bathroom and sink sealant, silicone handles the challenges of bathroom environments where other products fail. Silicone remains elastic for its entire service life, accommodating up to ±50% joint movement without breaking the bond, and allows it to move with tubs, sinks, and counters. This flexibility is essential for maintaining a watertight seal in joints constantly stressed by temperature changes and daily use. Acrylic caulk, in contrast, hardens after curing and becomes brittle, so even small shifts in a joint can cause cracks or gaps to form.

Silicone also forms a truly waterproof barrier, protecting against leaks that can damage underlying structures. Acrylic is only temporarily water-resistant and degrades quickly when exposed to standing water or high humidity, making it unsuitable as a shower, tub, or sink sealant.

Another major advantage is silicone’s resistance to mold and mildew, which is ideal for high-humidity spaces where hygiene and appearance matter. Acrylics tend to shrink, peel, or discolor after repeated scrubbing and are not mold- and mildew-resistant.

In addition, professional-grade silicones bond securely to almost any substrate you’ll find in residential homes, including:

  • Porcelain
  • Ceramic
  • Glass
  • Metal

For plumbers, choosing silicone reliably results in fewer callbacks and reduced maintenance.

GE products plumbers can trust

GE Supreme Silicone Kitchen & Bath Sealant.

For professionals, the right plumbing sealant can mean the difference between a reliable, watertight installation and callbacks to unsatisfied customers. For wet-area performance, GE Supreme Silicone Kitchen & Bath Sealant is the top choice. This 100% silicone formula provides a permanently waterproof and flexible seal that stands up against constant exposure to water, steam, and cleaning products. It resists mold and mildew growth for a cleaner, longer-lasting finish, while adhering strongly to common bathroom materials like porcelain, glass, and ceramic. Once cured, it remains elastic and durable, maintaining its bond even in areas with frequent expansion and contraction, such as around sinks and tubs.

When a paintable option is needed, GE Pro Seal Max Kitchen & Bath offers a professional-grade hybrid solution. It combines the toughness and flexibility of silicone with the paintability of acrylic latex, ideal for trim, cabinetry, or mixed-material joints. It also resists shrinkage and abrasion, ensuring a smooth, even bead that holds up over time.

Application tips for sealing sinks and tubs

A homeowner removes old acrylic caulk with the GE Sealant Remover Tool.

Getting a perfect, watertight seal around sinks and tubs starts with proper surface preparation. Begin by removing any existing caulk or sealant using the GE Sealant Remover Tool. This step ensures a clean bonding surface and prevents old material from interfering with adhesion. Once the old sealant is removed, wipe the joint clean with a mild cleaner and allow it to dry completely. Moisture or residue can compromise even the best sealant.

Cut the nozzle of your sealant tube at a 45-degree angle to control bead size, then apply a steady, even line along the joint. Work in manageable sections to avoid skin-over before tooling. Immediately smooth the bead with a putty knife or the GE Sealant Smoothing Tool to press the silicone into the joint and create a clean, uniform finish.

Plumbers have different approaches to sealing the base of toilets. Some prefer a fully sealed look, while others follow code recommendations and leave a small gap, so any future leaks can be detected early. GE recommends adhering to applicable plumbing codes and exercising professional judgment on a case-by-case basis. Lastly, avoid exposing the seal to water until it has fully cured, per the product label. For silicone, that typically means waiting at least 24 hours. Taking time to prep, apply, and cure properly will save you hassle and costs down the road.

To get GE Sealants’ products for your professional bathroom installs, visit these fine retailers in the U.S. or Canada.

Choose the right sealant and avoid callbacks and leaks later Silicone vs. hybrid sealant: which one is right for contractors?

Contractors know that not all sealants are created equal, and picking the wrong one can mean callbacks, leaks, and unhappy clients. Silicone and hybrid sealants each bring different strengths to the job. This guide breaks down the differences so you can match the right GE product to the conditions you face on every project.

Contractors often need to balance performance with job-site efficiency, and GE offers options in both 100% silicone and hybrid categories to meet those needs. While silicone shines in extreme conditions, hybrid sealants like the Pro Seal Max series give pros a versatile, durable option for mixed-material jobs and visible finishes.

What matters most on the jobsite

Sealants do more than just fill gaps. They must stand up to the conditions the building will face for years. Contractors need products that can handle variable expansion and contraction, as joints in siding, windows, and trim constantly shift with seasonal temperature changes. 

UV exposure is another significant factor. Exterior joints break down quickly under harsh sunlight if the wrong sealant is used. Moisture quantity is similarly important, whether it comes from rain, snow, or daily cleaning cycles indoors. Beyond performance, contractors also need to consider paintability and finish options, especially on visible trim and decorative surfaces.

Silicone sealants

Silicone sealants have long been a favorite among contractors because of their proven performance in demanding environments. Their biggest strength is flexibility. Once cured, pure silicone remains highly elastic, allowing as much as 50% joint movement without breaking or cracking. This makes silicone ideal for exterior joints exposed to widely shifting temperatures or areas with constant movement. Silicone also excels in water resistance, making it a natural go-to for bathrooms, kitchens, and other high-moisture zones. Additionally, silicone is highly resistant to UV rays, mold, and mildew, so it holds up well under both prolonged sunlight and damp conditions.

However, 100% silicone sealants do have limitations. They are generally not paintable, which can be a drawback on visible trim or decorative surfaces where color matching matters to clients. They also tend to require more careful surface preparation and can be more difficult to clean up during application. Judged solely on performance metrics, silicone sealants outperform hybrid alternatives, but not every job requires performance extremes. In either case, you can simplify the sealant tooling process with GE’s Sealant Remover Tool and Sealant Smoothing Tool.

Hybrid sealants

Hybrid sealants are gaining popularity with contractors because they balance strength, versatility, and appearance in ways that 100% silicone cannot always match. Their biggest selling point for contractors is paintability. With hybrid sealants, you can get exact color matches on siding and trim finishes. Hybrids also provide strong adhesion across a wide range of substrates, including wood, masonry, fiber cement, and metals. 

Compared to 100% silicone, hybrid formulations like GE’s Pro Seal Max series are rated for 25% joint movement, which is more than sufficient flexibility for many building applications. Hybrid sealants also cure quickly, with some products paint-ready in just one hour, and resist abrasion better than pure silicone. 

GE Sealants for contractors: product comparison

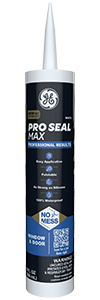
GE Supreme Silicone Window & Door Sealant and Pro Seal Max Window & Door Sealant.

Contractors often need to balance performance with job-site efficiency, and GE offers options in both 100% silicone and hybrid categories to meet those needs. 

GE Supreme Silicone Window & Door Sealant is a 100% silicone product designed for maximum flexibility, rated to handle significant joint movement (Class 50 under ASTM standards). It provides outstanding resistance to UV rays, mold, and constant moisture, making it the best choice for projects exposed to harsh weather or environments with frequent water contact.

On the hybrid side, GE Pro Seal Max Window & Door Sealant delivers strong adhesion across a broad range of materials. It resists shrinking, cures to a tougher finish that withstands abrasion, and tools more easily than pure silicone, making it especially contractor-friendly. While silicone shines in extreme conditions, hybrids like the Pro Seal Max series give pros a versatile, durable option for mixed-material jobs and visible finishes.

Silicone and hybrid sealant uses

Here’s a breakdown of some common sealing jobs and what kind of sealant is optimal for each.

1. High moisture and constant wet zones

For bathrooms, kitchens, and other spaces exposed to constant water, GE Supreme Silicone Kitchen & Bath Sealant is the stronger choice because 100% silicone remains permanently flexible and waterproof. Its resistance to mold and mildew growth ensures long-term protection in showers, sinks, and backsplashes where failures could lead to costly water damage.

2. Exterior façades exposed to UV and seasonal shifts

Siding, exterior trim, and door frames are constantly under stress from sunlight, rain, and temperature swings. These are areas where GE Pro Seal Max Window & Door Sealant excels. Its hybrid formulation offers stronger adhesion to multiple substrates and resists shrinking over time.

3. Mixed-material joints

Jobs that involve bonding to mixed materials can be challenging because not every sealant adheres well across such different substrates. GE Pro Seal Max Window & Door Sealant wins out in these situations because of its broad adhesion profile and its ability to stay bonded through movement and seasonal change.

4. High-traffic, impact-prone areas

Scuffed sealant on a baseboard.

Interior trim, baseboards, and entryway joints are frequently subject to scuffs and bumps. In these cases, you’ll want the sealant that cures to a tougher finish. Hybrid sealants provide abrasion resistance and shrink less than silicones. While silicone remains excellent for flexibility, it is softer once cured and can be more prone to surface damage in high-contact areas.

To get GE Sealants’ products for your home improvement project, visit these fine retailers in the U.S. or Canada.

Leak protection made simple How to reseal plumbing fixtures and penetrations

Note: This DIY article is provided as a general guide only and is not intended to take the place of product-specific installation procedures; always follow applicable manufacturers’ instructions. Depending on your home’s age and condition, location within the home, and other potential factors, repairs and/or upgrades or other services may be necessary prior to the beginning and/or completion of your project that may involve the services of a home improvement professional. This article does not include advice pertaining to local building codes and/or any related inspections.

Failed caulk around sinks, tubs, or pipe penetrations is a leak waiting to happen. This guide shows you exactly how to reseal plumbing fixtures with GE sealants so your work lasts and looks professional.

Why resealing sinks and tubs matters: signs of failure and risks

Check the bead around your sink or tub. 

If it’s cracked, pulling away, or dark with mildew, water might have already found a way in. Behind that failed line, moisture swells cabinets, stains drywall, and feeds mold you might not see until it’s too late. A plumbing sealant is only as strong as its bond. And once it lets go, the fixture is exposed. 

Resealing your plumbing fixtures on time keeps damage from spreading and restores that watertight barrier your bathroom depends on.

Tools and materials for resealing sinks and tubs, including GE plumbing sealant and remover tool.

Tools and materials checklist

Before you cut a nozzle, have everything you’ll need on hand:

Prep is 80% of the job. Remove every trace of the old caulk before resealing with plumbing sealant for a bond that lasts.

Remove the failed bead the right way

Old caulk has to come out as any residue can compromise how well your new sealant bonds. 

Start by scoring both edges of the bead with your GE Sealant Remover Tool, then pull the strip free in long passes. Scrape away residue until the joint is bare. Be patient here: half-removed caulk is a common reason reseals fail early.

Once the bead is gone, wipe the joint with isopropyl alcohol and a lint-free rag. Don’t use household cleaners, as soap leaves residue that weakens adhesion. 

If the gap is wider than 3/8 inch, press in a backer rod before resealing to control the joint depth. 

Let every surface dry fully. This ensures your plumbing sealant bonds tightly and lasts.

Choose the right plumbing sealant

The sealant you choose makes or breaks the job. If you pick the wrong sealant, the joint can fail prematurely, no matter how steady your hand is. Around sinks, tubs, and penetrations, you need the right plumbing sealant to keep water out. 

Here’s how to match the sealant to your project:

  • Good: GE Tub & Tile Silicone Sealant – 100% silicone, waterproof, flexible, with 7-year mold-free product protection. Solid choice for resealing sinks, tubs, and showers.
  • Better: GE Advanced Silicone Kitchen & Bath – 100% silicone, waterproof, more flexible than standard formulas, 10-year mold-free protection. Ideal for busy kitchens and baths.
  • Best: GE Supreme Silicone Kitchen & Bath – 100% silicone with higher flexibility and a lifetime mold-free product protection (and lifetime guarantee). This is the ideal choice for long-term performance in wet zones. 
  • Paintable: GE Pro Seal Max Kitchen & Bath – Hybrid, waterproof, and paintable (with latex paint or primer). Use it where you need to seal against water but plan to paint, like backsplashes or countertop seams.

Knowing how to reseal plumbing fixtures with the right sealant means you’ll avoid a common DIY mistake: grabbing painter’s caulk for a wet area.

Resealing sinks and tubs: the pro finish in 6 steps

Once the old bead is gone and you’ve got the right GE plumbing sealant in hand, it’s time to lay a new joint. 

Follow these six steps to get a bead that seals tight, looks sharp, and lasts.

  1. Mask Accurately

    Run painter’s tape along both sides of the joint. Leave the gap you want to fill fully exposed, nothing more. The tape keeps the bead straight and prevents smears onto tile or fixtures.

  2. Cut the nozzle small

    Trim the sealant nozzle at a 45° angle with an opening slightly smaller than the gap. A small cut gives you control and a smooth finish.

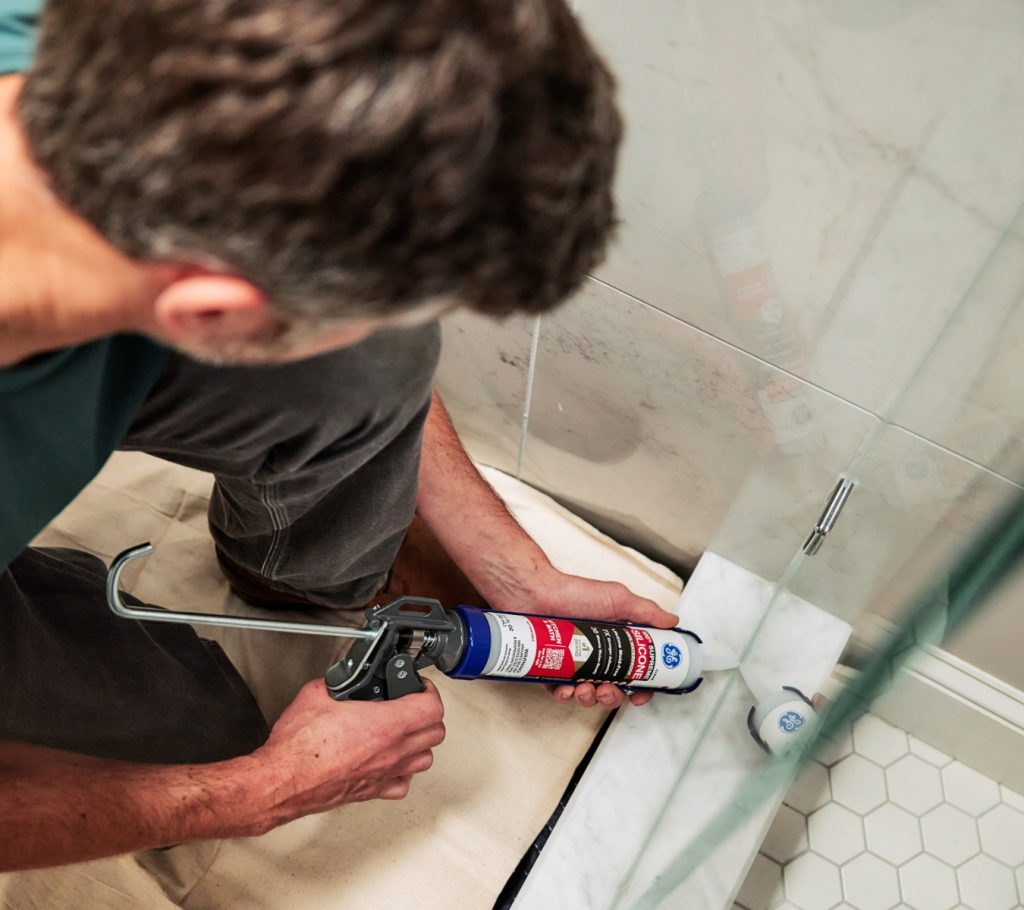
    Applying a continuous bead of GE Supreme Silicone Kitchen & Bath sealant along a shower edge.
  3. Lay a continuous bead

    Hold the gun at a 45° angle and pull smoothly along the joint. Keep pressure steady so the bead flows without breaks or blobs. Try not to stop mid-run—restart marks always show, one continuous pass is what gives you a professional, smooth finish.

  4. Tool the bead

    Within the product’s tooling window (often 5-10 minutes, but confirm on the product label), run the GE Smoothing Tool lightly over the line. This presses the plumbing sealant into the joint and helps to shape a clean finish. 

  5. Pull the tape

    Remove the painter’s tape right after tooling. Pull it back over itself at a sharp angle for a clean edge. Waiting until the bead skins over will likely tear and ruin the line.

  6. Let it cure

    Leave the joint untouched until the sealant sets. Each GE sealant has its own cure window: some are water-ready in 30 minutes, others need a full day before heavy use. Check the label and stick to it. 

    Also, don’t scrub or stress the bead until it’s fully cured. A plumbing sealant that’s rushed will not bond right, and redoing the job is always harder than waiting.

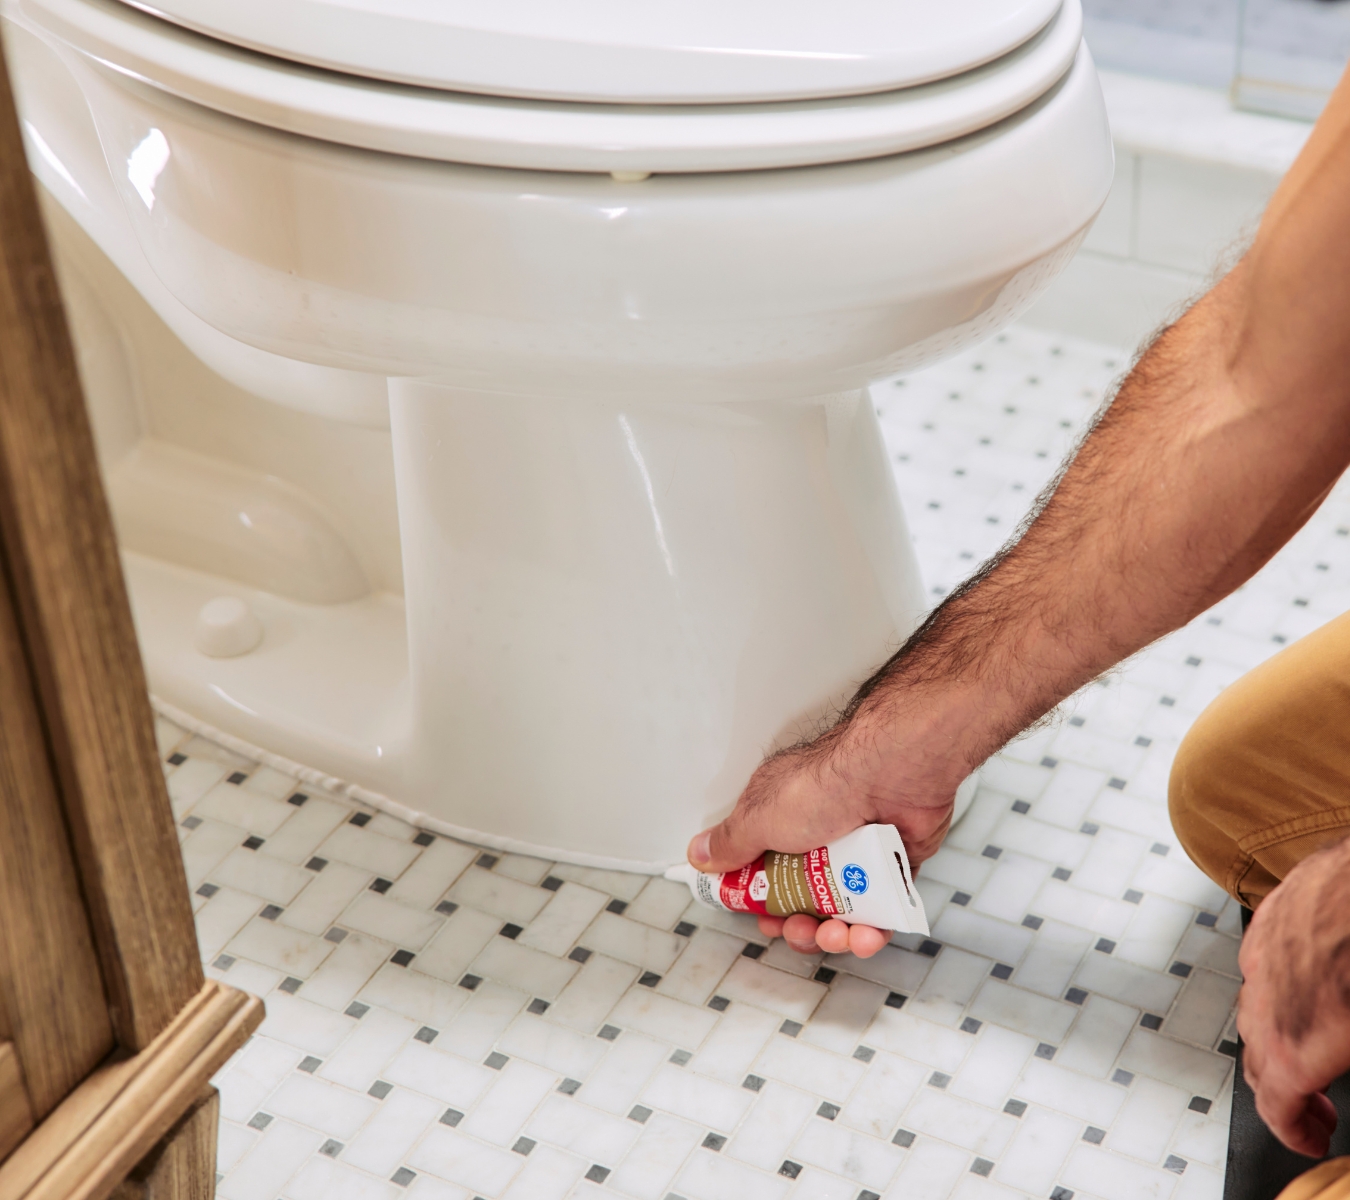
    A DIYer sealing around a toilet base.

Penetrations and trim: spouts, escutcheons, toilet base

Not every joint gets sealed the same way. Fixtures that meet walls or floors need special treatment:

  • Tub spouts and shower escutcheons: Seal the top and sides, but leave a small gap at the bottom. That gap works as a weep path, so any trapped water drains out instead of sitting behind the plate.
  • Toilet base: Many inspectors require a perimeter seal. Run a continuous bead around the front and sides, but leave a gap at the back. That opening makes leaks visible before they rot your subfloor.
  • Pipe penetrations through walls or vanities: If the opening is oversized, push in a backer rod first. Then apply your plumbing sealant in a smooth bead so it bonds to both the pipe and surface.

Resealing plumbing fixtures the right way also means handling these trim details correctly, because the right gaps can help prevent hidden damage.

Seal it once, seal it right. Choose GE Kitchen & Bath sealants today at a retailer near you in the U.S. or Canada for a watertight, mold-free finish.

Caulking a bathtub: expert tips for a leak-free finish

Note: This DIY article is provided as a general guide only and is not intended to take the place of product-specific installation procedures; always follow applicable manufacturers’ instructions. Depending on your home’s age and condition, location within the home, and other potential factors, repairs and/or upgrades or other services may be necessary prior to the beginning and/or completion of your project that may involve the services of a home improvement professional. This article does not include advice pertaining to local building codes and/or any related inspections.

If you’ve noticed peeling, cracked, or discolored caulk around your tub, you know how quickly it can turn into an eyesore and a source of leaks and water damage. Luckily, you don’t have to call a professional for help because with these expert tips on caulking a bathtub, you can take care of it yourself. Whether you’re wondering about the best caulk for a bathtub or how to ensure a smooth bead, these insights will help you get a clean, durable finish that holds up against moisture and daily use.

Caulking isn’t just cosmetic. It’s a barrier that keeps water out of the cracks between your tub, walls, and flooring. Caulk prevents mold growth, tile damage, and expensive repairs when done right.

Why bathtub caulking matters

Caulking isn’t just cosmetic. It’s a barrier that keeps water out of the cracks between your tub, walls, and flooring. Caulk prevents mold growth, tile damage, and expensive repairs when done right. However, even the smallest gaps can let water in when neglected or poorly applied, leading to long-term issues.

Choosing the best caulk for a bathtub

Not all caulks are created equal. The type of sealant you choose will make or break your project. Below are a few things the pros recommend so you know what to look for while shopping:

  • Opt for 100% silicone: Silicone sealant is fully waterproof, flexible, and mold-resistant, making it the gold standard for tubs and showers. Acrylic caulks, while paintable, don’t hold up in constantly wet or humid environments.
  • Look for a mildew-resistant formula: Many bathroom caulks contain built-in antimicrobial properties, slowing down mold growth and keeping your sealant fresh.
  • Choose a color that blends in: White and clear are common choices, but silicone sealant is often available in colors to match your grout or bathroom fixtures. A seamless look can elevate the finish of your space.
  • Pick a quality brand: Cheaper caulks often shrink or crack faster. Investing in a top-performing product ensures your effort lasts.

When choosing a silicone sealant, always check the label for “bathroom” or “kitchen and bath” to ensure the product is rated for wet environments. We recommend using GE Supreme Silicone Kitchen & Bath Sealant. It is 100% silicone and waterproof and comes in three colors (white, clear, and almond), so you can choose the one that best suits your bathroom.

The secret to a clean, professional finish when caulking a bathtub

Resealing your bathtub doesn’t have to be daunting. You want to take extra care to prevent uneven beads or messy smears. Luckily, a few techniques will deliver a sleek, professional look:

  • Prep is everything: Make sure the area is completely dry and free from soap scum, dirt, and dust. Sealant won’t adhere well to dirty or damp surfaces.
  • Use painter’s tape: Apply strips along each side of the joint to create a guide for your bead. This helps keep lines sharp.
  • Steady application: One pass of sealant is best for professional-looking results. To achieve this, cut the silicone sealant’s tip at a 45-degree angle and use a caulking gun to apply steady pressure for an even bead.
  • Smooth it out immediately: While a gloved finger does the trick, a Sealant Smoothing Tool creates a uniform finish without dragging or leaving gaps.
  • Remove tape immediately: Peel it off while the caulk is still wet to avoid jagged edges.

This little extra effort makes the difference between a job that’s good enough and one that’s flawless.

How often should you replace bathtub caulk?

Caulk doesn’t last forever. Even the best caulk for a bathtub will eventually deteriorate due to water exposure and cleaning products. Most professionals recommend inspecting your caulk at least once a year and replacing it every five years. Should you notice any of the following, replace it sooner:

  • Cracks, gaps, or peeling edges
  • Mold or mildew stains that won’t scrub away
  • Caulk pulling away from the tub or tile

Staying on top of this maintenance keeps your bathroom sealed, fresh, and damage-free.

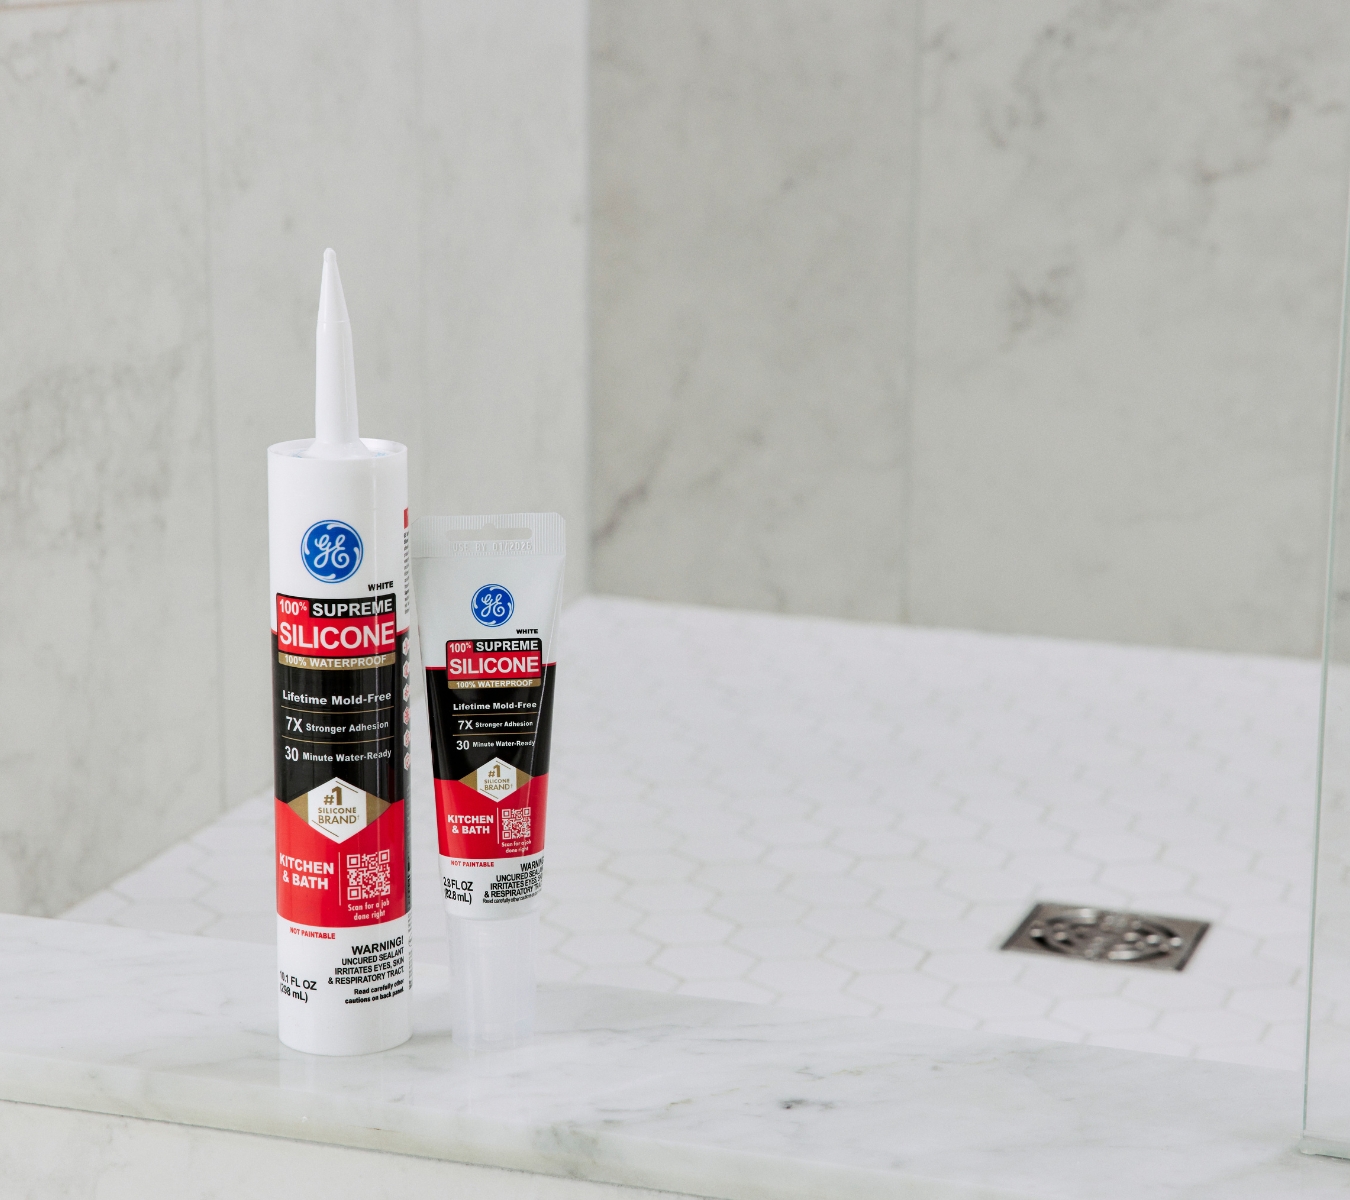
GE Supreme Silicone Kitchen & Bath Sealant sitting outside of a shower.

How do you remove caulk from a bathtub?

If you notice issues with your caulking, you’ll need to replace it. Removal and cleaning are essential steps because old caulk can leave residue that prevents new caulk from sticking. Removing old caulk efficiently requires a few steps to keep in mind.

  • Use the right tools: A Sealant Remover Tool helps lift out old lines without scratching your tub or tile. Use the pointed end of the tool for removal.
  • Clean thoroughly: After removing, use the flat end of the tool to scrape away any residue. Then, wipe the area with rubbing alcohol or a mild cleanser.
  • Dry completely: Don’t apply new caulk to damp surfaces. Wait for the surface to dry before getting started for the best adhesion.

Yes, it takes a little time, but skipping this step is the fastest way to end up redoing the job later.

Keeping bathtub sealant clean

Once you’ve achieved that crisp, fresh bead of caulk, you’ll want to keep it looking that way. Caulk can become discolored over time if not cared for properly. Here are a few tips that will help you maintain it:

  • Ventilate the bathroom: Good airflow reduces moisture buildup, which helps prevent mold.
  • Wipe down regularly: After showers, quickly towel-dry the caulk line to limit soap scum.
  • Avoid harsh scrubbing: Use gentle, non-abrasive cleansers because harsh chemicals can damage the seal over time.
  • Spot clean mold early: If you notice small spots, clean with a solution of water and vinegar before they spread.

Think of it like preventative care. Just a few seconds of maintenance will extend the lifespan of your sealant.

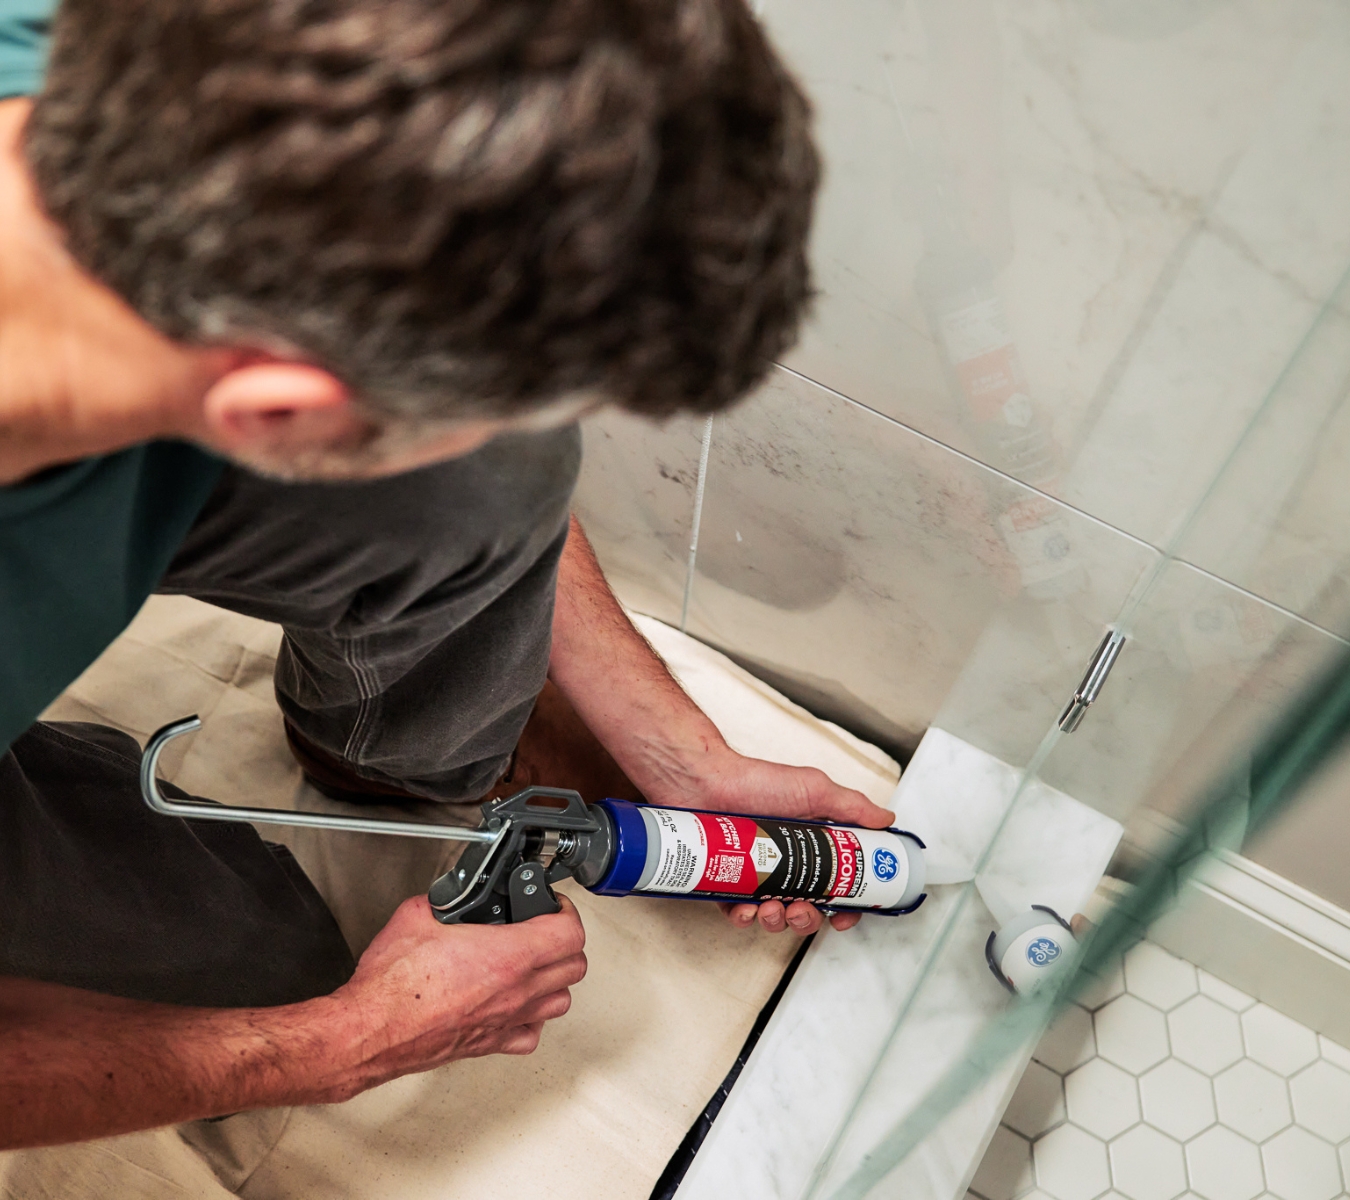
Man using the best caulk for a bathtub to apply sealant in the shower.

How to caulk a bathtub: extra expert tips for a leak-free seal

A few additional tips are needed to get a professional result when caulking a bathtub:

  • Work in small sections: Sealant dries quickly. Tackle one seam at a time to avoid rushing.
  • Mind the corners: These are the trickiest spots. Overlap beads slightly where seams meet for full coverage.
  • Don’t rush drying time: Check the product label for the manufacturer’s recommendation. While the sealant is curing, keep the area dry.
  • Properly store leftover caulk: Seal the tube tightly and store it upright in a cool, dry place for future touch-ups.

FAQ

What’s the best caulk for a bathtub?

A 100% silicone sealant is the best option for tubs because it’s waterproof, flexible, and mold-resistant. Look for a product labeled explicitly for bathrooms, such as the GE Supreme Silicone Kitchen & Bath Sealant.

How do you remove caulk from a bathtub without damaging the surface?

Use the GE Sealant Remover Tool to peel away old caulk and scrape off residue. Avoid using metal scrapers, which can scratch the tub or tile.

How often should bathtub caulk be replaced?

Most caulk should be replaced every five years, but it should be inspected annually. Replace it sooner if you see cracks, gaps, or mold stains that won’t go away with cleaning.

Can you apply silicone sealant over old caulk?

No, it’s not recommended. New sealant won’t adhere properly to old, deteriorating lines. Always remove the old caulk first for the best results when caulking a bathtub. 

Are you looking for the best caulk for a bathtub? Find a store near you in the U.S. or Canada that carries GE products.

Enjoy peace of mind and long-term savings when implementing these winterizing tips. An expert guide to winterizing outdoor kitchens and patios

Note: This DIY article is provided as a general guide only and is not intended to take the place of product-specific installation procedures; always follow applicable manufacturers’ instructions. Depending on your home’s age and condition, location within the home, and other potential factors, repairs and/or upgrades or other services may be necessary prior to the beginning and/or completion of your project that may involve the services of a home improvement professional. This article does not include advice pertaining to local building codes and/or any related inspections.

Outdoor kitchens and patios have become a must-have for modern backyards, offering the perfect place to entertain, cook, and relax in warmer months. But when winter creeps in with freezing temperatures, snow, and ice, those same spaces can quickly suffer damage if not adequately protected. The good news is that you can extend your investment’s lifespan by winterizing outdoor kitchens and patios and ensuring your outdoor oasis is ready to enjoy again when spring arrives.

Your outdoor kitchen and patio are more than just an extension of your home. Protecting them from harsh winters ensures they’ll be ready to welcome family and friends when warm weather returns.

Why winterizing outdoor kitchens matters

Unlike indoor living spaces, outdoor kitchens and patios are exposed to the full force of the elements. When water seeps into cracks or joints in countertops, masonry, or wooden structures, it doesn’t simply sit there. It expands when temperatures drop below freezing. This freeze-thaw cycle can lead to:

  • Cracks in countertops and stone features
  • Loose or shifting brick and pavers
  • Splitting or rotting wood posts
  • Deterioration of grout and mortar joints

Left untreated, these minor issues can get worse, leading to expensive repairs or replacements come spring. Winterizing your space protects both the beauty and functionality of your outdoor retreat.

A step-by-step guide to winterizing outdoor kitchens and patios

Cracked stonework, split joints, and deteriorated wood posts are all too familiar when moisture sneaks into gaps and freezes. The following steps focus on one of the most crucial steps, using cold-weather sealant, to protect vulnerable joints, features, and structures.

  1. Inspect all surfaces thoroughly

    The first step in winterizing outdoor kitchens is a detailed inspection before the first freeze. Walk through your outdoor space and keep an eye out for:

    • Gaps in countertop joints where water can penetrate
    • Hairline cracks in stone or brick features
    • Open seams where pergola or deck posts meet concrete
    • Signs of shifting pavers or mortar deterioration

    Use a flashlight for hard-to-see areas and run your hand over surfaces. Sometimes you’ll feel a gap before you see it. Early detection allows you to seal issues before winter weather worsens them.

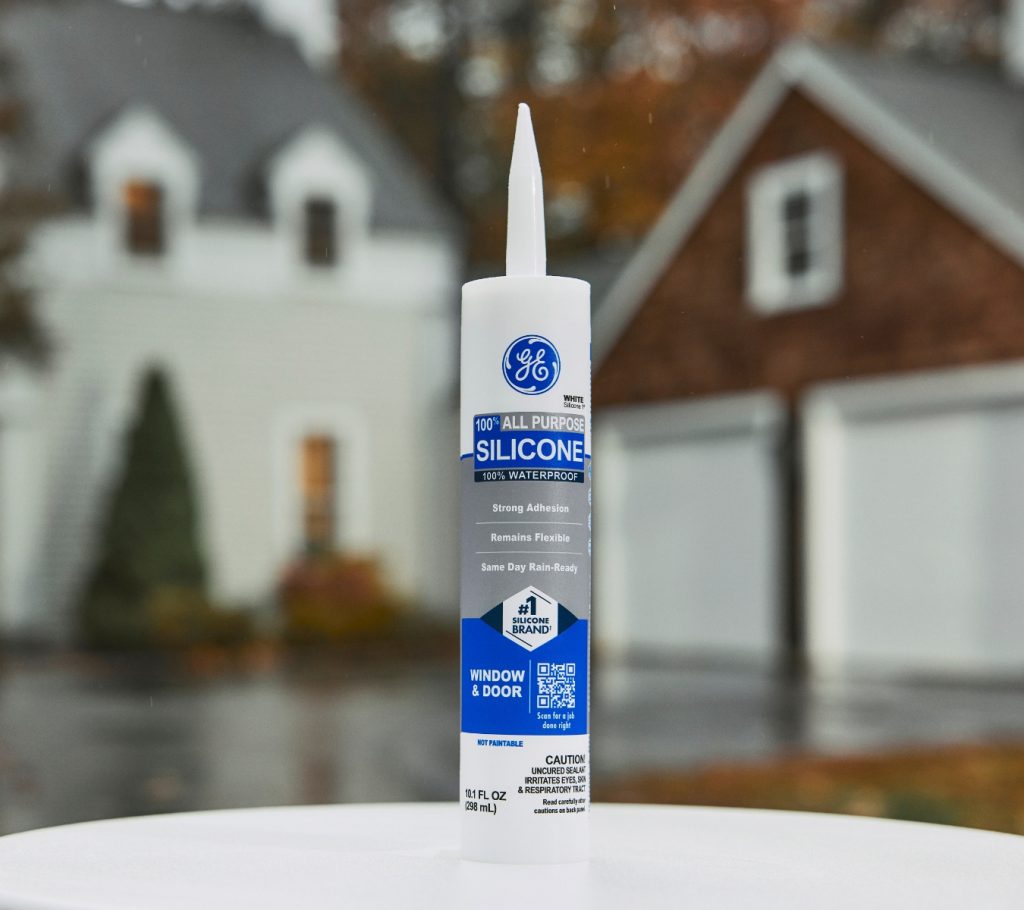
    GE All Purpose Silicone Sealant, a powerful cold-weather sealant.
  2. Choose the proper cold-weather sealant

    Not all sealants are created equal. For outdoor applications, especially in cold climates, you’ll want a cold-weather sealant formulated to withstand freezing and thawing without shrinking, cracking, or peeling.

    Look for a sealant that offers:

    • Flexibility: It should expand and contract with temperature changes.
    • Waterproof protection: To keep moisture from seeping into joints.
    • UV resistance: Even in winter, sunlight can break down lesser sealants.
    • Strong adhesion: So it bonds securely to stone, brick, wood, and concrete.

    Silicone-based sealants are popular choices for winter applications. The GE All Purpose Silicone Sealant is an excellent choice for most areas. It’s 100% weatherproof and resists UV degradation. It also adheres to various surfaces, including wood, granite, ceramic and porcelain tile, natural stone, and more.

  3. Seal countertop joints

    Countertops are a focal point of outdoor kitchens and one of the most vulnerable areas. Joints between granite, concrete, or tile slabs can easily collect water. Once temperatures dip, those joints can crack and compromise the structural integrity of your kitchen.

    To protect them:

    • Clean the surface: Remove dirt, grease, and debris with a mild cleaner.
    • Dry thoroughly: Moisture trapped under sealant can weaken adhesion.
    • Apply sealant evenly: Run a steady bead along the joint, then smooth it with a Sealant Smoothing Tool.
    • Allowing curing time: Follow the manufacturer’s directions for curing and keep the space dry until it’s fully set.

    Regularly checking countertop joints and resealing as needed prevents winter damage and extends the life of your counters year-round.

  4. Protect stone and brick features

    From pizza ovens to decorative walls, stone and brick add charm to outdoor kitchens and patios. Unfortunately, porous materials like these are especially prone to absorbing water. When that trapped moisture freezes, it can cause flaking, cracking, or spalling (surface chipping).

    Here’s how to winterize these features:

    • Fill visible cracks: Use a cold-weather sealant for masonry to fill gaps.
    • Apply a breathable sealer: Unlike joint sealant, a masonry sealer penetrates stone or brick, creating a barrier against water while allowing the material to “breathe.”
    • Pay attention to mortar joints: If mortar is crumbling, patch it before sealing.

    Taking the time to seal stone and brick helps maintain their structural integrity and keeps them looking sharp season after season.

  5. Seal pergola and deck posts

    Pergolas, decks, and other wood structures bring shade and style to patios but are also highly vulnerable to moisture damage. Where posts meet concrete or stone footings, gaps often form. Water sneaks in, freezes, and eventually causes splitting or rot.

    To prevent this:

    • Inspect base connections: Check for gaps at the bottom of posts.
    • Use cold-weather sealant: Apply it where wood meets stone or concrete.
    • Seal exposed wood: Consider adding a protective wood sealant to prevent water absorption on surfaces.

    This step can save you from costly repairs and help your structures last for years longer.

  6. Don’t forget the patio surface

    Patio surfaces are typically made of pavers, concrete, or stone. They also need attention before winter. Small gaps between pavers or hairline cracks in concrete slabs invite water damage.

    • Pavers: Sweep polymeric sand into joints and mist lightly with water to lock them in place.
    • Concrete slabs: Fill cracks with a flexible sealant that moves with temperature shifts.
    • Stone patios: Apply sealant around edges where water often collects.

    For the best results, try using the GE Concrete Silicone Sealant. It’s excellent for applying to concrete, mortar, and stone. Plus, it’s 100% waterproof, weatherproof, and permanently flexible.

  7. Extra tips for winterizing outdoor kitchens

    Sealing joints and surfaces is crucial, but don’t stop there. To fully winterize your outdoor kitchen:

    • Shut off water lines: Drain faucets and plumbing to prevent frozen pipes.
    • Protect appliances: Cover grills, refrigerators, and sinks with weatherproof covers.
    • Store soft materials: Bring cushions, fabrics, and accessories indoors.
    • Clear debris: Leaves and dirt trap moisture that can lead to damage.

    Together, these steps ensure your outdoor space weathers the cold without issue.

    A sink and grill in an outdoor kitchen.

The long-term benefits of winterizing

While winterizing outdoor kitchens might seem like extra work, it’s an investment in protecting your property. Properly sealing and preparing your space offers:

  • Cost savings: Avoid expensive repairs or replacements in the spring.
  • Longevity: Extend the life of countertops, patios, and structures.
  • Peace of mind: Enjoy winter knowing your space is protected.
  • Year-round beauty: Keep your outdoor retreat looking polished no matter the season.

Use cold-weather sealant to protect your space

Your outdoor kitchen and patio are more than just an extension of your home. Protecting them from harsh winters ensures they’ll be ready to welcome family and friends when warm weather returns.

By sealing countertop joints, stone and brick features, pergola posts, and patio surfaces with a high-quality cold-weather sealant, you safeguard your space against the freeze-thaw cycle. Combine that with other winterizing steps, and you’ll enjoy peace of mind and long-term savings.

Looking for the best sealant for your next project? Find GE products at a store near you in the U.S. or Canada.

Master crisp, clean caulk lines How to get crisp, clean caulk lines every time

Note: This DIY article is provided as a general guide only and is not intended to take the place of product-specific installation procedures; always follow applicable manufacturers’ instructions. Depending on your home’s age and condition, location within the home, and other potential factors, repairs and/or upgrades or other services may be necessary prior to the beginning and/or completion of your project that may involve the services of a home improvement professional. This article does not include advice pertaining to local building codes and/or any related inspections.

A crooked caulk line fails first to the eye, then to water. These five-step caulking tips use GE sealants and tools to provide you with sharp lines in the places that take the most abuse: tub lips, backsplash seams, and inside corners.

Why clean caulk lines matter

A clean caulk line shows how you prepped the surface, how steady your hand was, and how well you read the joint. If you rushed the wipe-down or cut the nozzle too wide, the bead will show it. 

When the line fails, it fails fast. Heat lifts it. Water works its way in. The tile edge darkens, and mold sets in the gap. What started as an uneven pull becomes a stained seam, and the repair starts all over again.

But when the edge is sharp, the bead sheds soap, shrugs off scrubbing, and holds form under flex. You tape once, tool once, and move on. The difference is in the prep and the precision. 

What you’ll need: silicone sealant and tools

The right silicone sealant tools keep your line straight, clean, and done in one pass, with no detours.

  1. GE Sealant Remover Tool: Strips out old caulk cleanly without scarring tile or grout. 
  2. GE Cartridge Opener & Smoothing Tool: The 2-in-1 tool cuts a crisp 45-degree nozzle and flips to a smoothing tool.
  3. GE Sealant Smoothing Tool: Profiles the bead in one glide for a consistent, even crown and sharp edges that look factory-finished.
  4. Sealant selection
    • GE Advanced Silicone Kitchen & Bath: 100% silicone for tubs, sinks, and splash zones. Permanently flexible, waterproof, mold-resistant, and water-ready in 30 minutes.
    • GE Pro Seal Max Kitchen & Bath: Hybrid formula with silicone-grade performance and paintability. Ideal when you want both moisture protection and a finish that can be painted.
  5. Prep gear: Isopropyl alcohol for the wipe-down. Painter’s tape for edge control. A caulk gun with a smooth trigger pull to prevent drips and skips.

With these in hand, you’re set.

Prepare the joint

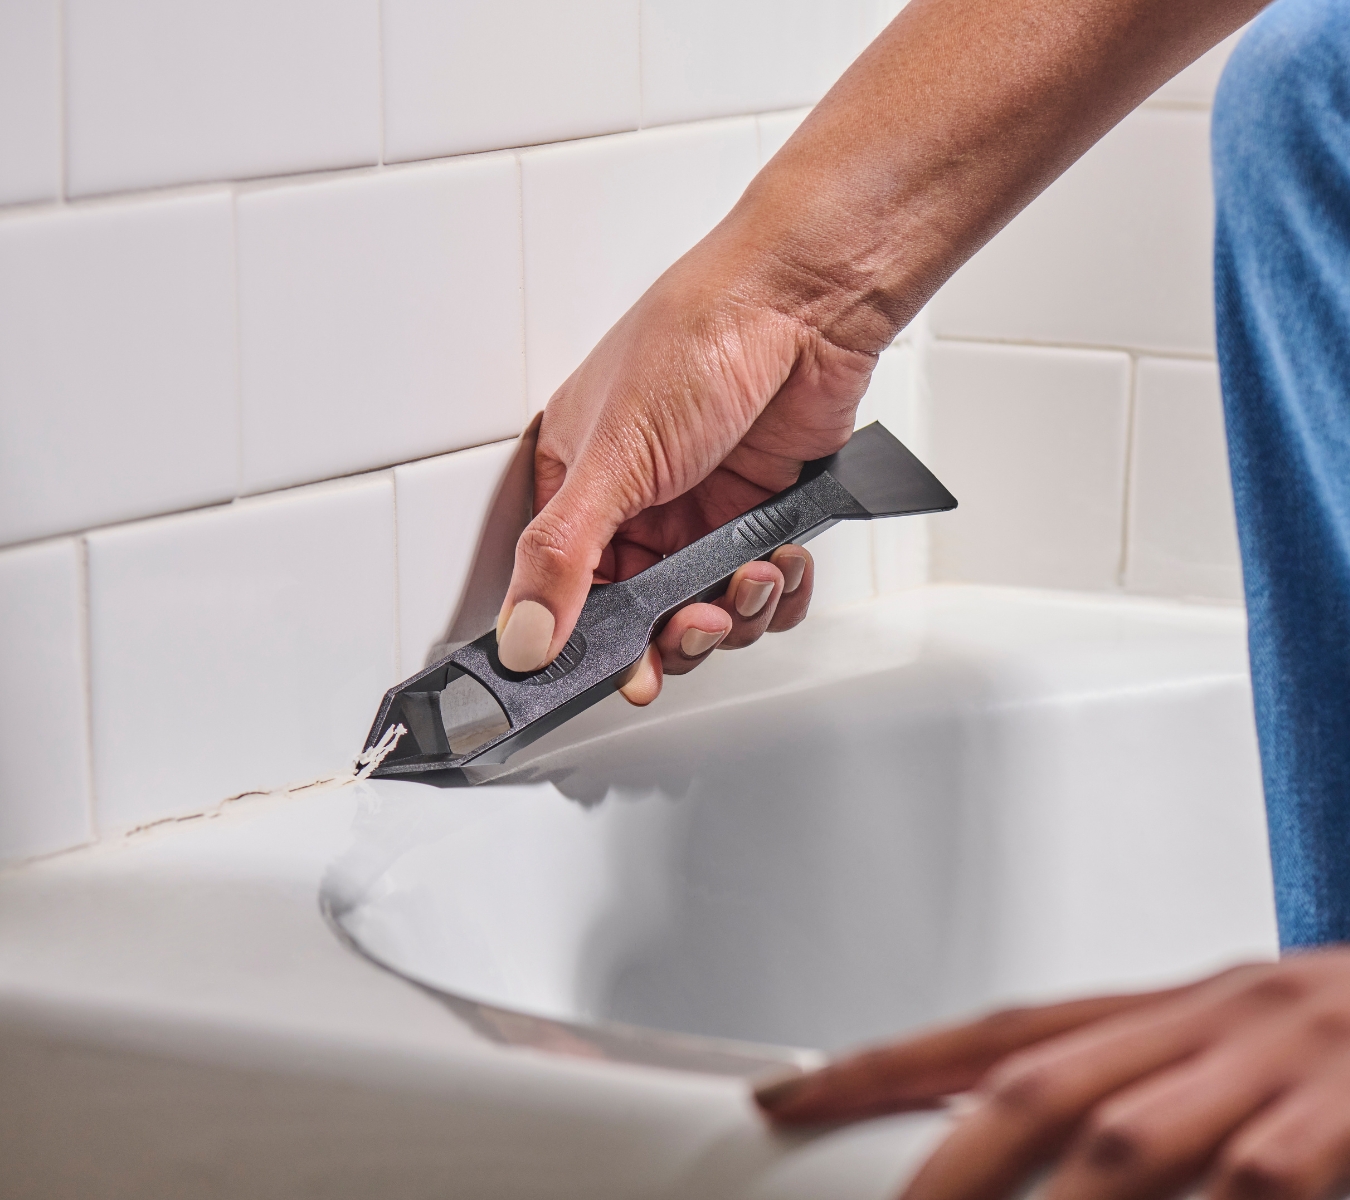
GE Sealant Remover Tool scraping away old caulk from a bathtub and tile joint.

Old caulk leaves behind residue, gaps, and adhesion problems that compromise every bead that follows. A new line needs a bare, dry surface. Anything less, and it pulls off in strips. Follow these five steps to ensure a clean caulk line every time.

1. Remove Sealant

Start by cutting out the old bead with the GE Sealant Remover Tool. Scrape tight to the surface, then run a stiff brush through the channel. Rinse. Wipe down with isopropyl alcohol to remove film, then let it dry.

Now, place painter’s tape on both sides of the joint. Leave a 1/16-inch reveal between the tape edges. This sets the bead path and gives the GE Sealant Smoothing Tool a clean run, without snagging on grout or gloss.

2. Cut the nozzle small and control the flow

The cut you make on the nozzle controls how wide the sealant spreads and how fast you burn through the tube.

Use the angled cutter built into the GE Cartridge Opener & Smoothing Tool. Slice at 45 degrees, close to the tip. Don’t cut deep. A wide tip buries corners, smears edges, and leaves a line that needs rework before it even cures.

And once it’s cut, rotate the nozzle so the angled opening matches the pull direction. This small move keeps the caulk bead shaped, not sprayed.

Remember: when you control the cut, you control the finish.

3. Pull a steady bead at a 45-degree angle

If you pull unevenly or change pace mid-run, the sealant arcs, clumps, or pulls away under steam.

Mount the gun at 45 degrees and pull—don’t push. Let the nozzle lead the sealant into the joint, not dump it on the surface. When the nozzle chases the edge, the bead sits in the gap instead of stacking on top.

Find the sweet spot in speed: slow enough to fill, fast enough to beat skin-over. Don’t hesitate, otherwise a ridge will form. Then again, rush, and you get gaps. Aim for one clean pass per edge.

If the joint widens or narrows, change your pace, not your grip. If you drift off line, stop. Trying to swipe it back only drags that old mess along the edge. Let it set, then slice and relaunch.

This is the best way to apply caulk on visible joints—clean, controlled, inspection-proof.

Tool within five minutes of laying the bead. The GE Sealant Smoothing Tool locks a clean line before skin-over starts, sealing edges against water and mold.

GE Sealant Smoothing Tool shaping a fresh silicone sealant bead into a smooth, even line.

4. Tool the bead: one smooth pull, no second passes

The caulk is in the joint, but it’s not finished until it’s tooled. 

Grab your GE Sealant Smoothing Tool. Place it flat against the joint, angled slightly toward your pull. Let the tool glide over the bead, not pressing into it. You’re just shaping the bead, not digging.

The tool forms a smooth line and presses the sealant against both sides of the joint. That pressure matters: it drives out air pockets, forces the bond, and keeps the line from curling once it sets. One pass is best practice—every extra swipe distorts the bead and weakens the edge.

Also, don’t swipe with your finger. It over-spreads the edge, removes too much sealant, and leaves oils behind that can disrupt adhesion.

5. Remove the tape and let it cure

The moment you finish tooling, pull the painter’s tape. If the sealant skins over, it tears when the tape lifts. That’s how edges get frayed and corners pull wide.

Peel back at a 45-degree angle, away from the bead. The edge should release clean, sharp, and flush. Then let the bead rest. GE Advanced Silicone Kitchen & Bath Sealant is water-ready in 30 minutes, but full cure takes 24 hours. GE Pro Seal Max Kitchen & Bath is water-ready immediately, with full cure in 24 to 74 hours, depending on temperature, humidity, porosity of substrate, and thickness of bead applied.

Resist the urge to press, prod, or wipe. Touching too early leaves fingerprints, flattens the bead, or breaks the bond at the edge. 

Once cured, inspect the profile in angled light. Step to the side and let the shadow fall across the line. Skips, ridges, and drag marks show up when the light runs across it, not straight at it.

Pro caulking tips: rookie mistakes to avoid

Even one misstep can blow the whole bead. Here are caulking tips that help you avoid where most first-timers lose the line:

  • Overfilling the joint. A fat bead might feel safer, but it wastes product and makes tooling a mess. Keep the nozzle tight to the joint. 
  • Dragging your feet. Work too slowly, and the skin starts to set. You’ll smear the line trying to tool it. 
  • Skipping surface prep. Silicone sealant won’t stick to dust, soap film, or old caulk. Always clean, dry, and tape first.
  • Using the wrong formula. Paintable acrylic can’t flex with tubs. Pure silicone won’t take paint. Know what joint you’re sealing, and what it’s expected to do.
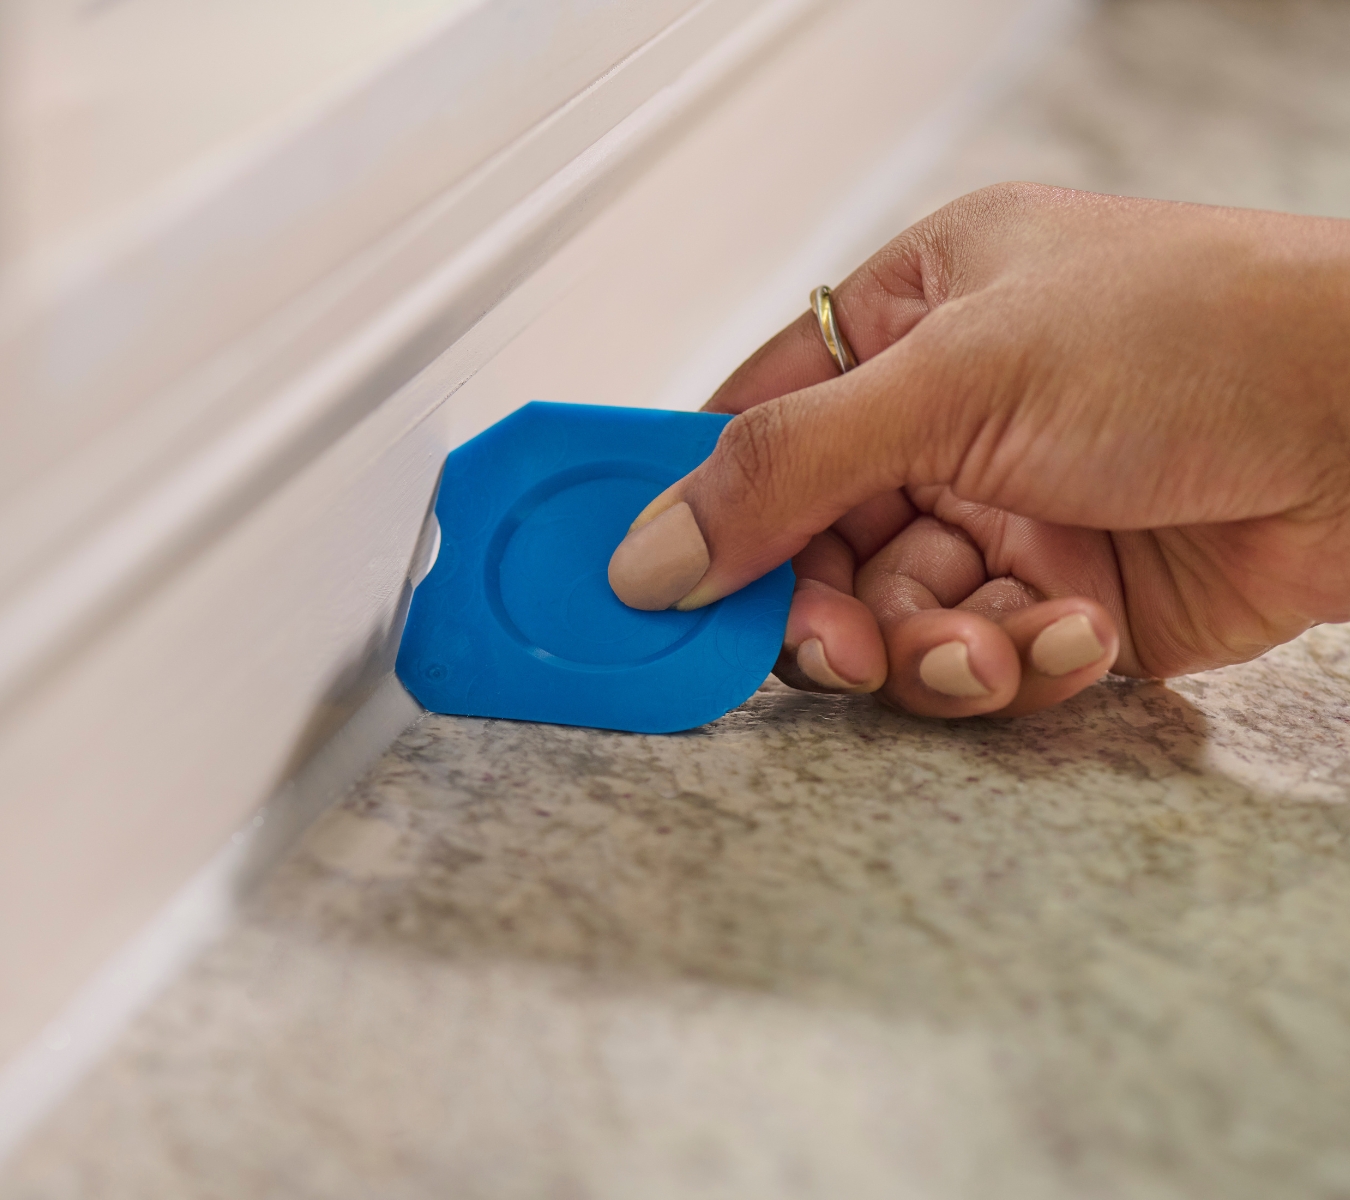
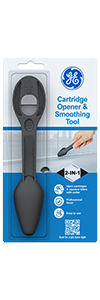
Every shortcut shows up later, in your edge, your texture, or your redo.

The difference between a bead that holds and one that fails comes down to three moves: cut tight, pull steady, and tool once. Use GE Advanced Silicone Kitchen & Bath when you need waterproof, mold-resistant protection in wet zones, or GE Pro Seal Max Kitchen & Bath when the joint needs both flex and a paintable finish.

Find GE Sealants and tools at a retailer near you in the U.S. or Canada.