Clean removal is the first step to a better seal 6 steps to easily remove caulk like a pro

Note: This DIY article is provided as a general guide only and is not intended to take the place of product-specific installation procedures; always follow applicable manufacturers’ instructions. Depending on your home’s age and condition, location within the home, and other potential factors, repairs and/or upgrades or other services may be necessary prior to the beginning and/or completion of your project that may involve the services of a home improvement professional. This article does not include advice pertaining to local building codes and/or any related inspections.

If you want a clean, long-lasting seal, the first step is to properly remove old caulk before applying anything new. Old, cracked, or peeling sealant can prevent fresh material from bonding correctly, leading to uneven results and early failure. With the right tools and a simple process, you can remove old caulk or silicone sealant cleanly and prep the surface for a smooth, professional-looking finish.

Having the right tools makes it much easier to remove caulk without damaging surrounding surfaces. A dedicated caulk removal tool, like the GE Sealant Remover Tool, is one of the most useful options, with angled edges designed to lift and separate old sealant from joints.

Signs it’s time to remove old caulk

Even well-applied caulk does not last forever, and knowing when to remove old caulk helps prevent bigger issues. One of the most common signs is cracking or visible gaps along the bead. When caulk pulls away from the surface, it can no longer keep out moisture or air.

Peeling or flaking is another clear indicator. As adhesion breaks down, sealants lose their ability to stay in place and protect the joint. Discoloration, dark spots, or mold growth often signal that moisture has worked its way behind the seal, especially in kitchens and bathrooms.

You may also notice shrinking or hardened caulk that no longer feels flexible to the touch. Silicone sealant should remain slightly elastic. If it feels stiff or brittle, it is time to remove silicone sealant and replace it. 

Why it’s important to remove old caulk thoroughly before resealing

Removing old caulk completely is a must before applying a new bead. Fresh sealant will not bond properly to existing material, especially if it is dirty, deteriorated, or partially detached. Even small remnants can interfere with adhesion, leading to gaps, uneven lines, or early failure.

Proper removal also improves the final appearance. Clean surfaces allow the new bead to sit evenly and be tooled smoothly, which is especially important in visible areas around sinks, tubs, windows, and trim. Skipping this step often results in a patchy finish that stands out once the project is complete.

Tools you’ll need to remove caulk like a pro
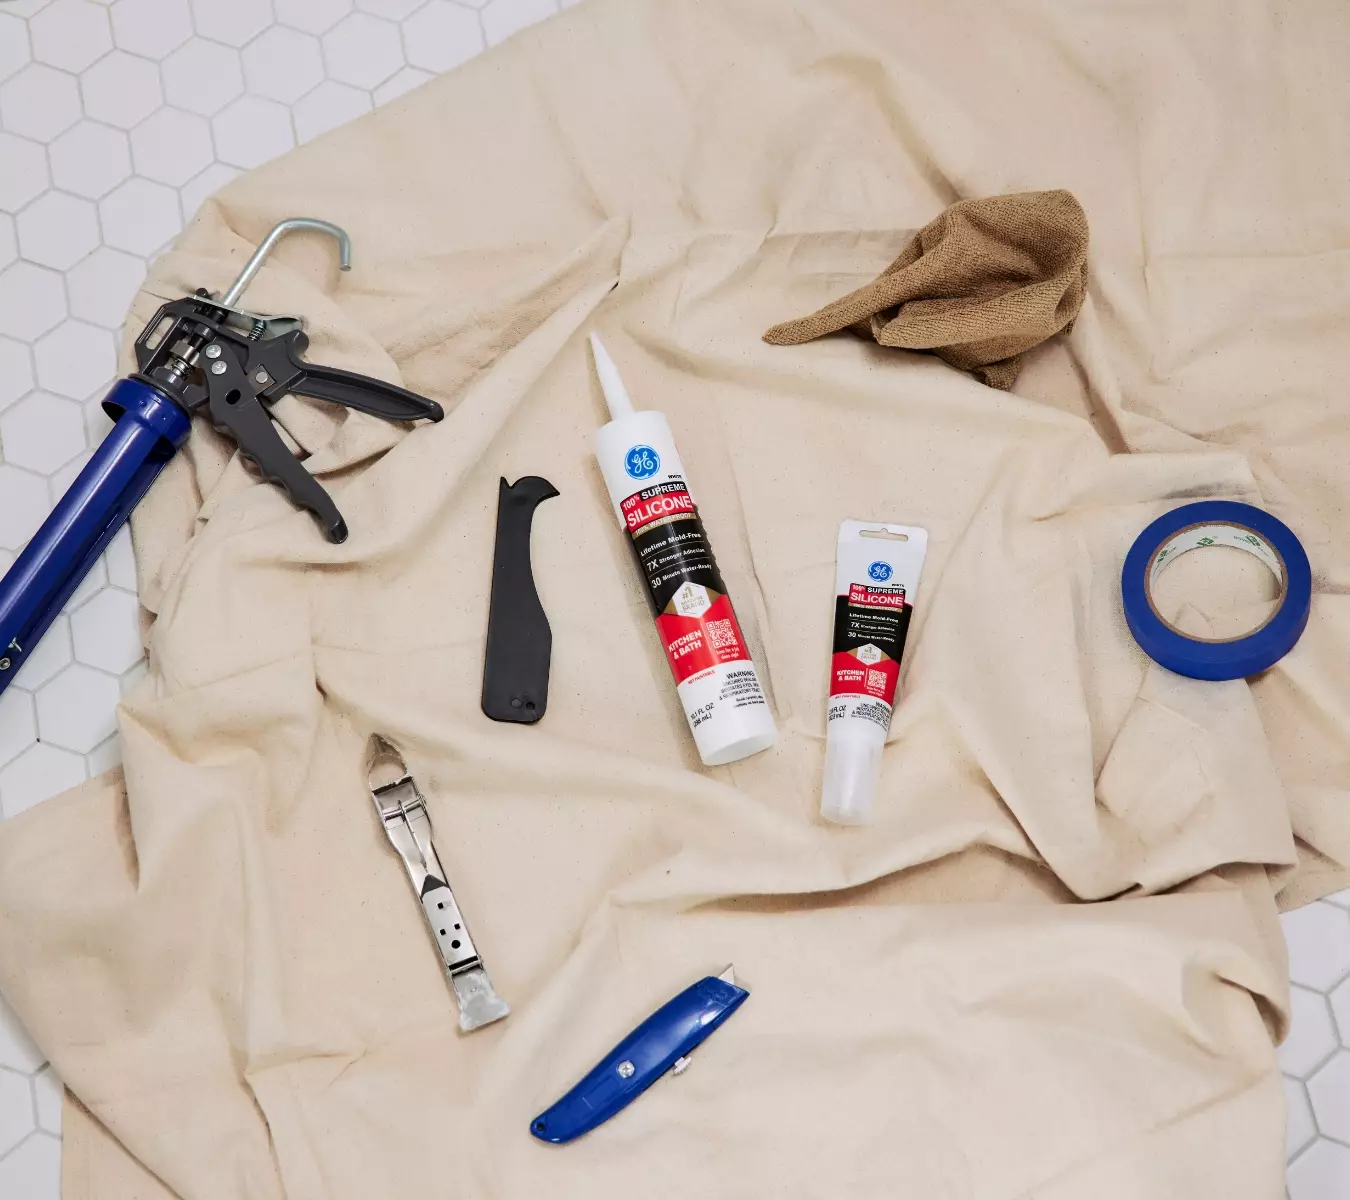
A photo of GE Supreme Silicone Kitchen & Bath, GE Sealant Remover tool, utility knife, tape, caulk gun and a cloth
GE Supreme Silicone Kitchen & Bath, GE Sealant Remover tool, utility knife, tape, caulk gun and a cloth

Having the right tools makes it much easier to remove caulk without damaging surrounding surfaces. A dedicated caulk removal tool, like the GE Sealant Remover Tool, is one of the most useful options. Its angled edges are designed to lift and separate old sealant from joints with better control than a standard blade.

A utility knife or razor blade can help score along the edges of the bead to loosen it before removal. For stubborn areas, a putty knife is useful for scraping away remaining residue and smoothing the surface. A clean cloth and mild cleaner or rubbing alcohol help remove leftover debris and prepare the area for a fresh application. For tougher, hardened sealant, consider applying gentle heat with a hair dryer to soften the material and make removal easier.

Step-by-step: how to remove caulk

Removing caulk is straightforward when you follow a consistent process and take your time with each step.

  1. Prep the area

    Start by cleaning the area around the caulk with a mild cleaner to remove dirt, grease, and buildup. This helps you see the edges of the bead more clearly and prevents debris from interfering during removal.

  2. Score the caulk

    Use a utility knife or razor blade to cut along both edges of the caulk line. This separates the sealant from the surrounding surfaces and makes it easier to lift away in clean sections.

  3. Loosen the sealant (optional)

    If the caulk is old or hardened, apply gentle heat using a hair dryer to soften it. This can make removal easier, especially for thicker or more stubborn beads.

  4. Remove the bulk of the caulk

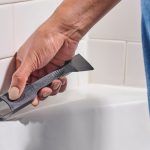
    Use the GE Sealant Remover Tool to lift and pull away the old caulk. Work slowly along the joint, keeping the tool angled to avoid scratching the surface. In many cases, the bead will come away in long strips once it is properly loosened.

  5. Scrape away residue

    After removing the main bead, use a putty knife or the remover tool to clear any remaining fragments. Focus on getting the joint as smooth and clean as possible.

  6. Clean and dry the surface

    Wipe the area with a clean cloth to remove dust and residue. Let it dry completely before applying new sealant. A clean, dry surface will get you better adhesion and a more professional-looking result.

Choosing the right sealant
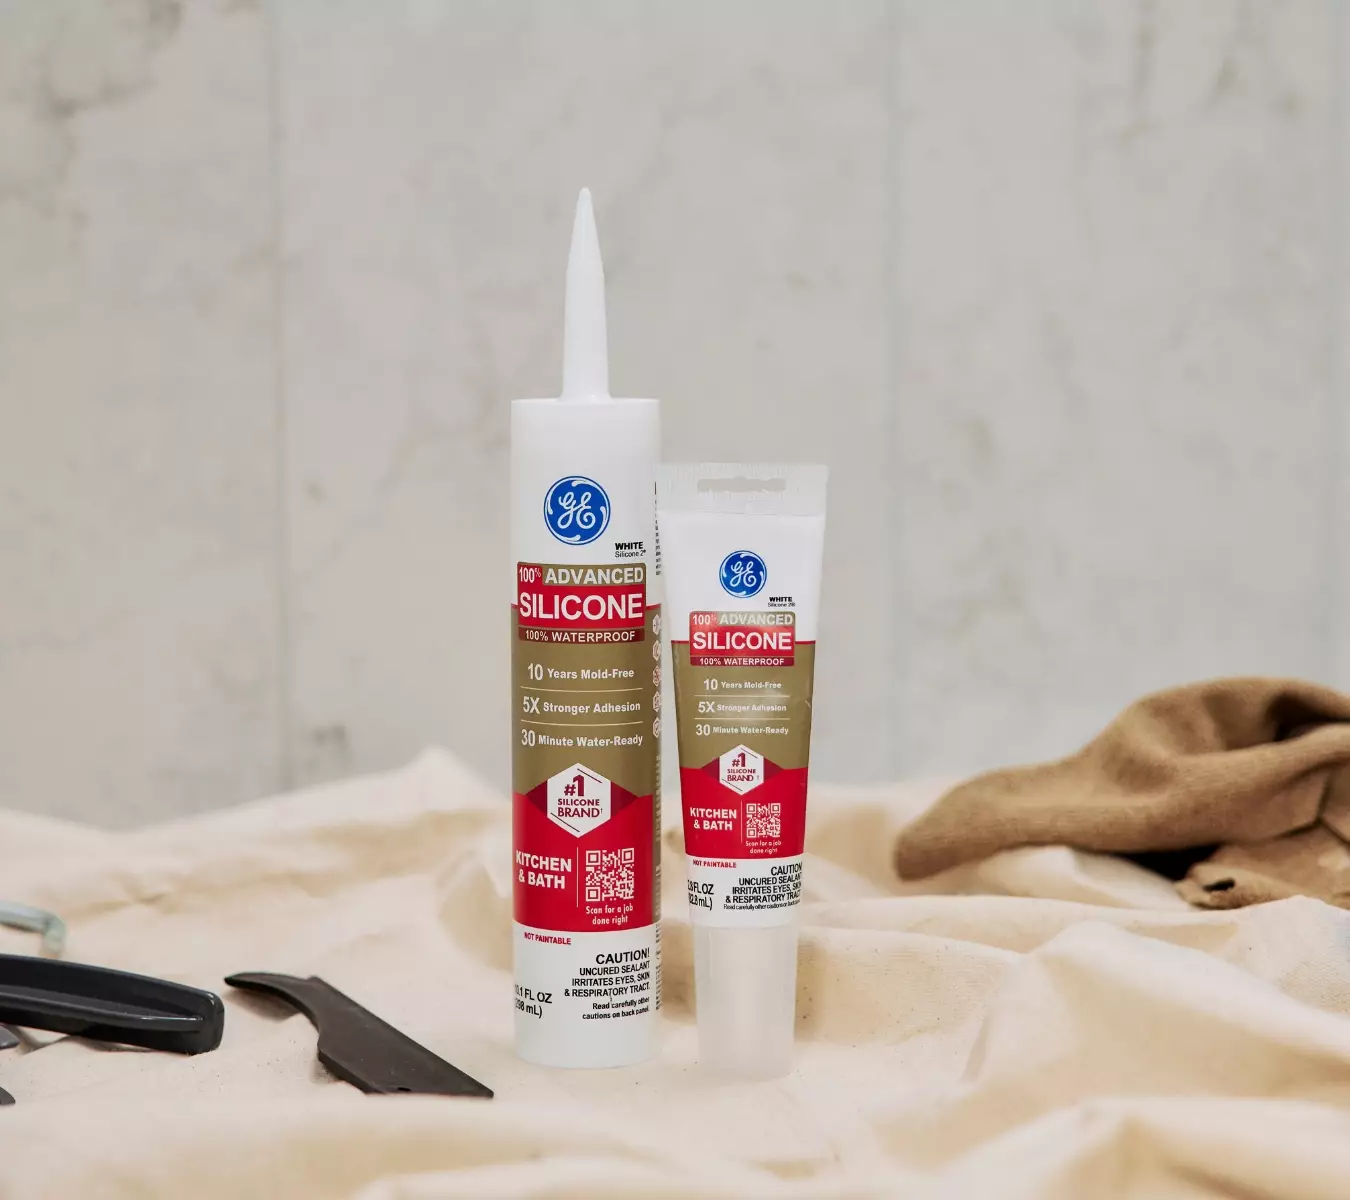
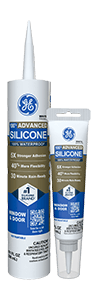
A photo of a cartridge and squeeze tube of GE Advanced Silicone Kitchen & Bath.
Cartridge and squeeze tube of GE Advanced Silicone Kitchen & Bath

Once the old caulk is fully removed, you’ll want to choose the right sealant for the new application. For interior areas exposed to regular moisture, such as kitchens and bathrooms, GE Advanced Silicone Kitchen & Bath Sealant is a reliable choice. It stays flexible, resists mold and mildew, and forms a durable seal that holds up in high-humidity environments.

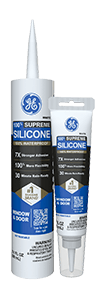
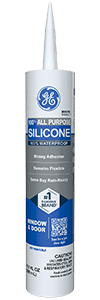
For exterior joints or areas exposed to temperature changes and weather, GE Supreme Silicone Window & Door Sealant provides added durability. It adheres well to common building materials and maintains its flexibility over time, helping prevent cracking or separation. And regardless of the application in question, you’ll have an easier time of it using the GE Sealant Smoothing Tool for clean tooling. 

Some pro tips and common mistakes to avoid

For cleaner caulk removal, work in short sections rather than trying to remove the entire bead at once. Keep your blade angle shallow, so you loosen the sealant without gouging the surface underneath. Use steady control instead of force, especially in corners or tight joints where damage is easier to cause. 

If the caulk is stubborn, slow down rather than scraping harder. One of the biggest mistakes is applying new caulk over old material or skipping the cleaning step afterward. Dull blades also make the job harder and can tear rather than lift the bead cleanly.

To get GE Sealants’ products for your home improvement project, visit these fine retailers in the U.S. or Canada.
Clean lines and professional baseboard caulking How to Caulk Baseboards for a Seamless Finish

Note: This DIY article is provided as a general guide only and is not intended to take the place of product-specific installation procedures; always follow applicable manufacturers’ instructions. Depending on your home’s age and condition, location within the home, and other potential factors, repairs and/or upgrades or other services may be necessary prior to the beginning and/or completion of your project that may involve the services of a home improvement professional. This article does not include advice pertaining to local building codes and/or any related inspections.

Baseboard gaps and shadow lines make a room look unfinished. With the right caulk, tools, and timing, you can close those gaps cleanly and paint within the hour. This guide shows how to caulk baseboards step by step for a seamless, professional result.

Choose the right caulk for baseboards

The first step to a clean, professional line is choosing the right material for the job. Most baseboards are painted, which means you need a paintable caulk for baseboards that bonds strongly and blends into the trim once painted. 

For standard interior trim, a high-quality acrylic or paintable hybrid provides you with balanced flexibility, adhesion, and a smooth finish: 

However, if your baseboard joint will stay visible and unpainted or sits near frequent moisture-exposure, such as along tile or utility trim, use a 100% silicone sealant. It resists moisture, cleans easily, and keeps its color, but it cannot be painted.

Paintable caulks remain the preferred choice for most interior baseboards. They finish clean, accept paint evenly, and deliver the seamless look that defines a professional result.

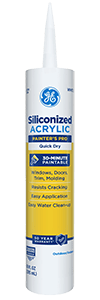
GE Sealant products and tools used for baseboard caulking, including Seal & Fill Multi-Purpose Kitchen & Bath Caulk, Painter’s Pro Quick Dry Siliconized Acrylic, Pro Seal Max Kitchen & Bath, GE Sealant Smoothing Tool, and GE Sealant Remover Tool.

Most interior baseboards are painted, so use a paintable caulk or hybrid for a seamless finish you can color-match. Try GE Seal & Fill Multi-Purpose Kitchen & Bath Caulk: paintable, easy to apply, and 30-minute paint-ready.

Gather your tools and prep supplies for caulking baseboards

Have every tool ready before you start. Once the bead begins, you won’t want to stop to find tape or a rag. 

You’ll need:

Laying out your tools before you begin keeps the job controlled and efficient.

Know exactly where to caulk baseboards (and where not to)

Before you pick up the gun, know which joints to seal and which to leave open. 

Caulk these joints:

  • Top edge of the baseboard, where it meets the wall. This is the primary joint that hides shadow gaps and gives the baseboard a clean, finished line.
  • Inside and outside corners, where baseboards meet or turn. A bead here can help limit hairline cracks and seal small gaps caused by wall movement.
  • Splices or scarf joints, where two baseboard lengths meet mid-wall. A narrow, tooled bead bridges the seam and helps the pieces read as one continuous line.

Be cautious here:

  • Baseboard to hardwood floor: The flooring expands and contracts with humidity. A rigid sealant can crack. Leave it unsealed or add shoe molding to cover the gap while allowing movement.
  • Baseboard to tile, vinyl, or laminate: A thin bead can block debris and moisture, but expect to reapply it periodically as the area flexes with use.

Prep surfaces for strong adhesion and clean lines

You want a clean, dry, and correctly shaped joint before caulking baseboards. Proper prep improves adhesion and helps the bead lay down in a smooth, controlled line.

Remove old material

Use your GE Sealant Remover Tool to gently lift cracked or loose caulk. If residue remains, scrape lightly and wipe the area clean. Never apply a new sealant over a failed bead.

Clean and dry the joint 

Vacuum dust and debris from the gap. On non-porous surfaces such as painted trim or tile, wipe with isopropyl alcohol and remove any remaining film. 

Let the joint dry completely before applying new caulk.

Control joint depth

For gaps around 1/4 inch or wider, press in the backer rod first so the joint depth is about half the width. 

This supports the bead and helps prevent it from sinking as it cures.

Mask for a straight line 

Once the joint is clean, dry, and sized correctly, apply painter’s tape along both sides of the joint along the line you want to see. 

Press the tape edges firmly to prevent seepage.

How to caulk baseboard trim

Follow these steps to learn how to apply caulk to baseboards using a clean, continuous bead so that it blends in once painted by working steadily, section by section, and tooling each bead before it begins to skin.

Cut the nozzle small and load the gun

Cut the tip of the cartridge nozzle at a narrow 45-degree angle using the built-in cutter on your caulk gun or the GE Cartridge Opener & Smoothing Tool. Start with a small opening; you can widen it later. 

Next, pierce the inner seal and load the cartridge. Rotate the nozzle so the cut edge lines up with the joint. 

Run a short test bead on scrap to check flow and bead size, then adjust until the caulk lays down smoothly and evenly.

Close-up of a baseboard joint being sealed with GE Seal & Fill Multi-Purpose Kitchen & Bath Caulk.

Run a steady bead and smooth in one clean pass

Hold the gun at roughly 45 degrees to the joint and pull it toward you at a steady pace.

Keep even trigger pressure so the bead just fills the gap, not thin and sticking out past the trim. 

Work in short runs, about three to four feet at a time, so you can tool before a skin begins to form.

Right after applying the bead, use the GE Sealant Smoothing Tool or the smoothing edge of the GE Cartridge Opener & Smoothing Tool. 

Select the profile edge you want. A slight concave finish works well for baseboards.

Set the tool at the start of the bead, press lightly, and pull in one continuous motion to seat the sealant and shape the surface. This step removes excess and leaves a consistent line.

Remove the tape and confirm the line

Remove the painter’s tape while the bead is still wet, pulling it away from the joint at an angle. 

If a fine string of caulk lifts, snap it cleanly with the tool instead of dragging it along the surface.

Paint and cure timing if you are painting

Timing matters in baseboard caulking. Paint too early, and the paint film can wrinkle or pull. Wait too long in a dusty room, and contaminants may settle on the bead before coating.

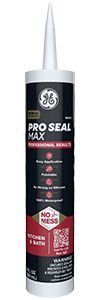
Follow the product label or Technical Data Sheet for the exact paint-ready time. Paintable hybrids such as Pro Seal Max Kitchen & Bath may need around 60 minutes before coating, depending on temperature and humidity.

Also, make sure to choose a paint compatible with your sealant and trim. Consult the paint and sealant TDS before you coat.

Fix common baseboard caulking mistakes

Even when you are being careful, small errors can show up after caulking baseboards. Here’s how to recognize them and what to do next.

Wavy or wide lines

This usually happens when the nozzle opening is too wide or the bead is applied too slowly. 

If the caulk spreads or ripples, lighten your trigger pressure or move the gun a bit faster to control the flow, and work in shorter sections.

For your next cartridge, start with a smaller nozzle opening to make bead control easier.

Voids or sinking 

If the caulk sinks into the joint or leaves gaps, the bead was too deep.

Press the backer rod into wider gaps before sealing so the caulk sits at the correct depth and cures without pulling away.

Paint won’t stick

If paint beads or flakes from the caulk, you may have used a non-paintable silicone on paint-grade trim.
Remove the old sealant and reapply with a paintable acrylic or hybrid so paint bonds properly.

Ridges or drag marks after tooling

A common cause of this is an overworked bead. 

Tool the bead once with a steady pull using the GE Sealant Smoothing Tool to seat the material and leave a uniform surface.

Get everything you need for clean baseboard caulking, with reliable tools that keep your bead steady and clean. Find GE Sealants and tools at a retailer near you in the U.S. or Canada.
Give your bathroom a professional finish! Your complete guide to preparing and caulking a bathroom

While caulking can easily go unnoticed, it plays a critical role in many rooms, especially in ones as prone to moisture as a bathroom. Caulking a bathroom not only improves the finished look of the room, but also serves as a crucial barrier against mold, mildew, and water damage.

Before you get started on your bathroom caulking project, we will explore the different types of caulk and sealant you can use in a bathroom and where each type should be applied.

What bathroom equipment requires caulk?

Bathrooms come with a lot of furniture and plumbing fixtures that each require specific caulking procedures. Knowing which bathroom equipment requires caulking and choosing the right type of caulk for each application is essential for achieving long-lasting results.

  1. Bathtub and Shower Enclosure

    One of the most important areas in the bathroom that requires caulking is the joint between the bathtub or shower enclosure and the surrounding walls or tile. This caulking prevents water from seeping into the walls and causing damage. Silicone caulks are the most recommended type for this application due to their flexibility, water resistance, and mold resistance. Choose a silicone caulk or sealant labeled specifically for bath and shower use for optimal durability and performance.

  2. Sink and Countertop

    Caulking where the sink meets the countertop is essential for preventing water from seeping through the joint and damaging the underlying materials. Silicone or hybrid caulks are suitable choices for this application, offering flexibility and resistance to water and mold. Choosing a clear caulk or one that matches the color of your countertop will give you a seamless appearance.

  3. Toilet Base

    Caulking around the base of the toilet serves both aesthetic and functional purposes. It helps create a clean and finished look while also sealing the joint to prevent water and debris from accumulating underneath the toilet. For this application, a sanitary silicone caulk is recommended for its water resistance and mold resistance.

  4. Baseboards

    Water will inevitably collect on the bathroom floor. By sealing your baseboards with a waterproof caulk, you can help prevent water from seeping underneath the baseboards and damaging the underlying floor or wall.

Using the right sealant and the proper technique ensures everything in your bathroom has a waterproof seal. This will help prolong the life of your bathroom materials and prevent mold and mildew.

Preparation for caulking a bathroom

To achieve the proper adhesion and finish required in a bathroom, you must properly prepare the space before you apply the caulk. Follow these steps to prepare your bathroom space.

  1. Assess the State of the Bathroom

    Is this a new bathroom installation or a refresh of existing materials? If there is already caulk in the bathroom, examine it carefully. Look around the bathtub, shower, sink, and toilet and check for signs of wear and tear such as cracks, discoloration, or gaps. Additionally, check for any water damage or mold growth in the surrounding area. Identifying these issues will help you gauge how much preparation is needed.

  2. Gather Your Supplies

    • Caulk remover or solvent
    • Putty knife or caulk removal tool
    • Scrub brush or sponge
    • Mildew-resistant cleaner
    • Bleach or hydrogen peroxide (for mold removal)
    • Isopropyl alcohol
    • Clean rags or towels
    • Painter’s tape
    • Silicone caulk and caulking gun
  3. Remove Old Caulk

    If old caulk is present, it must be removed completely to ensure proper adhesion of the new caulk. Use a caulk remover or solvent to soften the old caulk, then carefully scrape it away using a putty knife or caulk removal tool. Check thoroughly to ensure you remove all residue.

  4. Clean the Surface

    Once the old caulk is removed, clean the surface using a mildew-resistant cleaner and a scrub brush or sponge. Pay close attention to any areas with mold or mildew, using bleach or hydrogen peroxide to effectively kill and remove these growths. After cleaning, rinse the surface with water and let it dry completely.

  5. Apply Isopropyl Alcohol

    To further enhance adhesion, wipe down the cleaned surface with isopropyl alcohol using a clean rag or towel. This step removes any remaining residues, oils, or debris that could hinder the caulk’s adhesion.

  6. Prepare the Area

    Use painter’s tape to mask off the surrounding surfaces, such as the bathtub, shower tiles, or sink, to help give you clean and precise caulking lines. This step helps prevent excess caulk from spreading onto unintended areas and makes for a neater finish.

  7. Cut the Caulk Tube Tip

    When you’re ready to apply the caulk, cut the tip of the caulk tube at a 45-degree angle to create an opening that matches the size of the joint or gap you’ll be caulking.  Pierce the seal with a long nail or with the tool provided on most caulk guns. Start with a small opening and trim it larger, if needed.

  8. Apply the Caulk

    Load the caulk tube into a caulking gun and begin applying the caulk in a steady, even bead along the joint or gap. Hold the gun at a consistent angle and apply gentle pressure to get a smooth, uniform application. Work in small sections, smoothing the caulk with a damp finger or caulk finishing tool as you go to create a neat finish.

  9. Remove Excess Caulk

    After smoothing the caulk, immediately remove the painter’s tape before the caulk begins to dry. This will give the caulk clean, crisp lines and prevent the tape from pulling up any freshly applied caulk. Use a damp rag or paper towel to wipe away any excess caulk or smudges.

  10. Allow Caulk to Cure

    Allow the caulk to cure completely according to the manufacturer’s instructions before exposing it to moisture. This typically takes 24 to 48 hours. If the caulk was applied to a shower or bathtub, do not use it until the caulk or sealant is properly dry and set.

Get the professional finish and quality you need for your bathroom with GE

The bathroom is one of the most important rooms in your house when it comes to caulking. Without proper sealant, water will seep through any joints or crevices it can and damage the interior of your home. Using high-quality, professional-grade caulk and sealants from GE combined with routine upkeep and maintenance can help ensure you are protected from costly water damage repairs.

Get the best sealant you can by choosing GE.

Learn how to caulk like a pro! 8 tips for how to caulk like a pro

Caulking is one of those tasks that seem simple but can quickly turn into a messy affair if not done correctly. Whether you’re a seasoned DIY enthusiast or a novice homeowner, mastering the art of caulking can save you time, money, and frustration. In this guide, we’ll delve into the essential tips and tricks to help you achieve professional-quality caulking results.

Learn how to caulk with these 8 tips

Use these 8 tips to learn how to caulk and get professional-looking results.

  1. Choose the Right Caulk

    The first step toward achieving professional caulking results is selecting the right caulk for your project. There are various types of caulks and sealants available, including silicone, acrylic latex, and polyurethane. Each type has its unique properties and applications.

    • Silicone: Ideal for areas exposed to moisture, such as bathrooms and kitchens, as it is waterproof and highly flexible.
    • Acrylic latex: Suitable for interior applications and is paintable, making it ideal for sealing gaps and cracks around trim and baseboards.
    • Hybrid: Combines the durability of and ease of use of other types of caulk. Frequently used to seal gaps and cracks in metal, concrete, wood, and PVC.
    • Polyurethane: Highly durable and can be used for both interior and exterior projects, including sealing joints and cracks in concrete and masonry.
    • Butyl rubber: Primarily used for outdoor applications in areas that are exposed to water. This might include sealing roofing joints and other outdoor equipment.

    Consider the specific requirements of your project and choose the caulk accordingly.

    Choosing the right type of caulk for your project will make a significant difference in how it looks and holds up over time. The right type of caulk should hold up for years before needing to be replaced.

  2. Prepare the Surface

    Proper surface preparation is crucial for achieving a long-lasting caulking job. Begin by cleaning the area to be caulked thoroughly, removing any dirt, dust, grease, or old caulk residue. Use a putty knife or scraper to remove loose paint or debris from the joint.

    Next, ensure the surface is completely dry before applying the caulk. Moisture can interfere with the adhesion of the caulk, leading to poor results and potential mold growth. If necessary, use a hairdryer or allow extra drying time before proceeding.

  3. Use the Right Tools

    Having the right tools on hand can make a significant difference in the quality of your caulking job. Invest in a high-quality caulking gun for precise application and better control over the flow of caulk. Additionally, consider using a caulking tool or smoothing tool to create a smooth and professional-looking finish.

  4. Cut the Caulk Tube at the Right Angle

    When cutting the tip of the caulk tube, ensure that you do so at a 45-degree angle. This angle creates a small opening that allows for more precise application and better control over the flow of caulk. Additionally, cut the tip to match the size of the gap or joint you are caulking, ensuring that the bead of caulk fills the entire space without excess. It is better to start with a smaller cut and increase the size if needed. Don’t forget to pierce the inner foil seal of the caulk. Many caulk guns have an attached tool for this process.

  5. Apply Caulk in a Continuous Bead

    For professional-looking results, apply the caulk in a continuous bead along the joint or gap you are sealing. Hold the caulking gun at a 45-degree angle and apply steady pressure to the trigger as you move along the joint. Avoid starting and stopping, as this can create uneven beads and gaps in the caulking.

    If necessary, use masking tape to create clean, straight lines along the edges of the joint before applying the caulk. This technique helps achieve a neat and uniform finish, especially around corners and edges.

  6. Smooth and Shape the Caulk

    Once you’ve applied the caulk, use a caulking tool, smoothing tool, or your finger to smooth and shape the bead of the caulk. Work quickly but carefully to avoid smudging or smearing the caulk. Smooth the caulk in one continuous motion, applying even pressure to create a uniform finish.

    Pay extra attention to corners and edges, ensuring that the caulk fills the entire joint without gaps or air bubbles. If necessary, go back over the caulk with your finger or tool to achieve the desired shape and smoothness.

  7. Remove Excess Caulk

    After smoothing the caulk, use a damp cloth or sponge to remove any excess caulk from the surrounding surfaces. Wipe gently to avoid disturbing the freshly applied caulk. Pay close attention to corners and edges, where excess caulk tends to accumulate.

    If you notice any gaps or areas where the caulk didn’t fill completely, apply additional caulk as needed and repeat the smoothing process.

  8. Allow Sufficient Drying Time

    Finally, allow the caulk to dry completely before exposing it to moisture or painting over it. The drying time can vary depending on the type of caulk and environmental conditions. Refer to the manufacturer’s instructions for specific drying times and recommendations.

    Avoid touching or disturbing the caulk during the drying process to prevent smudging or compromising the integrity of the seal. Once the caulk is fully cured, it will provide a durable and long-lasting seal for your project.

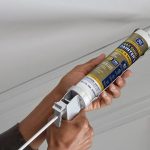
    An area with professional-looking caulk.
    Follow these tips to get professional-looking results.

GE sealants can give your caulking professional-looking results

Mastering the art of caulking takes practice, patience, and attention to detail. By following these tips and techniques, you can achieve professional-quality caulking results that enhance the appearance and durability of your projects. Whether you’re sealing gaps and cracks around your home or tackling larger renovation projects, proper caulking techniques will help you achieve a neat, seamless finish that stands the test of time. For professional-looking and long-lasting results, choose a GE sealant product.

Find GE caulks and sealants at any of these retailers.

How to Seal a Kitchen Sink for Long-Lasting Results

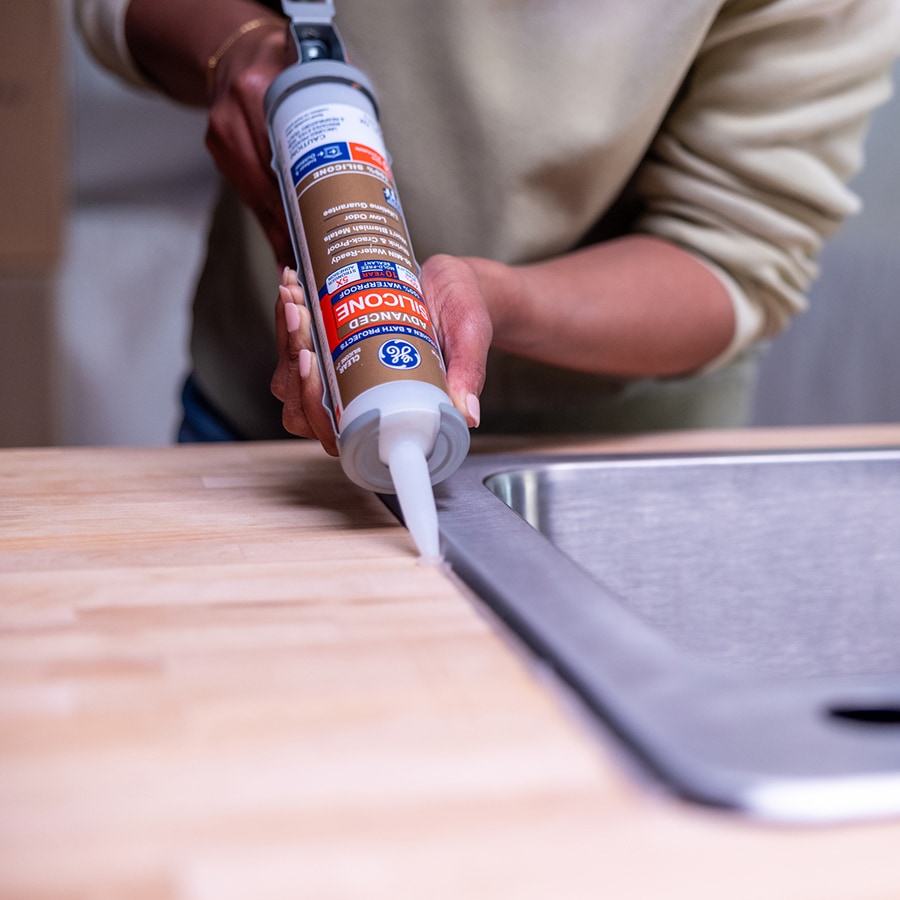
Between washing dishes, prepping food and cleaning, your kitchen sink has to stand up to a lot of daily wear and tear. That’s why it’s particularly important for your sink to have a durable, watertight seal. Old, damaged sealant or a sealant that isn’t 100% waterproof can let water and moisture seep between your sink and counters, which can create leaks in your cabinets or lead to problems like mold, mildew and rot. Knowing how to seal a kitchen sink properly with a 100% silicone sealant will prevent these problems before they start.

Tools & Supplies for Sealing Sinks

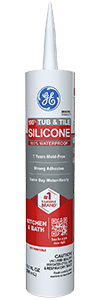
Picking the right sealant can make all the difference. For sealing a kitchen sink, or anywhere water could be present, choose a GE-branded 100% silicone sealant, like GE Tub & Tile Silicone 1® sealant. This sealant is 100% waterproof, permanently flexible and has 7-year mold-free product protection,1 so you can create a lasting, mold-resistant and watertight seal.

Whichever product you choose, check the packaging to ensure the sealant will adhere to your countertop material without staining it.

Pro Tip: 100% silicone sealants are not paintable so be sure to pick the appropriate color for your project.

Besides a GE-branded 100% silicone sealant, you will also need:

  • Caulk gun
  • Painter’s tape
  • Latex gloves
  • Soapy water
  • Paper towels
  • Utility blade
  • Caulk tool
  • Mineral spirits
  • Isopropyl alcohol

With all your tools and supplies ready, follow these steps to learn how to seal a kitchen sink so it has long-lasting, 100% waterproof protection:

  1. Start with a Clean Surface

    Whenever you start a new sealing project, make sure you have a clean work surface by wiping it down with isopropyl alcohol. If you’re replacing old caulk or sealant, completely remove it first, then wipe down the area with isopropyl alcohol. Let the surface dry before laying a new bead.

    Safety Tip: Make sure your work area is well ventilated when using isopropyl alcohol.

  2. Apply Painter’s Tape

    For a smoother bead and easier cleanup, apply painter’s tape on either side of the area you’re sealing.

  3. Carefully Cut the Sealant Cartridge

    Next, prepare your sealant by cutting the tip of the cartridge. Cut the cartridge tip at a 45-degree angle so the hole is about the same size as the area you’re sealing. Some caulk guns have a tool to cut the cartridge tip, but we recommend using a utility blade for consistently clean results. Cut off less than you think you’ll need because you can always cut more. Once cut, pierce the cartridge’s inner foil seal using the metal rod on your caulk gun or a long nail. Then load the sealant cartridge into the caulk gun.

  4. Apply Sealant

    After prepping your sealant and your work area, start running a bead of sealant around the entire sink where it meets the countertop. Start at one corner of the sink and work your way around. Pull the gun toward you and maintain a relaxed, confident grip and steady speed to apply the bead smoothly. If you can’t make it in one pass, it’s ok to readjust your grip and start where you left off. Fill gaps with additional sealant as needed.

  5. Tool the Bead & Remove the Painter’s Tape

    Use a caulk tool or your finger to tool the sealant bead until it’s smooth. It’s important to tool the bead before the sealant starts to cure, so if you need to, you can tool in sections. Run a bead of sealant in one manageable section, like along one edge of the sink, tool the bead, then continue applying more sealant.

  6. Let Sealant Cure Completely

    Finally, allow the sealant to cure completely for the best performance. GE Tub & Tile Silicone 1® sealant is same-day water-ready2 and fully cured in 24 hours, but check your product for specific curing instructions.Once the sealant has cured, your kitchen sink will be watertight and ready to use. For more step-by-step sealing tutorials with high-performing GE-branded sealants, check out our other How-To guides.

1Cured sealant is resistant to stain causing mold and mildew. Regular cleaning of the cured sealant is required, however, as soap and other residue can cause secondary mold and mildew growth.

2Exposure to water possible in as little as 12 hours with bead size max 3/16″, temperature min 65°F and humidity min 50%. Do not touch or clean sealant for 24 hours.

How to Seal Your Crown Molding, Trim and Baseboards Like A Pro

  1. USE THE RIGHT SEALANT BEFORE YOU PAINT MOLDING AND TRIM FOR BEAUTIFUL RESULTS.
    For these kinds of projects, Max® Shield Painter’s Pro is an excellent choice, ideal for tough paint projects both indoors and outdoors. This best-in-class† paintable sealant offers durable, long-lasting results, backed by Tri-Shield Protection: extreme flexibility, 100% waterproof and mold resistance1.And, for paint projects that might be exposed to moisture, Paintable Silicone Supreme Window & Door Sealant is 100% weatherproof and has 10-year mold-free product protection1. And, its shrink and crack-proof formula can be paint-ready in just 30 minutes2.
  2. OPEN THE TUBE AND SEAL.
    Cut nozzle of your cartridge to the desired bead size. Pierce inner seal with seal punch found on most caulk guns. Insert cartridge into caulk gun. Squeeze with even, consistent pressure in order to control the rate the sealant that is dispensed from the cartridge. TIP: Apply masking tape to either side of a joint to create a straight edge before applying caulk to your molding, trim or baseboards.
  3. FILL EDGES AND GAPS.
    Apply sealant along the edges and joints of your molding, trim or baseboards. TIP: Seal molding and trim from top to bottom. Start by laying a bead on the top edge of your molding, then work your way down to avoid smudging your fresh caulk/sealant.
  4. SMOOTH THE SEAL.
    Use a gloved finger or caulk-smoothing tool to smooth caulk into joint within two to five minutes.
    TIP:
    If you applied masking tape in the previous step, remove immediately after smoothing the seal.
  5. CLEAN UP.
    Before the sealant cures, wipe away excess from surface and tools with a dry cloth. Let dry completely, typically within 24 hours, unless your sealant is 30-minute paint-ready (like Paintable Silicone Supreme Window & Door).If you’re tackling a sealing project, let GE Sealants & Adhesives help you get the job done right. Learn more from our other projects and how to’s for more tips and information.

Discover 8 steps to protect your shower How to Seal a Shower to Prevent Mold & Leaks

Note: This article is provided as a general guide only and is not intended to take the place of product-specific installation procedures; always follow applicable manufacturers’ instructions. Depending on your home’s age and condition, location within the home, and other potential factors, repairs and/or upgrades or other services may be necessary prior to the beginning and/or completion of your project that may involve the services of a home improvement professional. This article does not include advice pertaining to local building codes and/or any related inspections.

Sealing your shower is essential for maintaining a functional, hygienic, and visually appealing bathroom. It also helps prevent costly water damage and mold-related issues.

We will dive into the importance of sealing your shower and how to seal a shower in eight steps.

When sealing showers, you will want to opt for 100% silicone sealant. Silicone is flexible and durable. It also repels water and moisture, which makes it ideal for high-moisture areas like showers.

Why do you need to seal your shower?

Your shower is regularly exposed to moisture and often receives very little ventilation, which is a recipe for bacteria and mold growth. Cracks and holes are even more susceptible to mold because they trap bacteria and are usually more difficult to thoroughly clean.

Sealing your shower places a waterproof sealant around the edges where water is often trapped, becoming a breeding ground for bacteria.

By sealing your shower, you:

  • Prevent water damage: Properly sealing your shower prevents water from seeping into areas it shouldn’t be. Water causes structural damage and leads to costly repairs.
  • Prevents mold growth: Trapped moisture creates the perfect environment for mold and mildew to thrive. Sealing your shower prevents water from becoming trapped in those areas, making cleaning the bathroom easier.
  • Improves durability: Using a flexible and durable sealant helps protect showers. It prevents too much movement and prolongs your shower’s lifespan. For instance, sealant around your shower faucet can help hold it in place by closing gaps.
  • Improves aesthetics: Sealing a shower with fresh sealant can improve your bathroom’s appearance. It gives the bathroom crisp, clean lines, preventing unsightly water stains and mold growth.

What part of a shower do you need to seal?

According to most plumbing codes, you must use sealant around areas where pipes meet the wall. However, you do not need to stop there.

Here are all the areas to seal around and inside your shower:

  • Seal around the edges of your shower door where the door meets the walls and floor. Sealing a shower door prevents water from leaking out from the cracks.
  • Seal around the edge where your shower meets the wall.
  • Seal around plumbing holes, gaps, and areas where pipes meet the floor or wall.
  • Seal in the corners and seams where walls touch each other or the floor.
  • Seal around fixtures such as the shower head, faucet handles, drain, and spout.
  • Seal the grout between shower tiles on the wall or floor because grout is very porous if left untreated.

If you see an area prone to mold growth, you should consider putting sealant in it to protect and preserve it. You can also fill in gaps and cracks around your shower with sealant.

8 Steps to Properly Seal a shower and Shower Door

Use these eight steps to guide your shower sealing process. These steps cover the most common method of sealing a shower. Always check your sealant’s specific instructions for application and cure time and adjust these steps as necessary. You will also want to check with your local code for regulations and laws.

  1. Step 1: Remove old sealant

    Before applying new sealant, remove any old caulk or sealant around your shower. The old sealant will cause your new sealant not to adhere fully to the surface. Use a razor blade, putty knife, or specialized removal tool to scrape away the old sealant carefully.

  2. Step 2: Clean all the surfaces

    Once all old sealant is off, thoroughly clean the area. You want to remove all dirt, grime, soap scum, and mold from the area. A scrub brush will be more effective than simply wiping the area clean. After cleaning the area, let it fully dry before beginning to apply new sealant.

  3. Step 3: Inspect for damage

    As you clean the area, inspect it for any damage. Damage in your shower includes cracks, gaps, loose tiles, and damaged grout. Repair any damage and clean the area before applying sealant. If there are gaps, you can also use sealant to fill some of the smaller of those gaps.

  4. Step 4: Choose the proper sealant

    Sealant, caulk, and every option in between can feel endless! Which is best for your shower project?

    When sealing showers, opt for 100% silicone sealant. Silicone is flexible and durable, standing up to your shower’s regular use. It also repels water and moisture, which makes it ideal for high-moisture areas like showers.

  5. Step 5: Apply the sealant

    Cut your sealant’s tip at a 45-degree angle, which gives you the best angle for applying an even bead. You will want your tip to be slightly smaller than the area you are filling and increase your bead size by squeezing the caulk gun harder. This gives you more control over your bead’s thickness.

    Follow your sealant’s instructions for loading it into your caulk gun and apply it at an angle.

    Seal a shower drain, fixtures, door frame, grout, and areas where walls meet plumbing, other walls, or the floor.

    Fill in the edge or gap entirely in a steady bead, trying not to stop between the line’s application so it remains as even as possible.

  6. Step 6: Smooth the sealant

    As soon as you finish an area, smooth the line. You can use a caulking tool or a wet finger to smooth the bead. Avoid using soap to smooth sealant, which can impact the sealant’s integrity.

    You won’t want to wait too long before smoothing it as the sealant might begin to dry.

    Smoothing the bead helps it adhere to the surface and gives it a crisp finish.

  7. Step 7: Let it cure

    Allow the sealant to cure according to the tube’s instructions. The cure time will vary depending on brand and sealant type. Some of GE’s sealants can be ready for water exposure in just a few hours.

    Most sealants will require a total of 24 hours before it’s fully cured.

  8. Step 8: Maintain the sealant

    The average sealant will last about five years. However, GE sealants can last years longer if you properly care for the sealant.

    Regularly cleaning the area of grime and soap scum will prevent damage to your sealant. If you notice small areas that are damaged, clean the area and add Re-New sealant. Re-New allows you to patch up sealant with new silicone without having to remove the previous sealant.

Sealing your shower requires quality silicone sealant that withstands excessive moisture. GE’s high-quality sealant is flexible and durable. It prevents leaks, mold growth, and bacteria buildup even in a high-use area like your bathroom shower.

Check out locations near you to find the closest retailer stocked with GE bathroom sealant.

How to Remove Old Caulk or Sealant the Right Way

When tackling renovations or just replacing old sealant, you’ll need to first prepare your work surface. Over time, caulks and sealants can wear down, grow mold, discolor, and shrink. This creates cracks that water, weather and pests can get through. Unless you’re refreshing 100% silicone seals with GE Re-New, old caulk or sealant needs to be completely removed before you can apply new sealant.

To remove sealant, you’ll need: a utility blade, caulking tool, isopropyl alcohol and paper towels.

  1. Score Old Sealant

    First, carefully score the seam of the old sealant with a utility blade. Run the blade along the edge of the old sealant, being cautious not to scratch the surface of whatever you plan to re-seal.

  2. Remove Old Sealant

    After scoring the old sealant, try to remove as much of the old sealant as you can by hand. Use a caulking tool to remove any remaining material.

    For tight corners where your fingers or a caulking tool won’t fit, use the utility blade again to carefully scrape off the sealant.

  3. Clean Surface with Isopropyl Alcohol

    Once you’ve removed as much of the old sealant material as possible, clean up any remaining residue, dust and debris using isopropyl alcohol. Dampen a paper towel with the alcohol, then wipe down your entire work surface. This step is important for making sure the new sealant you apply will adhere properly.

    If the old sealant had mold, clean the area with a mold cleaning solution prior to wiping down with isopropyl alcohol.

    Safety Tip: Make sure your work area is well ventilated when using isopropyl alcohol.

  4. Allow Work Surface to Dry

    Finally, allow your work surface to dry completely before you apply any new sealant. After this step, you’re ready for a successful sealing project.

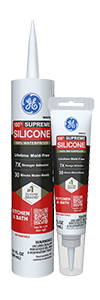
    To avoid removing old sealant again any time soon, create your next seal with a high-performing GE-branded silicone sealant that’s backed by a lifetime guarantee¹ like GE Advanced Silicone 2® or GE Supreme Silicone. Check out our other How-To Guides for more step-by-step tutorials that will help with your next sealing project.

1Manufacturer warrants that this product, when used as directed, will meet the above specifications for as long as you own your home. If not satisfied, return proof of purchase for refund. This is the sole and exclusive remedy and Manufacturer shall not be liable for any damages in excess of the purchase price. This warranty is in lieu of all other warranties, express or implied, including any warranty of merchantability or fitness.

How to Seal a Kitchen Counter for Long-Lasting Results

The gaps around the edges and joints of a kitchen counter are a perfect trap for crumbs, water and humidity. If these gaps are left unsealed or the sealant is old and cracked, you could experience problems like mold, mildew and rot in your walls or cabinets. Prevent these problems before they start by learning how to seal kitchen counters with silicone sealant for lasting protection against mold and water damage.

Tools & Supplies for Sealing Counters

Picking the right sealant can make all the difference. For sealing a kitchen counter, bathroom counter or anywhere water could be present, choose a GE-branded 100% silicone sealant, like GE Advanced Silicone 2® Kitchen & Bath sealant. This sealant is 100% waterproof, permanently flexible and has 10-year mold-free product protection1 and strong adhesion to create a watertight, mold-resistant seal.

Whichever product you choose, check the packaging to ensure the sealant will adhere to your countertop material without staining it.

Pro Tip: 100% silicone sealants are not paintable so be sure to pick the appropriate color for your project.

Besides a GE-branded 100% silicone sealant, you will also need:

  • Caulk gun
  • Painter’s tape
  • Latex gloves
  • Soapy water
  • Paper towels
  • Utility blade
  • Caulk tool
  • Mineral spirits
  • Isopropyl alcohol

Once you have all the tools and supplies you need for this project, you’re ready to seal a counter with these six steps:

  1. Start with a Clean Surface

    Whenever you start a new sealing project, make sure you have a clean work surface by wiping it down with isopropyl alcohol. If you’re replacing old caulk or sealant, completely remove it first, then wipe down the area with isopropyl alcohol. Let the surface dry before laying a new bead.

    Safety Tip: Make sure your work area is well ventilated when using isopropyl alcohol.

  2. Apply Painter’s Tape

    For a smoother bead and easier cleanup, apply painter’s tape on either side of the area you’re sealing.

  3. Carefully Cut the Sealant Cartridge

    Next, prepare your sealant by cutting the tip of the cartridge. Cut the cartridge tip at a 45-degree angle so the hole is about the same size as the area you’re sealing. Some caulk guns have a tool to cut the cartridge tip, but we recommend using a utility blade for consistently clean results. Cut off less than you think you’ll need because you can always cut more. Once cut, pierce the cartridge’s inner foil seal using the metal rod on your caulk gun or a long nail. Then load the sealant cartridge into the caulk gun.

  4. Apply Sealant

    Now that your sealant and work area is prepped, apply sealant along the edge of the counter where it meets the wall or backsplash. As you work, pull the gun toward you and maintain a relaxed grip and steady speed. If you can’t make it in one pass, it’s ok to readjust your grip and start where you left off. Fill gaps with additional sealant as needed.

  5. Tool the Bead & Remove the Painter’s Tape

    Use a caulk tool or your finger to tool the sealant bead until it’s smooth. It’s important to tool the bead before the sealant starts to cure, so if you need to, you can tool in sections. Run a short bead of sealant, tool the bead, then repeat as many times as needed.

  6. Let Sealant Cure Completely

    Finally, allow the sealant to cure completely for the best performance. GE Advanced Silicone 2® Kitchen & Bath sealant is water-ready in 30 minutes2 and fully cured in 24 hours, but check your product for specific curing instructions.Now you have a 100% waterproof seal that will help keep your countertops protected from mold, mildew and more. For more step-by-step sealing tutorials with high-performing GE-branded sealants, check out our other How-To guides.

1Cured sealant is resistant to stain causing mold and mildew. Regular cleaning of the cured sealant is required, however, as soap and other residue can cause secondary mold and mildew growth.

2Exposure to water possible in as little as 30 minutes with bead size max 3/16””, temperature min 65oF and humidity min 50%. Otherwise, sealant should not be exposed to water for 8 hours. Do not touch or clean sealant for 24 hours. 

How to Caulk a Bathtub the Right Way to Prevent Mold & Leaks

A bathtub should be able to stand up to humidity, splashes and the occasional overflowing bubble bath, and to do that, it needs a durable seal. Not only does it look unpleasant, but old tub sealant that’s cracked or peeling can let water and moisture into your walls, creating serious problems like mold, mildew and rot. To prevent these problems, it’s important to replace old sealant with a new, 100% silicone seal.

Tools & Supplies for Sealing Bathtubs

Picking the right sealant can make all the difference. For sealing a bathtub, or anywhere water could be present, choose a GE-branded 100% silicone sealant, like GE Advanced Silicone 2® Kitchen and Bath sealant. This sealant is 100% waterproof, permanently flexible, has 10-year mold-free product protection1 and excellent adhesion for a watertight seal.

Pro Tip: 100% silicone sealants are not paintable so be sure to pick the appropriate color for your project.

Besides a GE-branded 100% silicone sealant, you will also need:

  • Caulk gun
  • Painter’s tape
  • Latex gloves
  • Soapy water
  • Paper towels
  • Utility blade
  • Caulk tool
  • Mineral spirits
  • Isopropyl alcohol

With the right tools and sealant for your project in hand, follow these steps to learn how to seal a bathtub so it’s completely waterproof and mold-resistant for years to come:

  1. Start with a Clean Surface

    Whenever you start a new sealing project, make sure you have a clean work surface by wiping it down with isopropyl alcohol. If you’re replacing a seal, completely remove the old caulk or sealant, then wipe down the area with isopropyl alcohol. Let the surface dry before laying a new bead.

    Safety Tip: Make sure your work area is well ventilated when using isopropyl alcohol.

  2. Apply Painter’s Tape

    For a smoother bead and easier cleanup, apply painter’s tape on either side of the area you’re sealing.

    Pro Tip: When sealing certain types of bathtubs, such as fiberglass tubs, you may want to fill it with water before applying sealant. Tubs will naturally sink and flex from the weight of the water, putting stress on the sealant joint. If you fill the tub before applying the sealant, you can account for this stress and ensure the finished seal will properly expand and contract when you fill and empty the tub in the future.

  3. Carefully Cut the Sealant Cartridge

    Next, prepare your sealant by cutting the tip of the cartridge. Cut the cartridge tip at a 45-degree angle. Some caulk guns have a tool to cut the cartridge tip, but we recommend using a utility blade for consistently clean results. Cut off less than you think you’ll need because you can always cut more. Once cut, pierce the cartridge’s inner foil seal using the metal rod on your caulk gun or a long nail. Then load the cartridge into the caulk gun.

  4. Apply Sealant

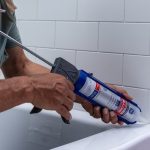
    Once your area is prepped and your sealant is ready, seal around the tub where it meets the wall. Start running a bead of sealant at the edge of the tub and work your way inward. Pull the gun toward you while maintaining a relaxed grip and steady speed. If you can’t make it in one pass, it’s ok to readjust your grip and start where you left off. Fill gaps with additional sealant as needed.

  5. Tool the Bead & Remove the Painter’s Tape

    Use a caulk tool or your finger to tool the sealant bead until it’s smooth. Because it’s important to tool the bead before the sealant starts to cure, it may be better to work in sections. Apply sealant along one side of the tub, tool the bead, then continue onto the next side.

  6. Let Sealant Cure Completely

    Finally, allow the sealant to cure completely for the best performance. GE Advanced Silicone 2® Kitchen & Bath sealant is water-ready in 30-minutes2 and fully cured in 24-hours, but check your product for specific curing instructions.Now you know how to seal a bathtub with the help of high-performing GE-branded sealants. For more step-by-step sealing tutorials, check out our other How-To guides.

1Cured sealant is resistant to stain causing mold and mildew. Regular cleaning of the cured sealant is required, however, as soap and other residue can cause secondary mold and mildew growth.

2Exposure to water possible in as little as 30 minutes with bead size max 3/16”, temperature min 65℉ and humidity min 50%. Otherwise, sealant should not be exposed to water for 8 hours. Do not touch or clean sealant for 24 hours.