
A fresh tube is cheaper than a failed seal Does sealant expire? 5 signs you need new silicone sealant

Note: This DIY article is provided as a general guide only and is not intended to take the place of product-specific installation procedures; always follow applicable manufacturers’ instructions. Depending on your home’s age and condition, location within the home, and other potential factors, repairs and/or upgrades or other services may be necessary prior to the beginning and/or completion of your project that may involve the services of a home improvement professional. This article does not include advice pertaining to local building codes and/or any related inspections.

Silicone sealant does not last forever, so it’s worth asking, “Does sealant expire?” before you start a repair or home improvement project. An old tube may look usable at first, but expired material can cure poorly, apply unevenly, or fail much sooner than expected once the job is done. Understanding what affects shelf life and how to spot expired silicone sealant can help DIYers avoid wasted time and product.

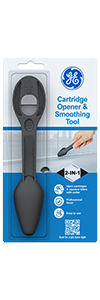
Once a sealant tube has been opened, poor sealing around the nozzle can let air in and cause the product to harden or cure unevenly. Keeping tubes sealed tightly and stored in a cool, dry place helps preserve performance. Tools like the GE Cartridge Opener and Smoother Tool can also help you handle the tube more cleanly during application, which will make storage and future use easier.

Does sealant expire? Here is the short answer

Yes, sealant does expire, including silicone sealant that has never been opened. Like many home improvement products, it has a shelf life that depends on the formula, the way it is stored, and how much exposure it gets to heat, cold, moisture, or air over time. 

This means the answer to “Does caulk expire?” is also yes. In many cases, the tube will include a use-by date, date code, or other product information that helps you estimate whether it is still usable. Checking this information before you get started will save you time and help you avoid redoing the job later. 

What affects silicone sealant shelf life?

Several factors determine how long silicone sealant stays usable in the tube. Heat, freezing temperatures, humidity, and direct sun can all shorten shelf life, even before the product is opened. Storage conditions matter because silicone is moisture-curing, which means exposure to air and moisture can start to change the material before you are ready to use it. 
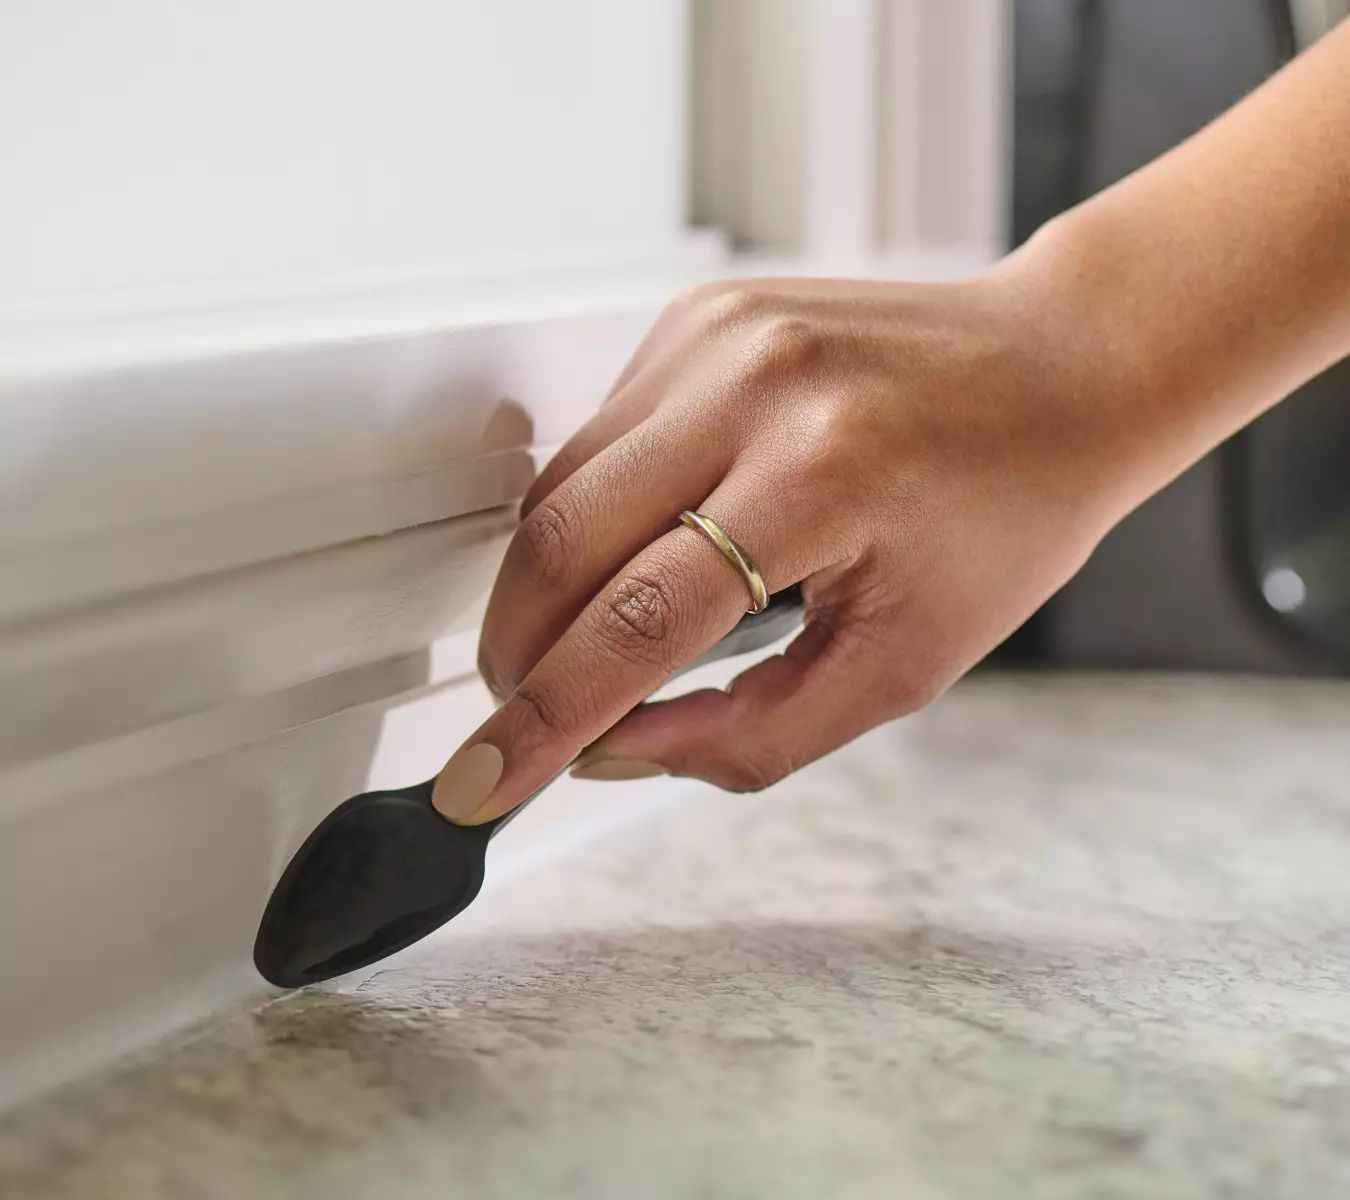
A photo of GE’s Cartridge Opener and Smoothing Tool.
GE’s Cartridge Opener and Smoothing Tool.

Once a tube has been opened, poor sealing around the nozzle can let air in and cause the product to harden or cure unevenly. Keeping tubes sealed tightly and stored in a cool, dry place helps preserve performance. Tools like the GE Cartridge Opener and Smoother Tool can also help you handle the tube more cleanly during application, which will make storage and future use easier.

5 signs your sealant may be expired or past its best use

Watch for these signs to identify expired silicone sealant:

  1. The date on the tube has passed

    The easiest warning sign is the one printed on the packaging. If the use-by date has passed, the sealant may no longer perform the way it should, even if the tube has never been opened. Over time, the material inside can begin to change in ways that affect consistency, adhesion, and cure performance. 

    Some tubes use a printed expiration date, while others use a batch or date code instead. If you are not sure how old the tube is, it is usually safer not to risk it on an actual repair. A fresh tube costs far less than the time and cleanup involved in fixing a failed seal.

  2. The sealant has separated, turned runny, or looks uneven

    Expired silicone sealant often shows visible changes before you even start the job. If the material looks watery, separated, lumpy, or uneven as it comes out of the tube, take it as a strong sign that it’s no longer usable. A good tube should dispense with a consistent texture that is smooth enough to apply and tool properly. 

    When the product starts to separate or behave unpredictably, it becomes much harder to control the bead and much less likely to cure the way it should. Rather than trying to work around expired silicone sealant, it is usually better to replace the tube and start with fresh material that can produce a cleaner, more dependable seal.

  3. The product has hardened in the tube

    If the sealant has hardened inside the nozzle or cartridge, it is usually no longer worth trying to save. This often happens after a tube has been opened and stored poorly, allowing air or moisture to start curing the product inside. 

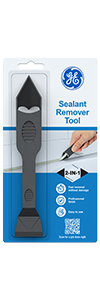
    In some cases, the tip may be blocked while the rest of the tube still feels partly soft, but uneven curing like that can still lead to poor application and unreliable results. If you do end up with a failed bead from old product, the GE Sealant Remover Tool can help remove it cleanly before you reseal the joint with a fresh tube.

  4. It doesn’t skin or cure as it should

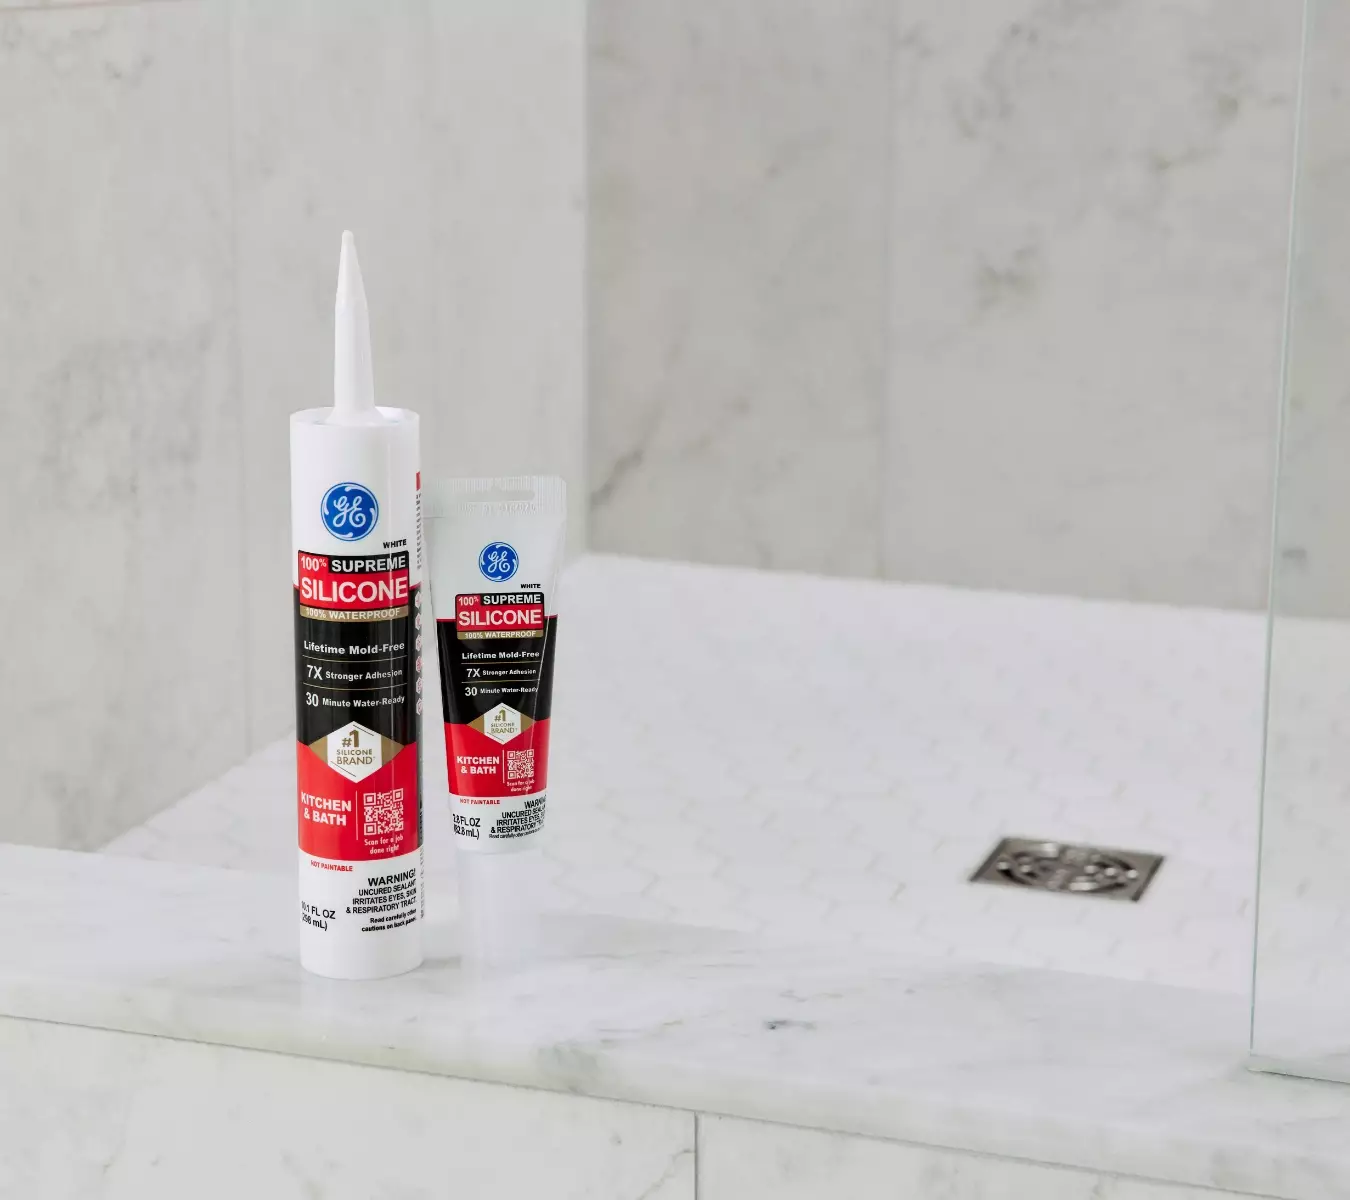
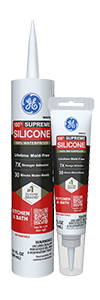
    A photo of GE Supreme Silicone Kitchen & Bath.
    GE Supreme Silicone Kitchen & Bath.

    Old sealant does not always fail right away at the nozzle. In some cases, it applies normally but then takes too long to skin over, stays soft longer than expected, or never cures into a reliable seal. This creates a problem in areas where timing matters, especially around sinks, tubs, showers, and other wet spaces. If the product is not behaving the way the label says it should, age may be part of the issue. Using a fresh product such as GE Supreme Silicone Kitchen & Bath helps reduce that risk in wet-area applications.

  5. The finished seal fails too soon

    Sometimes the clearest sign of expired silicone sealant appears after the job is done. If the bead starts pulling away, cracking, shrinking, or letting water through much sooner than expected, the product may have been too old to perform properly. When that happens, it is usually better to remove the failed bead and reseal the joint with a fresh product such as GE Advanced Silicone Window & Door.

    Even if the sealant looked normal during application, age can affect how well it bonds and cures over time. This is one reason DIYers shouldn’t rely on appearance alone when deciding whether an older tube is still usable.
To get GE Sealants’ products for your home improvement project, visit these fine retailers in the U.S. or Canada.

Let’s create the perfect home! What is a hybrid sealant and how can you use it?

Note: This DIY article is provided as a general guide only and is not intended to take the place of product-specific installation procedures; always follow applicable manufacturers’ instructions. Depending on your home’s age and condition, location within the home, and other potential factors, repairs and/or upgrades or other services may be necessary prior to the beginning and/or completion of your project that may involve the services of a home improvement professional. This article does not include advice pertaining to local building codes and/or any related inspections.

Hybrid sealants combine the strength of acrylics with the flexibility of silicone, giving you a product that sticks well, moves with your surfaces, and can be painted to match. In this guide, we’ll explain what hybrid sealants are, how they stack up against 100% silicone, and four smart ways you can use GE’s Pro Max hybrid series around your home.

Hybrid sealants and 100% silicone sealants both play important roles in home improvement, but they are designed with different strengths in mind. Hybrid sealants bring added versatility, bonding securely to a wider range of substrates, including wood, masonry, and metals, making them valuable for exterior and structural applications.

What is a hybrid sealant?

A hybrid sealant is a relatively new technology that blends the best features of silicone and polyurethane into one versatile formula. Like silicone, it remains flexible after curing, so it can move with surfaces that expand and contract through seasonal changes. Hybrid sealants like GE’s Pro Seal Max series combine the waterproof strength and flexibility of silicone with the paintability and ease of use you’d expect from an acrylic. The result is a versatile product that bonds to a wide range of materials like wood, vinyl, aluminum, and masonry. 

Silicone vs hybrid sealant: how do they compare?

Hybrid sealants and 100% silicone sealants both play important roles in home improvement, but they are designed with different strengths in mind. Silicone is often considered the gold standard for flexibility and moisture resistance. It stays elastic after curing and is highly effective in areas with constant water exposure, like showers or sinks. However, silicone can not be painted and sometimes struggles to bond with certain building materials.

On the other hand, hybrid sealants bring added versatility. They bond securely to a wider range of substrates, including wood, masonry, and metals, which makes them valuable for exterior and structural applications. Unlike 100% silicone sealants, hybrid sealants can be painted once they cure, which helps them blend seamlessly with trim, siding, or other finishes. This makes them a practical solution for many DIY sealing projects where appearance matters as much as performance. They are also designed to stand up to weather, UV exposure, and moisture, so they work well indoors and outdoors.

While silicone may still edge out hybrids in extreme water exposure, hybrids often deliver a better balance of durability, adhesion, and appearance. For DIYers, the decision usually comes down to location: use silicone in chronically wet zones and hybrids where flexibility and paintability are weightier priorities.

Best hybrid sealant uses

The unique characteristics of hybrid sealants make them the right choice for certain jobs. Here are four of the most common.

1. Sealing exterior siding and trim

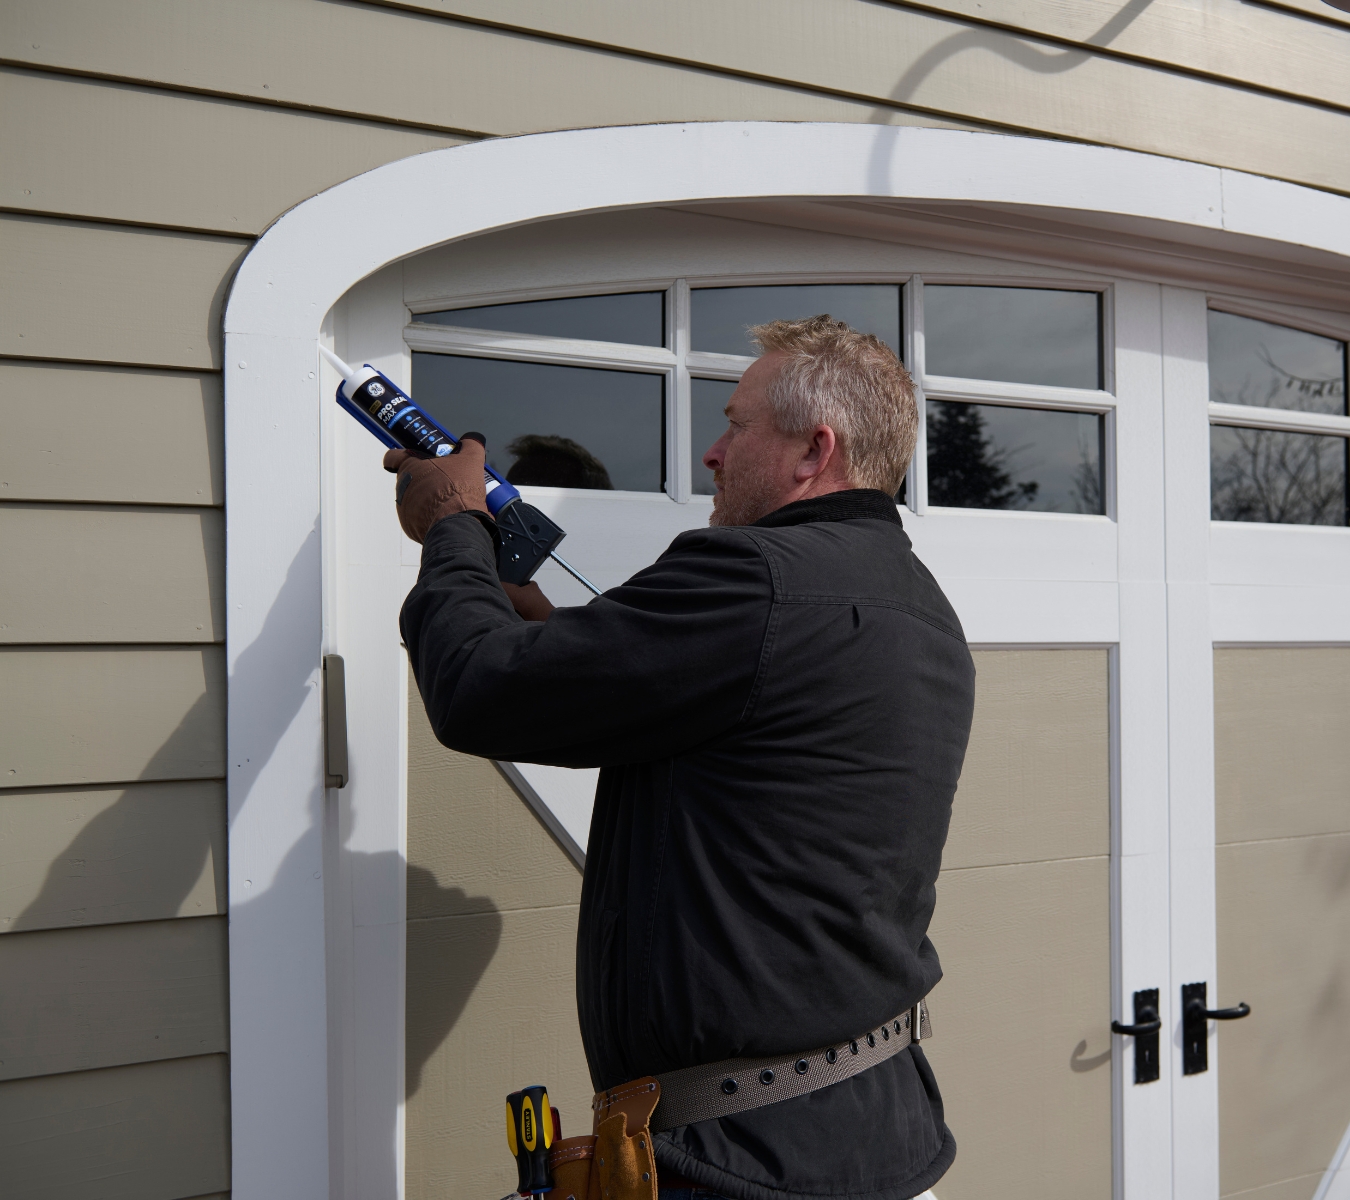
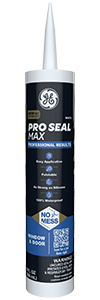
GE Pro Seal Max Window and Door hybrid sealant on an exterior siding joint.

Exterior siding and trim are constantly exposed to sun, rain, and fluctuating temperatures, leaving them vulnerable to gaps and cracks over time. These openings allow moisture to seep behind siding or trim boards, leading to rot, mold, or costly structural issues. They also create easy pathways for cold drafts to enter during the fall and winter months. Hybrid sealants are well-suited for this type of job because they combine strong adhesion with the flexibility needed to handle seasonal expansion and contraction. 

Unlike traditional caulk that may crack or pull away, hybrid sealants hold their bonds even under tough outdoor conditions. GE Pro Seal Max Window & Door is an excellent choice for exterior siding as it adheres strongly to wood, vinyl, and fiber cement, and can be painted to blend with exterior finishes. For a more professional-looking finish, seal siding and trim with GE’s Sealant Smoothing Tool.

2. Kitchen and bathroom counters

Counters in kitchens and bathrooms deal with constant wear, moisture, and frequent cleaning. Cracks or gaps where the counter meets the backsplash, sink, or wall can allow water to seep through, leading to mold growth or damage beneath the surface. Traditional caulks may break down quickly in these environments, but hybrid sealants offer the durability and flexibility needed to keep these busy areas protected. 

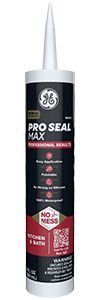
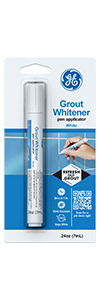
Hybrid sealants adhere strongly to common counter materials like laminate, stone, or tile, and because they are paintable, you can blend them nicely into the design of the space. For high-traffic areas that demand both strength and style, GE Pro Seal Max Kitchen & Bath is the smart choice. It resists moisture, stands up to routine cleaning, and maintains a neat, finished look. While you’re working in your kitchen and bathrooms, you can also complement the finished look of your seals by bringing out the contrast in your grout lines with GE’s Grout Whitener Pen.

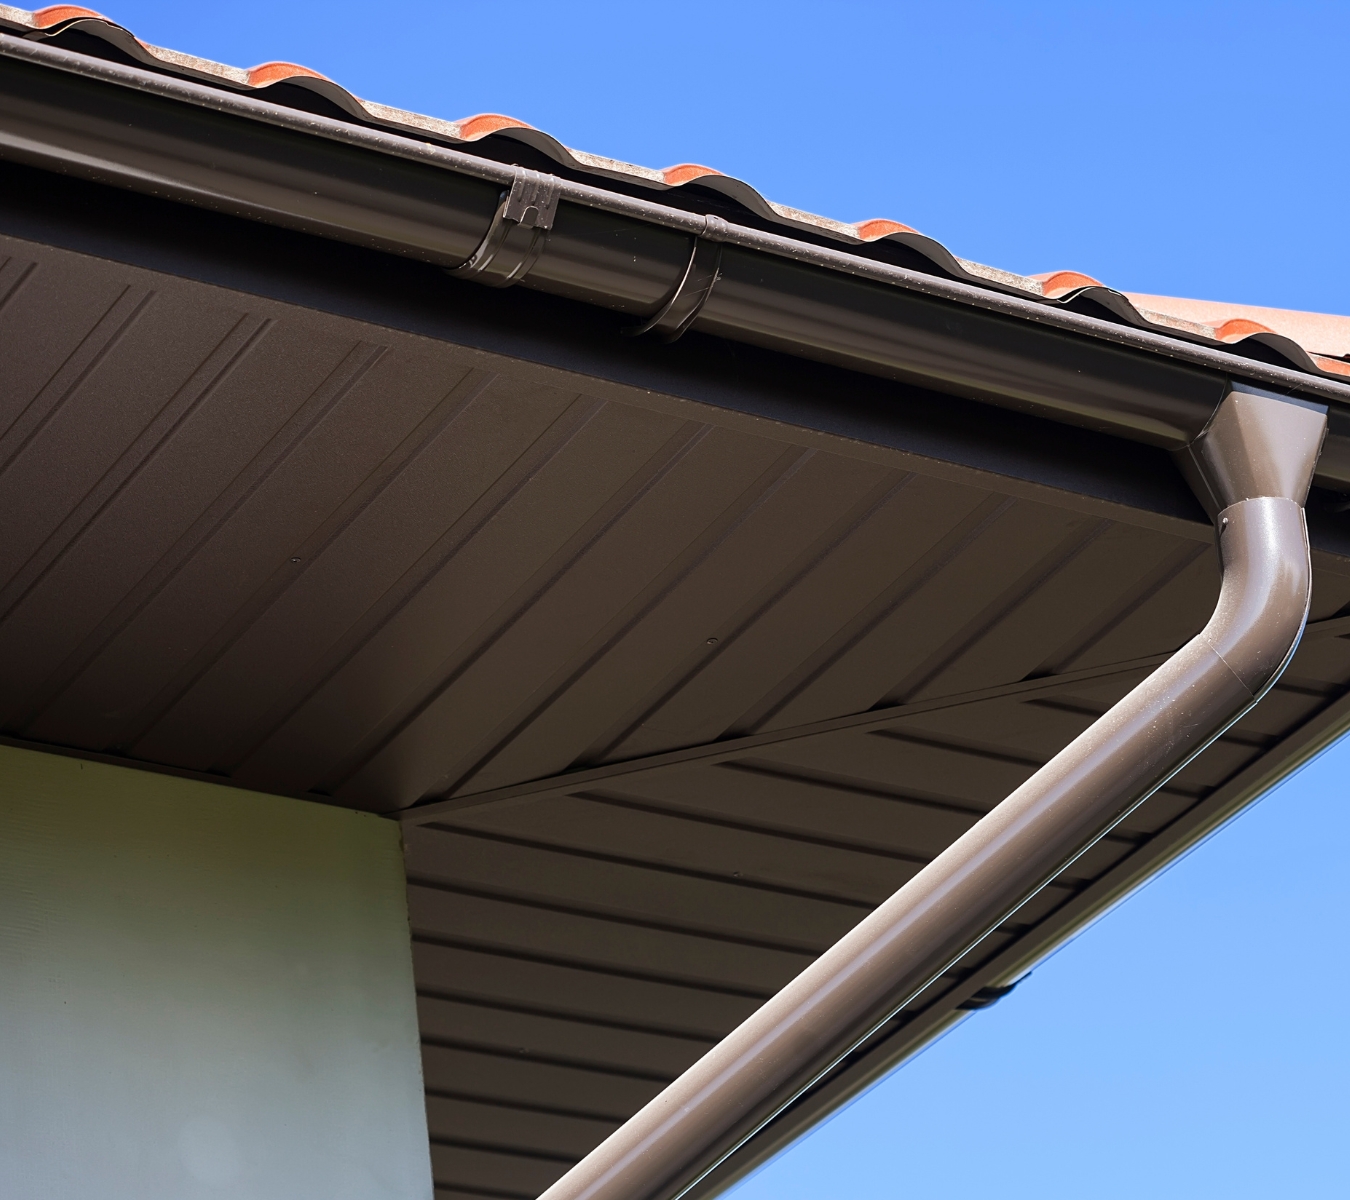
3. Roofing and gutter joints

A gutter joint.

Roofing and gutter systems can be challenging areas to seal. Joints between shingles, flashing, and gutters often expand and contract with temperature changes, causing standard caulks to crack or separate. Once gaps open, water can seep in, leading to roof leaks, wood rot, or ice dams in colder climates. 

Hybrid sealants bond well to common roofing and gutter materials, like metal, asphalt shingles, and PVC. Unlike traditional products that may deteriorate quickly outdoors, hybrids resist UV rays and moisture.

4. Sealing around decks and outdoor structures

On your decks, pergolas, and other outdoor structures, joints where wood meets masonry or composite boards can separate over time, creating gaps for water and pests. Left unchecked, this can lead to rotting posts, loose boards, or structural instability. Hybrid sealants are well-suited for these situations because they bond to a wide variety of materials used in these structures and stay flexible as surfaces expand and contract with the seasons. Unlike traditional caulks, hybrids resist cracking and shrinking, which keeps joints sealed longer. 

To get GE Sealants’ products for your home improvement project, visit these fine retailers in the U.S. or Canada.

Let’s go seal your kitchen counters! 10 modern approaches to sealing kitchen counters

Note: This DIY article is provided as a general guide only and is not intended to take the place of product-specific installation procedures; always follow applicable manufacturers’ instructions. Depending on your home’s age and condition, location within the home, and other potential factors, repairs and/or upgrades or other services may be necessary prior to the beginning and/or completion of your project that may involve the services of a home improvement professional. This article does not include advice pertaining to local building codes and/or any related inspections.

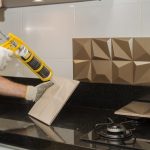
Kitchen counters contribute greatly to both the functionality and aesthetics of any modern kitchen. However, they are vulnerable to damage from water, crumbs, and other kitchen debris. Gaps exposed to moisture will attract mold and other health concerns. Knowing how to seal a kitchen countertop is necessary to prevent mold growth, water damage, and the premature aging of materials.

Silicone-based sealants excel in sealing kitchen counters, offering a durable barrier that naturally conforms to surfaces, expands to fill gaps, and resists heat and moisture. In this guide, we explore ten modern techniques for applying silicone sealant to kitchen counters to ensure they remain pristine and functional for years. Whether you’re installing a new kitchen or maintaining an existing one, understanding these sealing methods will help you provide lasting protection and enhanced durability to your counters.

What you need for sealing kitchen countertops

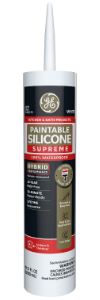
Before getting to work on your countertops, gather the right tools and supplies. Choose a high-quality silicone-based sealant designed for kitchens and baths, such as Supreme Silicone Kitchen & Bath Sealant, which offers waterproof protection and mold resistance. Silicone sealants remain flexible and maintain strong adhesion to surfaces, creating a lasting barrier against moisture and humidity. On average, you will need 4 grams of sealant per sealing task.

Supplies List

  • 100% Silicone Sealant: Ensure it’s a suitable color for your countertop material to avoid any staining
  • Caulk Gun: For precise application of your sealant
  • Painter’s Tape: To mask off areas around the sealant line for clean edges
  • Latex Gloves: To protect your hands during application
  • Soapy Water and Paper Towels: For cleaning the surface before application
  • Utility Blade and Caulk Tool: For opening the sealant tube and smoothing the applied sealant
  • Mineral Spirits or Isopropyl Alcohol: For cleaning and prepping the surface

Before starting, clean the countertop thoroughly with isopropyl alcohol and remove any old sealant so that the new application adheres well and performs effectively. Keep windows open when possible and be mindful of ventilation whenever you use cleaning solvents.

Before starting, clean the countertop thoroughly with isopropyl alcohol and remove any old sealant.

Kitchen counter sealing like a pro

With your supplies on hand, you’re ready to seal your countertops with a lasting protective barrier and a clean, professional aesthetic. Use these tips to get the most effective results.

  1. Seam Sealing

    To prevent debris, water, and humidity from accumulating in the seams where countertop sections join, apply a bead of silicone sealant. This method effectively seals the gaps and thwarts the growth of mold and mildew. Additionally, silicone sealants are not rigid when dry, leaving a flexible bond that will not crack. By creating a seamless barrier, seam sealing both protects against water damage and enhances the overall cleanliness and durability of your kitchen counters.

  2. Sink Edge Sealing

    Applying silicone sealant around the edges of the sink is crucial for creating a waterproof barrier. This barrier prevents excess moisture around the sink from seeping under the countertop and causing significant damage such as rot and mildew. Properly sealing the sink edge also helps maintain the structural integrity and appearance of the counter.

  3. Backsplash Sealing

    Apply silicone sealant along the joint where your countertop meets the backsplash to protect against water splashes and stains. Any glance at a bathroom mirror not recently cleaned will show you just how far water regularly splashes outside sinks. Applying sealant prevents moisture penetration from degrading wall materials over time and secures the backsplash, leaving a clean, hygienic surface for food preparation. This step is essential for maintaining the aesthetics and functionality of your kitchen.

  4. Edge Protection

    Seal your countertop’s front and side edges with silicone to safeguard against moisture and debris. Doing so will improve the countertop’s durability by resisting water ingress and preventing dirt and grime accumulation in most vulnerable areas. Taking the time to apply proper edge protection will add significant longevity and a pristine appearance to your counters.

  5. Fixture Sealing

    To secure fixtures like faucets and soap dispensers against water leaks, apply silicone sealant around their bases. Having sealed fixtures bases prevents moisture penetration into the cabinetry below, protecting against water damage and mold growth. Proper fixture sealing helps preserve kitchen installations and makes them cleaner overall.

  6. Joint Filling

    For countertops comprising multiple pieces or materials, use silicone sealant to fill the joints effectively. With sealed joints, you will create a smooth, uniform appearance while also preventing crumbs and liquids from getting trapped in between component sections. Time spent joint filling will pay off in the long run, leaving your counters easier to clean and maintain.

  7. Crack Repair

    Use silicone sealant to address existing cracks or chips in your countertop surfaces. Filling cracks mitigates further damage and deterioration. What appear to be minor, cosmetic imperfections today can quickly become larger, structural issues requiring replacement.

  8. Undermount Sink Installation

    Put a few beads of silicone around the rims of undermount sinks before setting them in place to leave a strong, waterproof bond. Sink installations are a common cause of mold ingress in kitchen counters.

  9. Temporary Seals

    Countertop materials are particularly vulnerable to damage during construction or renovation. Applying silicone to seal edges temporarily will protect exposed materials and surfaces from moisture, dust, and debris. Temporary seals are easy to apply and remove, offering a proactive solution for preserving the quality of your kitchen surfaces.

  10. Enhanced Aesthetics

    Silicone sealants do not take to paints. Pick colored silicone sealants to match or contrast with your countertop material. With the right color choice, homeowners can maintain any existing design themes or even add a unique accent detail.

Taking the DIY approach to home maintenance shouldn’t have to be a compromise of quality for thriftiness. With the right guidance — and the right materials — homeowners can maintain and enhance their kitchen countertops as effectively as the pros. If you’ve found this guide helpful, visit GE’s website or more end-to-end DIY guides for home improvement.

A sealant can feel dry before it is actually ready for water, movement, or stress How long does sealant take to dry?

Note: This DIY article is provided as a general guide only and is not intended to take the place of product-specific installation procedures; always follow applicable manufacturers’ instructions. Depending on your home’s age and condition, location within the home, and other potential factors, repairs and/or upgrades or other services may be necessary prior to the beginning and/or completion of your project that may involve the services of a home improvement professional. This article does not include advice pertaining to local building codes and/or any related inspections.

Many DIYers assume sealant is ready as soon as it feels dry to the touch but that is only part of the timeline. If you want to understand how long it takes sealant to dry, it helps to separate surface dry time from full sealant curing time, since the joint can still be vulnerable underneath even after the top layer has skinned over. This guide explains what affects sealant dry time, why curing matters, and how to make sealant dry faster without weakening the finished seal.

Several factors affect how quickly sealant dries on the surface and how long it takes to cure all the way. Product type and application area also cause variation, as a bathroom joint, an exterior seam, and a sheltered interior repair may not behave the same way even under similar conditions.

Sealant dry time vs. sealant curing time: what’s the difference?

For silicone sealants, dry time and cure time are related but are not the same thing. Sealant dry time usually refers to the point when the outer surface has skinned over or becomes dry to the touch. The surface skinning over affects whether the bead can be touched, tooled again, or lightly exposed without smearing. 

Sealant curing time is the longer process during which the full depth of the sealant sets enough to deliver its intended strength, flexibility, and moisture resistance. In practical terms, a bead can feel dry on the surface while still remaining vulnerable underneath. This is why a joint that looks finished may still need more time before it can handle water, movement, or regular use.

What affects sealant dry time and sealant curing time?

Several factors affect how quickly sealant dries on the surface and how long it takes to cure all the way through. Humidity is one of the biggest problems because many silicone sealants cure by reacting with moisture in the air. Temperature also contributes. Warm conditions usually help the process move along, while colder conditions can slow it down. 

Airflow and ventilation play a role by helping the environment around the joint remain stable and by reducing the chance that moisture lingers where it should not. Bead thickness is another major factor. A controlled bead will usually progress more predictably than one that is applied too heavily. 

Product type and application area also cause variation, as a bathroom joint, an exterior seam, and a sheltered interior repair may not behave the same way even under similar conditions. In general, warm, moderately humid conditions and a properly sized bead help silicone progress faster, while thick application, cold temperatures, and poor airflow slow it down.

The stages of sealant drying

Sealant drying happens in different stages. The first stage is touch-dry, when the outer surface has skinned over and no longer feels wet. That stage is useful for handling and light contact, but it does not mean the joint is ready for use. 

The next stage is water-ready or rain-ready, which is the point when the sealant can handle moisture exposure without washing away or losing its hold. For many DIY jobs, that is the milestone that matters most. The final stage is fully cured when the full depth of the bead has set enough to deliver its intended strength, flexibility, and long-term performance. Understanding those stages makes it easier to plan the job and avoid exposing joints too soon.

Step-by-step: how to avoid slowing the drying process

If you want sealant to dry and cure as expected, start by giving it the right conditions from the beginning. Clean and dry the joint fully before application, as leftover residue or moisture can interfere with the bond and slow the process down. 

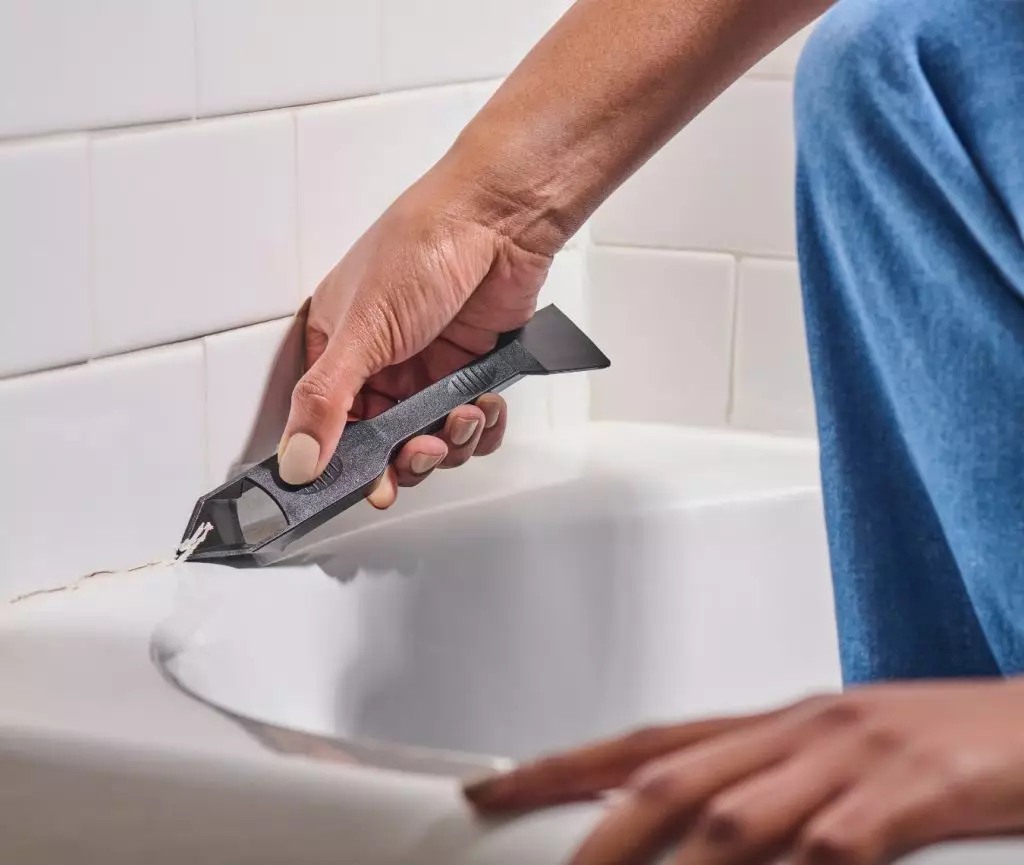
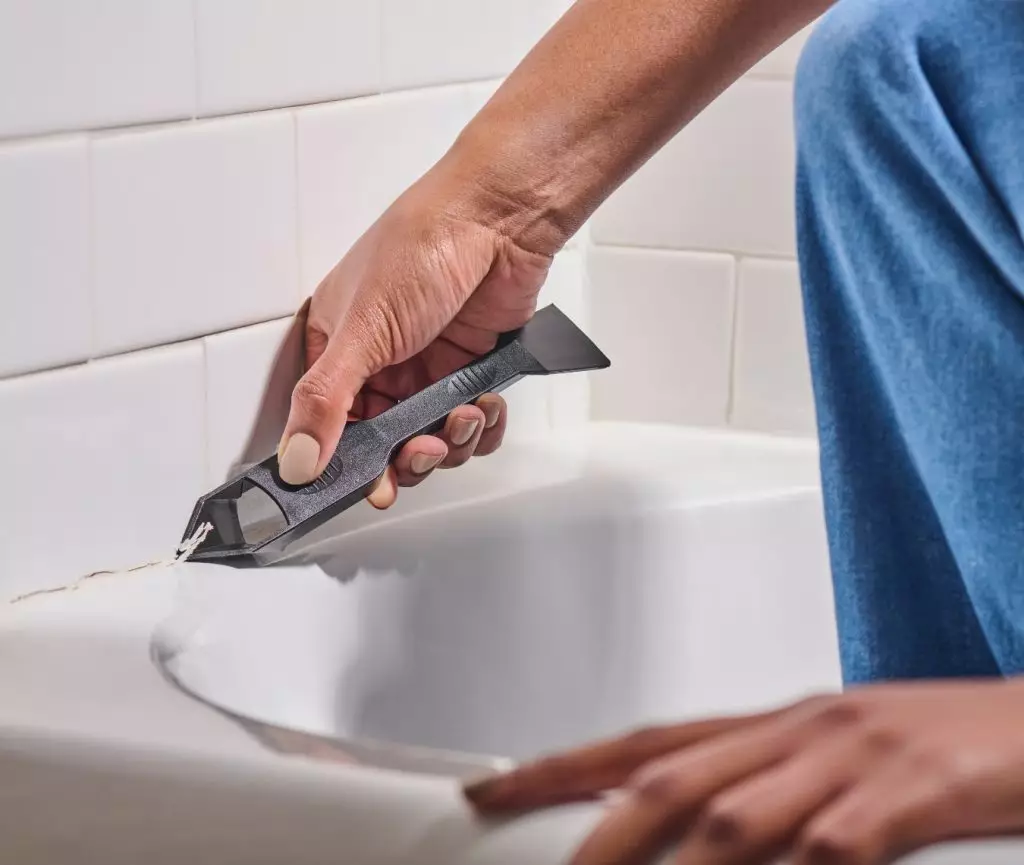
A photo of a homeowner removing sealant with GE’s Sealant Remover Tool.
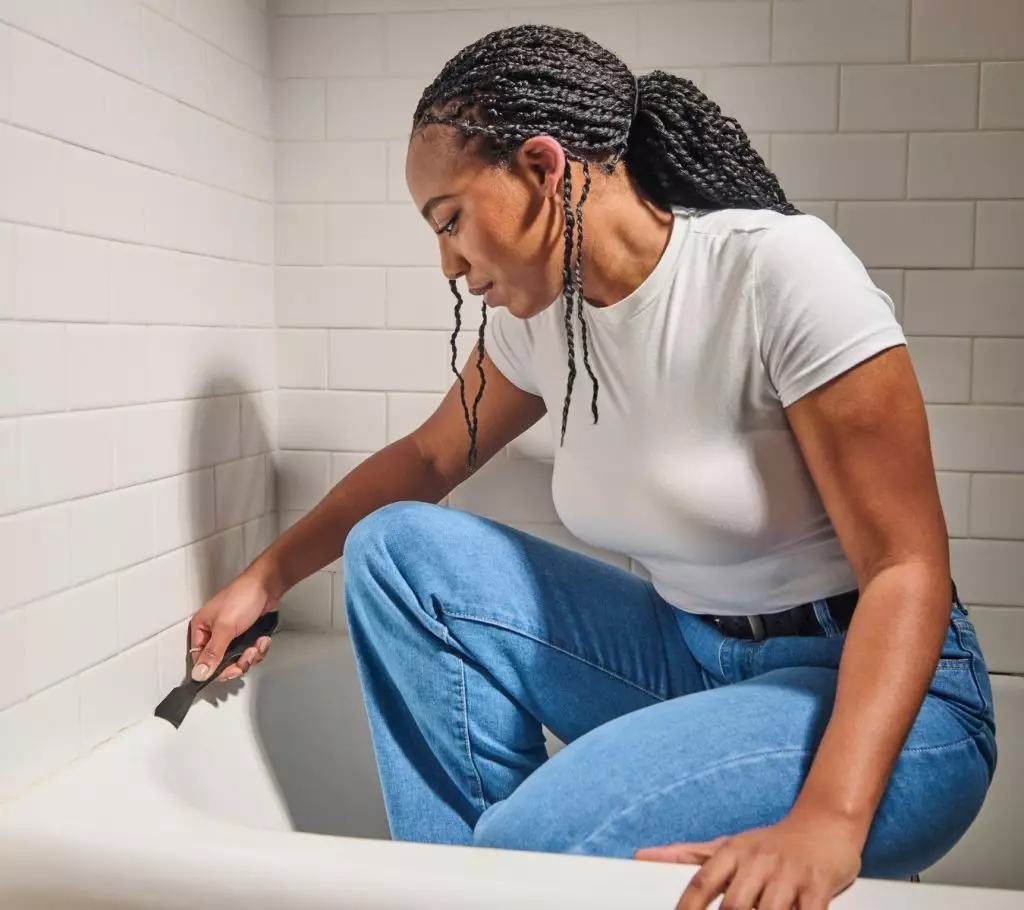
A homeowner removes sealant with GE’s Sealant Remover Tool

If failed material is still in place, remove it first with either GE’s Sealant Remover Tool or a putty knife so the new bead goes onto a sound surface. Next, cut the nozzle to match the size of the joint instead of opening it too wide. Apply an even bead rather than a heavy one, because oversized application usually takes longer to progress. 

It also helps to keep air moving through the room or work area so the environment stays more favorable for drying. After application, shape the bead with GE’s Sealant Smoothing Tool or a gloved finger, then leave it undisturbed while it sets.

How to make sealant dry faster without causing problems

If you are trying to figure out how to make sealant dry faster, the safest approach is to improve the conditions around the job rather than force the process. Increase ventilation, avoid overapplying the bead, and work within the temperature range the product is designed for. 

When timing matters, it also helps to choose a product with a faster water-ready or rain-ready window. What you do not want is to rush the job with shortcuts that weaken the final seal. Faster progress is always preferable, but only if the joint still cures into a durable result.

The right GE products for the job

A photo of GE Supreme Silicone Window & Door.
GE Supreme Silicone Window & Door.

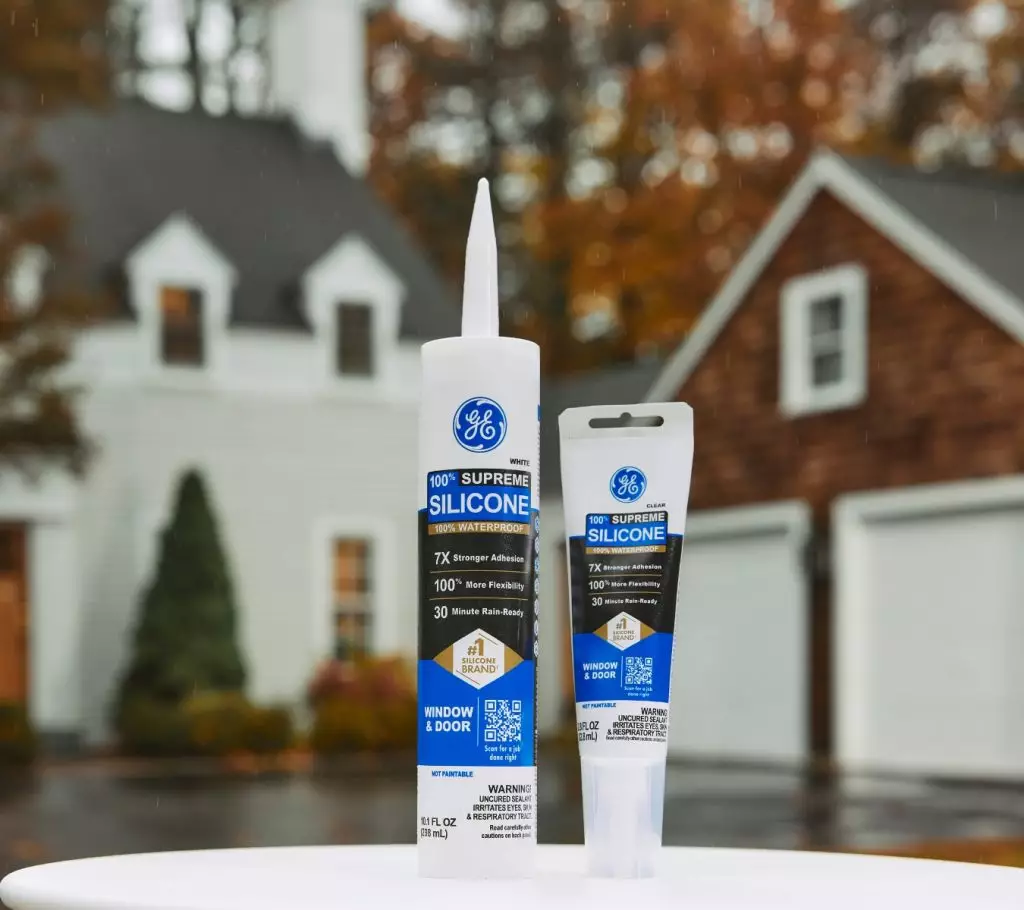
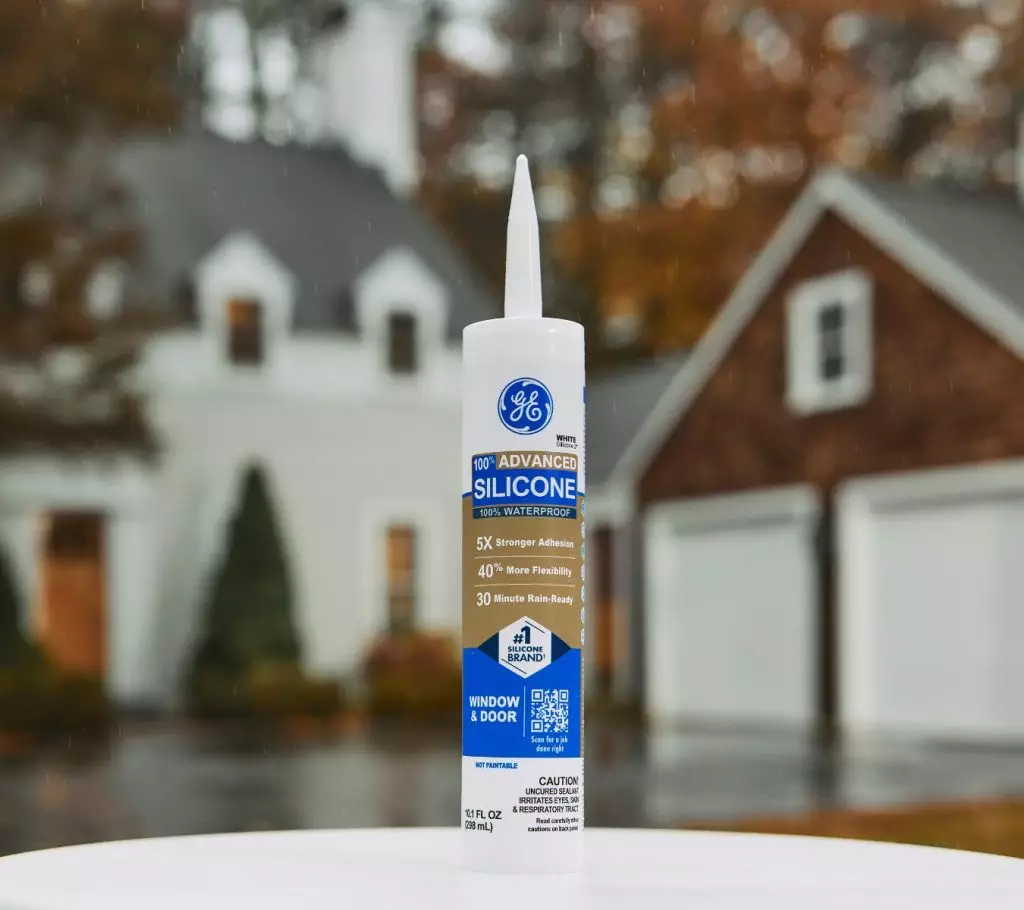
For exterior joints where a faster return to weather exposure is a priority, GE Advanced Silicone Window & Door is a practical choice. Its 30-minute rain-ready performance helps keep exterior projects moving without giving up long-term weather resistance. 

For wet-area joints, GE Supreme Silicone Kitchen & Bath makes more sense where joints will face regular humidity, splashing, or cleaning. The key is to match the product to the environment instead of assuming every sealant follows the same timeline.

To get GE Sealants’ products for your home improvement project, visit these fine retailers in the U.S. or Canada.

A well-sealed sink rim helps protect the countertop from future water damage How to install a drop-in sink in 8 simple steps

Note: This DIY article is provided as a general guide only and is not intended to take the place of product-specific installation procedures; always follow applicable manufacturers’ instructions. Depending on your home’s age and condition, location within the home, and other potential factors, repairs and/or upgrades or other services may be necessary prior to the beginning and/or completion of your project that may involve the services of a home improvement professional. This article does not include advice pertaining to local building codes and/or any related inspections.

A new sink can refresh the look of a kitchen quickly, but a clean installation depends on more than just dropping the sink into the opening and tightening a few clips. If you want to install a new sink successfully, the fit, the plumbing connections, and the perimeter seal all need specific attention. This guide explains how to install a drop-in sink in simple steps and shows how careful sink installation helps prevent water leaks around the rim over time.

Old residue, grime, and all failed sealant should come off before the new sink goes in. A clean opening gives the new perimeter seal a better surface to bond to and helps reduce the chance of leaks around the rim later.

What to check before you buy the sink

Before you buy a new sink, confirm that it will actually fit the opening and the cabinet below it. If you are replacing an existing drop-in sink with the same general style, matching the current cutout is usually the easiest path. You should still measure the countertop opening and check the cabinet width so the new sink does not create clearance problems underneath. 

It also helps to verify the sink depth, since a deeper basin can affect the space available for plumbing or disposal components. Check the faucet-hole configuration as well, especially if you plan to reuse your current faucet or add accessories like a sprayer or soap dispenser. Finally, confirm that the sink is appropriate for the countertop material and the way the cutout will be supported.

When this is a DIY job and when to bring in help

A simple drop-in sink replacement is typically manageable for non-expert DIYers when the existing cutout works, the plumbing stays in place, and the old sink comes out without trouble. The job becomes more complicated when countertop cutting is required, plumbing components must move, or a garbage disposal creates extra clearance or reconnection issues. As a good general rule, consult professional help if you find yourself uncertain about:

  • Shutoff valves
  • Nearby electrical components
  • Condition of the plumbing itself

Sink Installation: what you need to get started

Before installation starts, gather the things you’ll need so you can get the job done efficiently once the old sink is out. These usually include:

  • New drop-in sink
  • New faucet if you are replacing it
  • Caulk gun
  • Adjustable wrench
  • Screwdriver
  • Pliers
  • Bucket and towels
  • Tape measure

Keep these within easy reach before you disconnect anything. This is also the right time to set out the tools that help with sealing and cleanup. GE’s Sealant Remover Tool is useful if the old sealant is still bonded around the sink rim. Likewise,  GE’s Sealant Smoothing Tool can help you finish a cleaner perimeter bead once the new sink is in place.

Remove the old sink and prep the opening

Start by shutting off the water supply and disconnecting the supply lines under the sink. Keep a bucket and towels nearby because some water usually remains in the lines or drain components. If the setup includes a garbage disposal, remove that next so the sink can come free more easily. 

Then, loosen the mounting clips that hold the sink to the countertop. If the sealant is still holding the rim in place, cut through it carefully before trying to lift the sink out. Once the sink is removed, clean the opening thoroughly. Old residue, grime, and all failed sealant should come off before the new sink goes in. A clean opening gives the new perimeter seal a better surface to bond to and helps reduce the chance of leaks around the rim later.

How to install a drop-in sink: step-by-step

Follow these eight steps to nail your sink installation on the first go:

  1. Dry-fit the sink

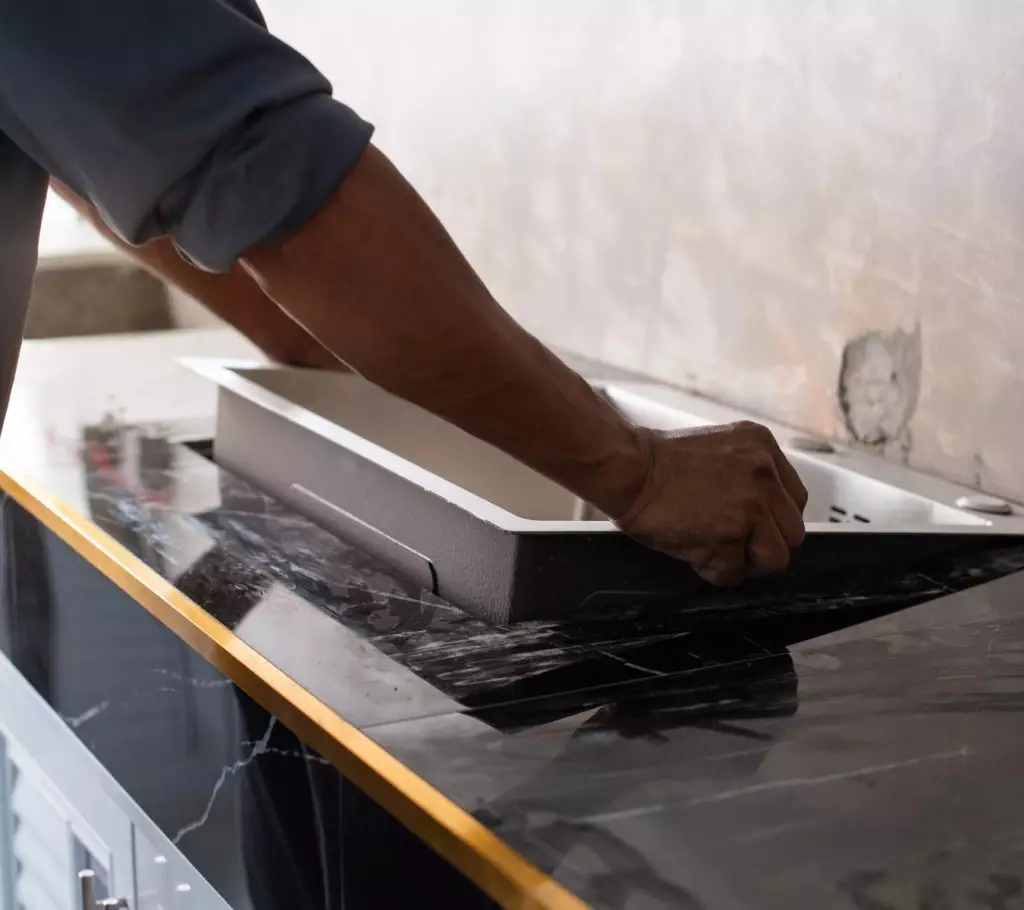
    A person installing a kitchen sink into a countertop
    Hands lowering a white drop-in sink with a raised rim into a black countertop cutout.

    Set the sink into the countertop opening before you apply any sealant. This lets you confirm that the rim covers the cutout evenly and that the basin clears everything below the counter.

  2. Check the alignment and faucet-hole layout

    Make sure the sink sits squarely and that the faucet-hole configuration works for the faucet and any accessories you plan to install.

  3. Apply the sealing bead under the rim

    Lift the sink back out and run a continuous bead where the rim will contact the countertop. Keep the line consistent so the perimeter will be protected once the sink is seated.

  4. Lower the sink carefully into place

    Set the sink into the opening and press it down into position without shifting it more than necessary.

  5. Secure the clips evenly

    Tighten the mounting clips gradually from below instead of fully tightening one side first. This helps the sink seat more uniformly around the cutout.

  6. Install the faucet and accessories

    Attach the faucet and any additional components according to their instructions before finishing the rest of the assembly.

  7. Reconnect the supply lines and drain components

    Reconnect the water lines, drain, and garbage disposal if the setup includes one.

  8. Test for leaks

    Turn the water back on and check both the plumbing connections underneath and the sink perimeter above. A proper sink installation should leave the sink seated evenly, the plumbing secure, and the rim ready to resist water intrusion.

Choosing the right GE sealants for the job

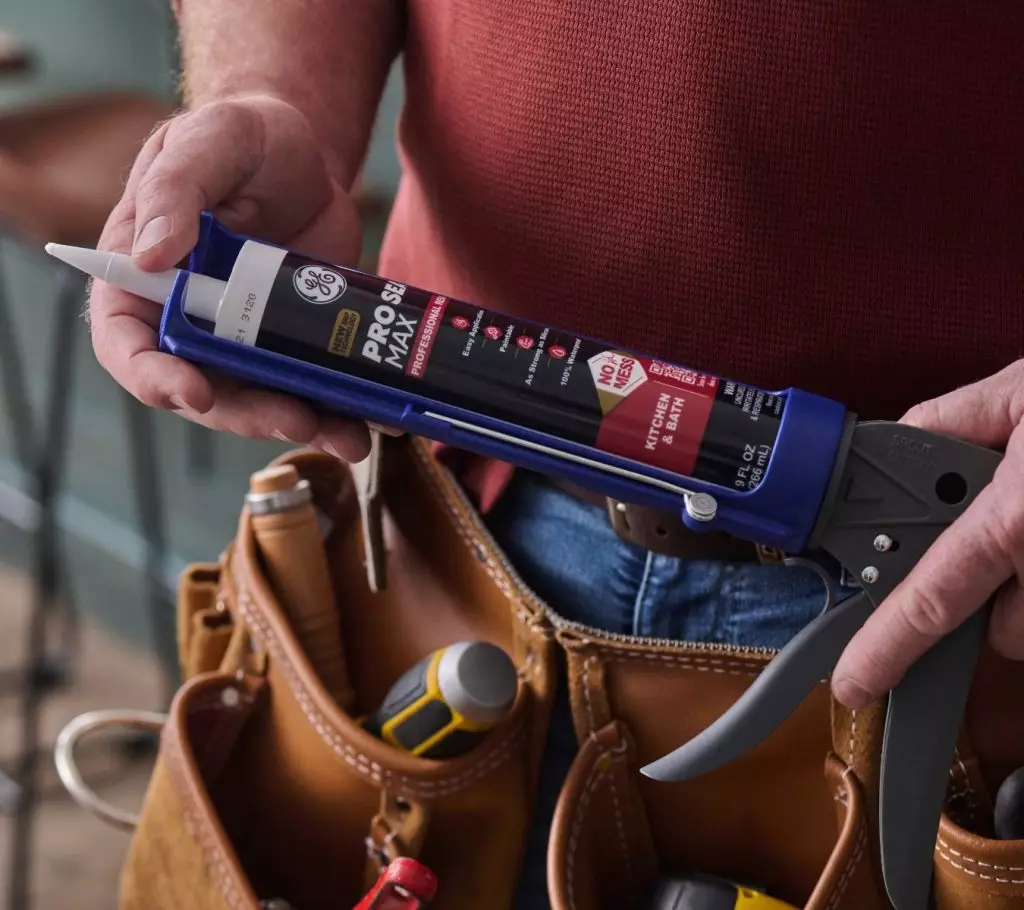
A person holding a caulking gun with a tube of GE Pro Seal Max Kitchen & Bath.
Hands gripping a caulking gun loaded with sealant, with tools visible in a brown tool belt.

For a kitchen sink perimeter, GE Pro Seal Max Kitchen & Bath is the top recommendation when you want a paintable, 100% waterproof seal that stays flexible in an interior moisture-prone area. It is low-odor and formulated to resist mold and mildew growth, which makes it a strong fit around the rim where splashing and cleanup are routine. 

GE Advanced Silicone Kitchen & Bath is the better option when you want a 100% silicone, 100% waterproof seal around sinks and other wet-area joints. It stays permanently flexible and offers 30-minute water readiness with 10-year mold-free product protection.

To get GE Sealants’ products for your home improvement project, visit these fine retailers in the U.S. or Canada.

A well-sealed undermount sink helps keep the countertop edge cleaner and drier How to install an undermount sink and seal it to prevent leaks

Note: This DIY article is provided as a general guide only and is not intended to take the place of product-specific installation procedures; always follow applicable manufacturers’ instructions. Depending on your home’s age and condition, location within the home, and other potential factors, repairs and/or upgrades or other services may be necessary prior to the beginning and/or completion of your project that may involve the services of a home improvement professional. This article does not include advice pertaining to local building codes and/or any related inspections.

Undermount sinks give the countertop a cleaner look and make it easier to wipe crumbs and water straight into the basin. Installing an undermount sink successfully requires proper support from below and careful sealing where the rim meets the underside of the countertop. This guide explains how to seal a kitchen sink, align the basin, and install a kitchen sink in a way that helps prevent leaks over time.

When you want a paintable, 100% waterproof seal in a moisture-prone interior space, GE Pro Seal Max Kitchen & Bath is the top recommendation for undermount sink installation. It stays permanently flexible, has a low-odor formula, and is designed to resist mold and mildew growth around sinks, countertops, backsplashes, fixtures, plumbing, and tile.

What makes undermount sinks different from drop-in sinks

An undermount sink sits below the countertop instead of resting on top of it. There is no raised rim above the surface, which gives the counter a cleaner look and makes it easier to wipe water or debris straight into the basin.  Cleaner wiping surfaces are one reason many homeowners prefer undermount sinks. The tradeoff is that the installation is less forgiving. 

A drop-in sink supports itself at the rim, while an undermount sink depends on stable support below the counter and a properly sealed connection at the sink edge. Because of this, installing undermount sink setups usually takes more planning and more careful execution than a standard drop-in replacement.

What to plan before you start

Before you start, confirm that the sink size works with the countertop cutout and the cabinet space below it. If the cutout already exists, make sure the new sink is compatible with that opening and with the reveal you want at the edge. 

It also helps to check the countertop material and the support method required for the sink, since undermount installation depends on secure attachment beneath the counter. Confirm the faucet and accessory layout as well so the sink, faucet holes, drain components, and any extras all work together. Finally, be realistic about the difficulty of the project. Some undermount sink jobs are manageable for a DIYer, while others are better handled by a professional.

What tools and materials you need

Before you start, gather:

  • Sink to install
  • Faucet and drain parts if you are replacing them
  • Caulk gun
  • Adjustable wrench
  • Screwdriver
  • Pliers
  • Tape measure

Keep towels and a bucket nearby as well, since some water usually remains in the lines or drain assembly when the old sink comes out. 

If the undermount sink will need temporary support during installation, have clamps or another support setup ready before you begin. This is also the right time to set out the tools that will help with sealing. GE’s Sealant Remover Tool or a putty knife can help remove old sealant cleanly from the underside of the counter, while GE’s Sealant Smoothing Tool can help with cartridge setup and final bead shaping.

Remove the old sink and prep the underside of the cutout

Start by shutting off the water and disconnecting the supply lines and drain assembly. If the setup includes a garbage disposal, remove that next so the sink can come free more easily. Once the plumbing is out of the way, release any clips, brackets, or supports holding the sink in place. 

If old sealant is still bonding the sink to the countertop, cut through it carefully before trying to lower the basin. After the sink is out, clean the underside of the countertop cutout thoroughly. Old sealant, grime, and loose residue should all be removed before the new sink goes in. A clean underside gives the new sealant a better surface to bond to and sets up the next phase of installation more cleanly.

Step-by-step: how to install an undermount sink

Follow these steps for a thorough undermount sink installation:

  1. Dry-fit the sink under the cutout

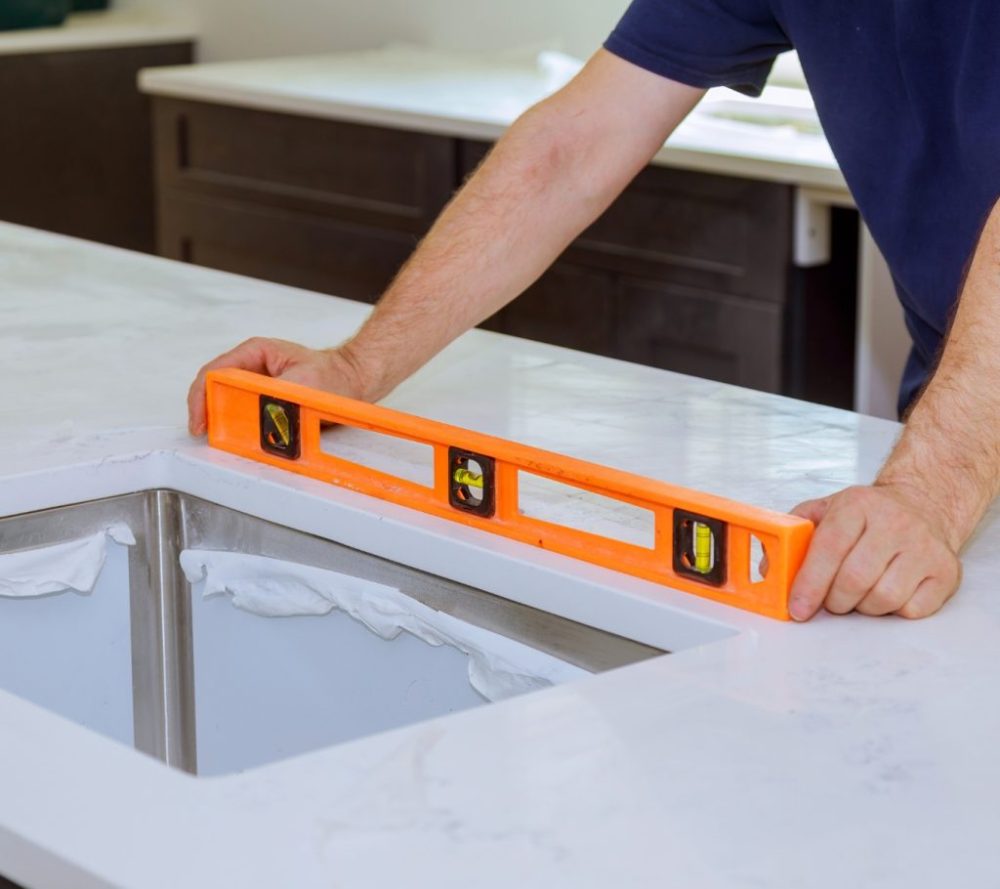
    Countertop sink opening being checked for alignment during an undermount sink installation.
    A Level used to verify alignment of a countertop sink cutout before an undermount sink is secured.

    Before applying any sealant, hold the sink in place below the opening and make sure the basin fits the cutout and cabinet space the way you expect.

  2. Confirm the reveal and alignment

    Check how the sink edge lines up with the countertop opening and make any adjustments before hardware or sealant go in.

  3. Prepare the mounting hardware or support system

    Set up the clips, brackets, rails, or temporary support method you will use so the sink can be held securely once lifted into place.

  4. Apply sealant at the sink rim

    Run a continuous bead where the sink rim will contact the underside of the countertop. Keep the line even so the perimeter will seat consistently.

  5. Lift and secure the sink in place

    Raise the sink carefully into position and press it into alignment without shifting it around more than necessary.

  6. Tighten the supports evenly

    Work gradually around the sink so the basin seats uniformly instead of pulling harder on one side.

  7. Install the faucet, drain, and accessories

    Complete the hardware setup once the sink is supported and aligned properly.

  8. Reconnect the plumbing and test for leaks

    Turn the water back on and check both the drain assembly and supply connections before calling the job complete.

Choosing the right GE sealant for the job

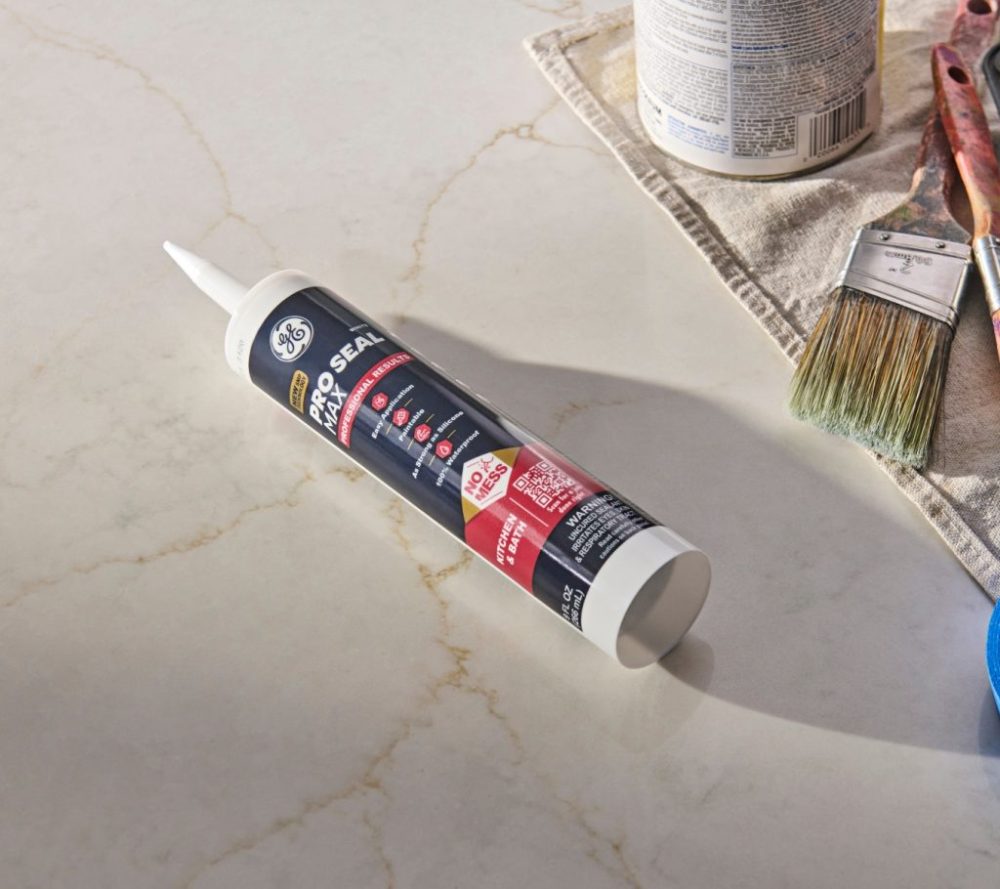
A photo of GE Pro Seal Max Kitchen & Bath.
GE Pro Seal Max Kitchen & Bath.

When you want a paintable, 100% waterproof seal in a moisture-prone interior space, GE Pro Seal Max Kitchen & Bath is the top recommendation for this kind of installation. It stays permanently flexible, has a low-odor formula, and is designed to resist mold and mildew growth around sinks, countertops, backsplashes, fixtures, plumbing, and tile. 

If you don’t need to paint over the seal and just require the strongest grade, 100% silicone moisture protection, GE Advanced Silicone Kitchen & Bath is the better option. It also stays permanently flexible and offers 30-minute water-ready performance with 10-year mold-free product protection.

To get GE Sealants’ products for your home improvement project, visit these fine retailers in the U.S. or Canada.

Better shower door sealing helps keep water where it belongs Bathroom waterproofing: how to seal a shower door in a few easy steps

Note: This DIY article is provided as a general guide only and is not intended to take the place of product-specific installation procedures; always follow applicable manufacturers’ instructions. Depending on your home’s age and condition, location within the home, and other potential factors, repairs and/or upgrades or other services may be necessary prior to the beginning and/or completion of your project that may involve the services of a home improvement professional. This article does not include advice pertaining to local building codes and/or any related inspections.

Even a well-installed shower door can leak if small gaps are left unsealed around fixed joints, corners, or frame connections. Good bathroom waterproofing depends on identifying those leak points, using the right sealant in the right places, and avoiding the moving parts that need to stay clear. This guide walks through how to inspect a shower door, seal the areas that matter, and help prevent shower leaks over time.

A neat sealant bead and proper cure time will do more to prevent leaks than applying extra material. Use the GE Sealant Smoothing Tool to help control the bead and smooth it into place.

How shower door leaks lead to bigger bathroom problems

Small leaks around a shower door can create bigger problems than many homeowners expect. Water that escapes at the bottom edge, side jamb, frame joint, or fixed panel connection can lead to repeated puddling outside the shower, which puts nearby flooring, trim, and wall materials at risk. 

Over time, that moisture can contribute to staining, mildew, mold growth, and damage that is harder to fix than the original leak. That is why shower door sealing is an important part of bathroom waterproofing. When the right joints are sealed properly, the shower contains water better, keeping the surrounding bathroom drier and easier to maintain.

Where shower doors usually leak

Most shower door leaks start at a few predictable spots. The bottom edge and sweep area are common trouble points because that is where water collects during regular use. Wall-to-frame joints can also open up over time, especially if the original seal has cracked, pulled away, or worn down. 

Other leak-prone areas include:

  • Corners where frame pieces meet
  • Fixed glass panel edges
  • Track exteriors on sliding doors
  • Small gaps around hardware or side jambs

Not every damp spot means the same kind of failure, so it helps to identify exactly where water is escaping before you apply new sealant. A more targeted repair is usually the best way to prevent shower leaks without sealing parts that need to stay open or movable.

Shower sweep or silicone sealant? Use each where it belongs

Shower sweeps and silicone sealant do different jobs, so they should not be treated as interchangeable. A shower sweep is meant for moving door edges, especially along the bottom, where it helps control water as the door opens and closes. 

Silicone sealant belongs at fixed joints between stationary surfaces, such as wall-to-frame connections, fixed panel edges, and corners where two nonmoving parts meet. Using each one where it belongs helps stop leaks without interfering with how the door functions. This is especially important on sliding and hinged doors, where the wrong seal in the wrong place can create a new problem instead of fixing the old one.

How to seal shower door leak points step-by-step

Start by running the shower briefly or checking after normal use so you can identify exactly where water is escaping. Mark the leak points before you begin. This helps you focus on the joints that actually need attention instead of resealing the entire door.

A photo of GE’s Sealant Remover Tool.
GE’s Sealant Remover Tool.

Next, remove any failed caulk, soap residue, mildew, or buildup from the area. The GE Sealant Remover Tool can help lift away old material more cleanly, especially at corners and narrow frame joints. Once the old material is gone, clean and dry the surfaces fully. Silicone bonds much better to a clean, dry joint than to residue or trapped moisture.

When the area is ready, apply silicone only at fixed joints, such as wall-to-frame connections, fixed panel edges, and stationary corners. GE Supreme Silicone Kitchen & Bath is the strongest fit here because it is designed for bathroom conditions and long-term water exposure. GE Advanced Silicone Kitchen & Bath is another good option for wet-area sealing where you need a durable, flexible bead.

Use the GE Sealant Smoothing Tool to help control the bead and smooth it into place. After sealing, let the silicone cure fully before using the shower again. A neat bead and proper cure time will do more to prevent leaks than applying extra material.

How to seal a glass shower door without creating new problems

When you seal glass shower door joints, the goal is to stop leaks without blocking parts that still need to move or drain. Apply silicone only where the glass or frame meets a fixed surface, such as a wall, curb, or stationary panel connection. Do not seal moving joints, sliding tracks that need to function, or built-in drainage paths that help water escape. 

A photo of a homeowner applying sealant to a glass shower door
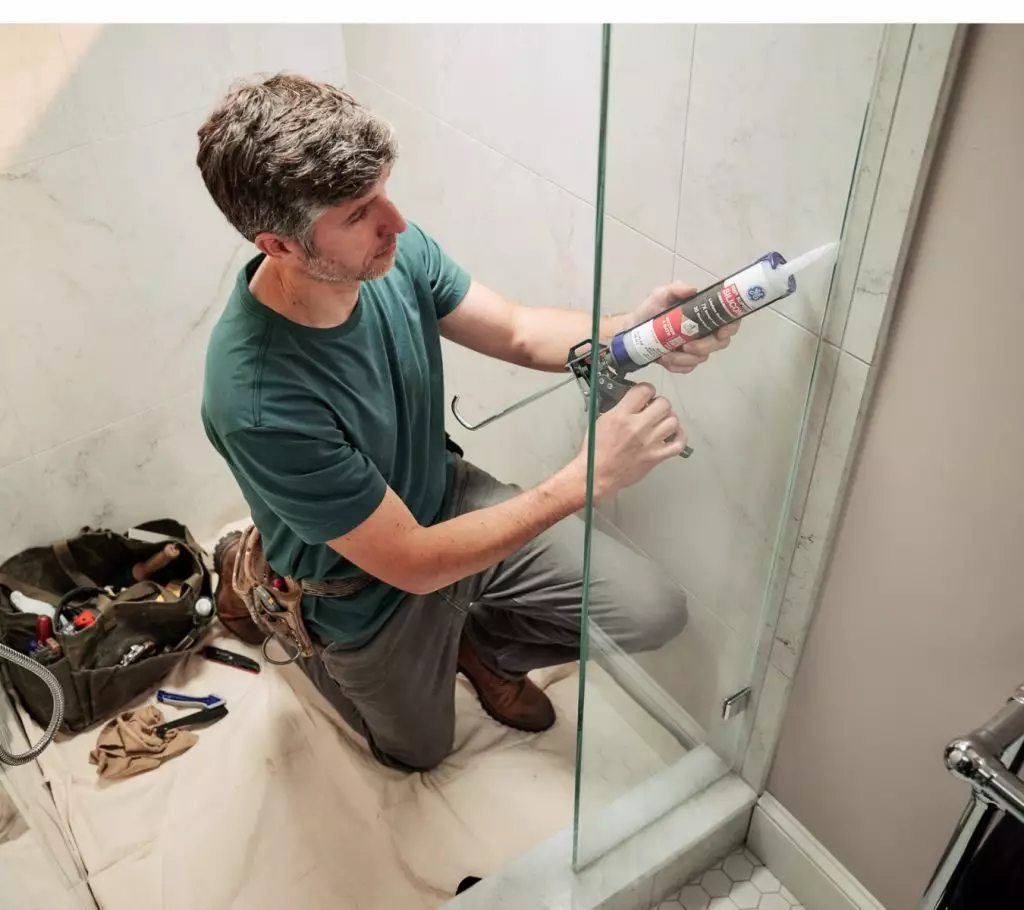
Sealant being applied to a glass shower door

On frameless or mostly glass doors, neat application matters even more because the bead stays visible. A smaller nozzle cut and steady bead control usually give you a cleaner result. Before sealing, confirm that the leak is actually coming from a fixed joint and not from a worn sweep or misaligned door.

Tips to keep the seal looking clean and lasting longer

A cleaner, longer-lasting seal usually comes down to control. Cut the nozzle small so the bead matches the joint instead of flooding it with excess material. Apply steady pressure to keep the bead size consistent from start to finish. 

Once the silicone is in place, tool it lightly and avoid going back over it too many times, which can smear the bead and pull material out of the joint. Cure time is important. Let the sealant set fully before using the shower again. It also helps to start with a dry area, since trapped moisture can interfere with adhesion and shorten the life of the seal.

Maintenance checks to prevent shower leaks

Check the shower door seal regularly, especially around sweeps, corners, frame joints, and fixed panel edges. Look for cracking, gaps, peeling, mildew buildup, or spots where water is starting to escape again. Catching those signs early is one of the simplest ways to prevent shower leaks before they turn into larger bathroom problems.

To get GE Sealants’ products for your home improvement project, visit these fine retailers in the U.S. or Canada.

Faster cleanup starts with the right method for the mess How to clean caulk off hands and equipment: fast and effective methods

Note: This DIY article is provided as a general guide only and is not intended to take the place of product-specific installation procedures; always follow applicable manufacturers’ instructions. Depending on your home’s age and condition, location within the home, and other potential factors, repairs and/or upgrades or other services may be necessary prior to the beginning and/or completion of your project that may involve the services of a home improvement professional. This article does not include advice pertaining to local building codes and/or any related inspections.

Cleaning up after a sealing job is easier when you match the method to the type of caulk, the surface, and how long the material has been sitting there. Fresh residue on skin, tools, and nearby surfaces is usually much simpler to remove than cured sealant, but the safest cleanup method is not always the same for each situation. This guide explains how to clean caulk off hands, remove sealant from tools and equipment, and avoid the kinds of messes that are hardest to fix later.

Removing cured silicone is a mechanical task and takes a bit of patience. The GE Sealant Remover Tool can help lift away cured or failed material from tools and equipment without as much guesswork, while for application, a shaping tool such as GE’s Sealant Smoothing Tool can help produce a cleaner bead with less excess to remove later.

Why sealant cleanup is not one-size-fits-all

Sealant cleanup depends on both the product and the timing. Silicone, hybrid, acrylic, and latex formulations do not all behave the same way once they get on skin, tools, or nearby surfaces, so one cleanup method will not fit every mess. 

Fresh residue is usually easier to wipe, wash, or peel away before it skins over or starts to cure. However, once the sealant has set, cleanup often becomes more surface-specific and may require more careful scraping or a dedicated remover. The easiest approach is to match the method to the mess, starting with the gentlest effective option before moving to stronger cleanup steps.

Start with the easiest win: clean up fresh sealant fast

Fresh sealant is always easier to deal with than cured material, so the best first step is to act quickly. Before the product starts to skin over, wipe away as much excess as you can with a paper towel, rag, or disposable cloth without spreading it farther. 

From there, check the label to see what the product recommends for cleanup. In some cases, soap and water may be enough while the sealant is still fresh, especially on skin or washable tools. In other cases, a different method may be needed depending on the formula. The key is not to assume every product cleans up the same way. 

How to clean caulk off hands safely

When you need to clean caulk off your hands, start by removing as much excess material as possible without spreading it around. If the sealant is still fresh, wipe it away with a paper towel or rag first. If it has started to set, gently rub or peel off what you can before moving on to washing.

Next, check the product label. For some fresh messes, soap and warm water may be enough if you catch them early. Wash thoroughly but avoid scrubbing so hard that you irritate your skin.

If residue remains, use a skin-safe follow-up method such as mineral or baby oil only if needed. This is often the best next step when you need to remove sealant from hands without making the cleanup harsher than necessary. Start with the gentlest effective option and work slowly.

Avoid harsh solvents on skin unless the product guidance clearly says they are safe for that use. Products that may work on tools or equipment are not always appropriate for the hands. If the sealant has fully cured, some remaining bits may need to wear off naturally rather than be forced off aggressively.

How to remove silicone sealant from tools and equipment

A photo of a homeowner removing old sealant with the GE Sealant Remover Tool
A homeowner removing old sealant with the GE Sealant Remover Tool

For caulk guns, smoothing tools, scrapers, utility knives, and similar equipment, start by wiping away fresh excess with a rag or paper towel before it spreads or hardens. If residue remains, follow the product guidance for cleanup while the material is still fresh.

Cured silicone needs a different approach for removal. At this point, removal is usually more mechanical and takes more patience. The GE Sealant Remover Tool can help lift away cured or failed material from tools and equipment without as much guesswork. For application and finishing tools, it also helps to keep cleanup in mind before the mess starts. A shaping tool such as GE’s Sealant Smoothing Tool can help produce a cleaner bead with less excess to remove later. In general, fresh residue calls for fast wipe-down cleanup, while cured silicone usually needs scraping, peeling, or a dedicated removal approach.

How to remove silicone sealant from nearby surfaces without spreading the mess

When sealant lands on a finished wall, trim, tub, glass panel, countertop, or floor, the goal is to lift it away without smearing it further or damaging the surface underneath. Start by removing excess carefully with a scraper or similar tool rather than rubbing it around with a wet cloth. 

If you need to remove silicone sealant after it has started to set, work slowly and keep the tool angle controlled so you do not scratch the finish. Surface compatibility makes a difference here. A method that works on glass may not be safe for painted trim, sealed stone, or delicate finishes. Avoid aggressive chemicals unless the product guidance and the surface both support them. However, in most cases, patience and gentle mechanical removal are safer than a stronger solvent.

Make cleanup easier next time

Once the sealant has cured, cleanup usually becomes slower and more surface-specific. At that point, removal often depends on patient scraping, peeling, or a product-safe remover rather than a quick wipe-down. The easier approach is to prevent as much mess as possible from the start. Wear gloves, use masking tape where clean lines matter, protect nearby surfaces with a drop cloth, and keep rags nearby for quick wipe-ups. 

A photo of the product label on GE Advanced Silicone Window & Door.
The product label on GE Advanced Silicone Window & Door.

It also helps to cut the nozzle correctly and keep a smoothing tool ready, so you do not leave more excess than necessary. Before starting, check the label on products such as GE Advanced Silicone Window & Door or GE Supreme Silicone Kitchen & Bath, so you understand the cleanup guidance, cure timing, and the best window for removing fresh residue.

To get GE Sealants’ products for your home improvement project, visit these fine retailers in the U.S. or Canada.

Discover how to caulk a toilet to fight mold and bathroom bacteria! How to caulk a toilet to prevent leaks and preserve floors

Caulking a toilet to seal out moisture and improve stability is one of the final steps professionals must complete before wrapping up a bathroom renovation. Not only is it important for your client’s health, but it’s also required by code. Proper caulking methods greatly increase a toilet’s expected lifespan and improve the overall aesthetics of the bathroom, helping to differentiate your professional services from the average contractor.

Learn why caulking a toilet properly matters. We’ll walk you through how to caulk a toilet that exceeds code requirements.

Note: This article is a general guide and does not intend to replace product-specific installation procedures; always follow applicable manufacturer instructions. Depending on your home’s age and condition, location within the house, and other potential factors, repairs and/or upgrades or other services may be necessary before the beginning and/or completion of your project that may involve the services of a home improvement professional.

Why do you need to caulk a toilet?

The International Plumbing Code requires caulk around the base of a toilet. You must use 100% silicone caulk where fixtures meet the wall or floor.

Here are a few of the primary reasons it’s required, and you should take the time to properly seal toilets above and beyond basic code requirements.

Maintain hygiene

The bathroom is a moisture magnet and tends to be the most humid room in the house.

Properly sealing any gaps in the bathroom is crucial for preventing excess humidity from turning into destructive mold and mildew.

There are often small gaps around your toilet, even in the most professionally installed toilets. Those gaps become havens for moisture to collect and turn into mold and bacteria. This mold and bacteria harm your client’s health and can damage your work much faster than a properly sealed toilet.

Prevent water damage

Like any other equipment that uses water, toilets are prone to occasional leakage. It might be splashes from cleaning the toilet, spraying from the nearby shower, or leaking from an old toilet.

Properly sealing all gaps in the toilet prevents leaks from running into those holes and creating water damage. Instead, a quality sealant ensures the water lays harmlessly outside the toilet, where someone can easily mop it.

Enhance aesthetics

Caulking provides a finished look to your bathroom renovations. It conceals visible gaps and unevenness between the toilet base and the floor. This will help improve your client’s satisfaction with your work and look better in any professional photos you might take of the renovation.

Improves stability

Caulk is not glue or an adhesive in the traditional sense. It’s a sealant that fills gaps and holes. However, by filling in gaps, you can add extra stability to the toilet. Caulk ensures it fits snugly in place and is less likely to shift over time. 100% Silicone sealant is the most durable and flexible sealant option for securing

How to caulk a toilet to the floor

Use these tips to take your toilet caulking skills to the next level to impress your clients and improve your work’s quality.

  1. Thoroughly clean the area

    You may be eager to jump into the job, especially if your client has you on a strict schedule. But preparation is just as crucial as sealing the toilet.

    Thoroughly clean the toilet base before applying caulk. You want to remove any old caulk, dirt, or debris. A clean surface ensures the new caulk adheres properly.

  2. Choose the right caulk

    Knowing how to caulk around a toilet starts with choosing the right caulk.

    You will want a high-quality, waterproof caulk specifically for bathroom use to meet the code. These caulks will withstand the extra moisture and wear of a bathroom.

    Silicone bathroom caulk tends to perform best for sealing toilets. It’s water-resistant and flexible.

  3. Prepare the surrounding area

    When working in a client’s home, you must be extra careful to avoid mess. Properly covering the surrounding area with towels and cloth protects the floor from spills or drips.

    You do not want to use tape when caulking. It leaves ridges and makes your silicone caulk more susceptible to peeling off early. Rather than using tape, properly cut your tube.

    Always cut the tube of your caulk smaller than the area you plan to seal. This gives you more control over the thickness and flow of the caulk     .

    You will also want to ensure you have proper ventilation in the bathroom. Ventilation prevents any strong odors while speeding up the drying process.

  4. Use proper caulking methods

    Take your time to caulk so it looks smooth and seals correctly. You’ll want to use the caulking gun to apply a thin caulk bead around the toilet base where it meets the floor or walls. You want to keep the caulk thickness consistent.

    Use a gloved finger or caulk finishing tool to smooth out the caulk bead. It improves the appearance and helps it adhere and seal better. If you use a wet finger, try to avoid soap with silicone caulk as soap can prevent it from properly adhering to the toilet surface.

  5. Wrap up

    Be sure you communicate clearly with your clients about how long it takes for the caulk to dry. You’ll want to tell them before you begin so they can plan around that timeline. You’ll then want to remind your clients again once you finish so they don’t use the toilet and mess up the seal.

    On average, silicone caulk takes 24 hours to fully cure. This timeframe can vary depending on what your sealant is made from. Always check your product instructions for your product’s specific dry time. Ask your clients not to touch or disturb the caulk during that time.

    On average, caulk takes 24 hours to dry, but times may vary depending on your product. Be sure to communicate before and after caulking to ensure adequate time for it to dry properly.

How to caulk a toilet base and detect wax ring leaks

You now know how to caulk a toilet bowl, but here’s a common mistake to avoid in the process.

When you caulk the toilet base, you keep water damage out. However, you can also keep any internal leaks in. The average wax toilet ring will last about twenty to thirty years before it begins to leak. This can cause significant water damage and mold growth if not caught early.

Due to this risk, homeowners may request you not seal the toilet bowl so they can detect any wax ring leaks early. A common request is asking contractors to seal the toilet in a U shape, leaving the back open to detect leaks.

We do not recommend doing this method as it is against the code. However, most caulk lasts about five years. Regularly redoing caulk also allows plumbers and contractors to inspect the toilet base for signs of a leak, especially when that wax seal nears its expiration date.

Properly sealing toilets lengthens the life of the toilet and bathroom and improves your customer’s satisfaction level, ensuring you have a customer for life. They will know they can depend on you to get the job done right the first time. Quality toilet caulking begins with quality silicone caulk. You can count on GE Supreme Silicone Kitchen & Bath Sealant to keep out the mold.

Find a store near you that carries our strong, reliable sealant.

Remove the moldy caulking in your shower. How to remove mold from shower caulking area before recaulking

Stepping into a clean, refreshing shower is a great way to start or end your day. However, when unsightly mold starts creeping into and staining the caulk around your shower, it can quickly turn your oasis into a nightmare. Mold not only looks unpleasant, but it can also pose health risks if left unattended.

Fortunately, removing mold and replacing the shower caulk is a manageable task with our 100% waterproof and mold and mildew-resistant silicone sealants and hybrid caulks. In this comprehensive guide, we’ll teach you how to remove mold from shower caulking areas before applying a fresh bead of new caulk.

Disclaimer: Note: This DIY article is provided as a general guide only and is not intended to take the place of product-specific installation procedures; always follow applicable manufacturers’ instructions. Depending on your home’s age and condition, location within the home, and other potential factors, repairs and/or upgrades or other services may be necessary prior to the beginning and/or completion of your project that may involve the services of a home improvement professional. This article does not include advice pertaining to local building codes and/or any related inspections.

Understanding mold growth

Bathrooms provide an ideal environment for mold growth due to the combination of moisture, warmth, and organic matter. Caulking, with its porous nature, easily traps moisture, becoming a breeding ground for mold spores. Additionally, soap scum and residues provide nutrients for mold to flourish. Regular cleaning and maintenance can prevent mold growth, but once it appears, prompt action is necessary to prevent further spread.

If the mold is allowed to grow, it can potentially cause health problems, such as respiratory issues or allergic reactions.

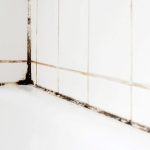
Showers offer the ideal environment for mold to grow with moisture, warmth, and organic matter. Remove shower mold quickly before it spreads and causes more problems.

Tools and materials needed to remove mold from shower caulking

Before you start tackling your mold problem, gather all the tools and materials you’ll need.

  • Protective Gear: Rubber gloves, safety goggles, and a mask to protect yourself from mold spores and cleaning agents.
  • Cleaning Agents: Bleach, hydrogen peroxide, white vinegar, baking soda, or commercial mold removers.
  • Scrubbing Tools: Old toothbrush, scrub brush, or a sponge.
  • Caulking Tools: Silicone caulk and caulking gun for resealing after cleaning.

A step-by-step guide to removing mold from shower caulking

Follow these steps to get your shower looking fresh and clean again.

  1. Safety first

    Before starting the cleaning process, ensure proper ventilation in the bathroom and wear protective gear to prevent exposure to mold spores and cleaning agents.

  2. Prepare the area

    Remove any items from the shower area and create a clear workspace. Lay down old towels or plastic sheets to protect surrounding surfaces from cleaning solutions.

  3. Mix cleaning solution

    Depending on personal preference and availability, prepare a cleaning solution using one of the following options:

    • Bleach Solution: Mix one part bleach with three parts water in a spray bottle.
    • Vinegar Solution: Fill a spray bottle with undiluted white vinegar.
    • Baking Soda Paste: Mix baking soda with water to create a thick paste.
    • Hydrogen Peroxide: Use undiluted hydrogen peroxide for stubborn mold stains.

    Remember, you should never mix different cleaning solutions as they can react and release harmful chemicals and gasses.

  4. Apply cleaning solution

    Spray or apply the chosen cleaning solution directly onto the moldy caulking, ensuring thorough coverage. Allow the solution to penetrate the mold for several minutes to loosen its grip.

  5. Scrub the area

    Using a scrub brush, old toothbrush, or sponge, scrub the moldy caulking vigorously to dislodge mold growth. Focus on stubborn areas and ensure that all traces of mold are removed.

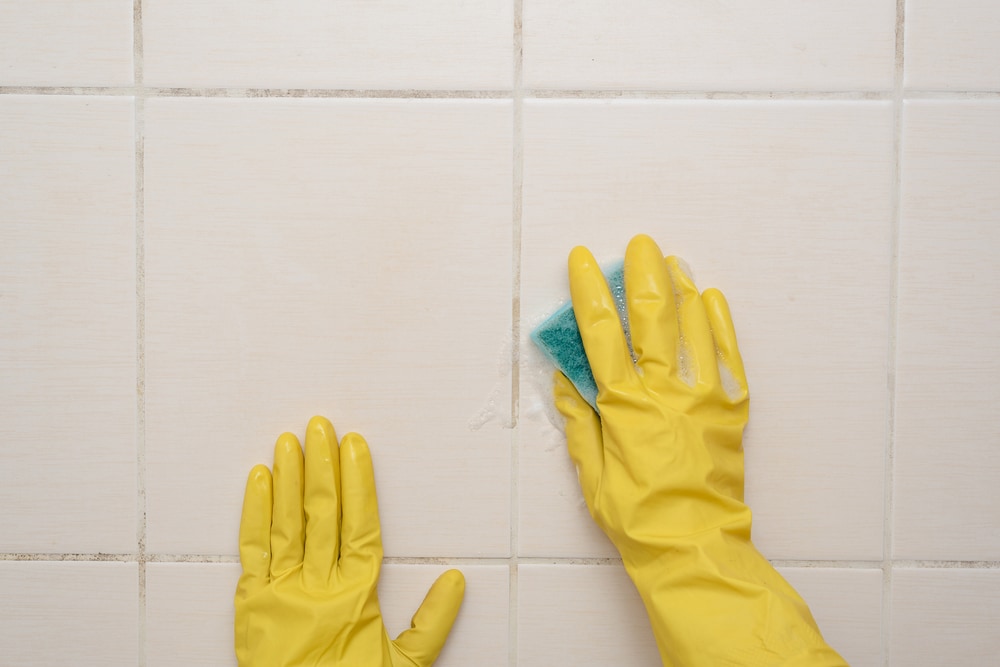
    Scrub vigorously to remove mold from shower caulking.
  6. Rinse thoroughly

    Once the mold has been scrubbed away, rinse the caulking thoroughly with clean water to remove any remaining residue and cleaning solution.

  7. Dry completely

    Use a dry towel or cloth to wipe down the shower caulking and ensure it is completely dry. Adequate drying helps prevent future mold growth.

  8. Seal with silicone caulk

    Inspect the caulking for any signs of damage or gaps. If necessary, remove old caulking and reapply a fresh bead of silicone caulk, like the GE Advanced Silicone 2® Kitchen & Bath Sealant. This silicone sealant is 100% waterproof and has 10-year mold free product protection.

    Smooth the caulk with a damp finger for a neat finish.

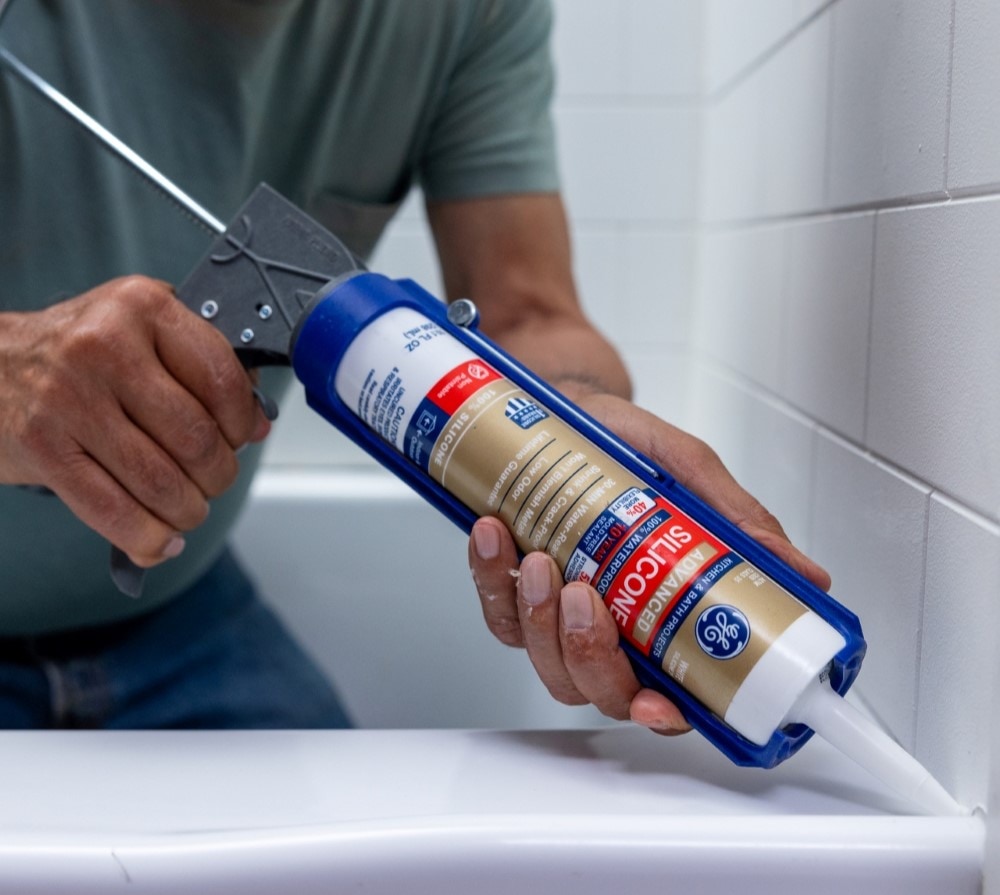
    Someone applying a fresh bead of silicone caulk in a shower.
    Apply a fresh bead of silicone caulk in your shower after removing the mold.

Preventative measures

To help prevent future mold growth, consider using some of these preventative measures.

  • Mold Resistant Products: One of the best ways to prevent mold and mildew growth is to use products that help stop the growth from happening. In a shower, this includes silicone sealant instead of other caulking products like vinyl latex. Silicone sealants are 100% waterproof and mold and mildew resistant.
  • Ventilation: Proper ventilation is crucial for reducing moisture buildup in the bathroom. Install and use exhaust fans during and after showers to expel humid air outside.
  • Regular Cleaning: Incorporate regular cleaning into your bathroom maintenance routine. Wipe down shower surfaces, including caulking, with a disinfectant cleaner or vinegar solution to prevent mold growth.
  • Dry Surfaces: After each shower, wipe down wet surfaces, including walls, floors, and caulking, with a squeegee or dry towel to remove excess moisture.
  • Repair Leaks: Address any leaks or water damage promptly to prevent moisture from seeping into walls, floors, and caulking.

Refresh your shower caulking with professional caulks and sealants from GE

Removing mold from shower caulking requires diligence, patience, and the right tools and techniques. By following the step-by-step process outlined in this guide and implementing preventative measures, you can effectively banish mold and maintain a clean, mold-free shower environment. Remember, regular maintenance is key to preventing mold growth and preserving the integrity of your bathroom. With these strategies in place, you can enjoy a refreshing shower experience without the worry of mold creeping back into your caulking.

When you need to replace the caulk in your shower, check out the professional products available from GE. Our silicone sealants and hybrid caulks are 100% waterproof and mold and mildew-resistant.

Purchase GE sealants from any of these retailers.