Pest Block Insulating Foam
Interior Seal Silicone Sealant
Exterior Seal Acrylic Caulk
Pro Seal Max Kitchen & Bath
Pro Seal Max Window & Door
Supreme Silicone Window & Door Sealant
Advanced Silicone 2® Window & Door Sealant
All Purpose Silicone 1® Sealant
Paintable Silicone Supreme Window & Door Sealant
Siliconized Advanced Acrylic Window & Door Sealant
Siliconized Multi-Purpose Acrylic Window & Door Caulk
Seal & Fill Multi-Purpose Window & Door Caulk
Supreme Silicone Kitchen & Bath Sealant
Advanced Silicone 2® Kitchen & Bath Sealant
Tub & Tile Silicone 1® Sealant
Paintable Silicone Supreme Kitchen & Bath Sealant
Siliconized Advanced Acrylic Kitchen & Bath Sealant
Siliconized Multi-Purpose Acrylic Kitchen & Bath Caulk
Re-New
Painter’s Pro Quick Dry Siliconized Acrylic
Painter’s Pro Siliconized Acrylic Caulk
Painter’s Caulk
Gutter Silicone 2® Sealant
Concrete Silicone 2® Sealant
Metal Silicone 2® Sealant
Project Filter
  • location
    Insulating Foam
    Kitchen & Bath
    Paint Projects
    Specialty
    Windows, Doors, Siding & Trim
  • project-type
    All
    Window & Door
    Kitchen & Bath
    Seal & Paint
    Insulating Foam
    Specialty
  • color
    Almond
    Black
    Brown
    Clear
    Light Gray
    Metallic Gray
    White
  • formulas
    Acrylic
    Insulating Foams
    Paintable Silicone
    Silicone
    Siliconized Acrylic
  • performance
    Not Paintable
    Paintable
  • product-type
    Adhesives
    Caulks & Sealants
    Specialty Products
  • application
    Can
    Cartridge
    Pen
    Squeeze Tube
  • gap_width
    Gaps 1"-3"
    Gaps less than 1"
    Window & Door
  • humidity-level
    Extensive Humidity
    Normal Humidity
  • product_finder
    Pathway 1
    Pathway 2
    Pathway 3
    Pathway 4
    Pathway 5
    Pathway 6
    Pathway 7

Contact Form

Remove caulk like a pro! 7 Steps to Easily Remove Caulk Like a Pro

Caulk is an essential component in any home that helps seal gaps and joints and keep moisture and air out, all while maintaining the integrity of various surfaces. Over time, however, caulk can deteriorate due to factors like age, wear and tear, and exposure to harsh elements. Knowing when it’s time to remove and replace caulk is crucial for maintaining a well-sealed and aesthetically pleasing home.

We will take you through the signs you need to look for to know when it’s time to replace the caulk along with tips to help you remove caulk or sealant like a pro.

Signs you need to replace caulk

Even with professional installation, caulk will eventually wear out and need to be replaced. Look for these signs to let you know when it’s time to replace:

  • Cracks and gaps: One of the most obvious signs the caulk needs to be replaced is gaps or cracks in the caulk lines. Cracked caulk can no longer effectively seal the area, leading to potential water damage and decreased energy efficiency. Inspect the caulk lines around windows, doors, bathtubs, sinks, and other areas prone to moisture to identify any cracks or gaps.
  • Peeling and flaking: Peeling or flaking sealant is a sign of deterioration and loss of adhesion. When caulk starts to peel away from surfaces, it can no longer seal gaps effectively. Peeling caulk not only looks bad but also leaves the area vulnerable to water damage and air leakage.
  • Discoloration and mold growth: If you see any discoloration or mold growth, this is a sign moisture has seeped in behind the caulk. Discolored or moldy caulk not only looks unappealing but also indicates that the caulk is no longer sealed. Replacement is necessary to prevent further mold growth and maintain a clean, hygienic environment.
  • Shrinking and gaps: Shrinking caulk is a common issue that occurs as the caulk dries out and contracts. When this happens, you may notice gaps between the caulk and the adjacent surfaces. These gaps allow moisture and air to penetrate, leading to potential damage.

Flexibility and elasticity loss: Caulk is designed to remain flexible and elastic to accommodate movement without cracking or breaking. However, as caulk ages, it can become stiff and brittle. Test the flexibility of the caulk by gently pressing on it with your finger. If it feels rigid and does not yield, it’s a sign that the sealant needs to be replaced.

Caulk wears out over time. When it is discolored, cracked, or hard, it needs to be replaced.

Tools needed to remove old caulk

Once you’ve identified old caulk, it’s time to remove it. Before you get started, you need to gather the right tools. These tools will make the process smoother and give you better, more professional results.

  • Utility knife or razor blade: A utility knife or razor blade is essential for cutting through the old caulk and separating it from the adjacent surfaces. Choose a sharp blade with a pointed tip to ensure precise cutting and easy removal. Use the knife to score along the edges of the caulk lines, both horizontally and vertically, to loosen it from the surface.
  • Caulk removal tool: A caulk removal tool, also known as a caulk scraper, is specifically designed to help pry and scrape away old caulk from surfaces. These tools have a sharp, angled edge that allows you to dig into the caulk and remove it without damaging the surrounding surfaces. Look for a caulk removal tool with a comfortable handle for ease of use.
  • Heat gun or hair dryer: Applying heat to old sealant can help soften it and make it easier to remove. You can use a heat gun or hair dryer to gently warm up the caulk, making it more pliable. Be careful not to apply too much heat or hold the heat source too close to the surface, as this can damage surrounding materials.
  • Putty knife or painter’s tool: A putty knife or painter’s tool can be handy for removing stubborn caulk residue and smoothing out surfaces after caulk removal. Choose a flexible putty knife with a wide blade to help scrape away any remaining caulk and achieve a clean, smooth finish. Alternatively, a painter’s tool with a flat edge can also be effective for scraping and smoothing surfaces.

Chemical caulk remover: In some cases, a chemical caulk remover may be necessary to dissolve the caulk and facilitate removal. These products are typically applied directly to the caulk and left to penetrate for a specified period before scraping away the softened caulk. Follow the manufacturer’s instructions carefully when using chemical caulk removers. Be sure you wear protective gloves and properly ventilate the area.

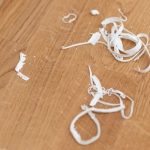
How to remove caulk like a pro in 7 steps

If you’ve ever wondered how to remove old caulk, we will walk you through the process that will give you a professional finish. You can use these steps whether you’re renovating your bathroom, sealing gaps around doors, finishing your baseboards, or replacing windows.

  1. Prep the Area

    Clean the area around the caulk lines with a mild detergent to thoroughly remove any dirt, debris, grease, or mildew.

  2. Score the Caulk

    Use a utility knife or razor blade to score along the edges of the caulk lines, both horizontally and vertically.

  3. Apply Heat (Optional)

    Use a heat gun or hair dryer to gently warm up the caulk, making it more pliable and easier to remove. Make sure you don’t use too much heat as this can melt the sealant instead of simply loosening it.

  4. Use a Caulk Removal Tool

    Use a caulk removal tool to pry and scrape away the old caulk from the surfaces.

  5. Scrape Residue

    Use a putty knife or painter’s tool to scrape away any remaining caulk residue and achieve a smooth surface.

  6. Clean the Area

    Wipe down the surfaces with a clean cloth to remove any remaining caulk residue and debris.
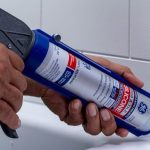
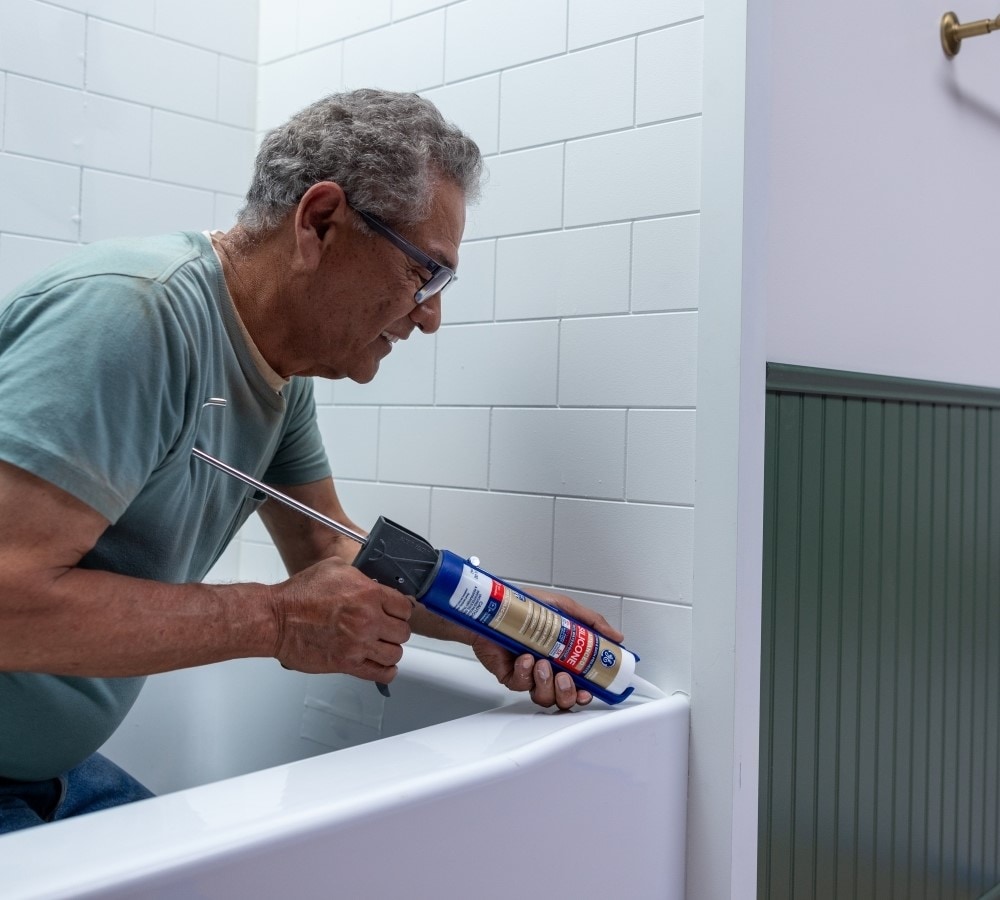
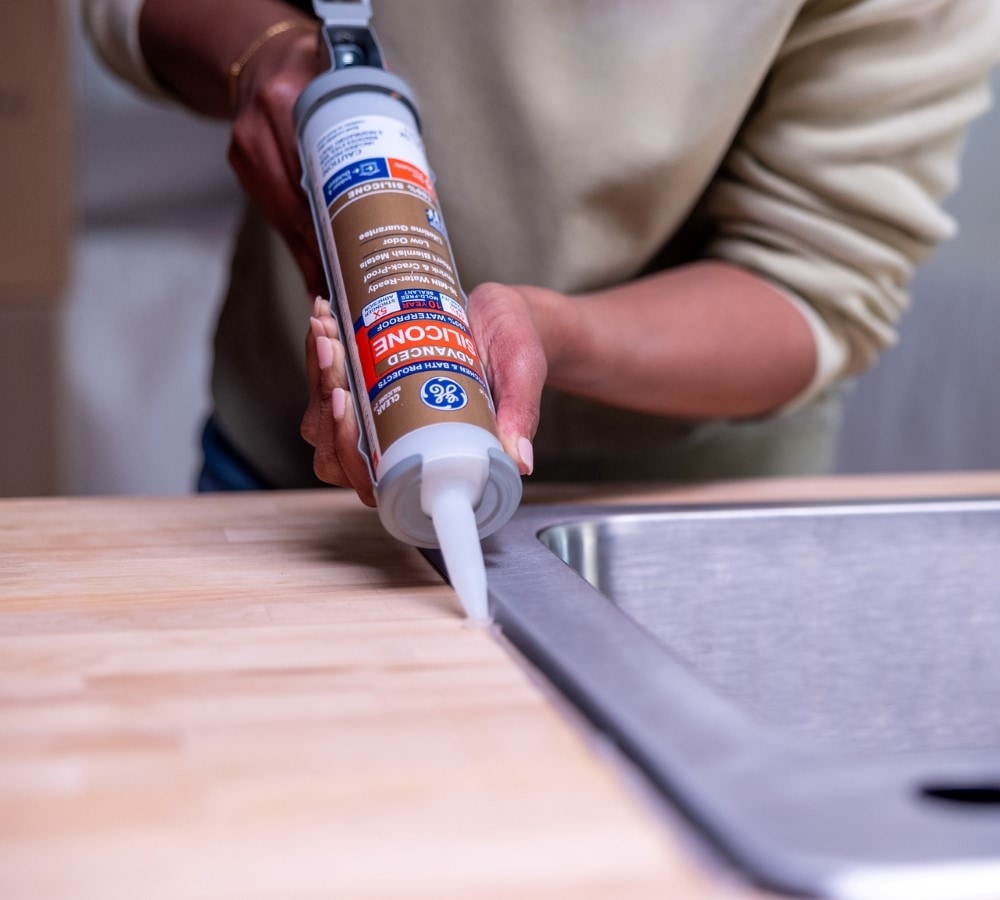
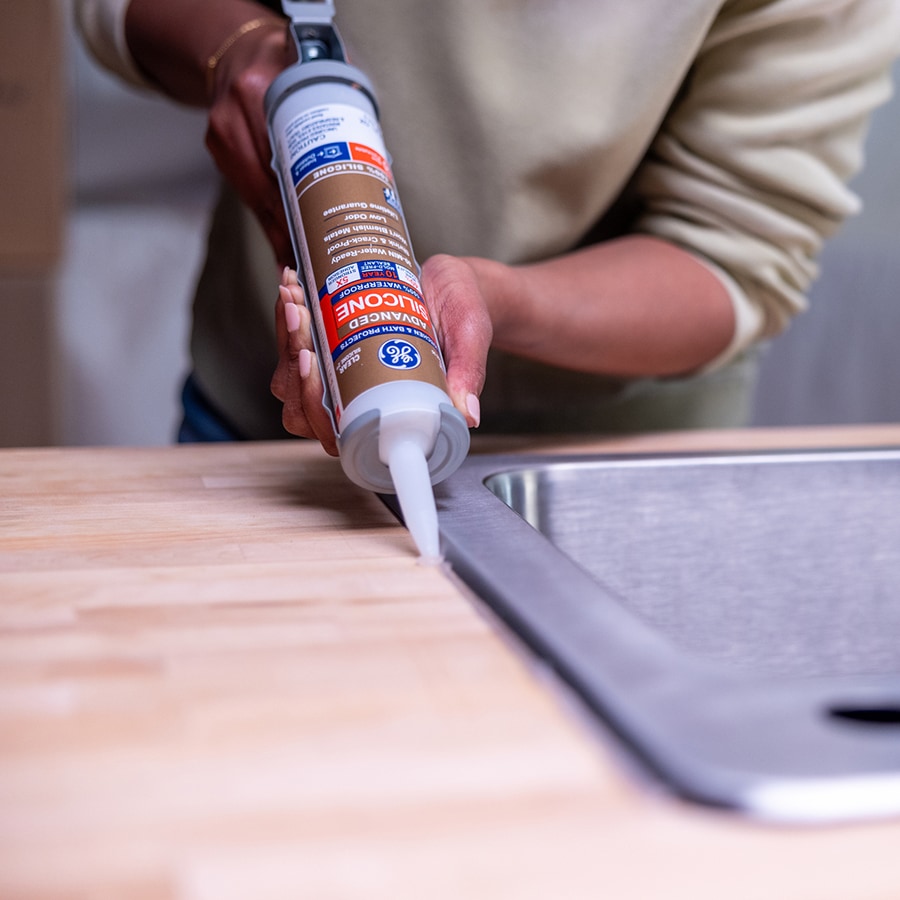
  7. Apply New Caulk

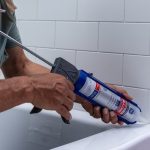
    Once the surfaces are clean and dry, apply a fresh bead of caulk to seal the gaps and joints.

Professional best practices for caulk removal

While removing caulk may seem straightforward, to get professional-looking results, you need the right tools, techniques, and attention to detail. Make sure you choose high-quality tools that are appropriate for the job, whether you are removing flexible silicone sealant or decades-old, dried caulk. Following these steps will ensure your project is ready to go for a fresh application of caulk.

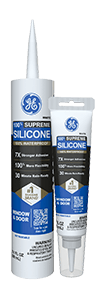
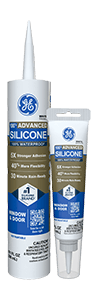
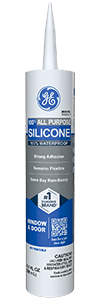
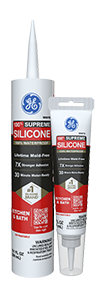
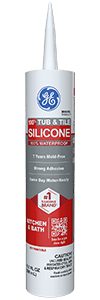
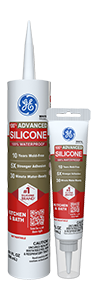
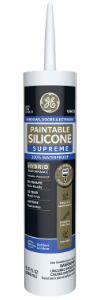
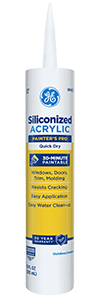
Ready to start your next sealant project? Be sure you have the professional supplies you need, including any GE sealants.

Contact Form

Give your bathroom a professional finish! Your complete guide to preparing and caulking a bathroom

While caulking can easily go unnoticed, it plays a critical role in many rooms, especially in ones as prone to moisture as a bathroom. Caulking a bathroom not only improves the finished look of the room, but also serves as a crucial barrier against mold, mildew, and water damage.

Before you get started on your bathroom caulking project, we will explore the different types of caulk and sealant you can use in a bathroom and where each type should be applied.

What bathroom equipment requires caulk?

Bathrooms come with a lot of furniture and plumbing fixtures that each require specific caulking procedures. Knowing which bathroom equipment requires caulking and choosing the right type of caulk for each application is essential for achieving long-lasting results.

  1. Bathtub and Shower Enclosure

    One of the most important areas in the bathroom that requires caulking is the joint between the bathtub or shower enclosure and the surrounding walls or tile. This caulking prevents water from seeping into the walls and causing damage. Silicone caulks are the most recommended type for this application due to their flexibility, water resistance, and mold resistance. Choose a silicone caulk or sealant labeled specifically for bath and shower use for optimal durability and performance.

  2. Sink and Countertop

    Caulking where the sink meets the countertop is essential for preventing water from seeping through the joint and damaging the underlying materials. Silicone or hybrid caulks are suitable choices for this application, offering flexibility and resistance to water and mold. Choosing a clear caulk or one that matches the color of your countertop will give you a seamless appearance.

  3. Toilet Base

    Caulking around the base of the toilet serves both aesthetic and functional purposes. It helps create a clean and finished look while also sealing the joint to prevent water and debris from accumulating underneath the toilet. For this application, a sanitary silicone caulk is recommended for its water resistance and mold resistance.

  4. Baseboards

    Water will inevitably collect on the bathroom floor. By sealing your baseboards with a waterproof caulk, you can help prevent water from seeping underneath the baseboards and damaging the underlying floor or wall.

Using the right sealant and the proper technique ensures everything in your bathroom has a waterproof seal. This will help prolong the life of your bathroom materials and prevent mold and mildew.

Preparation for caulking a bathroom

To achieve the proper adhesion and finish required in a bathroom, you must properly prepare the space before you apply the caulk. Follow these steps to prepare your bathroom space.

  1. Assess the State of the Bathroom

    Is this a new bathroom installation or a refresh of existing materials? If there is already caulk in the bathroom, examine it carefully. Look around the bathtub, shower, sink, and toilet and check for signs of wear and tear such as cracks, discoloration, or gaps. Additionally, check for any water damage or mold growth in the surrounding area. Identifying these issues will help you gauge how much preparation is needed.

  2. Gather Your Supplies

    • Caulk remover or solvent
    • Putty knife or caulk removal tool
    • Scrub brush or sponge
    • Mildew-resistant cleaner
    • Bleach or hydrogen peroxide (for mold removal)
    • Isopropyl alcohol
    • Clean rags or towels
    • Painter’s tape
    • Silicone caulk and caulking gun
  3. Remove Old Caulk

    If old caulk is present, it must be removed completely to ensure proper adhesion of the new caulk. Use a caulk remover or solvent to soften the old caulk, then carefully scrape it away using a putty knife or caulk removal tool. Check thoroughly to ensure you remove all residue.

  4. Clean the Surface

    Once the old caulk is removed, clean the surface using a mildew-resistant cleaner and a scrub brush or sponge. Pay close attention to any areas with mold or mildew, using bleach or hydrogen peroxide to effectively kill and remove these growths. After cleaning, rinse the surface with water and let it dry completely.

  5. Apply Isopropyl Alcohol

    To further enhance adhesion, wipe down the cleaned surface with isopropyl alcohol using a clean rag or towel. This step removes any remaining residues, oils, or debris that could hinder the caulk’s adhesion.

  6. Prepare the Area

    Use painter’s tape to mask off the surrounding surfaces, such as the bathtub, shower tiles, or sink, to help give you clean and precise caulking lines. This step helps prevent excess caulk from spreading onto unintended areas and makes for a neater finish.

  7. Cut the Caulk Tube Tip

    When you’re ready to apply the caulk, cut the tip of the caulk tube at a 45-degree angle to create an opening that matches the size of the joint or gap you’ll be caulking.  Pierce the seal with a long nail or with the tool provided on most caulk guns. Start with a small opening and trim it larger, if needed.

  8. Apply the Caulk

    Load the caulk tube into a caulking gun and begin applying the caulk in a steady, even bead along the joint or gap. Hold the gun at a consistent angle and apply gentle pressure to get a smooth, uniform application. Work in small sections, smoothing the caulk with a damp finger or caulk finishing tool as you go to create a neat finish.

  9. Remove Excess Caulk

    After smoothing the caulk, immediately remove the painter’s tape before the caulk begins to dry. This will give the caulk clean, crisp lines and prevent the tape from pulling up any freshly applied caulk. Use a damp rag or paper towel to wipe away any excess caulk or smudges.

  10. Allow Caulk to Cure

    Allow the caulk to cure completely according to the manufacturer’s instructions before exposing it to moisture. This typically takes 24 to 48 hours. If the caulk was applied to a shower or bathtub, do not use it until the caulk or sealant is properly dry and set.

Get the professional finish and quality you need for your bathroom with GE

The bathroom is one of the most important rooms in your house when it comes to caulking. Without proper sealant, water will seep through any joints or crevices it can and damage the interior of your home. Using high-quality, professional-grade caulk and sealants from GE combined with routine upkeep and maintenance can help ensure you are protected from costly water damage repairs.

Get the best sealant you can by choosing GE.

Contact Form

Caulk your tub like a pro! Guide to the best products and tools for caulking a tub

Best products and tools for professionally caulking a tub

A bathtub is not just a functional part of your bathroom; it’s a sanctuary where you unwind after a long day. However, if there’s one thing that can quickly detract from your relaxation time, it’s a leaky bathtub. Caulking a tub is essential to prevent water damage and maintain the integrity of your bathroom. But with so many caulking products on the market, which ones should you choose for the best results? In this guide, we’ll explore the top products to use while caulking a bathtub.

Types of caulking for bathtubs

There are a variety of caulks and sealants to choose from that will work with a bathtub or shower. The most common varieties include:

Choose from a variety of caulks and sealants to finish your bathtub.

For a bathtub, you need a product that is 100% waterproof and will give the tub a tight seal that prevents water leaking and damage. Some sealants designed specifically for kitchen and bathroom projects have additives that help make them mildew- and mold-resistant. There are also tinted versions available to give you a better color match to your bathtub and surrounding materials.

Choosing a waterproof product is crucial when caulking a bathtub. You also want something that is mildew- and mold-resistant.

Pros and cons of using silicone sealant in your bathtub

Silicone sealant serves a multitude of purposes in your bathtub area.

  1. Pros of Silicone Sealant

    • 100% Waterproof: Silicone sealant forms a watertight seal, making it perfect for wet environments like the bathroom.
    • Flexible: Its flexibility allows for natural expansion and contraction without cracking, ensuring long-lasting performance.
    • Mold and mildew resistant: Silicone is naturally resistant to mold and mildew growth, keeping your bathroom cleaner and healthier.
    • Easy to apply: Silicone sealant is easy to apply and can be smoothed out with a wet finger for a clean finish.
    • Wide temperature range: Silicone sealant remains stable across a wide temperature range, making it suitable for both indoor and outdoor use.
  2. Cons of Silicone Sealant

    • Surface requirements:  The surface needs to be well-prepped to achieve optimal adhesion.
    • Difficult to remove: Once cured, silicone sealant can be challenging to remove, requiring special solvents or tools for extraction.
    • Not paintable: Silicone sealant is not paintable.
  3. Life Expectancy of Silicone Sealant

    The life expectancy of silicone sealant in a bathtub depends on various factors, including the quality of the product, application technique, and environmental conditions. On average, silicone sealant can last anywhere from 5 to 20 years in a bathroom setting. Proper maintenance, such as regular cleaning and inspection for signs of wear or damage, can help extend its lifespan.

Pros and cons of using hybrid sealant in your bathtub

Hybrid sealant is a versatile option that offers qualities of silicone mixed with other materials.

  1. Pros of Hybrid Sealant

    • Durability: Hybrid sealant offers stronger durability compared to pure silicone sealant, thanks to the combination of materials that enhance its strength and resilience.
    • Flexibility: Its flexible nature allows the hybrid sealant to maintain a tight seal even as the bathtub and surrounding surfaces expand and contract with temperature changes and use.
    • Waterproofing: Hybrid sealant provides 100% waterproofing capabilities, effectively sealing gaps and preventing water damage to the walls, floors, and subflooring around the bathtub.
    • Mold and mildew resistance: Many hybrid sealants contain additives that inhibit the growth of mold and mildew, reducing the need for frequent cleaning and maintenance in the bathroom.
    • Versatility: Hybrid sealant can be used in various applications beyond the bathtub, making it a versatile choice for sealing gaps and cracks in other areas of the home as well.
  2. Cons of Hybrid Sealant

    • Affordability: Typically more expensive than pure silicone or acrylic latex caulk.
    • Curing time: May have a longer curing time compared to other types of caulk. Typically cures completely in about 24 hours.
    • Application difficulty: Can be more challenging to apply than acrylic latex caulk due to its thicker consistency, requiring a steady hand and proper technique for a neat finish.
  3. Life Expectancy of Hybrid Sealant

    The life expectancy of hybrid sealant in a bathtub can vary depending on factors such as product quality, application technique, and environmental conditions. On average, hybrid sealant can last anywhere from 5 to 15 years in a bathroom setting with proper maintenance and care.

Pros and cons of using acrylic latex caulk in your bathtub

Acrylic latex caulk is a versatile product that may work in your bathtub.

  1. Pros of Acrylic Latex Caulk

    • Affordability: Acrylic latex caulk is generally more budget-friendly when compared to other types of sealants, making it an attractive option for cost-conscious consumers.
    • Easy application: Acrylic latex caulk is easy to apply with a caulking gun and can be easily smoothed for a neat finish, even for DIY enthusiasts.
    • Paintable: Once cured, acrylic latex caulk can be painted.
    • Flexibility: Acrylic latex caulk is flexible, even when cured. This allows for continued sealing even as gaps shift.
  2. Cons of Acrylic Latex Caulk

    • Limited waterproofing: While acrylic latex caulk provides adequate sealing for small gaps and cracks, it does not offer the same level of waterproofing as silicone caulk, especially in high-moisture areas like bathtubs and showers.
    • Durability: Acrylic latex caulk is not as durable as silicone caulk, particularly in environments prone to frequent temperature changes or heavy moisture exposure, leading to potential cracking or degradation over time.
    • Not mold-resistant: Unlike silicone sealants, acrylic latex caulk can develop mold as it gets exposed to moisture.
  3. Life Expectancy of Acrylic Latex Caulk

    The life expectancy of acrylic latex caulk in a bathtub can vary depending on factors such as product quality, application technique, and environmental conditions. On average, acrylic latex caulk can last anywhere from 2 to 10 years in a bathroom setting with proper maintenance and care.

Finish your bathtub caulking project with help from GE sealants

Considering all the pros and cons for each type of caulk, GE recommends using silicone sealant because it is 100% waterproof, mold-resistant, highly flexible, and durable.

A tube of silicone sealant being applied to a bathtub.
GE recommends silicone sealant for bathtubs.

No matter what type of bathroom project you have, there is a GE sealant product to help. GE sealants come in a range of options including silicone, acrylic latex caulk, and hybrid sealants.

Make sure you choose a high-quality GE sealant product for your next bathroom project.

Contact Form

Install a drop-in sink like a pro! How to install a drop-in sink professionally

Whether it is a standalone project or part of a complete renovation, installing a new sink in your kitchen can give it a fresh look. One of the most popular types of kitchen sinks is a drop-in sink. Learning how to install a drop-in sink can save you time and money on your kitchen upgrade.

In this guide, we will walk you through the steps required to install a drop-in sink like a professional.

What size sink do you need?

Before you purchase your new drop-in sink, you need to make sure you buy one that will fit. If the new sink is simply replacing the old one, buy a sink with the same dimensions and it should easily fit in the same space.

If you are installing new countertops or want to increase the size of your sink, carefully measure the space where the drop-in sink will go. Pay attention to the width of your cabinet, as this will determine the maximum size of your new sink.

As the saying goes, “Measure twice, cut once.” Make sure you carefully measure your countertop space to ensure you purchase a new drop-in sink that will work with your space.

Do you need to call a professional?

While many sink installations are simply a matter of removing the old one and putting in the new one, some installations require more extensive plumbing work, especially if it is part of a kitchen remodel and the plumbing is moving. If you are not confident in your plumbing capabilities, you should consult or hire a professional plumber before you start.

Remove the existing sink

When replacing an existing drop-in sink, you will need to remove the old sink first. Follow these steps to get started:

  • Turn off the power breakers for any electricity near the sink.
  • Turn off the water lines that connect to the sink.
  • Turn on the faucet to release any water in the line and disconnect the water lines.
  • If you have a garbage disposal, loosen the mounting bracket and twist the disposal off.
  • Look under the sink for mounting clips. You should be able to loosen and slide out these clips.
  • If there is any sealant around the edge of the sink, carefully use a utility knife to cut through the sealant.
  • Carefully push upward on the bottom of the sink to lift it out of the hole. You may need a second person to help with this step.

Gather your tools and materials

Before you start the installation, gather all the necessary tools and materials to ensure a smooth sink installation process. Here’s a list of what you’ll need:

  • New drop-in sink
  • Faucet
  • Plumber’s putty or silicone sealant
  • Adjustable wrench
  • Screwdriver
  • Bucket
  • Towels or rags
  • Tape measure
  • Pliers
  • Safety goggles

Learn how to install a drop-in sink in 11 steps

Follow these steps to install your new drop-in sink like a professional.

  1. Prepare the area

    Start by clearing out the space where you’ll be installing the sink. Remove any items from the cabinets below and clear the countertop. Ensure that the area is clean and free of debris.

  2. Measure and mark

    Measure the dimensions of your sink and the cutout area on your countertop. Many new sinks come with a paper template for easier measuring and marking. Use a tape measure to ensure accuracy. Once you have the measurements, mark the outline of the sink cutout on the countertop using a pencil or marker.

  3. Cut the countertop (if necessary)

    If your countertop does not already have a cutout for the sink, you’ll need to cut one. Use a jigsaw or a similar cutting tool to carefully cut along the marked outline. Take your time and follow the manufacturer’s instructions for cutting the countertop.

  4. Apply plumber’s putty or caulk

    Next, apply a thin bead of the plumber’s putty or silicone caulk along the underside of the sink’s rim. This will create a watertight seal between the sink and the countertop. Be sure to apply the putty or caulk evenly around the entire perimeter of the sink.

  5. Position the sink

    Carefully lower the sink into the cutout on the countertop, ensuring that it fits snugly. Double-check the alignment and adjust if necessary. Once the sink is in position, press down firmly to secure it in place.

  6. Install the faucet

    Install the faucet according to the manufacturer’s instructions. This typically involves attaching the faucet to the sink using nuts and bolts provided with the faucet. Use an adjustable wrench to tighten the connections securely. Most sinks either have pre-drilled holes or pop-out areas for the faucet and any additional parts and accessories, like a soap dispenser or sprayer nozzle.

  7. Connect the water supply lines

    Next, connect the water supply lines to the faucet. Most faucets will have hot and cold water supply lines that need to be connected to the corresponding shut-off valves under the sink. Use pliers to tighten the connections, but be careful not to over-tighten and damage the fittings.

  8. Secure the sink

    Once the sink is in position and the faucet is installed, it’s time to secure the sink to the countertop. Underneath the sink, use a screwdriver to tighten the clips or brackets provided with the sink. These will help hold the sink in place and prevent it from shifting or moving.

  9. Check for leaks

    Before using the sink, it’s important to check for leaks. Turn on the water supply and let the faucet run for a few minutes. Check underneath the sink for any signs of water leaks or drips. If you notice any leaks, tighten the connections as needed until they are secure.

  10. Seal the edges

    Finally, seal the edges of the sink with a bead of silicone sealant. This will create a waterproof seal and prevent water from seeping into the countertop. Use a caulking gun to apply the sealant for sinks evenly around the perimeter, then smooth it out with your finger or a caulk finishing tool.


    Someone applying silicone sealant to the outer edge of a sink.
    Use silicone sealant to give your new sink a waterproof seal.

  11. Clean up

    Once the installation is complete and everything is secure, clean up any excess putty, caulk, or debris from the area. Wipe down the sink and countertop with a damp cloth to remove any fingerprints or smudges.

GE sealants ensure a waterproof seal for your new drop-in sink

You don’t want to have to redo your new sink installation because of leaks. By using a GE silicone sealant, you will get a 100% waterproof seal.

Check out the lineup of GE sealants and find them at any of these retailers near you.

Contact Form

Learn how to caulk like a pro! 8 tips for how to caulk like a pro

Caulking is one of those tasks that seem simple but can quickly turn into a messy affair if not done correctly. Whether you’re a seasoned DIY enthusiast or a novice homeowner, mastering the art of caulking can save you time, money, and frustration. In this guide, we’ll delve into the essential tips and tricks to help you achieve professional-quality caulking results.

Learn how to caulk with these 8 tips

Use these 8 tips to learn how to caulk and get professional-looking results.

  1. Choose the Right Caulk

    The first step toward achieving professional caulking results is selecting the right caulk for your project. There are various types of caulks and sealants available, including silicone, acrylic latex, and polyurethane. Each type has its unique properties and applications.

    • Silicone: Ideal for areas exposed to moisture, such as bathrooms and kitchens, as it is waterproof and highly flexible.
    • Acrylic latex: Suitable for interior applications and is paintable, making it ideal for sealing gaps and cracks around trim and baseboards.
    • Hybrid: Combines the durability of and ease of use of other types of caulk. Frequently used to seal gaps and cracks in metal, concrete, wood, and PVC.
    • Polyurethane: Highly durable and can be used for both interior and exterior projects, including sealing joints and cracks in concrete and masonry.
    • Butyl rubber: Primarily used for outdoor applications in areas that are exposed to water. This might include sealing roofing joints and other outdoor equipment.

    Consider the specific requirements of your project and choose the caulk accordingly.

    Choosing the right type of caulk for your project will make a significant difference in how it looks and holds up over time. The right type of caulk should hold up for years before needing to be replaced.

  2. Prepare the Surface

    Proper surface preparation is crucial for achieving a long-lasting caulking job. Begin by cleaning the area to be caulked thoroughly, removing any dirt, dust, grease, or old caulk residue. Use a putty knife or scraper to remove loose paint or debris from the joint.

    Next, ensure the surface is completely dry before applying the caulk. Moisture can interfere with the adhesion of the caulk, leading to poor results and potential mold growth. If necessary, use a hairdryer or allow extra drying time before proceeding.

  3. Use the Right Tools

    Having the right tools on hand can make a significant difference in the quality of your caulking job. Invest in a high-quality caulking gun for precise application and better control over the flow of caulk. Additionally, consider using a caulking tool or smoothing tool to create a smooth and professional-looking finish.

  4. Cut the Caulk Tube at the Right Angle

    When cutting the tip of the caulk tube, ensure that you do so at a 45-degree angle. This angle creates a small opening that allows for more precise application and better control over the flow of caulk. Additionally, cut the tip to match the size of the gap or joint you are caulking, ensuring that the bead of caulk fills the entire space without excess. It is better to start with a smaller cut and increase the size if needed. Don’t forget to pierce the inner foil seal of the caulk. Many caulk guns have an attached tool for this process.

  5. Apply Caulk in a Continuous Bead

    For professional-looking results, apply the caulk in a continuous bead along the joint or gap you are sealing. Hold the caulking gun at a 45-degree angle and apply steady pressure to the trigger as you move along the joint. Avoid starting and stopping, as this can create uneven beads and gaps in the caulking.

    If necessary, use masking tape to create clean, straight lines along the edges of the joint before applying the caulk. This technique helps achieve a neat and uniform finish, especially around corners and edges.

  6. Smooth and Shape the Caulk

    Once you’ve applied the caulk, use a caulking tool, smoothing tool, or your finger to smooth and shape the bead of the caulk. Work quickly but carefully to avoid smudging or smearing the caulk. Smooth the caulk in one continuous motion, applying even pressure to create a uniform finish.

    Pay extra attention to corners and edges, ensuring that the caulk fills the entire joint without gaps or air bubbles. If necessary, go back over the caulk with your finger or tool to achieve the desired shape and smoothness.

  7. Remove Excess Caulk

    After smoothing the caulk, use a damp cloth or sponge to remove any excess caulk from the surrounding surfaces. Wipe gently to avoid disturbing the freshly applied caulk. Pay close attention to corners and edges, where excess caulk tends to accumulate.

    If you notice any gaps or areas where the caulk didn’t fill completely, apply additional caulk as needed and repeat the smoothing process.

  8. Allow Sufficient Drying Time

    Finally, allow the caulk to dry completely before exposing it to moisture or painting over it. The drying time can vary depending on the type of caulk and environmental conditions. Refer to the manufacturer’s instructions for specific drying times and recommendations.

    Avoid touching or disturbing the caulk during the drying process to prevent smudging or compromising the integrity of the seal. Once the caulk is fully cured, it will provide a durable and long-lasting seal for your project.

    An area with professional-looking caulk.
    Follow these tips to get professional-looking results.

GE sealants can give your caulking professional-looking results

Mastering the art of caulking takes practice, patience, and attention to detail. By following these tips and techniques, you can achieve professional-quality caulking results that enhance the appearance and durability of your projects. Whether you’re sealing gaps and cracks around your home or tackling larger renovation projects, proper caulking techniques will help you achieve a neat, seamless finish that stands the test of time. For professional-looking and long-lasting results, choose a GE sealant product.

Find GE caulks and sealants at any of these retailers.

Contact Form

How to Seal Around the Exterior of a Door Properly

When left unsealed, the gaps between your door frame or trim and your home’s siding can let in water, drafts and pests, so it’s important to know how to seal a door frame properly. If you notice your old door sealant is cracked, degrading or damaged, then it’s time to replace it. A new, 100% silicone seal will help keep your home weatherproof, pest-resistant and potentially more energy-efficient.

Tools & Supplies for Sealing Doors

Picking the right sealant for your project can make all the difference. For sealing around the exterior of a door, or anywhere that could be exposed to water and harsh weather, choose a GE-branded 100% silicone sealant, like GE Supreme Silicone Window & Door sealant. This sealant is 100% weatherproof, permanently flexible and won’t crack or shrink with temperature changes. It also offers lifetime mold-free product protection1 so your door sealant will be protected against mold and mildew too.

 Pro Tip: 100% silicone sealants are not paintable so be sure to pick a color that matches your home’s exterior. ​​GE Supreme Silicone Window & Door sealant is available in six different colors: almond, black, brown, clear, light gray and white.

Besides a GE-branded 100% silicone sealant, you will also need:

  • Caulk gun
  • Painter’s tape
  • Latex gloves
  • Soapy water
  • Paper towels
  • Stiff bristle brush
  • Utility blade
  • Caulk tool
  • Mineral spirits
  • Isopropyl alcohol

Once you have your tools and GE-branded 100% silicone sealant, you’re ready to learn how to seal a door frame to keep out weather, drafts and pests:

  1. Start with a Clean Surface

    Whenever you start a new sealing project, make sure you have a clean work surface by wiping it down with isopropyl alcohol. If you’re replacing a seal, completely remove the old caulk or sealant, then wipe down the area with isopropyl alcohol. Let the surface dry before laying a new bead.

    Safety Tip: Make sure your work area is well ventilated when using isopropyl alcohol.

    Applying painter’s tape on either side of the area you’re sealing can help create a smoother bead and easier cleanup. However, depending on your home’s siding and how wide the gaps between it and the door are, it may be better to rely solely on your own steady hand.

  2. Carefully Cut the Sealant Cartridge

    Next, prepare your sealant by cutting the tip of the cartridge. Cut the cartridge tip at a 45-degree angle. Some caulk guns have a tool to cut the cartridge tip, but we recommend using a utility blade for consistently clean results. Cut off less than you think you’ll need because you can always cut more. Once cut, pierce the cartridge’s inner foil seal using the metal rod on your caulk gun or a long nail. Then load the cartridge into the caulk gun.

  3. Apply Sealant

    Now apply the sealant. Maintain a relaxed, confident grip and steady speed as you apply the sealant. Run a bead between the door frame and the home’s siding, starting from the top corner and working down to the bottom corner. If you can’t make it in one pass, it’s ok to readjust your grip and start where you left off.

    Repeat along the opposite side, and fill gaps with additional sealant as needed.

    Seal around everywhere there are gaps between the frame or casing of the door and the rest of the house, including the door sill.

  4. Tool the Bead

    Use a caulk tool or your finger to tool the sealant bead until it’s smooth. Because it’s important to tool the bead before the sealant starts to cure, it may be better to work in sections. Run a bead of sealant along one side of the door frame, tool the bead, then continue applying sealant on the next side.

  5. Remove Painter’s Tape & Let Sealant Cure Completely

    If you used painter’s tape, immediately remove it before the sealant has a chance to cure. Remove any excess or unwanted sealant with mineral spirits.

    Finally, allow the sealant to cure completely for the best performance. GE Supreme Silicone Window & Door sealant is water-ready in 30-minutes2 and fully cured in 24-hours, but check your product for specific curing instructions.

    Now your exterior door has a 100% weatherproof seal that’s made to last. For more step-by-step sealing tutorials with high-performing GE-branded sealants, check out our other How-To guides.

1Cured sealant is resistant to stain causing mold and mildew. Regular cleaning of the cured sealant is required, however, as soap and other residue can cause secondary mold and mildew growth.

2Exposure to water possible in as little as 30 minutes with bead size max 3/16””, temperature min 65oF and humidity min 50%. Otherwise, sealant should not be exposed to water for 8 hours. Do not touch or clean sealant for 24 hours.


Contact Form

How to Seal a Kitchen Sink for Long-Lasting Results

Between washing dishes, prepping food and cleaning, your kitchen sink has to stand up to a lot of daily wear and tear. That’s why it’s particularly important for your sink to have a durable, watertight seal. Old, damaged sealant or a sealant that isn’t 100% waterproof can let water and moisture seep between your sink and counters, which can create leaks in your cabinets or lead to problems like mold, mildew and rot. Knowing how to seal a kitchen sink properly with a 100% silicone sealant will prevent these problems before they start.

Tools & Supplies for Sealing Sinks

Picking the right sealant can make all the difference. For sealing a kitchen sink, or anywhere water could be present, choose a GE-branded 100% silicone sealant, like GE Tub & Tile Silicone 1® sealant. This sealant is 100% waterproof, permanently flexible and has 7-year mold-free product protection,1 so you can create a lasting, mold-resistant and watertight seal.

Whichever product you choose, check the packaging to ensure the sealant will adhere to your countertop material without staining it.

Pro Tip: 100% silicone sealants are not paintable so be sure to pick the appropriate color for your project.

Besides a GE-branded 100% silicone sealant, you will also need:

  • Caulk gun
  • Painter’s tape
  • Latex gloves
  • Soapy water
  • Paper towels
  • Utility blade
  • Caulk tool
  • Mineral spirits
  • Isopropyl alcohol

With all your tools and supplies ready, follow these steps to learn how to seal a kitchen sink so it has long-lasting, 100% waterproof protection:

  1. Start with a Clean Surface

    Whenever you start a new sealing project, make sure you have a clean work surface by wiping it down with isopropyl alcohol. If you’re replacing old caulk or sealant, completely remove it first, then wipe down the area with isopropyl alcohol. Let the surface dry before laying a new bead.

    Safety Tip: Make sure your work area is well ventilated when using isopropyl alcohol.

  2. Apply Painter’s Tape

    For a smoother bead and easier cleanup, apply painter’s tape on either side of the area you’re sealing.

  3. Carefully Cut the Sealant Cartridge

    Next, prepare your sealant by cutting the tip of the cartridge. Cut the cartridge tip at a 45-degree angle so the hole is about the same size as the area you’re sealing. Some caulk guns have a tool to cut the cartridge tip, but we recommend using a utility blade for consistently clean results. Cut off less than you think you’ll need because you can always cut more. Once cut, pierce the cartridge’s inner foil seal using the metal rod on your caulk gun or a long nail. Then load the sealant cartridge into the caulk gun.

  4. Apply Sealant

    After prepping your sealant and your work area, start running a bead of sealant around the entire sink where it meets the countertop. Start at one corner of the sink and work your way around. Pull the gun toward you and maintain a relaxed, confident grip and steady speed to apply the bead smoothly. If you can’t make it in one pass, it’s ok to readjust your grip and start where you left off. Fill gaps with additional sealant as needed.

  5. Tool the Bead & Remove the Painter’s Tape

    Use a caulk tool or your finger to tool the sealant bead until it’s smooth. It’s important to tool the bead before the sealant starts to cure, so if you need to, you can tool in sections. Run a bead of sealant in one manageable section, like along one edge of the sink, tool the bead, then continue applying more sealant.

  6. Let Sealant Cure Completely

    Finally, allow the sealant to cure completely for the best performance. GE Tub & Tile Silicone 1® sealant is same-day water-ready2 and fully cured in 24 hours, but check your product for specific curing instructions.Once the sealant has cured, your kitchen sink will be watertight and ready to use. For more step-by-step sealing tutorials with high-performing GE-branded sealants, check out our other How-To guides.

1Cured sealant is resistant to stain causing mold and mildew. Regular cleaning of the cured sealant is required, however, as soap and other residue can cause secondary mold and mildew growth.

2Exposure to water possible in as little as 12 hours with bead size max 3/16″, temperature min 65°F and humidity min 50%. Do not touch or clean sealant for 24 hours.

Contact Form

How to Seal Your Crown Molding, Trim and Baseboards Like A Pro

  1. USE THE RIGHT SEALANT BEFORE YOU PAINT MOLDING AND TRIM FOR BEAUTIFUL RESULTS.
    For these kinds of projects, Max® Shield Painter’s Pro is an excellent choice, ideal for tough paint projects both indoors and outdoors. This best-in-class paintable sealant offers durable, long-lasting results, backed by Tri-Shield Protection: extreme flexibility, 100% waterproof and mold resistance1.And, for paint projects that might be exposed to moisture, Paintable Silicone Supreme Window & Door Sealant is 100% weatherproof and has 10-year mold-free product protection1. And, its shrink and crack-proof formula can be paint-ready in just 30 minutes2.
  2. OPEN THE TUBE AND SEAL.
    Cut nozzle of your cartridge to the desired bead size. Pierce inner seal with seal punch found on most caulk guns. Insert cartridge into caulk gun. Squeeze with even, consistent pressure in order to control the rate the sealant that is dispensed from the cartridge. TIP: Apply masking tape to either side of a joint to create a straight edge before applying caulk to your molding, trim or baseboards.
  3. FILL EDGES AND GAPS.
    Apply sealant along the edges and joints of your molding, trim or baseboards. TIP: Seal molding and trim from top to bottom. Start by laying a bead on the top edge of your molding, then work your way down to avoid smudging your fresh caulk/sealant.
  4. SMOOTH THE SEAL.
    Use a gloved finger or caulk-smoothing tool to smooth caulk into joint within two to five minutes.
    TIP:
    If you applied masking tape in the previous step, remove immediately after smoothing the seal.
  5. CLEAN UP.
    Before the sealant cures, wipe away excess from surface and tools with a dry cloth. Let dry completely, typically within 24 hours, unless your sealant is 30-minute paint-ready (like Paintable Silicone Supreme Window & Door).If you’re tackling a sealing project, let GE Sealants & Adhesives help you get the job done right. Learn more from our other projects and how to’s for more tips and information.

Contact Form

Discover 8 steps to protect your shower How to Seal a Shower to Prevent Mold & Leaks

Note: This article is provided as a general guide only and is not intended to take the place of product-specific installation procedures; always follow applicable manufacturers’ instructions. Depending on your home’s age and condition, location within the home, and other potential factors, repairs and/or upgrades or other services may be necessary prior to the beginning and/or completion of your project that may involve the services of a home improvement professional. This article does not include advice pertaining to local building codes and/or any related inspections.

Sealing your shower is essential for maintaining a functional, hygienic, and visually appealing bathroom. It also helps prevent costly water damage and mold-related issues.

We will dive into the importance of sealing your shower and how to seal a shower in eight steps.

When sealing showers, you will want to opt for 100% silicone sealant. Silicone is flexible and durable. It also repels water and moisture, which makes it ideal for high-moisture areas like showers.

Why do you need to seal your shower?

Your shower is regularly exposed to moisture and often receives very little ventilation, which is a recipe for bacteria and mold growth. Cracks and holes are even more susceptible to mold because they trap bacteria and are usually more difficult to thoroughly clean.

Sealing your shower places a waterproof sealant around the edges where water is often trapped, becoming a breeding ground for bacteria.

By sealing your shower, you:

  • Prevent water damage: Properly sealing your shower prevents water from seeping into areas it shouldn’t be. Water causes structural damage and leads to costly repairs.
  • Prevents mold growth: Trapped moisture creates the perfect environment for mold and mildew to thrive. Sealing your shower prevents water from becoming trapped in those areas, making cleaning the bathroom easier.
  • Improves durability: Using a flexible and durable sealant helps protect showers. It prevents too much movement and prolongs your shower’s lifespan. For instance, sealant around your shower faucet can help hold it in place by closing gaps.
  • Improves aesthetics: Sealing a shower with fresh sealant can improve your bathroom’s appearance. It gives the bathroom crisp, clean lines, preventing unsightly water stains and mold growth.

What part of a shower do you need to seal?

According to most plumbing codes, you must use sealant around areas where pipes meet the wall. However, you do not need to stop there.

Here are all the areas to seal around and inside your shower:

  • Seal around the edges of your shower door where the door meets the walls and floor. Sealing a shower door prevents water from leaking out from the cracks.
  • Seal around the edge where your shower meets the wall.
  • Seal around plumbing holes, gaps, and areas where pipes meet the floor or wall.
  • Seal in the corners and seams where walls touch each other or the floor.
  • Seal around fixtures such as the shower head, faucet handles, drain, and spout.
  • Seal the grout between shower tiles on the wall or floor because grout is very porous if left untreated.

If you see an area prone to mold growth, you should consider putting sealant in it to protect and preserve it. You can also fill in gaps and cracks around your shower with sealant.

8 Steps to Properly Seal a shower and Shower Door

Use these eight steps to guide your shower sealing process. These steps cover the most common method of sealing a shower. Always check your sealant’s specific instructions for application and cure time and adjust these steps as necessary. You will also want to check with your local code for regulations and laws.

  1. Step 1: Remove old sealant

    Before applying new sealant, remove any old caulk or sealant around your shower. The old sealant will cause your new sealant not to adhere fully to the surface. Use a razor blade, putty knife, or specialized removal tool to scrape away the old sealant carefully.

  2. Step 2: Clean all the surfaces

    Once all old sealant is off, thoroughly clean the area. You want to remove all dirt, grime, soap scum, and mold from the area. A scrub brush will be more effective than simply wiping the area clean. After cleaning the area, let it fully dry before beginning to apply new sealant.

  3. Step 3: Inspect for damage

    As you clean the area, inspect it for any damage. Damage in your shower includes cracks, gaps, loose tiles, and damaged grout. Repair any damage and clean the area before applying sealant. If there are gaps, you can also use sealant to fill some of the smaller of those gaps.

  4. Step 4: Choose the proper sealant

    Sealant, caulk, and every option in between can feel endless! Which is best for your shower project?

    When sealing showers, opt for 100% silicone sealant. Silicone is flexible and durable, standing up to your shower’s regular use. It also repels water and moisture, which makes it ideal for high-moisture areas like showers.

  5. Step 5: Apply the sealant

    Cut your sealant’s tip at a 45-degree angle, which gives you the best angle for applying an even bead. You will want your tip to be slightly smaller than the area you are filling and increase your bead size by squeezing the caulk gun harder. This gives you more control over your bead’s thickness.

    Follow your sealant’s instructions for loading it into your caulk gun and apply it at an angle.

    Seal a shower drain, fixtures, door frame, grout, and areas where walls meet plumbing, other walls, or the floor.

    Fill in the edge or gap entirely in a steady bead, trying not to stop between the line’s application so it remains as even as possible.

  6. Step 6: Smooth the sealant

    As soon as you finish an area, smooth the line. You can use a caulking tool or a wet finger to smooth the bead. Avoid using soap to smooth sealant, which can impact the sealant’s integrity.

    You won’t want to wait too long before smoothing it as the sealant might begin to dry.

    Smoothing the bead helps it adhere to the surface and gives it a crisp finish.

  7. Step 7: Let it cure

    Allow the sealant to cure according to the tube’s instructions. The cure time will vary depending on brand and sealant type. Some of GE’s sealants can be ready for water exposure in just a few hours.

    Most sealants will require a total of 24 hours before it’s fully cured.

  8. Step 8: Maintain the sealant

    The average sealant will last about five years. However, GE sealants can last years longer if you properly care for the sealant.

    Regularly cleaning the area of grime and soap scum will prevent damage to your sealant. If you notice small areas that are damaged, clean the area and add Re-New sealant. Re-New allows you to patch up sealant with new silicone without having to remove the previous sealant.

Sealing your shower requires quality silicone sealant that withstands excessive moisture. GE’s high-quality sealant is flexible and durable. It prevents leaks, mold growth, and bacteria buildup even in a high-use area like your bathroom shower.

Check out locations near you to find the closest retailer stocked with GE bathroom sealant.

Contact Form

How to Seal a Baseboard in 6 Easy Steps

When installing new baseboards, there’s a small gap between the baseboard and the wall. You should seal this gap with caulk before painting the baseboards to create a clean, professional-looking finish. If you have shoe molding on your baseboards, you can also seal the joint where the molding meets the baseboard to create a smooth look over the entire feature.

Old, peeling or cracked caulking around your baseboards means it’s time to reseal them. Not only is the old caulk unsightly, the cracks in the seal can let in unwanted drafts from outdoors or your home’s crawl space or basement. Plus, if you’re repainting, you’ll find a new, in-tact seal much easier to paint.

Tools & Supplies for Sealing Baseboards

Picking the right caulk can make all the difference. For sealing a baseboard or any dry area you plan to paint after sealing, choose a GE-branded siliconized acrylic caulk, like GE Painter’s Quick Dry caulk. This caulk is paint-ready in as little as 30 minutes1 or immediately spray-paint-ready, and because it’s siliconized, it’s permanently flexible and will resist cracking even after being painted. GE Painter’s Quick Dry caulk also comes with a 50-year limited durability guarantee,2 so you won’t have to reseal your baseboards for a long time.

Besides a GE-branded caulk, you will also need:

  • Caulk gun
  • Painter’s tape
  • Latex gloves
  • Soapy water
  • Paper towels
  • Utility blade
  • Caulk tool
  • Isopropyl alcohol

Once you have your GE-branded caulk of choice and all your supplies, you’re ready to seal and prep your baseboards for a perfect paint job:

  1. Start with a Clean Surface

    Whenever you start a new sealing project, make sure you have a clean work surface by wiping it down with isopropyl alcohol. If you’re replacing old caulk or sealant, completely remove it first, then wipe down the area with isopropyl alcohol. Let the surface dry before laying a new bead.

  2. Apply Painter’s Tape

    For a smoother bead and easier cleanup, apply painter’s tape on either side of the area you’re caulking.

  3. Carefully Cut the Caulk Cartridge

    Next, prepare your caulk by cutting the tip of the cartridge. Cut the cartridge tip at a 45-degree angle. Some caulk guns have a tool to cut the cartridge tip, but we recommend using a utility blade for consistently clean results. Cut off less than you think you’ll need because you can always cut more. Once cut, pierce the cartridge’s inner foil seal using the metal rod on your caulk gun or a long nail. Then load the sealant cartridge into the caulk gun.

  4. Apply Caulk

    Now you’re ready to begin sealing. Start at one end of the baseboard and work your way to the other end. Pull the gun toward you and maintain a relaxed, confident grip and steady speed to apply the bead smoothly. If you can’t make it in one pass, it’s ok to readjust your grip and start where you left off. Fill in any additional gaps as needed.

    Repeat this process for the entire room that you’re sealing.

  5. Tool the Bead & Remove the Painter’s Tape

    Use a caulk tool or your finger to tool the caulk bead until it’s smooth. It’s important to tool the bead before the caulk starts to dry, so if you need to, you can tool in sections. Run a bead of caulk, tool the bead, then repeat as many times as needed.

  6. Let Caulk Dry Completely

    Finally, allow the caulk to dry completely for the best performance. GE Painter’s Quick Dry caulk is paint-ready in 30 minutes1 and fully dry in 24 hours, but check your product for specific drying and curing instructions.Now your baseboards have a long-lasting seal and are prepped for you to paint. For more step-by-step sealing tutorials with high-performing GE-branded caulks and sealants, check out our other How-To guides.

1Sealant can be spray-painted immediately and brush- and roller-painted in as little as 30 minutes with bead size max 3/16″, temperature minimum of 65°F, and humidity minimum 50 percent. Otherwise, sealant should not be painted for 30-minutes. Apply paint with reduced applicator pressure to avoid disturbing the sealant. Paintable Silicone Sealant works well with most water-based acrylic paints. Sealant is not recommended with oil-based paints. If oil-based paints are used, test apply an acrylic primer and paint in a small, inconspicuous area.

2Manufacturer warrants that this product, when used as directed, will meet the above specifications for as long as you own your home. If not satisfied, return proof of purchase for refund. This is the sole and exclusive remedy and Manufacturer shall not be liable for any damages in excess of the purchase price. This warranty is in lieu of all other warranties, express or implied, including any warranty of merchantability or fitness.