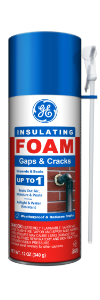
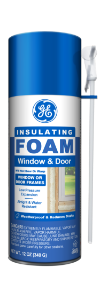
Pest Block Insulating Foam
Interior Seal Silicone Sealant
Exterior Seal Acrylic Caulk
Pro Seal Max Kitchen & Bath
Pro Seal Max Window & Door
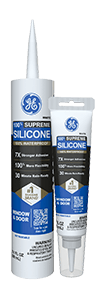
Supreme Silicone Window & Door Sealant
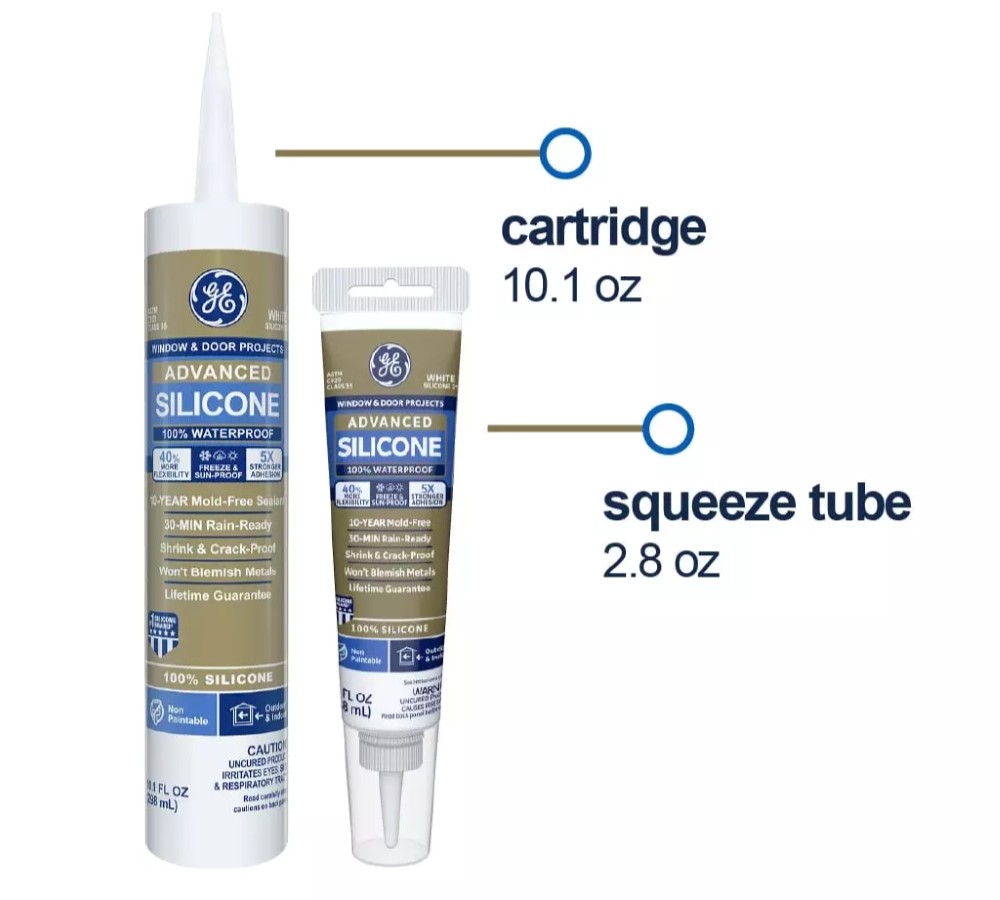
Advanced Silicone 2® Window & Door Sealant
All Purpose Silicone 1® Sealant
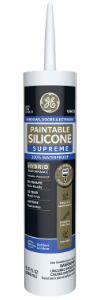
Paintable Silicone Supreme Window & Door Sealant
Siliconized Advanced Acrylic Window & Door Sealant
Siliconized Multi-Purpose Acrylic Window & Door Caulk
Seal & Fill Multi-Purpose Window & Door Caulk
Supreme Silicone Kitchen & Bath Sealant
Advanced Silicone 2® Kitchen & Bath Sealant
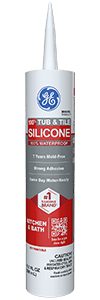
Tub & Tile Silicone 1® Sealant
Paintable Silicone Supreme Kitchen & Bath Sealant
Siliconized Advanced Acrylic Kitchen & Bath Sealant
Siliconized Multi-Purpose Acrylic Kitchen & Bath Caulk
Re-New
Painter’s Pro Quick Dry Siliconized Acrylic
Painter’s Pro Siliconized Acrylic Caulk
Painter’s Caulk
Gutter Silicone 2® Sealant
Concrete Silicone 2® Sealant
Metal Silicone 2® Sealant
Project Filter
  • location
    Insulating Foam
    Kitchen & Bath
    Paint Projects
    Specialty
    Windows, Doors, Siding & Trim
  • project-type
    All
    Window & Door
    Kitchen & Bath
    Seal & Paint
    Insulating Foam
    Specialty
  • color
    Almond
    Black
    Brown
    Clear
    Light Gray
    Metallic Gray
    White
  • formulas
    Acrylic
    Insulating Foams
    Paintable Silicone
    Silicone
    Siliconized Acrylic
  • performance
    Not Paintable
    Paintable
  • product-type
    Adhesives
    Caulks & Sealants
    Specialty Products
  • application
    Can
    Cartridge
    Pen
    Squeeze Tube
  • gap_width
    Gaps 1"-3"
    Gaps less than 1"
    Window & Door
  • humidity-level
    Extensive Humidity
    Normal Humidity
  • product_finder
    Pathway 1
    Pathway 2
    Pathway 3
    Pathway 4
    Pathway 5
    Pathway 6
    Pathway 7

Contact Form

How to Seal a Kitchen Counter for Long-Lasting Results

The gaps around the edges and joints of a kitchen counter are a perfect trap for crumbs, water and humidity. If these gaps are left unsealed or the sealant is old and cracked, you could experience problems like mold, mildew and rot in your walls or cabinets. Prevent these problems before they start by learning how to seal kitchen counters with silicone sealant for lasting protection against mold and water damage.

Tools & Supplies for Sealing Counters

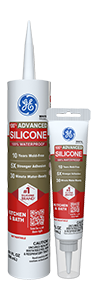
Picking the right sealant can make all the difference. For sealing a kitchen counter, bathroom counter or anywhere water could be present, choose a GE-branded 100% silicone sealant, like GE Advanced Silicone 2® Kitchen & Bath sealant. This sealant is 100% waterproof, permanently flexible and has 10-year mold-free product protection1 and strong adhesion to create a watertight, mold-resistant seal.

Whichever product you choose, check the packaging to ensure the sealant will adhere to your countertop material without staining it.

Pro Tip: 100% silicone sealants are not paintable so be sure to pick the appropriate color for your project.

Besides a GE-branded 100% silicone sealant, you will also need:

  • Caulk gun
  • Painter’s tape
  • Latex gloves
  • Soapy water
  • Paper towels
  • Utility blade
  • Caulk tool
  • Mineral spirits
  • Isopropyl alcohol

Once you have all the tools and supplies you need for this project, you’re ready to seal a counter with these six steps:

  1. Start with a Clean Surface

    Whenever you start a new sealing project, make sure you have a clean work surface by wiping it down with isopropyl alcohol. If you’re replacing old caulk or sealant, completely remove it first, then wipe down the area with isopropyl alcohol. Let the surface dry before laying a new bead.

    Safety Tip: Make sure your work area is well ventilated when using isopropyl alcohol.

  2. Apply Painter’s Tape

    For a smoother bead and easier cleanup, apply painter’s tape on either side of the area you’re sealing.

  3. Carefully Cut the Sealant Cartridge

    Next, prepare your sealant by cutting the tip of the cartridge. Cut the cartridge tip at a 45-degree angle so the hole is about the same size as the area you’re sealing. Some caulk guns have a tool to cut the cartridge tip, but we recommend using a utility blade for consistently clean results. Cut off less than you think you’ll need because you can always cut more. Once cut, pierce the cartridge’s inner foil seal using the metal rod on your caulk gun or a long nail. Then load the sealant cartridge into the caulk gun.

  4. Apply Sealant

    Now that your sealant and work area is prepped, apply sealant along the edge of the counter where it meets the wall or backsplash. As you work, pull the gun toward you and maintain a relaxed grip and steady speed. If you can’t make it in one pass, it’s ok to readjust your grip and start where you left off. Fill gaps with additional sealant as needed.

  5. Tool the Bead & Remove the Painter’s Tape

    Use a caulk tool or your finger to tool the sealant bead until it’s smooth. It’s important to tool the bead before the sealant starts to cure, so if you need to, you can tool in sections. Run a short bead of sealant, tool the bead, then repeat as many times as needed.

  6. Let Sealant Cure Completely

    Finally, allow the sealant to cure completely for the best performance. GE Advanced Silicone 2® Kitchen & Bath sealant is water-ready in 30 minutes2 and fully cured in 24 hours, but check your product for specific curing instructions.Now you have a 100% waterproof seal that will help keep your countertops protected from mold, mildew and more. For more step-by-step sealing tutorials with high-performing GE-branded sealants, check out our other How-To guides.

1Cured sealant is resistant to stain causing mold and mildew. Regular cleaning of the cured sealant is required, however, as soap and other residue can cause secondary mold and mildew growth.

2Exposure to water possible in as little as 30 minutes with bead size max 3/16””, temperature min 65oF and humidity min 50%. Otherwise, sealant should not be exposed to water for 8 hours. Do not touch or clean sealant for 24 hours. 

Contact Form

How to Caulk a Bathtub the Right Way to Prevent Mold & Leaks

A bathtub should be able to stand up to humidity, splashes and the occasional overflowing bubble bath, and to do that, it needs a durable seal. Not only does it look unpleasant, but old tub sealant that’s cracked or peeling can let water and moisture into your walls, creating serious problems like mold, mildew and rot. To prevent these problems, it’s important to replace old sealant with a new, 100% silicone seal.

Tools & Supplies for Sealing Bathtubs

Picking the right sealant can make all the difference. For sealing a bathtub, or anywhere water could be present, choose a GE-branded 100% silicone sealant, like GE Advanced Silicone 2® Kitchen and Bath sealant. This sealant is 100% waterproof, permanently flexible, has 10-year mold-free product protection1 and excellent adhesion for a watertight seal.

Pro Tip: 100% silicone sealants are not paintable so be sure to pick the appropriate color for your project.

Besides a GE-branded 100% silicone sealant, you will also need:

  • Caulk gun
  • Painter’s tape
  • Latex gloves
  • Soapy water
  • Paper towels
  • Utility blade
  • Caulk tool
  • Mineral spirits
  • Isopropyl alcohol

With the right tools and sealant for your project in hand, follow these steps to learn how to seal a bathtub so it’s completely waterproof and mold-resistant for years to come:

  1. Start with a Clean Surface

    Whenever you start a new sealing project, make sure you have a clean work surface by wiping it down with isopropyl alcohol. If you’re replacing a seal, completely remove the old caulk or sealant, then wipe down the area with isopropyl alcohol. Let the surface dry before laying a new bead.

    Safety Tip: Make sure your work area is well ventilated when using isopropyl alcohol.

  2. Apply Painter’s Tape

    For a smoother bead and easier cleanup, apply painter’s tape on either side of the area you’re sealing.

    Pro Tip: When sealing certain types of bathtubs, such as fiberglass tubs, you may want to fill it with water before applying sealant. Tubs will naturally sink and flex from the weight of the water, putting stress on the sealant joint. If you fill the tub before applying the sealant, you can account for this stress and ensure the finished seal will properly expand and contract when you fill and empty the tub in the future.

  3. Carefully Cut the Sealant Cartridge

    Next, prepare your sealant by cutting the tip of the cartridge. Cut the cartridge tip at a 45-degree angle. Some caulk guns have a tool to cut the cartridge tip, but we recommend using a utility blade for consistently clean results. Cut off less than you think you’ll need because you can always cut more. Once cut, pierce the cartridge’s inner foil seal using the metal rod on your caulk gun or a long nail. Then load the cartridge into the caulk gun.

  4. Apply Sealant

    Once your area is prepped and your sealant is ready, seal around the tub where it meets the wall. Start running a bead of sealant at the edge of the tub and work your way inward. Pull the gun toward you while maintaining a relaxed grip and steady speed. If you can’t make it in one pass, it’s ok to readjust your grip and start where you left off. Fill gaps with additional sealant as needed.

  5. Tool the Bead & Remove the Painter’s Tape

    Use a caulk tool or your finger to tool the sealant bead until it’s smooth. Because it’s important to tool the bead before the sealant starts to cure, it may be better to work in sections. Apply sealant along one side of the tub, tool the bead, then continue onto the next side.

  6. Let Sealant Cure Completely

    Finally, allow the sealant to cure completely for the best performance. GE Advanced Silicone 2® Kitchen & Bath sealant is water-ready in 30-minutes2 and fully cured in 24-hours, but check your product for specific curing instructions.Now you know how to seal a bathtub with the help of high-performing GE-branded sealants. For more step-by-step sealing tutorials, check out our other How-To guides.

1Cured sealant is resistant to stain causing mold and mildew. Regular cleaning of the cured sealant is required, however, as soap and other residue can cause secondary mold and mildew growth.

2Exposure to water possible in as little as 30 minutes with bead size max 3/16”, temperature min 65℉ and humidity min 50%. Otherwise, sealant should not be exposed to water for 8 hours. Do not touch or clean sealant for 24 hours. 
Contact Form

How to Seal Exterior Window Trim to Last

Knowing how to seal exterior window trim will help keep your home protected against rain, snow, drafts and more. When left unsealed or left with old degrading sealant, the gaps between your home’s window trim and siding can let leaks, humidity, airflow and even pests into your home. Sealing around windows is also one way to help keep your home energy efficient and maybe even lower your heating and cooling bills.

Tools & Supplies for Sealing Windows

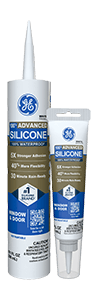
Picking the right sealant for your project can make all the difference. For sealing exterior window trim, or anywhere that could be exposed to water and harsh weather, choose a GE-branded 100% silicone sealant, like GE Advanced Silicone 2® Window & Door sealant or GE Supreme Silicone Window & Door sealant. Both sealants are 100% weatherproof, permanently flexible and won’t crack or shrink with temperature changes. Plus, they offer mold-free product protection1 so your windows are protected against mold and mildew too.

Pro Tip: 100% silicone sealants are not paintable so be sure to pick a color that matches your home’s exterior. ​​GE Advanced Silicone 2® Window & Door sealant and GE Supreme Silicone Window & Door sealant are available in six different colors: almond, black, brown, clear, light gray and white.

Besides a GE-branded 100% silicone sealant, you will also need:

  • Caulk gun
  • Painter’s tape
  • Latex gloves
  • Soapy water
  • Paper towels
  • Stiff bristle brush
  • Utility blade
  • Caulk tool
  • Mineral spirits
  • Isopropyl alcohol

With your tools and GE-branded 100% silicone sealant in hand, you’re ready to learn how to seal exterior window trim so it’s weatherproof and durable for seasons to come:

  1. Start with a Clean Surface

    Whenever you start a new sealing project, make sure you have a clean work surface by wiping it down with isopropyl alcohol. If you’re replacing a seal, completely remove the old caulk or sealant, then wipe down the area with isopropyl alcohol. Let the surface dry before laying a new bead.

    Safety Tip: Make sure your work area is well ventilated when using isopropyl alcohol.

    Applying painter’s tape on either side of the area you’re sealing can help create a smoother bead and easier cleanup. However, depending on your home’s siding and how wide the gaps between it and the trim are, it may be better to rely solely on your own steady hand.

  2. Carefully Cut the Sealant Cartridge

    Next, prepare your sealant by cutting the tip of the cartridge. Cut the cartridge tip at a 45-degree angle. Some caulk guns have a tool to cut the cartridge tip, but we recommend using a utility blade for consistently clean results. Cut off less than you think you’ll need because you can always cut more. Once cut, pierce the cartridge’s inner foil seal using the metal rod on your caulk gun or a long nail. Then load the cartridge into the caulk gun.

  3. Apply Sealant

    Now it’s time to start sealing. Maintain a relaxed, confident grip and steady speed as you apply the sealant. Run a bead between the window trim and the home’s siding, starting from the top corner and working down to the bottom corner. If you can’t make it in one pass, it’s ok to readjust your grip and start where you left off.

    Repeat along the opposite side, and fill gaps with additional sealant as needed.

    Remember to seal along the bottom of the window too.

  4. Tool the Bead

    Use a caulk tool or your finger to tool the sealant bead until it’s smooth. Because it’s important to tool the bead before the sealant starts to cure, it may be better to work in sections. Run a bead of sealant along one side of the trim, tool the bead, then continue applying sealant on the next side.

  5. Remove Painter’s Tape & Let Sealant Cure Completely

    If you used painter’s tape, immediately remove it before the sealant has a chance to cure. Remove any excess or unwanted sealant with mineral spirits.Then finally, allow the sealant to cure completely for the best performance. Both GE Advanced Silicone 2® Window & Door sealant and GE Supreme Silicone Window & Door sealant are water-ready in 30-minutes2 and fully cured in 24-hours, but check your product for specific curing instructions.

    Now your exterior windows are weatherproof and ready to weather the storm for years to come. For more step-by-step sealing tutorials with high-performing GE-branded sealants, check out our other How-To guides.

1 Cured sealant is resistant to stain causing mold and mildew. Regular cleaning of the cured sealant is required, however, as soap and other residue can cause secondary mold and mildew growth.

2 Exposure to water possible in as little as 30 minutes with bead size max 3/16””, temperature min 65oF and humidity min 50%. Otherwise, sealant should not be exposed to water for 8 hours. Do not touch or clean sealant for 24 hours. 
 

Contact Form

Seal your bathroom like a professional. 8 Never-Fail Bathroom Sealing Tips You Wish You Knew Yesterday

A bathroom is often home to moisture buildup, mold, and mildew, but it doesn’t have to be. Taking precautions to properly seal cracks, crevices, and areas prone to moisture exposure will fight mold while extending the life of your bathroom.

Explore the best bathroom sealant and tips for using it like a professional.

Note: This DIY article is provided as a general guide only and is not intended to replace product-specific installation procedures; always follow applicable manufacturers’ instructions. Depending on your home’s age and condition, location within the home, and other potential factors, repairs and/or upgrades or other services may be necessary prior to the beginning and/or completion of your project that may involve the services of a home improvement professional. This article does not include advice pertaining to local building codes and/or any related inspections.

What parts of a bathroom do you need to seal?

According to the International Residential Code, licensed contractors are required to keep areas airtight anywhere fixtures come in contact with walls or floors. You will want to double-check your specific area for additional codes and laws to seal a bathroom correctly.

Here’s a list of what you should seal around a bathroom, both according to code and best practices:

  • Seal around the bathtub or shower base where it meets the floor and where it meets the wall.
  • Seal around the base of the toilet where it meets the floor and where it meets the wall.
  • Seal around any sinks where it meets the floor and wall.
  • Seal around any piping that comes from the wall.
  • Fill any bathroom holes with sealant.
  • Seal any joints in the bathroom.
Sealing a bathroom
What to seal in a bathroom

How often do you need to seal a bathroom?

The average bathroom sealant will last about five years before you will need to re-seal the bathroom. However, a high-quality sealant can last over ten years, or even the lifetime of your home, if you properly apply it and take care of it.

To help bathroom sealant last longer, be sure to clean it regularly. Secondary mold and mildew growth is possible. This occurs when soap or residue sits on top of the silicone and creates a surface for mold growth.

Seal your bathroom every five to ten years. Keeping sealant clean of soap and residue helps it last longer.

Best bathroom sealant to protect against mold and mildew

Silicone sealant is the best bathroom sealant. It’s 100% waterproof, flexible, and protects against mold and mildew.

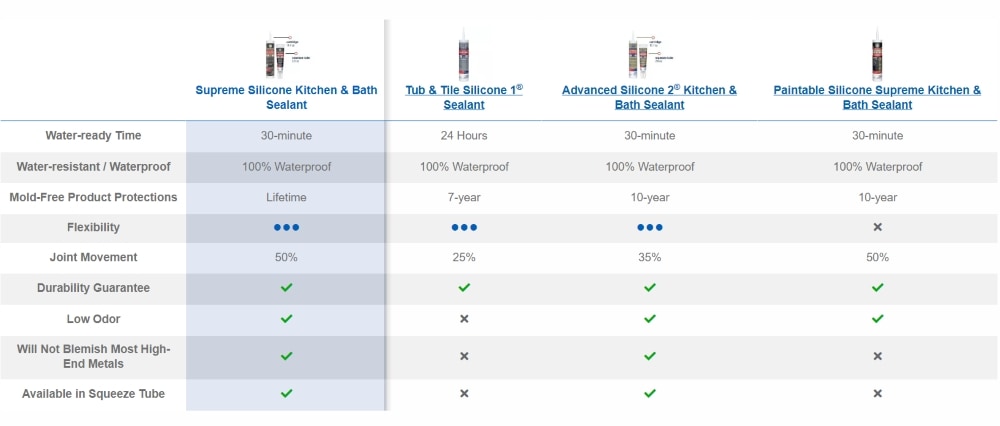
GE Sealants offers four bathroom sealants with different strengths:

Screenshot from the website comparing GE bathroom sealant.
GE Sealant’s best bathroom sealant

8 tips to seal a bathroom like a professional

To lay sealant that will last longer and adhere stronger, follow these eight tips from the professionals.

  1. Stick to the standards

    There are many areas of a bathroom renovation where a contractor’s creativity can shine. Sealing is not one of those areas. There are strict codes around sealing bathrooms because of the dangers water and humidity can cause. It can risk the integrity of the bathroom, leak moisture into the walls and floors, and cause harmful mold growth.

    Be sure to be thorough when sealing bathroom tubs, toilets, and sinks.

    Choosing 100% waterproof silicone sealant is the only way to protect a bathroom adequately. Applying it around the toilet, bathtub, sinks, and all floor and wall fixtures is a must to meet safety standards and preserve all your hard work in a bathroom renovation.

  2. Clean the area before sealing

    Dirt impacts the sealant’s ability to adhere to a surface and, when trapped underneath the sealant, can cause bacteria growth despite sealing the area.

    Cleaning the area includes removing old sealant and ensuring there’s no mold and dirt before applying fresh sealant.

    After cleaning the area, thoroughly dry it to help the sealant cure.

  3. Cut a small tip on the sealant tube

    To keep a bathroom looking tidy and the seal strong, you will want just enough sealant to fill a gap without it being too large of a bead.

    Cutting the tip of your sealant tube slightly smaller than the gap gives you more control over your bead’s width. You will squeeze your sealant tube harder for larger gap areas, giving you a steady bead.

    This avoids excess sealant that will take much longer to dry, a messy sealant job, and improper adhesion.

  4. Use backer rods for deeper gaps

    If a bathroom has a gap deeper than a half inch, use a backer rod before finishing with sealant. If you fill a significant gap without a backer rod, there’s a greater chance the sealant will pull away from one side of the wall. Adding the stiff foam rope behind the sealant provides a third surface for the sealant to attach to, giving it greater stability and strength.

  5. Seal a line in one go

    Sealant looks best when you apply an entire line at once. Whenever you stop, have air bubbles, or adjust your angle, your bead also changes in size and appearance.

    Before beginning a stretch of sealant, find a comfortable position that will allow you a wide range of motion with minimal adjustments to maintain a steady bead.

  6. Smooth the sealant

    Smoothing bathroom sealant helps it look better and adhere to the surrounding surface.

    There are bathroom sealing tools you can use to smooth out the sealant. Many professionals will also use the wet-gloved finger method. Wet a finger and run it along the sealant. Avoid soap or anything else on your glove that might impact the sealant’s integrity.

    When smoothing out sealant, try to do it as soon as possible after application. You won’t want to wait until you finish the entire bathroom as it will be much harder to smooth it.

  7. Let the sealant sit for 24 hours

    Some silicone sealant is water-ready in as little as thirty minutes. Others are same-day water-ready, which means they can protect surfaces and crevices from water in just 12 hours.

    However, silicone sealant takes a total of 24 hours to cure fully. While it might be ready to protect against water, you      should avoid touching it for a full day to let it properly cure.

  8. Touch-up problem areas rather than re-sealing the entire bathroom

    When you have to re-seal an entire bathroom, it takes considerable time and effort. Sometimes, there might be just one or two problem areas.

    Using a product like Re-New lets you touch up small areas between re-sealing. It keeps the water out while helping your current bathroom sealant job last longer.

Seal your bathrooms the right way the first time. With a high-quality, waterproof silicone sealant, you can keep bathrooms safe from bacteria and mold for longer. They are easier to apply, last longer, and hold stronger.

Find a GE Sealant in a store near you.

Contact Form

Learn how to caulk crown molding! 10 contractor tips for caulking crown molding to last

Crown molding is the perfect finishing touch to any room, adding elegance and sophistication to your home’s interior. However, achieving a flawless finish requires more than just installing the molding itself. Proper caulking is essential to fill in gaps and cracks providing a seamless transition between the molding and the wall or ceiling.

In this guide, we’ll delve into the art of caulking crown molding, offering tips and tricks to help you achieve smooth professional-looking results.

Note: This DIY article is provided as a general guide only and is not intended to take the place of product-specific installation procedures; always follow applicable manufacturers’ instructions. Depending on your home’s age and condition, location within the home, and other potential factors, repairs and/or upgrades or other services may be necessary prior to the beginning and/or completion of your project that may involve the services of a home improvement professional. This article does not include advice pertaining to local building codes and/or any related inspections.

Why are there gaps in crown molding?

Even with a new installation, there might be gaps between the crown molding and the wall or ceiling. This can happen for a couple of reasons:

  • Construction Materials: Even with the most accurate measuring and building, there will inevitably be some imperfections in the angle of a wall or ceiling. When these surfaces come together, the slight differences can lead to gaps when you install crown molding.
  • Temperature Changes: Building materials are affected by temperature. As temperatures decrease the walls and ceiling can shrink away from your crown molding. This can cause significant gaps in the winter.

By filling these gaps with a high-quality caulk or sealant, you can get a smoother, better finish to your crown molding.

Crown molding adds the finishing touch to a room. Seal any gaps with high-quality caulking for a smooth, professional look.

Use these 10 tips for caulking crown molding

Get a professional-looking finish on your crown molding with these tips.

  1. Choose the right caulk

    Selecting the right caulk is the first step toward achieving a successful caulking job. For crown molding, it’s essential to use a paintable, flexible caulk that adheres well to both wood and painted surfaces. Silicone-based or acrylic-latex caulks are excellent choices for this purpose. Make sure to read the label carefully to ensure compatibility with the materials you’re workin

  2. Prepare the surface

    Before you begin caulking, it’s crucial to prepare the surface properly. Clean the area around the crown molding to remove any dust, dirt, or debris that could interfere with adhesion. Use a mild detergent solution and a clean cloth to wipe down the surfaces. Allow the area to dry completely before proceeding.

  3. Use the right tools

    Having the right tools can make all the difference when caulking crown molding. Invest in a high-quality caulking gun to ensure smooth and consistent application of the caulk. Additionally, have a damp rag or sponge nearby to clean up any excess caulk and smooth out the bead.

  4. Cut the caulk tube tip at an angle

    Before loading the caulk into the gun, cut the tip of the caulk tube at a 45-degree angle. This will create a smaller opening, allowing for a more precise application of the caulk. Start with a smaller opening and trim more if necessary, depending on the size of the gap you’re filling. You also need to pierce the seal in the tube. Many caulking guns have an attached tool for this purpose.

  5. Apply caulk in small sections

    Instead of trying to caulk the entire length of the crown molding at once, work in small sections. Apply a bead of caulk along one section of molding, then smooth it out with your finger or a caulk finishing tool before moving on to the next section. This will help you achieve a more uniform finish and prevent the caulk from drying out before you can smooth it.

    Tip: For smoother caulking lines, apply painter’s tape to either side of the joint to create a straight edge. Then, apply the caulk in the remaining space. Peel the tape up before the caulk dries.

  6. Use backer rod for large gaps

    For larger gaps between the crown molding and the wall or ceiling, consider using a backer rod before caulking. Backer rods are flexible foam strips that help provide support and fill in larger gaps, ensuring a more durable and long-lasting seal. Without backer rods, the caulk can collapse into larger gaps causing a misshapen, unsightly line.

  7. Practice proper technique

    Achieving a smooth and professional-looking caulk bead requires proper technique. Hold the caulking gun at a consistent angle (usually around 45 degrees) and apply steady pressure to the trigger as you move along the length of the molding. Keep a steady hand and maintain a consistent speed to ensure an even bead of caulk.

  8. Smooth out the caulk

    After applying the caulk, use a damp rag or sponge to smooth out the bead and remove any excess caulk. Wetting your finger can also help smooth out the caulk and create a clean, finished look. Be sure to wipe away any excess caulk before it dries to avoid unsightly drips or smudges.

  9. Allow sufficient drying time

    Once you’ve finished caulking, allow the caulk to dry completely before painting or applying any additional finishes. The drying time will vary depending on the type of caulk you’re using and the environmental conditions, so be sure to check the label for specific instructions. Rushing this step can result in a subpar finish and compromise the integrity of the caulk seal.

  10. Paint over the caulk

    If necessary, paint over the caulk to match the color of the molding and achieve a seamless finish. Use a high-quality paintbrush or roller to apply a thin, even coat of paint over the caulked areas. Be sure to allow the paint to dry completely before inspecting the results.

Get the professional results you need with GE sealants

Caulking crown molding may seem like a daunting task, but with the right tools, techniques, and attention to detail, you can achieve professional-looking results that enhance the beauty and value of your home. By following these tips and taking your time to do the job right, you can ensure a flawless finish that will stand the test of time. So, roll up your sleeves, grab your caulking gun, and get ready to transform your space with the timeless elegance of crown molding.

To get the professional results you need, choose a high-quality caulk or sealant from GE.

Shop GE sealants at any of these retailers

Contact Form

Stop pests from invading your home! Sealing to prevent pests: 7 steps to stop common household pests

Sealing your home to prevent pests is a proactive measure to protect your property and health. Pests can cause significant damage to your home, ranging from structural harm by termites to potential health risks from rodents and disease-carrying insects. Additionally, ongoing pest control services can add up, with the average cost of service calls ranging from $300 to $900 annually. As such, it’s important to take pest prevention steps before infestations start.

Effective pest prevention involves more than just occasional remedies. Rather, it requires a comprehensive approach to sealing potential entry points and minimizing attractions. These actions contribute to both a healthier living environment and significant savings by avoiding the costs associated with pest eradication and home repair.

Remember, the key to pest prevention lies in diligence and a multi-pronged approach including physical barriers and chemical treatments where necessary. By adopting a comprehensive approach to pest control, homeowners can enjoy peace of mind and a pest-free home.

How to prevent pests: 7 critical steps

For proactive homeowners keen on pest prevention, we’ve compiled 7 ways to effectively seal your home.

  1. Locate Potential Entry Points for Bugs and Pests

    Conducting a thorough inspection of both the interior and exterior of your home is crucial for identifying potential entry points for pests. This includes examining areas such as:

    • Roof trims
    • Siding
    • Foundation cracks
    • Window and door frames
    • Utility entrances
    Cracks in the foundation are a potential entry point for pests.

    Sealing these gaps effectively can prevent pests from entering your home. Regular checks and maintenance ensure these defenses remain intact over time.

    A potential pest infestation can be prevented by properly closing and sealing off any entry points in your home. Look for cracks in the siding, foundation, windows, and doors.

  2. Fill the Gaps with Silicone Sealant and Foam

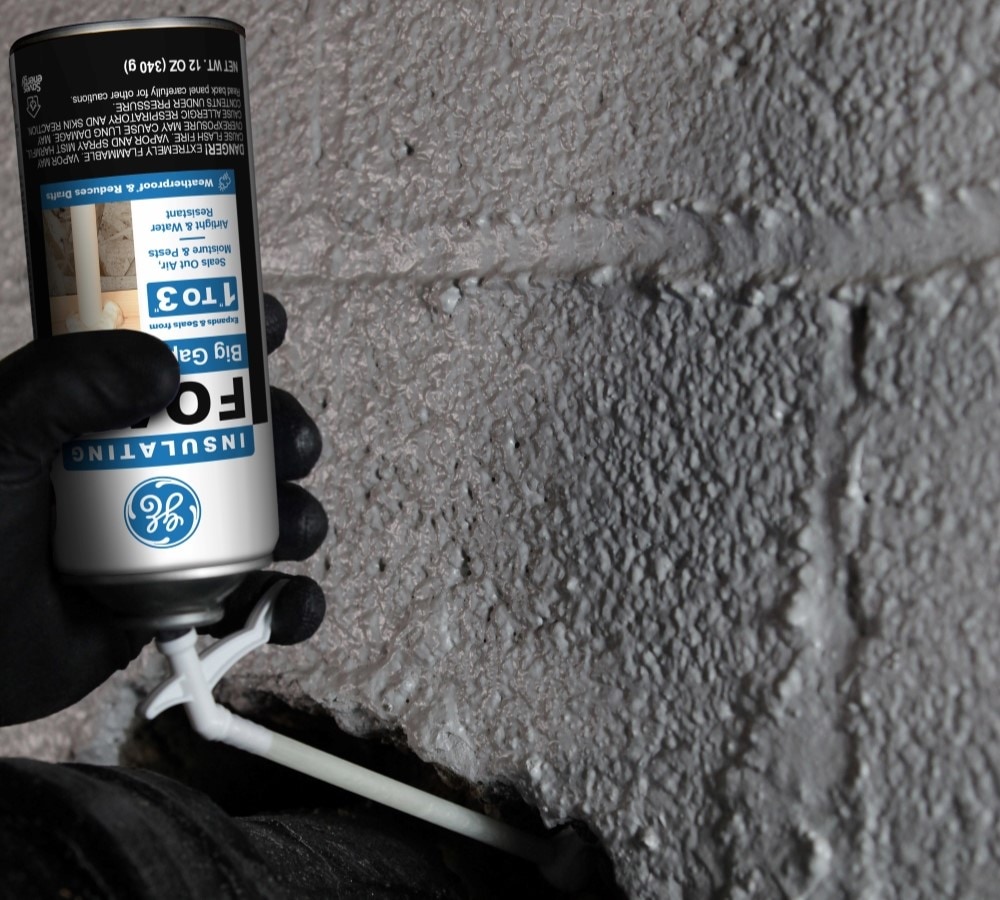
    Using a silicone sealant is an effective way to close off small gaps and cracks that serve as entry points for pests. A silicone sealant is suitable for both interior and exterior applications, offering flexibility and durability against various weather conditions and temperature changes, while <a href=”https://gesealants.com/insulating-foam/?gad_source=1&amp;gclid=CjwKCAiAivGuBhBEEiwAWiFmYUc_A6weLEeFY5UrXtFT7XZAweeUd-yns08rmd2Xw2Y9u_ktvOlqdBoCV-MQAvD_BwE”>Insulating Foam </a>helps seal remaining, stubborn cracks and gaps. It’s particularly effective for gaps smaller than half an inch, providing a long-lasting barrier against pests. This step is essential for creating a physical barrier that pests cannot penetrate, significantly reducing the likelihood of infestations and contributing to the overall pest management approach in your home.

  3. Clean the Surface Before Sealing

    Preparing the surface before applying sealant is key to ensuring the effectiveness of the pest-proofing measure. This involves removing any old sealant, dirt, and debris from the area to be sealed. A clean surface allows the new sealant to adhere properly, creating a more durable and effective barrier against pests. Using a caulk removing tool or wire brushes for tougher surfaces ensures that the area is ready for sealing. Proper preparation prevents future infestations by ensuring that pests have no easy access points into your home. We recommend Advanced Silicone 2*+ Window & Door Sealant to get the job done right.

    GE’s Advanced Silicone 2 Window & Door Sealant provides an effective barrier against pests.
  4. Prepare the Tube and Seal

    Properly preparing the sealant tube for application is crucial for achieving a smooth, effective seal. To do so, cut the nozzle at an angle to the desired bead size and pierce the inner seal with a stiff wire or similar object. Some caulk guns have a tool for piercing the seal attached. Loading the cartridge into the caulking gun correctly ensures that the sealant is applied evenly and accurately around the targeted areas.

    Properly prepare the sealant to achieve a good seal.
  5. Clean the Tube and Smooth the Seal before Storing

    After applying the sealant, smoothing it out within two to five minutes ensures a clean, professional finish. Use a gloved finger or a wet caulk-smoothing tool to help achieve a seamless seal. After applying caulk, smooth it out by gently dragging a dampened finger or caulk finishing tool along the bead for a neat, professional finish. Cleaning the area around the sealed joint and tools used in the process maintains a tidy work environment and prepares you for the next sealing project. When using silicone sealants ensure you have mineral spirits on hand for clean up.

  6. Inspect and Replace Weather Stripping Around Doors and Windows

    Regularly checking and replacing weather stripping around doors and windows is important. Weather stripping can wear out over time, creating gaps that are easy for pests to exploit. Replacing old or damaged weather stripping provides a tight seal. This maintenance task contributes to pest prevention and improves energy efficiency by minimizing drafts, leading to lower heating and cooling costs.

  7. Install Screens and Meshes over Windows, Doors, and Vent Openings

    Installing fine mesh screens over windows, doors, and vent openings is another effective step homeowners can take. This not only blocks common pests from entering but also allows for ventilation and natural light, enhancing indoor comfort while maintaining a pest-free environment, ultimately protecting the home’s integrity and occupants’ health.

GE sealants for effective pest prevention

GE sealants help you keep your home clean and pest-free. If you’re a DIY homeowner looking to stop the unwanted pests in their tracks, look for GE sealants at these retailers.

Looking for more DIY project ideas? Visit our Projects & How To’s page for more.

Contact Form

Sealing Spotlight: Philip or Flop Talks Importance of Sealing Shower Doors Right

The project discussed in this post is sponsored by the makers of GE Sealants & Adhesives.

For his most recent project collaboration with GE Sealants & Adhesives, Philip, from Philip or Flop, gave his kids’ jack-and-jill bathroom a stunning makeover. He not only updated its style with a new sliding glass shower door, wall paneling, and toilet, but he also used a range of GE-branded sealants to get his project done right.


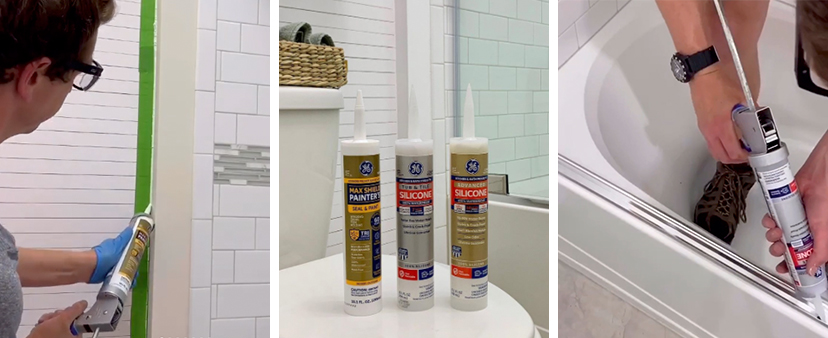
Since his brand-new shower door is located in an area prone to water exposure, Philip sealed the area underneath the door’s threshold and along the inside edge of the shower enclosure with Tub & Tile Silicone 1 sealant to protect the project area from shower leaks. This sealant is 100% silicone, offering a 100% waterproof seal with 7-year mold-free product protection and permanent flexibility. In addition, Tub & Tile Silicone 1 sealant was ready that same day for water exposure and offered strong adhesion and durability.

Want to know more about Philip’s project details? Check out his blog post for his bathroom renovation play-by-play.

Contact Form

Let’s go paint a room! 7 Steps Pros Swear by for Painting a Room

If you know how to paint a room, you’ll have lots of DIY options to create your aesthetic of choice in your home. With just a brush, a can of paint, and a vision, you can reinvent a space, infusing it with life, depth, and personality.

This guide is your roadmap to achieving a painted room that mirrors the beauty of your personal taste. We understand that the difference between a standard paint job and an exceptional one lies in the details — those small but crucial steps that elevate the quality of your work. Whether you’re aiming to refresh a tired space, introduce a bold new color, or prepare your home for sale, mastering the art of painting is key. From selecting the right supplies to applying the final coat, we’ll walk you through each step to ensure your walls look like a professional did it. Dive into our comprehensive guide and transform your space with confidence and style.

Steps for House Painting Done Right

Follow these steps to paint your room like a pro.

  1. Choose High-Quality Painting Supplies

    The outcome of your painting project significantly hinges on the quality of the materials you use. Opting for inexpensive, low-quality paints and tools can yield subpar results. High-quality paints provide better coverage, lasting durability, and a more uniform finish.

    Similarly, investing in premium brushes and rollers can make a substantial difference in the application process, ensuring smooth, streak-free walls. Remember, the tools and paints you choose are the foundation of your project’s success. Don’t compromise on quality. Select the best supplies your budget allows for a professional-looking finish that stands the test of time.

  2. Protect Furniture and Flooring

    Before opening any paint cans, safeguarding your furniture and floors is essential. For furniture, use plastic sheeting to encase each piece completely, securing the edges with tape to prevent any paint splatters from causing damage. This method is superior to using old fabrics, which can absorb and transfer paint onto your furniture.

    For floor protection, plastic sheeting is not advisable due to its slippery nature. Instead, opt for canvas drop cloths. They provide a sturdy, non-slip surface that effectively catches drips and spills, ensuring your floors stay clean and paint-free.

  3. Sand Down the Walls

    Achieving a flawless paint job begins with the preparation of your walls. Sanding is a critical step that ensures a smooth, even canvas by removing imperfections such as uneven spackle and protruding nail holes. Use fine-grit sandpaper attached to a sanding pole and work your way methodically from the baseboard to the ceiling and then horizontally along the edges. This process both creates a uniform surface for painting and enhances the paint’s adherence, resulting in a more polished and durable finish. However, exercise caution to apply gentle pressure to avoid damaging the wall’s integrity.

  4. Seal Gaps, Cracks, and Holes

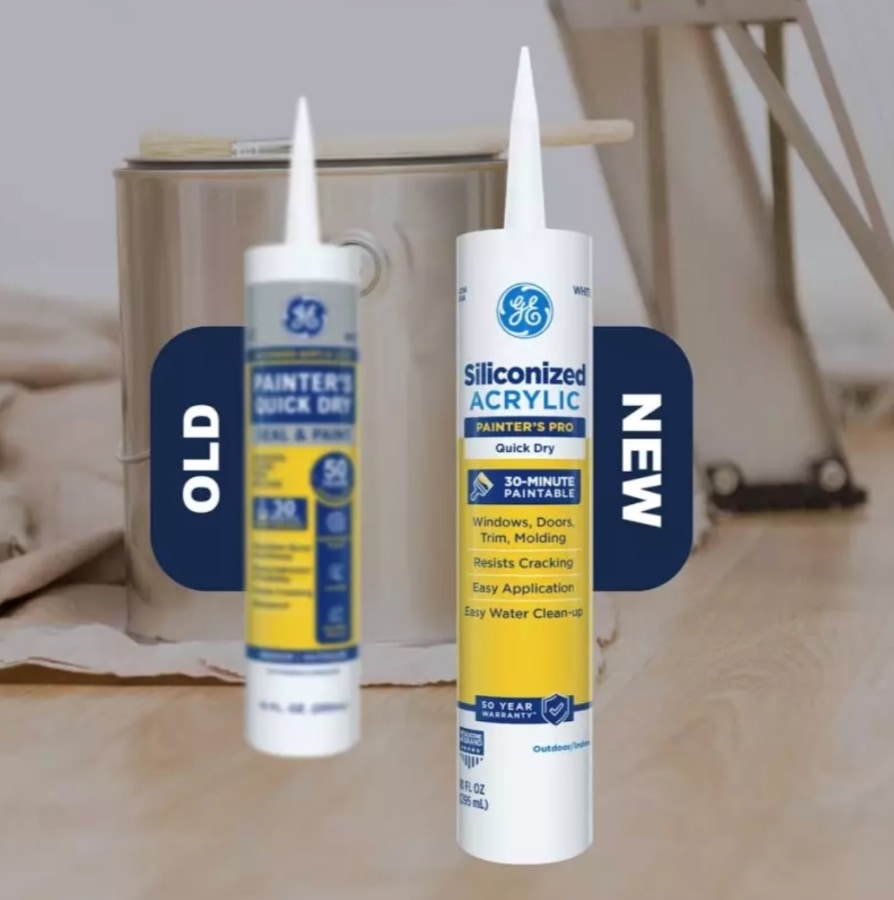
    Before applying paint, addressing any gaps or cracks between the wall and trim is crucial. If left unattended, these imperfections can detract from the overall finish of your paint job. Use a high-quality caulk or sealant to fill these spaces, ensuring a smooth transition between surfaces. Painter’s Pro caulk is an advanced-grade siliconized acrylic latex caulk that is ideal for decorative paint projects and filling gaps and cracks.

    For areas exposed to moisture, such as kitchens and bathrooms, choosing a sealant that is both waterproof and mold-resistant is essential. This not only enhances the durability of your paint job but also protects your home from potential water damage and mold growth, maintaining the integrity of your walls. For best-in-class results, we recommend siliconized acrylic Painter’s Pro Quick Dry and

    Siliconized Advanced Acrylic Kitchen & Bath Sealant for tackling tough paint projects in these areas.

  5. Use a Tinted Primer

    Applying a tinted primer is an important step in the painting process, especially when covering over a dark color or trying to create a vibrant finish. Primers serve as an intermediary layer for better adhesion of the paint to the wall, resulting in a more uniform color in fewer coats. Opting for a tinted primer closer to your final paint color can significantly enhance the depth and richness of the color, providing a more dynamic and lasting finish. Allow the primer to fully cure before proceeding, setting the stage for a flawless application of your chosen paint.

  6. Use Proven Painting Techniques

    Mastering the correct painting techniques can elevate the quality of your work from amateur to professional. Begin by cutting in at the edges with a brush, creating clean lines where the wall meets the ceiling, baseboards, and adjacent walls. When using a roller, start from the center of the wall and move in a ‘W’ pattern, spreading the paint evenly without overloading the roller. This method avoids streaks and ensures a consistent coat across the surface. Remember, the quality of your painting technique is just as important as the quality of the paint itself.

  7. Maintain a Wet Edge for Even Coats

    One of the key strategies for achieving a smooth, streak-free finish is to maintain a wet edge while painting. This involves overlapping each stroke with the next before the paint has a chance to dry. Start at one corner and work your way across the wall in sections, seamlessly applying paint. By keeping the edge wet, you avoid the unsightly marks that occur when paint dries unevenly. This technique requires a steady pace and consistent application, ensuring that each layer of paint blends perfectly into the next, resulting in a professional-quality finish on your walls.

Consult GE sealants for Detailed DIY Guides to Home Improvement

GE sealants publishes thorough how-tos to help you apply a professional’s touch to your DIY home improvement projects.

A tube of Painter’s Pro Quick Dry, an essential part of painting a room.
Want to paint a room yourself in your home? We’ve got the tips you need.

Consult GE sealants for detailed DIY Guides to Home Improvement.

Contact Form

Weatherproof your home and cut your energy bills! 9 steps to weatherproof your home and fight the cold

As the leaves turn and the air chills, the impending winter heralds a timely reminder of the importance of home weatherproofing. Beyond the comfort it provides, weatherproofing your home is also a financially savvy move. With potential energy bill reductions of up to 10%​​​​, effective weatherproofing and sealing your house for winter is an investment that will save you money while making your home more comfortable.

With energy costs on the rise, weatherproofing your home with the right sealants and caulk will directly impact your monthly expenses. This guide takes you through 10 ways to fortify your home against the cold. Each step is both a shield against the frost and a smart move toward substantial savings. Whether you’re caulking windows or servicing your heating system, you’re not just preparing for winter. You’re setting the stage for year-round efficiency and comfort.

How to weatherproof your home

Follow these 9 steps to effectively weatherproof your home and reduce your energy costs.

  1. Apply Sealant on Windows and Doors

    One of the most effective ways to weatherproof your home is by applying silicone sealant to windows and doors. Silicone sealants like Advanced Silicone 2® Window & Door sealant are favored for their durability and flexibility, which is essential in withstanding the temperature changes of winter.

    Sealing these areas can prevent cold drafts and moisture from entering, which can significantly reduce heating costs. A steady bead of sealant around window frames and door edges forms a barrier against the cold, contributing to an overall warmer and more energy-efficient home.

    Weatherproofing your home can potentially save you up to 10% on your energy bills. Use products like window and door sealants, weatherstripping, silicone sealants, and others to weatherproof all areas of your home.

  2. Upgrade Your Attic Insulation

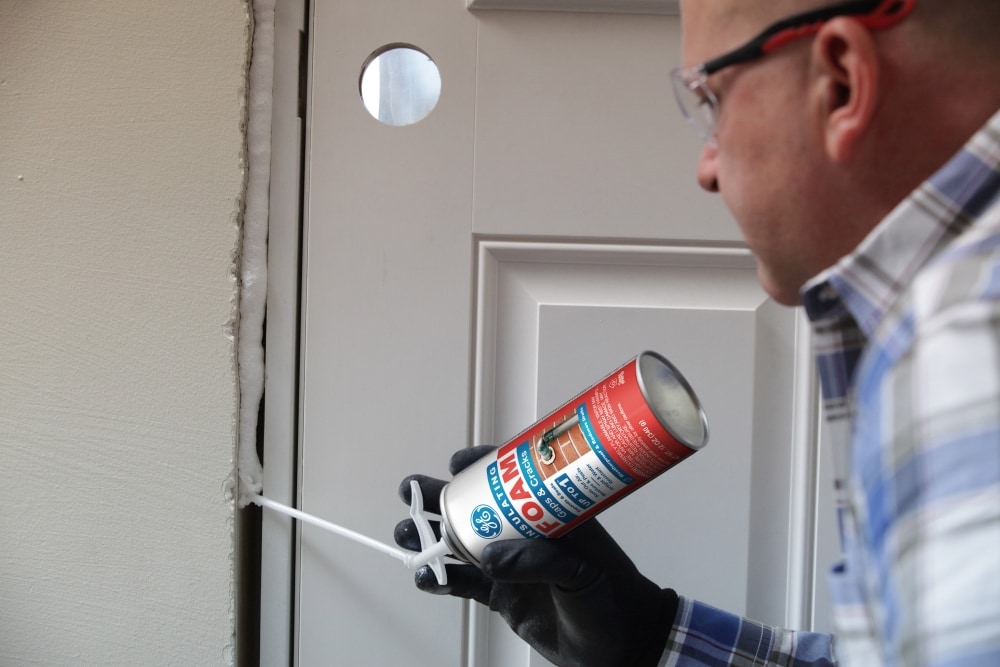
    Insulating your attic is a critical step in weatherproofing. The proper use of a spray foam sealant like Window and Door Foam can prevent warm air from escaping and cold air from penetrating your living spaces. This sealant expands to fill gaps and cracks, creating an airtight barrier. Remember to wear protective gear and follow the manufacturer’s instructions when applying spray foam for optimal safety and effectiveness.

    A person applying spray foam sealant in an attic.
    Seal gaps in your attic with spray foam sealant.
  3. Check Your Basement and Foundation

    Basements and foundations are often overlooked during weatherproofing. Applying a silicone sealant can help protect these areas from water damage and insulation loss. Silicone sealant is easy to apply with a caulk gun and provides a resilient, flexible seal that can withstand the movements caused by temperature fluctuations. Sealing these lower areas of your home helps prevent cold air ingress and the formation of mold due to dampness, ensuring a dry and warm environment throughout the winter months.

    A person applying silicone sealant to foundation walls.
    Silicone sealant can help protect your basement and foundation from water damage.
  4. Use Weatherstripping

    Weatherstripping is a simple yet effective method to seal air leaks around movable components such as doors and windows. Selecting the right materials is crucial for securing the weatherstripping in place. It ensures a snug fit that blocks cold drafts. This type of sealant creates a strong bond that withstands the frequent opening and closing of doors and windows, providing a long-term solution to improve energy efficiency and comfort in your home.

  5. Apply Waterproof Sealant in Wet Areas

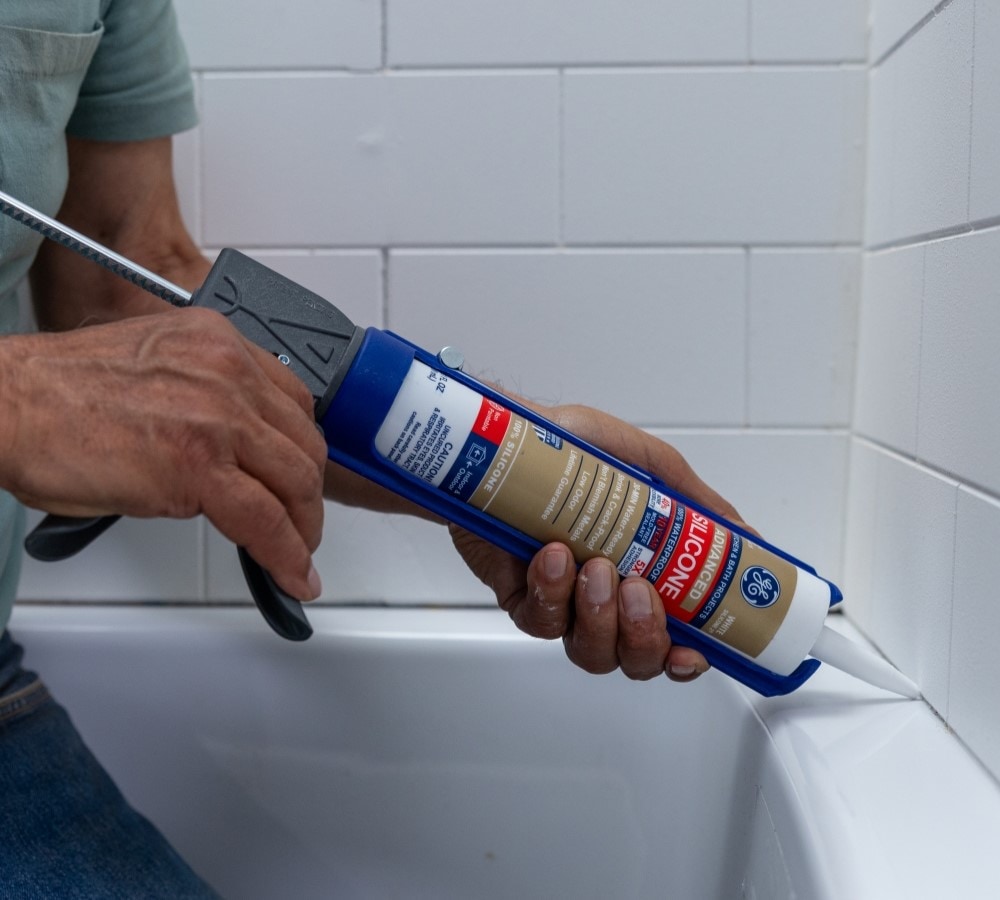
    Areas of your home exposed to moisture, like bathrooms and kitchens, require a waterproof sealant to prevent water damage and cold air intrusion. Applying this sealant around sinks, bathtubs, and backsplashes can prevent mold growth and maintain the integrity of your home’s thermal envelope. Not only does this step protect your home’s structure, but it also contributes to maintaining a consistent indoor temperature, reducing the need for excessive heating.

    A person applying a waterproof sealant around a bathtub.
    Seal around your bathtub to prevent water damage and seal cracks.
  6. Learn How to Apply Caulk Efficiently

    The process of caulking is integral to weatherproofing your home. Learning how to apply caulk effectively can seal a variety of gaps and joints, preventing cold drafts. A smooth, continuous bead along windowsills and door frames can significantly enhance insulation. Proper application ensures that the caulk adheres well and provides a durable seal that lasts through winter.

  7. Choose the Right Caulking Gun

    A reliable caulking gun is a necessary tool for applying caulk with precision. Look for one with an easy-to-use trigger and a smooth pressure mechanism, which allows for greater control and a consistent bead of caulk. This can improve the effectiveness of the seal and reduce the likelihood of air leaks that can lead to higher heating costs.

  8. Use Sealants for Joint Protection

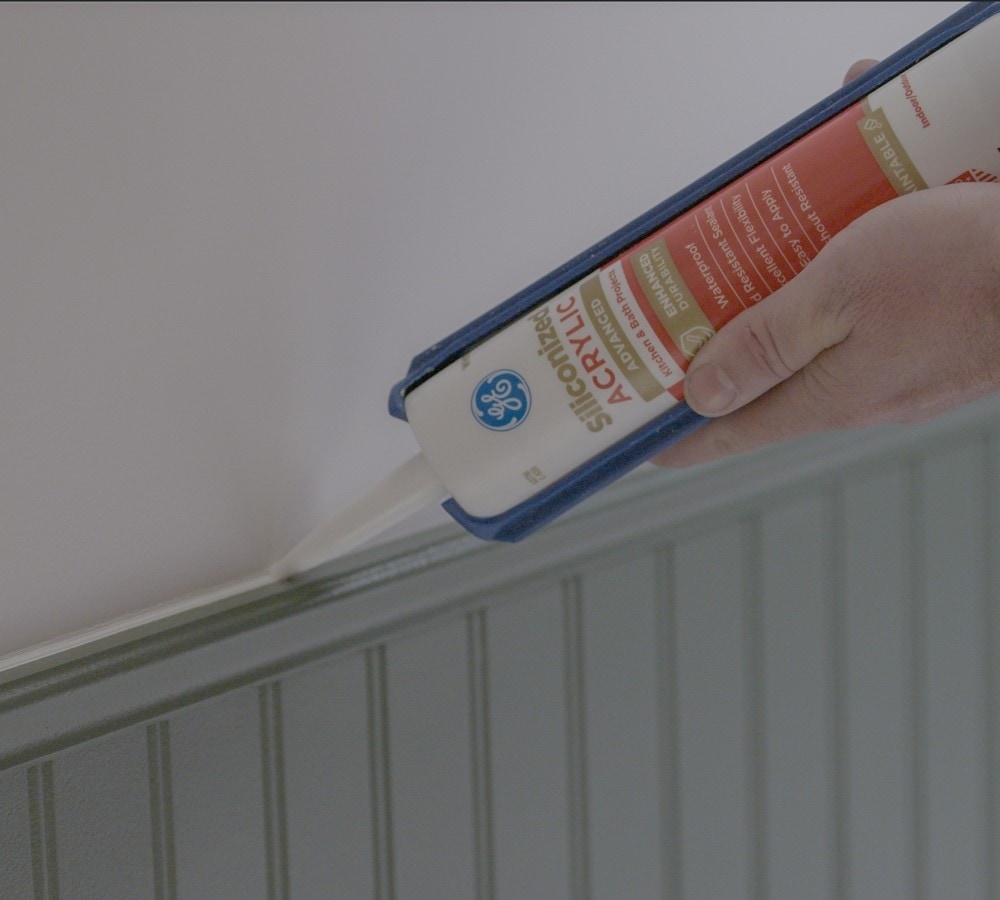
    Joints around baseboards, crown moldings, and where walls meet floors are potential areas for heat loss. Using a sealant in these areas can prevent warm air from escaping and stop cold air from entering. This measure increases warmth and contributes to overall energy savings by maintaining a stable indoor temperature.

    Seal your baseboards to prevent drafts in your house.
  9. Request an Energy Audit

    An essential step in optimizing your home for winter is to request an energy audit from your energy provider. This professional assessment identifies how you can further improve energy efficiency and pinpoint areas of energy waste. Auditors use specialized tools like infrared cameras and blower doors to detect air leaks and insulation gaps.

    Implementing the recommendations can lead to substantial energy savings, making your home more comfortable and reducing your carbon footprint. It’s a proactive measure to ensure your weatherproofing efforts are comprehensive and effective.

Get the tools you need to weatherproof your home with GE sealants

For professional-grade weatherproofing, trust GE sealants, the industry leader in sealants and caulks. Explore our range of products at these retailers to find the perfect solution for sealing your home against the elements this winter.


Looking for more DIY project ideas? Visit our Projects & How To’s page for more.