Pest Block Insulating Foam
Interior Seal Silicone Sealant
Exterior Seal Acrylic Caulk
Pro Seal Max Kitchen & Bath
Pro Seal Max Window & Door
Supreme Silicone Window & Door Sealant
Advanced Silicone 2® Window & Door Sealant
All Purpose Silicone 1® Sealant
Paintable Silicone Supreme Window & Door Sealant
Siliconized Advanced Acrylic Window & Door Sealant
Siliconized Multi-Purpose Acrylic Window & Door Caulk
Seal & Fill Multi-Purpose Window & Door Caulk
Supreme Silicone Kitchen & Bath Sealant
Advanced Silicone 2® Kitchen & Bath Sealant
Tub & Tile Silicone 1® Sealant
Paintable Silicone Supreme Kitchen & Bath Sealant
Siliconized Advanced Acrylic Kitchen & Bath Sealant
Siliconized Multi-Purpose Acrylic Kitchen & Bath Caulk
Re-New
Painter’s Pro Quick Dry Siliconized Acrylic
Painter’s Pro Siliconized Acrylic Caulk
Painter’s Caulk
Gutter Silicone 2® Sealant
Concrete Silicone 2® Sealant
Metal Silicone 2® Sealant
Project Filter
  • location
    Insulating Foam
    Kitchen & Bath
    Paint Projects
    Specialty
    Windows, Doors, Siding & Trim
  • project-type
    All
    Window & Door
    Kitchen & Bath
    Seal & Paint
    Insulating Foam
    Specialty
  • color
    Almond
    Black
    Brown
    Clear
    Light Gray
    Metallic Gray
    White
  • formulas
    Acrylic
    Insulating Foams
    Paintable Silicone
    Silicone
    Siliconized Acrylic
  • performance
    Not Paintable
    Paintable
  • product-type
    Adhesives
    Caulks & Sealants
    Specialty Products
  • application
    Can
    Cartridge
    Pen
    Squeeze Tube
  • gap_width
    Gaps 1"-3"
    Gaps less than 1"
    Window & Door
  • humidity-level
    Extensive Humidity
    Normal Humidity
  • product_finder
    Pathway 1
    Pathway 2
    Pathway 3
    Pathway 4
    Pathway 5
    Pathway 6
    Pathway 7

Contact Form

Sealing out water, sealing in protection! How to weatherproof a shed with silicone sealant

Note: This DIY article is provided as a general guide only and is not intended to take the place of product-specific installation procedures; always follow applicable manufacturers’ instructions. Depending on your home’s age and condition, location within the home, and other potential factors, repairs and/or upgrades or other services may be necessary prior to the beginning and/or completion of your project that may involve the services of a home improvement professional. This article does not include advice pertaining to local building codes and/or any related inspections.

Your trusty old shed contains some of your most prized possessions (not to mention the expensive machinery and equipment). Sleep better at night knowing they are safe from the elements by learning how to weatherproof a shed with silicone sealant in this article.

Why you need to waterproof your shed with silicone sealant

Silicone sealant offers a strong, durable, and permanently flexible barrier that ensures drafts, moisture, and pests remain outside of your shed. Moisture from rain, melting ice on the shed roof, or even outdoor humidity can have dire consequences on your shed’s contents.

You might be considering other adhesive options for your shed sealing project, but below are some of the reasons to keep silicone sealants at the top of your list:

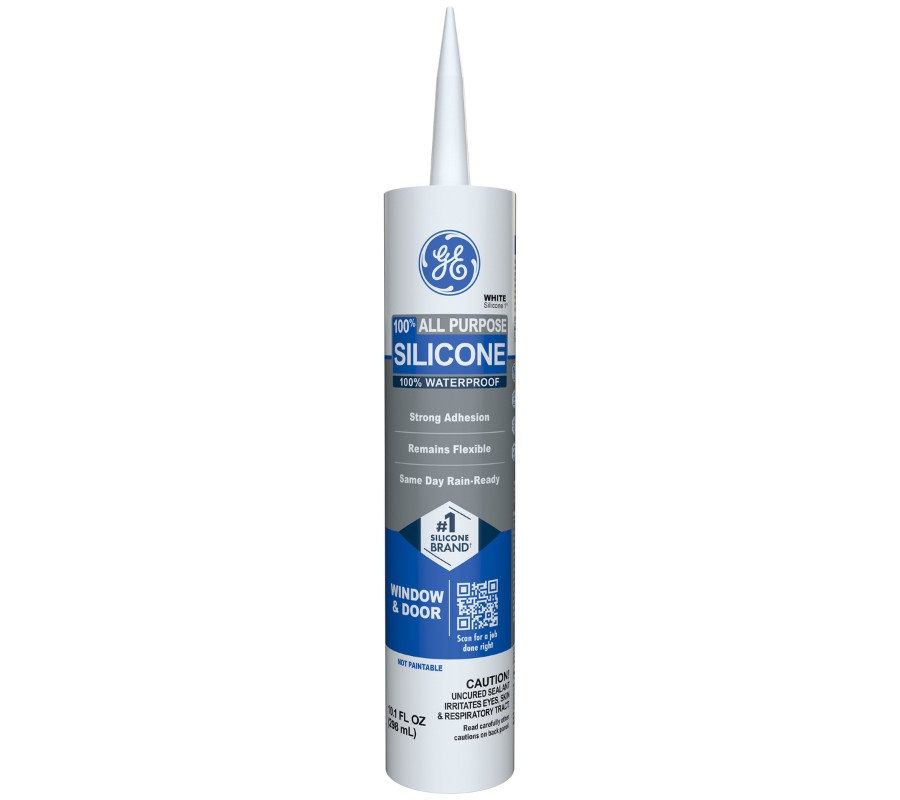
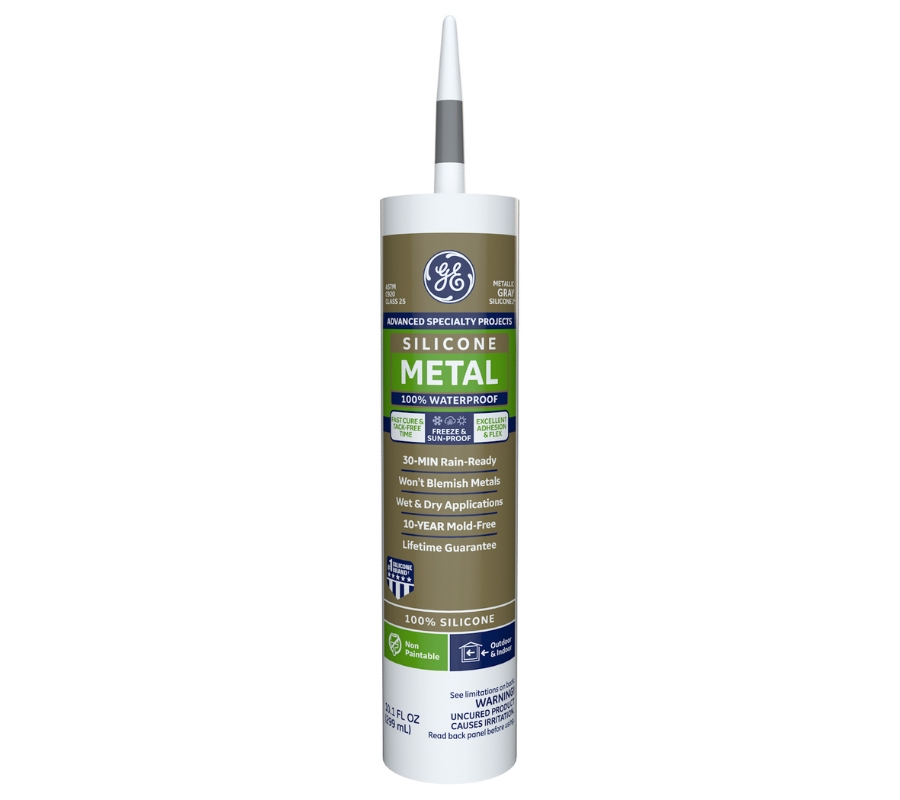
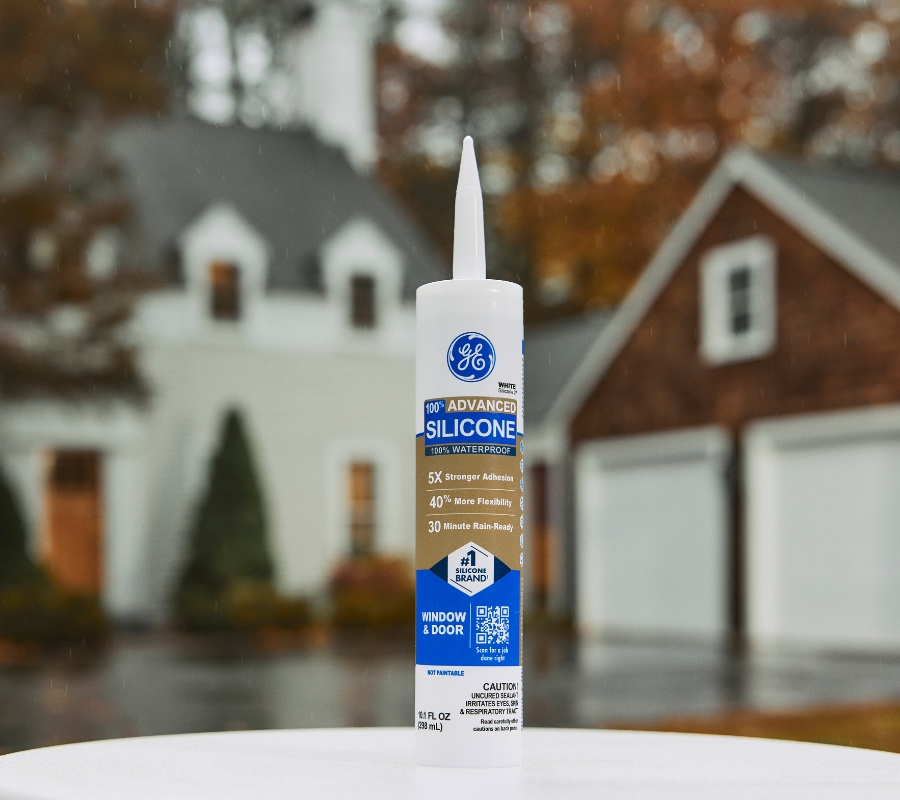
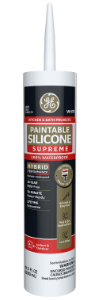
  • Weatherproofing: Why stop at waterproofing your shed when you can guarantee that it remains weatherproof? All Purpose Silicone 1 Sealant has superior UV-degradation, temperature fluctuation, and moisture resistance.
  • Mold protection: Mold has no place in your shed. It can predispose you to a host of respiratory complications while impairing the structural and functional integrity of wood, metals, and electronic equipment. The mold protection offered by silicone sealants is another welcome addition to their many benefits.
  • Durability: Silicone sealants are meant to withstand the test of time. Incorporating the latest in adhesive technology, silicone sealants offer unrivaled longevity and durability as opposed to other acrylic and latex-based sealants. For your waterproof shed, durability ensures you don’t have to think about maintenance or renovations for a long time.

How to weatherproof a shed

Below are some of the best ways to ensure your shed remains water-free throughout the year, both for an existing shed and one under construction.

How to waterproof a garden shed under construction

Waterproofing a garden shed while still under construction with silicone sealant ensures the best outcome. The silicone sealant allows changes in movement that guarantee a water-tight finish.

Depending on your local weather and geography, you may or may not need to adjust the following points to suit your project.

  • Raise the shed above the ground level: The first step toward a waterproof shed is securing the floor. Water ingress into your shed occurs secondary to several culprits, but the floor is among the most common. Raising your floor above the ground level by a few inches stops water from seeping into the shed.

To achieve a raised garden shed, you should try one of the following tactics:

  • Consider a concrete foundation
  • Utilize tongue and groove flooring with joists

Lifting the shed base above the ground has the added advantage of improved air circulation, which can impact the shed’s ventilation.

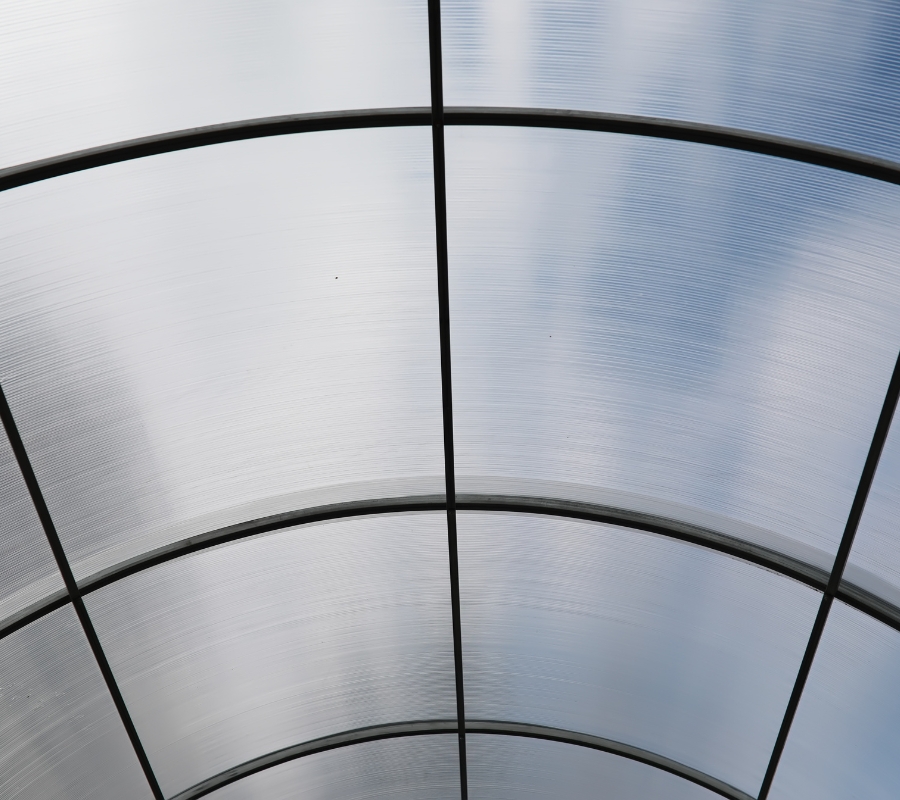
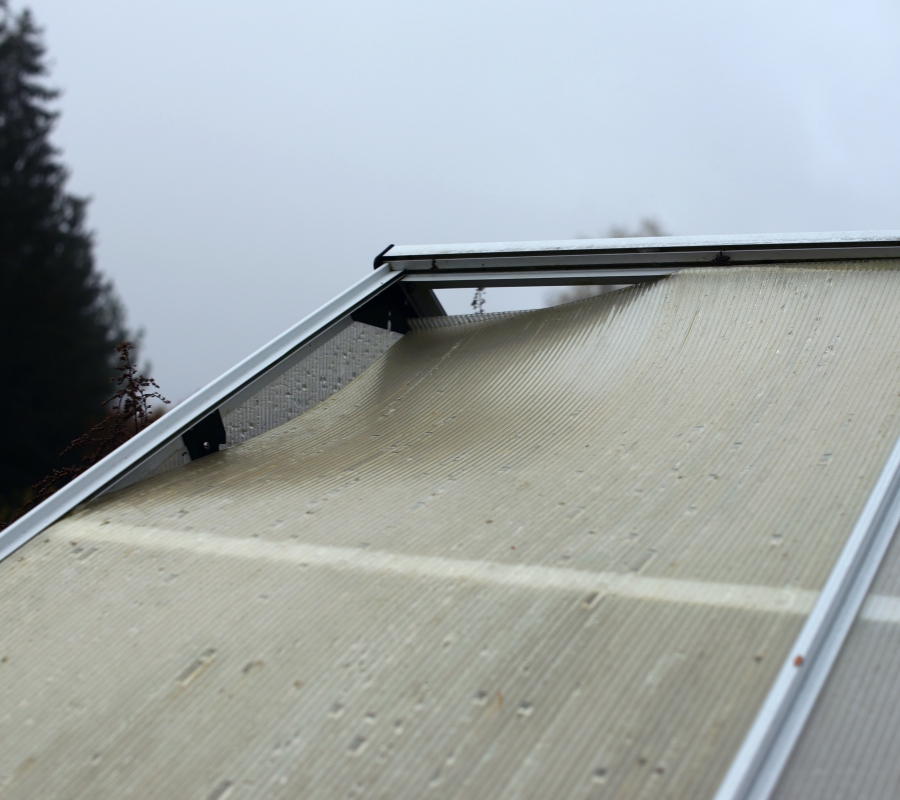
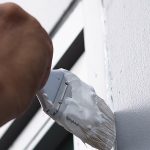
  • Using waterproof materials for the siding and roofing: Just as important as the base and foundation are the roof and siding of your shed. It might seem obvious, but the type of materials utilized for the roofing and siding have an overall net positive or negative effect on the long-term waterproof capabilities of the shed. Applying a felt layer over the roof can provide some much-needed additional protection.

How to waterproof an existing garden shed

If your shed has already kept your bikes and power tools safe for a few months or years, making a few improvements to guarantee a water-free interior and safety for your beloved items doesn’t hurt. Below are some tried and tested improvements bound to make a lasting impact on the waterproofing capabilities of your shed.

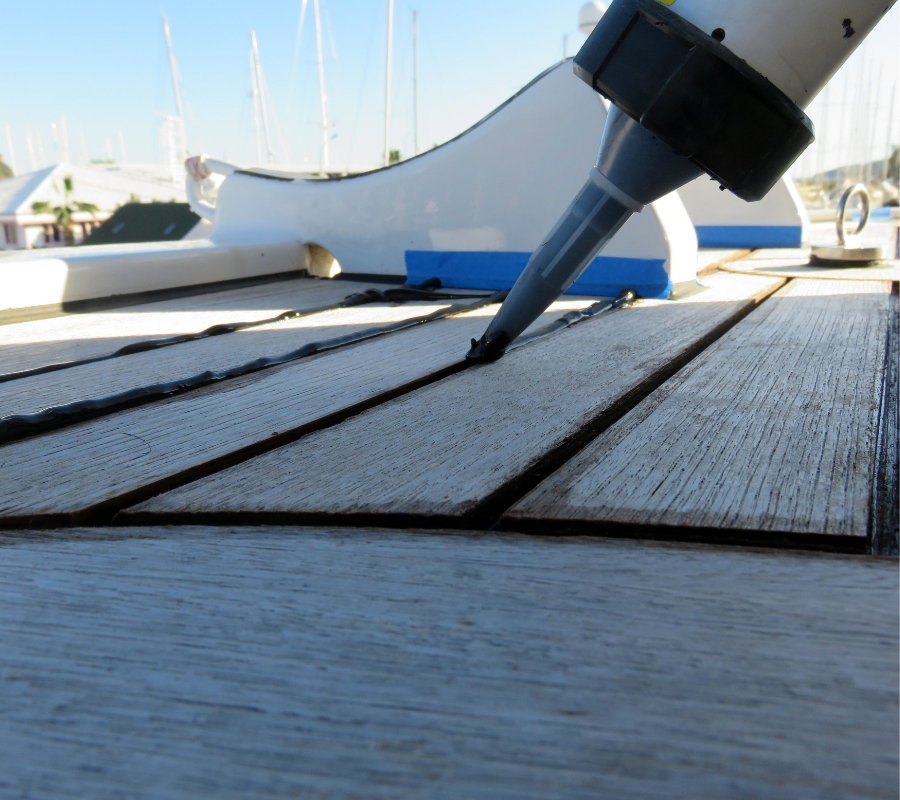
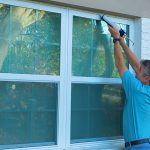
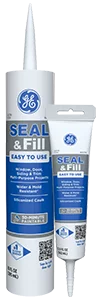
  • Identify and seal gaps around the windows and doors: Gaps around windows and doors can let in unwanted rain, drafts, or even pests. Unwanted insects can damage your treasured equipment to an extent similar to water and mold. Small gaps and seals around windows and doors are typical and might be in your shed. The good news is that a high-quality sealant provides a relatively inexpensive and easy-to-apply solution.

Read the steps explained right after to learn how to properly apply silicone sealant to a shed for your weatherproofing needs and achieve a professional and visually appealing finish.

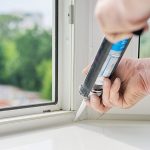
  1. Identify the gap you would like to fill.
  2. Prepare the surface by removing any existing caulk, sealant, paint, dirt, or debris.
  3. Apply the silicone sealant along the edges where the door (or window) frame meets the wall.
  4. Smoothen the silicone bead using a gloved finger.
  5. Consider installing an additional weatherproof door seal or weather strip.
  6. Ensure the door (or window) closes tightly with no other gaps.

  • Check the gutters for any blockage: Stillwater is dangerous. Blockages in your gutter cause water to pool behind the obstruction. Excess spillage from this water may eventually reach the shed through direct seepage or infiltrative processes.
  • Create drainage zones around the base of the shed: If you can’t raise your shed, the next best thing is to dig drainage ditches around the base and foundation of the shed to stop water from pooling around the shed in the event of rain. This will ensure that water is constantly directed away from the direction of the shed and far from any stowed bike, equipment, or furniture in the shed.

Keeping your shed moisture-free is important to any homeowner. One of the best ways to waterproof your shed is to apply silicone sealant around the window and doors and wherever you might encounter a gap. When looking for silicone sealant for your shed’s waterproofing needs, find a store near you in the US or a store near you in Canada.

FAQs

What is the best way to waterproof a shed?

The best way to waterproof a shed is to ensure the roofing and siding are impermeable to water. Applying a waterproofing treatment to the wood siding can help achieve this.

How do you keep rain out of a shed?

The most effective way to keep rain out of a shed is to apply a high-quality silicone sealant to any gaps on the roof, windows, or doors.

How do you waterproof an existing shed?

Waterproofing an existing shed involves applying silicone sealant to the windows and doors, clearing blockages in gutters, and digging drainage channels around the shed’s base.

Contact Form

Safe, durable seals for food prep, storage, and beyond! What are food-safe and food-compliant silicone sealants?

Note: This DIY article is provided as a general guide only and is not intended to take the place of product-specific installation procedures; always follow applicable manufacturers’ instructions. Depending on your home’s age and condition, location within the home, and other potential factors, repairs and/or upgrades or other services may be necessary prior to the beginning and/or completion of your project that may involve the services of a home improvement professional. This article does not include advice pertaining to local building codes and/or any related inspections.

Restaurants and commercial kitchen operators need food-grade silicone sealant options rated for use in kitchens and food storage. These specialized sealants are non-toxic, waterproof, and resistant to heat and chemicals. For other indirect food-related uses, food-compliant silicone sealant is a handy and suitable option. This guide explains what both are and explores their practical uses for home and commercial applications.

What is a food-safe silicone sealant?

A food-safe silicone sealant is specifically formulated to meet FDA or food-grade safety standards, ensuring it does not release harmful chemicals when exposed to food, water, or high temperatures. Unlike standard silicone sealants—which may contain additives, solvents, or antimicrobial agents—food-safe variants are non-toxic, odorless, and free from harmful chemicals like phthalates and bisphenol-A (BPA).

Key features required for a sealant to be rated food-grade include:

  • Waterproofing
  • High heat resistance
  • Flexibility

Ideally, food-grade sealants will also resist mold, mildew, and bacterial growth.

Regular sealants are not always safe for food-related applications because they may degrade over time, leach chemicals, or break down when exposed to moisture and temperature fluctuations. Choosing a certified food-safe silicone sealant ensures a long-lasting, non-toxic, and durable seal for kitchen and food-related projects.

Food-safe silicone sealants are rated for direct contact with food and are used to seal surfaces like prep areas, cutting boards, and food storage containers. Food-compliant sealants, while not certified for direct food contact, are suitable for sealing areas near food, such as countertops, backsplashes, and cabinets. For food-adjacent applications, GE’s All Purpose Silicone 1® Sealant is 100% waterproof, mold-resistant, and designed to withstand moisture and cleaning—making it a reliable option for kitchens and storage spaces.

Common uses for food-grade silicone sealants

Food-grade or food-safe sealants are commonly used for:

  • Sealing around appliances: Gaps around the edges of refrigerators, stoves, and other built-in appliances can collect crumbs and grime, and trap moisture and bacteria. A food-safe sealant creates a clean, waterproof barrier near shelves or drawers that come into direct contact with food.
  • Sealing high-contact countertops: In food prep areas—such as butcher-block surfaces or dedicated workstations in restaurants—food-safe sealants help prevent water infiltration and bacterial growth. These sealants ensure that joints and seams don’t compromise sanitation.
  • Direct food-contact surfaces: Any surface where food is regularly stored or rests for extended periods may require sealing with a food-safe silicone. This includes cutting boards, food trays, and storage bins that have developed surface cracks or loose seams.

What is food-compliant silicone sealant?

Food-compliant silicone sealants are designed for indirect contact with food. While they are not rated for direct food exposure, they are safe for sealing areas adjacent to food prep and storage spaces. These sealants are waterproof, flexible, and free from harmful additives, but do not meet FDA food-contact standards.

For homeowners and contractors looking for a durable, mold-resistant sealant suitable for kitchens, a food-compliant product provides a safe, effective option for a range of general-purpose uses. For most residential kitchens, using a general-purpose, food-compliant sealant is perfectly safe — even if it’s not rated for direct food contact. Unless you’re working in a commercial kitchen with strict health regulations, there’s typically no need to worry.

Common uses for food-compliant silicone sealant

An image of GE’s All Purpose Silicone 1® Sealant.
A photo of GE All Purpose Silicone 1® Sealant.

When choosing a food-compliant sealant, look for:

  • FDA-compliant formulations
  • High-temperature resistance
  • Long-lasting adhesion

Food-compliant sealants are ideal for kitchens and storage spaces where food is present but not in direct contact with the surface. Sealants like GE All Purpose Silicone 1® are used to create watertight, mold-resistant seals in areas that require regular cleaning and occasional exposure to moisture, steam, or temperature changes.

Sealants can also be used where countertops meet walls or backsplashes. A food-compliant sealant helps protect these seams without the need for food-contact certification.

To get GE Sealants’ products for your home improvement projects, find a store near you in the US or Canada.


Contact Form

Keep your RV or camper sealed and protected for every journey Camper and RV sealant: how to protect your investment

Note: This DIY article is provided as a general guide only and is not intended to take the place of product-specific installation procedures; always follow applicable manufacturers’ instructions. Depending on your home’s age and condition, location within the home, and other potential factors, repairs and/or upgrades or other services may be necessary prior to the beginning and/or completion of your project that may involve the services of a home improvement professional. This article does not include advice pertaining to local building codes and/or any related inspections.

Over time, gaps around windows, vents, and seams can allow moisture to seep into your RV or camper, leading to mold, structural deterioration, and costly repairs. Sealing your vehicle with a high-quality silicone sealant helps create a durable, weatherproof barrier that remains flexible through temperature changes. This guide outlines the key areas to seal in your RV or camper and provides step-by-step instructions to keep your vehicle protected for years to come.

Why you should seal your RV or camper

If you’ve invested in an RV or camper, you’re probably keen to take the necessary steps to keep it in good, clean working condition. Over time, exposure to rain, snow, and UV rays can cause cracks or gaps in various RV seams, vents, and window frames. Water infiltration can also lead to mold growth, wood rot, interior damage—and costly repairs.

Having a well-sealed RV also enhances temperature control, by reducing heat loss in the winter and keeping cool air inside during the summer. This helps maintain a comfortable interior environment and lowers energy consumption for heating and cooling.

Additionally, sealing exterior seams and roof joints protects against dust, pests, and road debris, keeping the RV cleaner and in better condition longer. Using a durable, weatherproof silicone sealant ensures a long-lasting, flexible seal that withstands temperature changes, vibration, and outdoor exposure.

Sealing your RV or camper with 100% silicone sealant helps prevent leaks, reduce air drafts, and protect against weather damage. GE Supreme Silicone Window & Door Sealant is ideal for windows, doors, and vents, while GE Metal Silicone 2® Sealant provides a durable, waterproof bond for roofs and seams. These flexible, weatherproof sealants expand and contract with temperature changes, ensuring a long-lasting, airtight seal to keep your RV protected on every journey.

What areas should you seal in your RV or camper?

Sealing critical areas on an RV or camper helps prevent leaks, improve insulation, and protect against weather damage. Pay attention to these areas in your vehicle:

  • Windows and doors: Gaps around RV windows and doors can allow rain, dust, and drafts inside, reducing comfort and increasing energy use. Applying silicone sealant around these openings ensures a flexible, weatherproof seal that won’t crack or shrink over time.
  • Vents and skylights: These openings are high-risk areas for leaks, especially when exposed to heavy rain or snow. A durable, waterproof silicone sealant prevents moisture from seeping into seams, protecting the interior from water damage.
  • Seams and roof joints: RV roofs and exterior seams are prone to water penetration and UV degradation. Using a high-quality silicone roof sealant helps prevent leaks and reinforces weak points in the structure.
An exterior roof seam in an RV.
A photo of an exterior roof seam in an RV

Picking the right sealant for your RV or camper

Not all sealing products suitable for RVs or campers are created equal. Finding the right sealant for your RV or camper is essential for long-term protection against leaks, weather damage, and even road vibrations. Unlike standard caulks, 100% silicone sealants offer superior flexibility, waterproofing, and UV resistance. For RV windows and doors, use Advanced Silicone 2® Window & Door Sealant for a durable seal with the flexibility to handle road vibration.

For sealing RV roofs, seams, and metal components, GE Metal Silicone 2® Sealant is a top choice. This 100% waterproof and weatherproof formula bonds to aluminum, steel, and other metals, creating a durable seal that resists cracking, shrinking, and peeling. Its rain-ready formula cures quickly, making it ideal for outdoor applications where exposure to the elements is a concern.

When choosing an RV sealant, look for:

  • Strong adhesion
  • Permanent flexibility
  • Resistance to temperature extremes

A high-quality silicone sealant should also be mold-resistant to prevent mildew buildup in humid conditions.

Step-by-step guide to sealing your RV or camper

Follow these steps to ensure a durable, weatherproof seal on your vehicle’s roofs and seams.

  1. Inspect for leaks and damageCarefully examine windows, doors, vents, roof seams, and panel joints for cracks, worn-out sealant, or visible gaps. Use a flashlight and a water spray test to identify potential leak points.
  2. Clean surfacesRemove any old, deteriorated sealant with a scraper or sealant remover. Clean the area with soap and water, then dry completely to ensure proper adhesion.
  3. Apply silicone sealant
    Metal Silicone 2® Sealant.
    A photo of Metal Silicone 2® Sealant

    • For windows and doors: Apply GE Supreme Silicone Window & Door Sealant around the edges, ensuring a continuous bead for an airtight, flexible seal.
    • For roof seams and metal components: Use GE Metal Silicone 2® Sealant, which bonds securely to aluminum, steel, and other metal surfaces to prevent leaks and withstand UV exposure.
  4. Smooth and secure the seal Using a caulk smoothing tool or gloved finger, press the sealant into place for even coverage and better adhesion.
  5. Allow proper curing time GE silicone sealants are rain-ready in 30 minutes, but full curing takes 24 hours. Avoid disturbing the sealant during this period to ensure long-lasting protection.
  6. Check for effectiveness After the sealant has cured, inspect for gaps, cracks, or missed spots. Perform another water test to confirm all areas are sealed.

Tips for long-term care

To keep your RV or camper sealed, inspect all sealed areas every six months for signs of cracking, peeling, or gaps. Pay close attention to windows, doors, vents, roof seams, and panel joints, as road vibrations and weather exposure can weaken seals over time.

Clean sealed surfaces with mild soap and water to remove dirt and debris, preventing buildup that could break your sealant’s adhesion. If the sealant appears worn or damaged, remove the old layer, clean the area, and reapply a fresh bead of sealant.

To get GE Sealants’ products for your home improvement projects, visit these fine retailers in the U.S. or Canada.

Contact Form

Protect your boat from leaks with a strong, flexible, and waterproof seal Boat sealant: a useful guide to sealing windows and hatches

Note: This DIY article is provided as a general guide only and is not intended to take the place of product-specific installation procedures; always follow applicable manufacturers’ instructions. Depending on your home’s age and condition, location within the home, and other potential factors, repairs and/or upgrades or other services may be necessary prior to the beginning and/or completion of your project that may involve the services of a home improvement professional. This article does not include advice pertaining to local building codes and/or any related inspections.

Using a marine-grade silicone sealant creates a flexible, waterproof barrier that withstands harsh marine conditions without cracking or breaking down. Over time, worn or improperly sealed areas can lead to water intrusion, mold growth, and structural issues, increasing maintenance costs. This guide provides step-by-step instructions for sealing boat windows and hatches to ensure long-term protection and durability.

Why you should seal your boat

Properly sealing a boat’s windows, hatches, and seams is an essential part of long-term maintenance for boats of all shapes and sizes. Boats are constantly exposed to rain, waves, and humidity, which can seep through small gaps and lead to mold, mildew, and interior damage. Unsealed or poorly sealed areas can also compromise electrical systems and stored equipment, making waterproofing a critical aspect of boat maintenance.

Using a marine-grade silicone sealant ensures a watertight, flexible bond that withstands constant movement, vibrations, and exposure to salt water and UV rays. Unlike standard sealants, marine-grade silicone remains permanently waterproof and resistant to shrinking or cracking, making it ideal for sealing hatches, windows, and seams.

Sealing boat windows and hatches with marine-grade silicone sealant helps prevent leaks, water damage, and structural wear. GE Marine Silicone 1® Sealant provides a 100% waterproof, permanently flexible bond for window and hatch frames, while GE Metal Silicone 2® Sealant offers corrosion-resistant sealing for metal fittings and components. Both sealants withstand UV exposure, salt water, and extreme weather, ensuring a long-lasting, watertight seal for marine environments.

Boat maintenance tips and areas to seal

Properly sealing windows, hatches, and seams helps protect a boat from water intrusion, structural damage, and long-term wear. These areas are constantly exposed to moisture, temperature fluctuations, and movement, making marine-grade silicone sealant essential for long-lasting protection.

  • Windows: Boat windows are one of the most common areas for leaks and water intrusion. Over time, the seal around the window frame can weaken, allowing rain and spray to seep inside. Applying a durable, waterproof silicone sealant, like Marine Silicone 1® Sealant (which is 100% waterproof and weatherproof and offers strong adhesion to glass, fiberglass, and wood), ensures a tight, flexible bond that prevents water from entering the cabin.
  • Hatches: Hatches provide ventilation, access, and storage, but gaps in their seals can lead to flooding and interior damage. Waterproofing boat hatch edges with marine-grade silicone prevents moisture buildup and ensures a watertight closure, even in rough conditions.
    Metal Silicone 2® Sealant
    A photo of Metal Silicone 2® Sealant

  • Seams and joints:  For sealing metal frames, railings, and boat fittings, GE Metal Silicone 2® Sealant provides superior corrosion resistance and strong adhesion to aluminum, steel, and other metals. This permanently flexible and weatherproof formula ensures long-term durability in harsh marine environments, preventing water intrusion and metal deterioration.

To keep boat windows and hatches properly sealed, inspect sealed areas every six months for cracks, peeling, or shrinkage. Exposure to UV rays, salt water, and constant movement can wear down sealants over time.

How to waterproof boat hatches, windows, and other exposed areas

Follow these steps to ensure a long-lasting, watertight seal using marine-grade sealant for window and hatch frames and metal sealant for metal fittings and components.

  1. Inspect for leaks and gaps Carefully examine windows, hatches, and seams for cracks, worn-out seals, or loose fittings. Look for water stains, condensation, or damp areas that indicate existing leaks.
  2. Clean surfaces Remove old, deteriorated sealant using a putty knife or sealant remover. Clean the area with isopropyl alcohol or a marine-safe cleaner to remove dirt, grease, and salt deposits. Let the surface dry completely before applying the new sealant.
    A boat owner applies marine-grade sealant to deck fittings.
    A photo of a boat owner applying marine-grade sealant to deck fittings.
  3. Smooth and secure the seal Use a caulking tool or gloved finger to smooth the sealant, ensuring full contact with the surface. Wipe away excess sealant before it dries.
  4. Allow full curing time Both GE Marine Silicone 1® and Metal Silicone 2® are rain-ready in 30 minutes, but full curing takes 24 hours. Avoid exposing sealed areas to water or pressure during this time.
  5. Test for effectiveness Once fully cured, check for leaks by spraying water over the sealed area. If necessary, apply an additional layer of sealant for enhanced protection.

To get GE Sealants’ products for your home improvement projects, visit these fine retailers in the U.S. or Canada.

Contact Form

Seal your garage properly for a cleaner, more efficient space Garage sealing: helpful tips to prevent leaks, drafts, and pests

Note: This DIY article is provided as a general guide only and is not intended to take the place of product-specific installation procedures; always follow applicable manufacturers’ instructions. Depending on your home’s age and condition, location within the home, and other potential factors, repairs and/or upgrades or other services may be necessary prior to the beginning and/or completion of your project that may involve the services of a home improvement professional. This article does not include advice pertaining to local building codes and/or any related inspections.

Properly sealing your garage helps prevent water damage, reduces drafts, and blocks pests from entering through small gaps. Over time, cracks in the foundation, gaps around garage doors, and unsealed windows can lead to moisture issues, temperature fluctuations, and unwanted bugs and rodents. This guide provides step-by-step instructions for sealing key areas using durable silicone sealants to ensure long-lasting protection.

Why you should seal your garage

Gaps around garage doors, windows, and foundation cracks allow moisture to seep in, leading to mold growth, wood rot, and structural damage over time. During heavy rain or snow, water infiltration can create puddles, slippery floors, and potential long-term foundation issues.

A properly sealed garage reduces drafts and helps maintain a more stable indoor temperature. In cold months, unsealed gaps let in cold air, making garages and adjacent living spaces harder—and more expensive—to heat. In warmer months, hot air can enter, increasing cooling costs. By sealing air leaks, homeowners can enhance energy efficiency and reduce heating and cooling expenses.

Additionally, sealing cracks and openings helps prevent rodents, insects, and other pests from entering. Small gaps at the bottom of garage doors or around windows create easy entry points for mice, spiders, and even larger pests. A weatherproof, flexible silicone sealant like Supreme Silicone Window & Door Sealant effectively blocks these gaps, creating a long-lasting barrier against moisture, drafts, and infestations.

GE Supreme Silicone Window & Door Sealant provides a permanently flexible, weatherproof barrier, ensuring it expands and contracts with temperature changes without cracking or losing adhesion. Its 100% waterproof formula protects garage doors, windows, and foundation cracks from moisture damage, keeping your garage insulated and secure year-round.

Key areas to seal in your garage

Before sealing your garage, identify and plan for these key problem areas to ensure long-term protection and improved energy efficiency.

  • Garage doors: Gaps around the garage door frame and along the bottom seal are common entry points for cold air, water, and pests. Over time, weatherstripping can degrade, allowing moisture and drafts inside. Applying silicone along the edges and bottom of the garage door helps create a weatherproof, flexible seal resistant to cracking and peeling.
  • Windows: Unsealed garage windows can allow rain, wind, and pests to enter. Using a durable silicone sealant around window frames prevents moisture damage, air leaks, and heat loss, keeping the space more energy-efficient.
  • Foundation cracks: Small cracks in the garage floor or walls can allow water seepage, insects, and rodents inside. Filling these cracks with a permanently waterproof silicone sealant helps prevent structural deterioration and pest infestations. Regularly inspecting and sealing these key areas ensures a well-protected, insulated garage year-round.

Choosing the right sealant for your garage

Silicone sealants are typically the best choice for sealing garages because of their flexibility, waterproofing, and resistance to temperature changes. Unlike acrylic or latex-based sealants, silicone remains permanently flexible, preventing cracks or shrinkage that could compromise the seal over time.

Advanced Silicone 2® Window & Door Sealant
A photo of Advanced Silicone 2® Window & Door Sealant

For sealing garage doors, windows, and foundation cracks, Advanced Silicone 2® Window & Door Sealant is an ideal option. It offers 100% more flexibility than standard sealants, ensuring it expands and contracts with temperature shifts without breaking down. Its permanently waterproof and weatherproof properties make it highly effective in blocking moisture, air leaks, and pests. Additionally, it features mold-free product protection, preventing mildew buildup in damp conditions.

When choosing a sealant, look for durability, strong adhesion, and compatibility with materials like wood, concrete, metal, and vinyl. Clear or white silicone sealants provide a clean, professional finish that blends with most surfaces.

Step-by-step guide to sealing your garage

Follow these steps to get your garage sealed right with long-lasting protection:

  1. Inspect for gaps and cracks
    Before applying sealant, thoroughly check for gaps around garage doors, windows, and foundation cracks. Use a flashlight to spot small openings and a piece of tissue or paper to detect drafts—if the paper moves, air is leaking through.
  2. Clean the surfaceFor strong adhesion, clean all areas where sealant will be applied. Use a mild detergent and water to remove dirt, dust, and old sealant residue. Let surfaces dry completely before sealing.
  3. Seal garage door gaps
    • Bottom seal: If the garage door has a visible gap at the bottom, apply sealant along the threshold for a flexible, weatherproof seal.
    • Side and top gaps: Apply a continuous bead of sealant along the edges where the garage door frame meets the walls. Smooth with a caulking tool or gloved finger for even coverage.
  4. Seal garage windows
    Apply silicone sealant around window frames, ensuring all gaps are covered. As silicone remains flexible and waterproof, it will prevent cracking over time as wooden window frames shift and contract with temperature and moisture changes.
  5. Fill foundation cracks

    Foundation cracks in a garage.
    A photo of foundation cracks in a garage.

    Small cracks in the garage floor or foundation walls can allow water and pests to enter. Fill cracks with sealant, pressing the sealant into place with a putty knife for full coverage.

  6. Allow proper curing time
    GE Silicone Sealants are rain-ready in 30 minutes, but full curing takes 24 hours. Avoid disturbing sealed areas during this period to ensure a strong, long-lasting bond.
  7. Test for effectiveness After curing, check for remaining air leaks or moisture entry points. If needed, apply an additional layer of sealant for enhanced protection.

Long-term care

To maintain an effective seal, inspect your garage every six months for signs of wear, such as cracks, peeling, or gaps in the sealant. Temperature changes and daily use can cause minor shifts, so check areas around garage doors, windows, and foundation cracks regularly.

Clean sealed surfaces with mild soap and water to prevent dirt buildup that could weaken adhesion. If any sealant appears damaged, remove the old layer, clean the area, and reapply a fresh bead of sealant.

To get GE Sealants’ products for your home improvement project, visit these fine retailers in the US and Canada.

Contact Form

Keep your greenhouse sealed tight for optimal growing conditions How to seal a greenhouse for maximum insulation

Note: This DIY article is provided as a general guide only and is not intended to take the place of product-specific installation procedures; always follow applicable manufacturers’ instructions. Depending on your home’s age and condition, location within the home, and other potential factors, repairs and/or upgrades or other services may be necessary prior to the beginning and/or completion of your project that may involve the services of a home improvement professional. This article does not include advice pertaining to local building codes and/or any related inspections.

When properly sealed, greenhouses maintain stable temperatures and prevent excess moisture buildup. However, gaps around doors, windows, and panel joints can prove difficult to seal tightly, leading to heat loss and humidity issues. This guide for sealing your greenhouse outlines essential steps to create an airtight seal using durable silicone sealants for long-term protection.

Why greenhouses need proper sealing

Poorly sealed greenhouses experience temperature fluctuations, increased humidity, and higher energy costs. Gaps around doors, windows, and panel joints allow warm air to escape in cooler months and unwanted heat to enter in warmer months, making precise climate control difficult. Unregulated moisture levels can also create condensation, leading to mold growth, plant disease, and structural damage over time.

Beyond environmental control, a sealed greenhouse improves energy efficiency by reducing the need for additional heating or cooling, which can lower your energy costs. Effective sealing helps maintain a consistent growing environment and protects plants from temperature stress and humidity-related issues.

Silicone sealants provide a durable, weather-resistant barrier that prevents air and moisture leaks. By properly sealing key areas, greenhouse owners can enhance insulation, extend their greenhouses’  lifespans, and create optimal growing conditions.

Sealing a greenhouse with silicone sealant helps maintain temperature control, prevent moisture buildup, and improve energy efficiency. A high-quality silicone, like GE Advanced Silicone 2® Window & Door Sealant, remains permanently flexible, allowing it to expand and contract with temperature changes. This flexibility ensures a long-lasting, airtight seal that won’t crack or lose adhesion, even in fluctuating weather conditions.

Key areas to seal in your greenhouse

Sealing key areas in a greenhouse will allow you to maintain insulation and prevent air leaks. Doors and windows are primary points where heat escapes and drafts enter. Over time, shifting frames and weather exposure can create small gaps that impact temperature regulation. Applying silicone sealant around these openings ensures a tight seal while allowing natural expansion and contraction.


Panel joints in a greenhouse.
A photo of panel joints in a greenhouse.

Panel joints are another critical area, especially in polycarbonate or glass greenhouses. Small gaps between panels can let in cold air and moisture, leading to condensation. A flexible, weather-resistant sealant helps bond panels securely while preventing water infiltration.

Vents and openings must also be properly sealed, while still allowing controlled airflow. Loose or poorly fitted vents can cause unwanted heat loss. Using a durable sealant around vent frames helps prevent gaps without restricting necessary ventilation. Addressing these areas guarantees you’ll have a well-insulated greenhouse, with reduced energy costs and improved plant health.

Choosing the right sealant for your greenhouse

For sealing greenhouses, silicone sealants like Advanced Silicone 2® Window & Door Sealant or Supreme Silicone Window & Door Sealant are the best options due to their:

  • Flexibility
  • 100% waterproofing
  • Resistance to temperature changes
  • Combination of high adhesion and high mobility to suit a variety of needs

Unlike acrylic or latex-based sealants, silicone remains elastic over time, preventing cracks or shrinkage that could compromise the seal.

A greenhouse sealant must withstand UV exposure, temperature fluctuations, and humidity without breaking down. High-quality silicone sealants resist deterioration from sunlight, extreme temperatures, and moisture. They also provide a strong adhesion to common greenhouse materials such as polycarbonate, glass, metal, and wood.

When choosing a sealant, look for permanently waterproof, mold-resistant, and weatherproof formulas designed for outdoor use. Clear silicone is often preferred for aesthetic purposes, blending seamlessly with greenhouse structures. Additionally, a low-odor, non-toxic formulation is recommended for use in plant environments. Proper application is just as important as selecting the right product. A good greenhouse sealant should be easy to apply, cure quickly, and remain flexible to accommodate natural material movement.

Step-by-step guide to sealing a greenhouse

Properly sealing your greenhouse will help you maintain temperature control, prevent moisture buildup, and improve energy efficiency. Follow these steps to ensure an airtight, durable seal.

  1. Inspect for gaps and drafts
    A gap and drafty spots in a greenhouse.
    A photo of gaps and drafty spots in a greenhouse.

    Before applying sealant, examine the greenhouse for air leaks. Check around doors, windows, panel joints, and vents for visible gaps or areas where drafts are noticeable. Observing the movements of a small piece of paper or the smoke of an incense stick near potential leaks can help identify problem spots.

  2. Clean the surfaceFor a strong bond, clean all surfaces where the sealant will be applied. Use a mild detergent and water to remove dirt, dust, and old sealant residue. Allow the area to dry completely before proceeding.
  3. Apply the silicone sealantChoose a weatherproof, flexible silicone sealant like Advanced Silicone 2® Window & Door Sealant for greenhouse sealing. Cut the nozzle at a 45-degree angle for controlled application, then use a caulking gun to apply an even bead of sealant along gaps in doors, windows, panel joints, and vent frames.
  4. Smooth and secure the sealUsing a gloved finger or a caulk smoothing tool, press the sealant into place for full adhesion. Ensure complete coverage, especially around polycarbonate panels and aluminum framing, to create a strong, waterproof barrier.
  5. Allow proper curing timeSealants should cure fully within 24 hours; however, ensure you vary your wait time based on the humidity. They are also rain-ready within 30 minutes, making them ideal for outdoor use. Avoid disturbing the sealant during this period to ensure a long-lasting bond.
  6. Check for Air Leaks Post-SealingAfter curing, test for leaks by checking for air drafts or condensation buildup. If necessary, apply an additional layer of sealant in problem areas.

Maintenance and long-term sealing tips

Regular maintenance will help you ensure your sealed greenhouse stays airtight and energy efficient. Inspect seals every six months, especially before seasonal temperature changes. Look for cracks, peeling, or shrinkage in the silicone sealant, as exposure to weather and UV rays can cause deterioration over time.

To maintain a strong seal, clean sealed areas periodically with mild detergent and water to remove dirt, algae, or mold buildup. Avoid using harsh chemicals that may weaken the sealant. If signs of wear appear, remove the damaged sealant using a utility knife or sealant remover, clean the area thoroughly, and reapply a fresh bead of GE Advanced Silicone 2® Window & Door Sealant for continued protection.

Additionally, check for structural shifts in greenhouse panels, doors, and vents. Minor adjustments may be needed to maintain a tight fit. By following these steps, greenhouse owners can extend the life of their sealant and maintain optimal insulation and plant protection year-round.

To get GE Sealants products for your home improvement project, visit these retailers in the U.S. and Canada.

Contact Form

Elevate your home with a weatherproof sealant. Where to use weatherproof sealant

Note: This DIY article is provided as a general guide only and is not intended to take the place of product-specific installation procedures; always follow applicable manufacturers’ instructions. Depending on your home’s age and condition, location within the home, and other potential factors, repairs and/or upgrades or other services may be necessary prior to the beginning and/or completion of your project that may involve the services of a home improvement professional. This article does not include advice pertaining to local building codes and/or any related inspections.

A weatherproof sealant that lasts as long as the surface it is attached to is the only way to ensure your construction, repair, or renovation projects remain durable and withstand the test of time. Read on to find out which GE weatherproofing sealant is right for your project.

What is a weatherproof sealant?

Do items with the suffix -proof live up to expectations or is it just a marketing gimmick? Your favorite handheld device might be marketed as waterproof, but you might not jump at the idea of swimming with it. Consequently, you might approach the idea of a weatherproof silicone sealant with skepticism.

While there might be a catch with other products, GE delivers what is promised with its line of 100% weatherproof Window and Door Sealants. Weatherproof sealants are silicone-based adhesives designed to create a waterproof and flexible seal around gaps and cracks with the capability to resist temperature and sunlight variations.

The long-lasting protection from moisture, temperature, and sunlight makes weatherproof sealants the ideal choice for exterior fixtures, windows, doors, and gutters that come into contact with the weather.

Why choose a weatherproof sealant?

If a surface is exposed to the elements, the need to ensure it can resist the changes in atmospheric conditions is not hard to imagine. Construction adhesives such as caulk and sealant are designed to seal gaps and ensure drafts, pests, and moisture remain outside of the barrier.

Weatherproof sealants ensure that the seal outlasts the surface it is adhered to, and retains its integrity when exposed to rain, extreme temperatures, and UV radiation.

Weatherproof sealants are designed for outdoor use.

GE’s silicone weatherproof sealants

GE’s line of 100% weatherproof sealants employs advanced technology that makes them the ideal choice for a vast majority of home renovation projects that involve outdoor fixtures.

GE’s window and door sealants

Windows and doors do more than simply adorn your walls. Leaks around doors can facilitate the infiltration of moisture, air leakages, pests, and drafts that can cause mold growth (a direct threat to your health), exorbitant energy costs (a threat to your wallet), or reduce the indoor comfort of your home. Sealing around window and door frames, therefore, is one of the most common ways to use silicone weatherproofing sealant.

GE has just the right sealant for all your window and door needs. GE’s line of window and door sealants include:

Supreme Silicone Window and Door Sealant: The Supreme Silicone Window and Door Sealant is the preferred choice when strength is the most important determining parameter. With seven times more strength than standard silicone sealant, it also carries a lifetime mold-free guarantee.

Advanced Silicone Window and Door Sealant: With five times more strength than standard silicone sealant and a 10-year mold-free guarantee, the Advanced Silicone Window and Door Sealant delivers flexibility to any outdoor project.

All-Purpose Silicone Sealant: The All-Purpose Silicone Sealant by GE is perfect for window and door use along with other applications that might require a flexible, weatherproof sealant.

GE’s specialty weatherproofing sealants

When it comes to the world of renovation, not all surfaces are made equal. When working with special surfaces such as concrete, metal, PVC, or any other non-porous surface, standard weatherproof sealant might struggle to cope. To ensure you retain professional and durable finishes on all of these surfaces, GE offers a line of specialty weatherproof silicone sealants with boosted performance that include:

Gutter Silicone Sealant: You don’t have to worry about an approaching rainstorm when applying the Gutter Silicone Sealant as it is rain-ready in half an hour and provides excellent attachment to both wet and dry surfaces. This weatherproofing sealant is perfect for metal and vinyl gutters in direct contact with rain, sunlight, and extreme temperatures.

Metal Silicone Sealant: If you’ve had to work with high-end metal, you might have noticed that some silicone sealants tend to tarnish the metal finish. Additionally, conventional silicone sealants form a less durable bond with the metal surface. However, GE’s Metal Silicone Sealant is ideal for metal roofs, sheds, vents, sidings, and RVs without discoloring the high-end metal finish.

Concrete Silicone Sealant: GE’s Concrete Silicone Sealant works best for concrete and mortar surfaces. When working on your concrete driveway, you can rest assured that the 100 percent flexible formula provides you with both durability and flexibility. Additionally, the fact that the sealant is rain-ready in 30 minutes makes it easy to use in unpredictable weather such as on a cloudy day.

Where not to use GE’s silicone sealants

All of the weatherproof silicone sealants described in this article have one thing in common, they cannot be painted over. When working on an outdoor project where paintability is the determining factor, you should consider using caulk (which has the downside of not being weatherproof).

Alternatively, if you require silicone sealant properties, you may apply a clear weatherproof silicone sealant over a pre-painted surface, or use a siliconized acrylic sealant.

Weatherproof silicone sealants are the partner you didn’t know you needed for all your home renovation projects. Whether you’re working outdoors or on special difficult surfaces, there is an appropriate GE sealant to help you get the job done.

To find GE products near you, check out our Where to Buy page.

FAQs

Below are some frequently asked questions about weatherproof silicone sealants.

Where do you apply a weatherproof sealant?

Sealant is applied anywhere you might wish to create a barrier to keep moisture outside.

What is a weatherproof sealant used for?

Weatherproof sealant is used to resist temperature and sunlight variations such as anti-oxidation, anti-aging, and anti-degradation.

Contact Form

Discover the difference between caulk vs. sealant! Caulk vs. sealant: Understand the differences

Note: This DIY article is provided as a general guide only and is not intended to take the place of product-specific installation procedures; always follow applicable manufacturers’ instructions. Depending on your home’s age and condition, location within the home, and other potential factors, repairs and/or upgrades or other services may be necessary prior to the beginning and/or completion of your project that may involve the services of a home improvement professional. This article does not include advice pertaining to local building codes and/or any related inspections.

To ensure your next project is a success, you need to learn the differences between caulk vs. sealant. This guide shares what makes each product unique and when to use each one.

When tackling construction or renovation projects, selecting the right materials is essential for quality results. The last thing you want to do is compromise the success or longevity of your project. One common point of confusion is deciding between caulk vs. sealant. While caulk and sealant may seem similar, they serve different purposes based on their distinct technical properties.

This guide will clarify the differences between caulk vs. sealant, focusing on movement capabilities and ingredients so you can make an informed choice before diving into your next project.

What is caulk?

Caulk refers to a gunnable product designed to fill and seal joints where minimal movement is expected. It’s typically applied in areas where surfaces will remain relatively static, with a movement capability of less than 12.5%. This low movement threshold is intentional, as caulk is formulated for rigid, stable areas where flexibility is not a primary concern. Due to these characteristics, caulk is often used indoors in areas such as window frames, trim, and baseboards, where structural shifts or expansion are minimal.

Caulking specifically refers to the application of caulk to joints or seams. When you caulk something, you’re applying a carefully controlled layer of this product to ensure a tight seal against issues like minor drafts, moisture, or debris infiltration. Because of its precise and targeted application, caulk requires skilled handling to avoid gaps or unevenness, especially when it needs to blend seamlessly.

Ingredients and composition of caulk

One of the main differences between caulk vs. sealant is its ingredients. Caulk is typically made up of materials like acrylic or latex. These materials provide a smooth finish and make it easy to paint over, which is particularly useful in indoor applications where aesthetics is a priority. For example, an acrylic-latex caulk can be painted to match interior walls, trim, or moldings, enhancing the finished look of a project without sacrificing functionality.

Latex-based caulks also offer the benefit of easy cleanup, as they are water-soluble before curing. This feature makes them popular for interior use, where precision is important, and mistakes can be fixed quickly and with ease. However, caulk’s low tolerance for movement means it may crack or detach if used in areas with significant temperature fluctuations, high moisture exposure, or frequent material expansion. In these cases, you may need to reapply caulk later down the road.

Caulk is for static applications where there will be little movement. Sealant is for dynamic ones. Choose accordingly for long-lasting results and a successful project.

What is sealant?

Sealants are also gunnable solutions, and they are similar in function to caulks, but with a crucial distinction: movement capability. Unlike caulk, sealant is engineered for flexibility with a movement capability greater than 12.5%. This adaptability allows sealants to maintain a durable bond even as surfaces expand, contract, or shift over time. Sealants are crucial in areas exposed to fluctuating temperatures, weather conditions, or dynamic loads, which can cause materials to expand and contract.

Applying a sealant often refers to creating a flexible, water-resistant barrier capable of withstanding various environmental stressors. This is especially important in exterior applications, such as joints in concrete, glass facades, or siding, where moisture and temperature changes can weaken caulk.

Ingredients and composition of silicone

Silicone is the primary ingredient in most sealants due to its impressive flexibility, moisture resistance, and durability. Silicone-based sealants are ideal in environments exposed to water, such as bathrooms, kitchens, and outdoor settings. Unlike acrylic-latex caulk, silicone sealant does not crack or peel easily and can withstand UV exposure, making it perfect for outdoor use.

Additionally, silicone sealant adheres well to non-porous surfaces, such as glass and metal, allowing for a reliable bond in applications where surfaces may not readily accept other materials. This is what sets it apart from latex-based caulks, which may struggle to adhere to glass or aluminum without the use of additional bonding agents.

One tradeoff with silicone sealants, however, is the inability to paint them. While they provide exceptional durability, they often retain a slightly shiny finish that may not blend with certain aesthetics. For interior uses where a painted finish is desired, specialized silicone formulations or hybrid sealants may be available, but standard silicone will not bond well with paint.

Technical terminology you need to know

To truly understand the nuances between silicone sealant vs. caulk, it helps to dive into the specific terminology and ingredients that define their performance. Knowing this information can guide you in selecting products tailored to the unique demands of each project. Here are some essentials to keep in mind:

  • Skinning and curing times: Both caulk and sealant have different skinning (initial drying) and curing (fully drying) times. Sealants, especially silicone-based ones, generally form a skin quickly, allowing work in high-moisture areas, though they may take longer to fully cure. Caulks tend to cure faster but can be vulnerable to moisture if applied before drying.
  • Joint movement capability: Caulk and sealant products are often rated by their joint movement capability, expressed as a percentage. This rating indicates how much a product can expand and contract without cracking. Caulks are typically rated for low movement (less than 12.5%), while sealants are designed for greater flexibility, adapting to shifting materials.
  • Plasticizers: Commonly found in caulks, plasticizers add flexibility to the product but can lead to off-gassing and sometimes degrade over time, which is why caulks often need replacement sooner than silicone-based sealants. High-quality caulks may use advanced plasticizers to extend longevity, so they don’t need to be redone as quickly.
  • UV stabilizers and mildewcides: Often added to silicone sealants, UV stabilizers protect against yellowing and cracking caused by sunlight exposure. Mildewcides prevent mold and mildew growth, making silicone sealants suitable for bathrooms, kitchens, and outdoor applications.
  • Types of silicone sealants: Acid-cure sealants release acetic acid during curing, which can produce a vinegar-like smell. It’s highly adhesive but can corrode sensitive materials. Neutral-cure sealants release non-corrosive byproducts, making them ideal for materials that may react with acids. They’re also preferred for exterior applications or around metals.

It’s also worth keeping in mind that the American Society for Testing and Materials, as well as the International Organization for Standardization, provide technical standards for caulks and sealants. Look for these certifications when purchasing to ensure an additional level of quality assurance.

When to use caulk vs. sealant

In most cases, caulk is the right choice for indoor projects where a low-movement, paintable surface is essential. This includes tasks like finishing trim, baseboards, and window frames. Caulk’s ease of cleanup and compatibility with paint make it versatile for such controlled applications.

Sealant is the preferred option for outdoor or high-movement areas where flexibility is essential. It’s also a must in moisture-prone areas due to sealant being mold and mildew-resistant. Applications such as sealing around sinks, bathtubs, exterior siding, and joints in masonry are best suited for sealants due to their resilience against movement and environmental factors like moisture. When in doubt, opt for sealant in environments where durability and flexibility are essential. Keeping these tips in mind will ensure it’s easy to decide which one is better for your project.

Whether you’re looking for a durable silicone sealant for exterior use or a smooth, paintable caulk for interior detailing, our lineup has you covered. Explore our range of high-performance products and discover the perfect solution for your next project. For more information, visit our Where to Buy page to find our products at a location near you.

Contact Form

Paint like a pro once you master the best techniques of caulking when painting A professional’s guide to the do’s and don’ts of caulking when painting

Note: This DIY article is provided as a general guide only and is not intended to take the place of product-specific installation procedures; always follow applicable manufacturers’ instructions. Depending on your home’s age and condition, location within the home, and other potential factors, repairs and/or upgrades or other services may be necessary prior to the beginning and/or completion of your project that may involve the services of a home improvement professional. This article does not include advice pertaining to local building codes and/or any related inspections.

Clean lines, minimal imperfections, and seamless finishes are exactly what you’re looking for in your home renovation project. Whether or not you’re a stickler for perfection, an ugly sealing job will stick out like a sore thumb and may dampen your style. In this article, we explore the do’s and don’ts of caulking when painting.

Caulk vs. sealant: Understanding the difference

As a cardinal rule, caulk and sealant should never be used interchangeably. Other than their names, caulk and sealant have several other differences, some of which affect their applications. Understanding the difference between caulk and sealant is the first step toward mastering the dos and don’ts of caulking when painting.

Caulk is an acrylic-based adhesive used to fill gaps. Due to its acrylic nature, caulk should not come into contact with moisture, which will interfere with its structural integrity and overall lifespan. On the upside, caulk is paintable and can be used in areas where aesthetic appeal is paramount.

Sealant, conversely, is a silicone-based adhesive with added flexibility and water resistance that makes it ideal for creating a barrier that keeps moisture on one side.

Caulk is preferred for interior painting projects, while sealant is preferred for high-moisture areas.

When and where to use caulk and sealant

Caulk and sealant confer varying advantages to your projects. Before understanding the best techniques and practices for applying both, you should first get a handle on when and where to use caulk or sealant. Below is an in-depth guide on how to do just that.

Caulk: A paintable option

Caulk is water-based and made from a combination of acrylic and latex, which makes it paintable. However, this feature also happens to be its Achilles heel, making it unsuitable for forming a moisture barrier. Caulk is used to fill interior gaps and cracks and is often used to seal around trims, baseboards, crown moldings, and wall cracks.

Silicone sealant: Waterproofing

Silicone sealant is flexible and waterproof, two features absent in a standard acrylic-based caulk. These added features make sealant a staple in high-moisture environments such as the kitchen and bathroom and where you might need to create an indoor-outdoor barrier, such as with windows and doors.

However, despite its capabilities, silicone sealant is not paintable, requiring a creative approach to any finishing that might require painting. GE has plenty of neutral-colored sealants to match most of your project needs. Alternatively, apply a clear silicone after painting to ensure the sealant blends in and remains invisible.

Hybrid paintable sealant: The best of both worlds

For some projects, a non-paintable sealant just doesn’t cut it. You may utilize GE’s Seal & Fill Multi-purpose Window & Door Caulk when aiming for a professional finish that blends in with the surroundings. As the name suggests, this sealant offers a blend of caulk and sealant properties, making it waterproof and paintable.

This hybrid paintable sealant can be used in the kitchen and bathroom, and around doors, windows, and siding.

When you can get away with using either caulk or sealant

In some unique cases, you may get away with using either caulk or sealant. It is important to emphasize that waterproofing, flexibility, and paintability are not of the utmost importance to the project in these scenarios. You will probably be aiming for a solution to fill a gap or crack in the interior of your home. Examples of these scenarios include:

  • Trim and molding: Silicone sealant can seal around interior gaps, trims, baseboards, or crown moldings as well as caulk, as both can effectively fill the gaps and create smooth transitions.
  • Door frames: For interior door frames where paintability trumps waterproofing, you may use caulk to blend in with the walls or sealant to confer additional flexibility. Both products effectively seal the gaps.

In these situations, the purposes of caulk and sealant overlap, and the choice of either depends on your professional judgment and preferences.

Caulking when painting: The dos and don’ts

Mastering your caulking technique is bound to improve several aspects of the project. From resource efficiency to time-saving and overall finish, the proper technique is a worthy investment. Below is our professional guide on the dos and don’ts of caulking when painting.

Do: Caulk before painting

Do you apply caulk before or after painting?

In most cases, caulking should come before painting since caulking is meant to cover any gaps and cracks that might stick out after the painting is done. Additionally, when applying caulk, it helps to ensure the adhesive has a smooth uninterrupted surface to ensure maximum bonding strength.

You should also smooth the caulk applied with a gloved finger.

Don’t: Use silicone sealant unless it’s a paintable version

As already mentioned, silicone sealant should not be painted over as it resists the adhesion of most paints which might cause peeling, cracking, and detraction from the surface. If it is mandatory to use silicone sealant, as is the case with the kitchen and bathroom, GE’s Paintable Supreme Kitchen and Bath sealant can offer excellent results.

Alternatively, you could pre-paint the surface and apply either a clear or color-matching sealant to make it less of an eyesore.

Do: Allow sufficient drying time for the caulk

Depending on manufacturer specifications, caulk may need anywhere between 30 minutes to 24 hours to fully cure. It is critical that you ensure the caulk properly dries before trying to paint over it. If in a hurry, you can pick a fast-drying caulk to speed up the process.

Do: Clean surfaces thoroughly before applying caulk

An uneven or dirty surface can negatively impact the caulk’s bonding strength. It is crucial that you wipe down the surface to be sealed and remove any dirt, grease, paint, or caulk remnants to ensure a durable and long-lasting seal.

How to apply caulk for the best finish

A professional finish is the desire of DIYers and professionals alike. Below is a step-by-step blueprint on how to get the best finish whenever applying caulk:

  • Prepare the area to be caulked
  • Cut the caulk tube tip
  • Pierce the inner foil seal (if there is one)
  • Apply even pressure
  • Smooth the caulk
  • Allow caulk to dry (30 minutes to 24 hours)

Caulk or paint first?  Caulking should come before painting. If you would like to paint over the caulk to blend in with surrounding walls or surfaces, this can be done after. Siliconized acrylic caulk can be painted over while providing the sought-after waterproofing properties of sealant and should be used in moisture-prone areas.

To find GE products near you, check out our Where to Buy page.

Contact Form

Let’s make your home more energy efficient! How to lower your energy bill by improving sealing and insulation

Note: This DIY article is provided as a general guide only and is not intended to take the place of product-specific installation procedures; always follow applicable manufacturers’ instructions. Depending on your home’s age and condition, location within the home, and other potential factors, repairs and/or upgrades or other services may be necessary prior to the beginning and/or completion of your project that may involve the services of a home improvement professional. This article does not include advice pertaining to local building codes and/or any related inspections.

Learning how to lower your energy bill through proper sealing and insulation can help you save money, preserve your HVAC system, and allow your home to reduce its environmental footprint.

With rising energy costs impacting nearly every household, finding ways to reduce expenses has become more important than ever. If you’ve been wondering how to lower your energy bill but feel unsure of where to start, you’re not alone.

Many homes lose significant amounts of energy and money due to poor sealing and insulation, forcing HVAC systems to work harder just to keep indoor temperatures comfortable. This constant energy loss adds up over time, leading to higher bills and wasted resources.

The good news is that sealing air leaks and upgrading insulation can address this issue at its root, offering a practical, lasting solution. When you improve your home’s insulation and seal areas prone to drafts, you reduce energy waste, save money, and make your living space more eco-friendly.

In this guide, you’ll learn how to identify energy-draining gaps and cracks, discover which areas of your home will benefit the most from sealing and insulation, and find out why these changes are the best ways to lower an energy bill. By the end, you’ll be equipped with steps to create a more efficient home.

The financial benefits of better sealing and insulation

Sealing and insulating your home can lead to significant savings on your monthly energy bills. By reducing the amount of air that leaks in and out, your heating and cooling systems don’t have to work as hard to maintain a comfortable temperature.

According to the Environmental Protection Agency (EPA), homeowners can save up to 15% on heating and cooling costs by properly sealing and insulating their homes. Over time, this can add up to considerable savings and a more sustainable lifestyle.

Not only does improved insulation lower your energy costs, but it also increases the efficiency of your heating and cooling systems, extending their lifespan and reducing the likelihood of costly repairs. In addition, some homeowners may be eligible for an insulation tax credit, which can further offset the initial investment.

Sealing and insulating your home can lower energy bills, helping you save money and reduce energy waste. Focus on key areas like attics, windows, and basements for the biggest impact.

Signs you may be losing energy due to poor sealing or insulation

One of the best ways to lower your energy bill is to identify if your home is currently losing energy due to inadequate sealing or insulation. For some homeowners, they might not notice any obvious issues, whereas others may have significant issues to address. Here are some signs to look for:

  • Drafts: If you feel a breeze near doors, windows, or electrical outlets, it’s likely due to air leakage. Drafts can be a strong indicator that these areas need additional sealing or insulation.
  • Uneven temperatures: If certain rooms in your home are consistently warmer or cooler than others, it may signal that the insulation in these areas isn’t sufficient. Properly insulating all parts of your home helps distribute temperatures more evenly, reducing strain on your HVAC system.
  • High energy bills: If your energy costs are increasing without a clear reason, this could be a sign that your heating and cooling systems are working harder than necessary due to air leaks and poor insulation.
  • Dust buildup: Homes with insufficient sealing often experience more dust, as air leaks bring in debris from outside. If you notice excessive dust around windows, doors, or vents, it may be time to inspect these areas for leaks.

Key areas to seal and insulate for maximum savings

To maximize energy efficiency, start by focusing on areas where air leaks are most common. Here are some key areas where sealing and insulating can make a noticeable impact on your energy savings:

  • Attic: The attic is one of the primary sources of heat loss. Adding insulation to the attic floor and sealing any gaps around pipes, ducts, and vents can help prevent warm air from escaping in the winter and cool air from leaking out in the summer.
  • Windows and doors: Gaps around windows and doors can account for a significant portion of air leakage. Weatherstripping and sealant around these areas can create a tighter seal, helping to maintain indoor temperatures without straining your HVAC system.
  • Basement and crawl spaces: Uninsulated basements and crawl spaces are often overlooked but can contribute to substantial energy loss. Insulating the walls and sealing gaps in these areas can prevent cold drafts from entering your home, reducing heating costs.
  • Ductwork: Leaky ducts can allow air conditioning and heat to escape before they reach their intended destination, leading to energy waste. Sealing and insulating ducts ensures that more of your heated or cooled air reaches the rooms you want, improving overall energy efficiency.
  • Electrical outlets and switches: These small gaps might seem insignificant, but they can lead to a noticeable amount of energy loss. Installing an insulating foam behind outlets and switches on exterior walls can help reduce drafts.

How sealing and insulation improve energy efficiency and sustainability

Investing in home sealing and insulation is one of the most effective ways to create a more energy-efficient and sustainable home. By minimizing energy waste, you’re not only saving on your bills but also reducing your home’s environmental footprint.

For example, sealing and insulating help keep warm air inside during winter and block hot air in the summer, reducing the energy required to heat or cool your home. This energy efficiency translates into fewer emissions, as your HVAC system consumes less power from fossil fuels.

How to lower your energy bill: Practical tips you can use

Improving your home’s sealing and insulation doesn’t have to be overwhelming. Here are some practical tips to help get you started:

  • Conduct an energy audit: An energy audit performed by a professional can identify specific areas where your home may be losing energy. Some utility companies even offer free or discounted audits, which can be a valuable first step in understanding your home’s energy efficiency. On the other hand, you can conduct inspections on your own.
  • Use weatherstripping: Weatherstripping is a simple yet effective way to seal gaps around doors and windows. With various options available, you can choose materials that best fit the needs of your home, such as rubber or foam strips for high-movement areas like doors.
  • Tend to cracks with sealant: Adding silicone sealant around windows, baseboards, and exterior walls can significantly reduce air leakage and keep your home at a comfortable temperature.
  • Add insulation: If your home lacks insufficient insulation, adding more can be an excellent investment. Fiberglass, spray foam, and cellulose are common options, each with its benefits based on your climate and specific needs.
  • Install door sweeps: Door sweeps can help block drafts under exterior doors. This simple addition is particularly useful for doors leading to uninsulated spaces like garages or basements.
  • Insulate hot water pipes: Insulating pipes can prevent heat loss, allowing your water heater to operate more efficiently. This not only saves energy but can also reduce water heating costs.

Start improving your home’s energy efficiency now

Now that you know how to keep your energy bill low, remember that sealing and insulation improvements are also an investment that continues to pay off over time. With the potential for reduced energy costs, tax credits, and a smaller environmental footprint, enhancing your home’s insulation is one of the best ways to secure long-term savings and sustainability.

At GE Sealants, we’re committed to providing high-quality products that help homeowners make these energy-saving improvements with ease. To learn more about how our products can contribute to a more efficient and cost-effective home, visit our Where to Buy page and start your journey toward lower energy costs today.