Pest Block Insulating Foam
Interior Seal Silicone Sealant
Exterior Seal Acrylic Caulk
Pro Seal Max Kitchen & Bath
Pro Seal Max Window & Door
Supreme Silicone Window & Door Sealant
Advanced Silicone 2® Window & Door Sealant
All Purpose Silicone 1® Sealant
Paintable Silicone Supreme Window & Door Sealant
Siliconized Advanced Acrylic Window & Door Sealant
Siliconized Multi-Purpose Acrylic Window & Door Caulk
Seal & Fill Multi-Purpose Window & Door Caulk
Supreme Silicone Kitchen & Bath Sealant
Advanced Silicone 2® Kitchen & Bath Sealant
Tub & Tile Silicone 1® Sealant
Paintable Silicone Supreme Kitchen & Bath Sealant
Siliconized Advanced Acrylic Kitchen & Bath Sealant
Siliconized Multi-Purpose Acrylic Kitchen & Bath Caulk
Re-New
Painter’s Pro Quick Dry Siliconized Acrylic
Painter’s Pro Siliconized Acrylic Caulk
Painter’s Caulk
Gutter Silicone 2® Sealant
Concrete Silicone 2® Sealant
Metal Silicone 2® Sealant
Project Filter
  • location
    Insulating Foam
    Kitchen & Bath
    Paint Projects
    Specialty
    Windows, Doors, Siding & Trim
  • project-type
    All
    Window & Door
    Kitchen & Bath
    Seal & Paint
    Insulating Foam
    Specialty
  • color
    Almond
    Black
    Brown
    Clear
    Light Gray
    Metallic Gray
    White
  • formulas
    Acrylic
    Insulating Foams
    Paintable Silicone
    Silicone
    Siliconized Acrylic
  • performance
    Not Paintable
    Paintable
  • product-type
    Adhesives
    Caulks & Sealants
    Specialty Products
  • application
    Can
    Cartridge
    Pen
    Squeeze Tube
  • gap_width
    Gaps 1"-3"
    Gaps less than 1"
    Window & Door
  • humidity-level
    Extensive Humidity
    Normal Humidity
  • product_finder
    Pathway 1
    Pathway 2
    Pathway 3
    Pathway 4
    Pathway 5
    Pathway 6
    Pathway 7

Contact Form

Seal up your outlets, stop sneaky drafts, and save on energy costs today! How to eliminate sneaky drafts with electrical outlet insulation seal

Note: This DIY article is provided as a general guide only and is not intended to take the place of product-specific installation procedures; always follow applicable manufacturers’ instructions. Depending on your home’s age and condition, location within the home, and other potential factors, repairs and/or upgrades or other services may be necessary prior to the beginning and/or completion of your project that may involve the services of a home improvement professional. This article does not include advice pertaining to local building codes and/or any related inspections.

Remember when your heart didn’t skip a beat every time you saw the electricity bill? What if you learned that one of the reasons for your expensive energy bills is the lack of an electrical outlet insulation seal in your home? Read on to learn how sealing a few outlets can keep money in your pocket and make your home comfortable (among other benefits).

The most effective outlet insulation method is applying sealant to the gaps and cracks. However, you may also use electrical outlet gasket seals.

Understanding outlet insulation: The problem

You’re probably wondering, “What’s with all the fuss surrounding a few light switches and electrical sockets?” and “Can you make any significant savings from simply insulating these small gaps on the wall?” To properly understand the answers to these questions, you must first understand the problems of allowing sneaky drafts into your home.

Drafts and air leakage

Nothing beats the feeling of walking into your perfectly cooled home during a summer heat wave (or coming home to a warm and toasty home on a snow day). It’s a convenience you know all too well, and one you might already be paying a pretty penny to enjoy. Therefore, it goes without saying that any unwanted drafts will negatively impact your comfort at home.

Whether it’s a stream of hot air in the middle of summer or a chilly draft during winter, drafts are unwelcome. This is one of the reasons why houses without electrical outlet insulation can prove to be inhospitable.

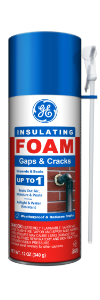
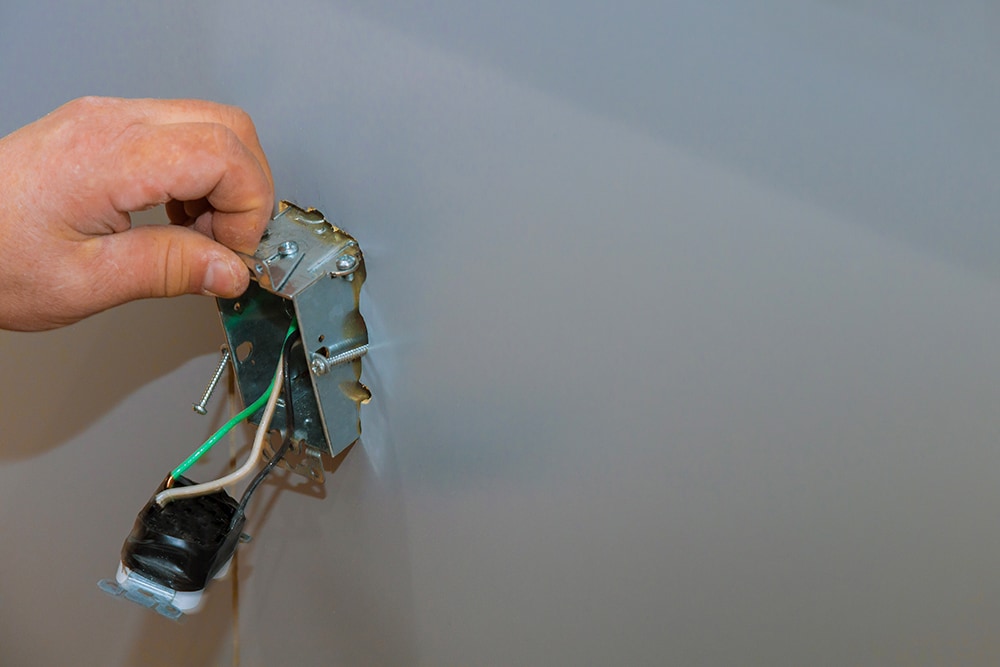
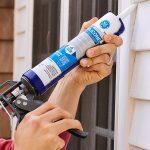
Spray foam is applied around the electrical box (not inside) to ensure an airtight seal that ensures your HVAC unit doesn’t work overtime to achieve optimum temperature.

Increased energy costs

When the conversation around energy costs switches to opportunity cost, there is a lot you can do with the money you might be paying to keep your home’s temperature just right. The drafts and air leakage mentioned earlier will probably have you cranking up the AC, which means an added workload on your HVAC system that, in turn, translates to more expensive energy costs.

Simply put, you don’t have to pay more than you have to just to keep your indoor temperatures within the optimum range, and investing in a high-quality insulating foam for outlet insulation could be the first step toward realizing significant savings.

Loss of home comfort

The financial impact might be what hurts the most, but sweating into your eyes in the middle of a heatwave could be the last straw that makes you look for electrical outlet insulation. Rooms without proper insulation might feel warmer in the summer and cooler in the winter, making it difficult to achieve an ideal temperature.

Why proper insulation for outlets is critical

Once you understand the problems associated with leaky electrical outlets, you become aware of the benefits of investing in a quality seal to help solve your draft problem. Outlet insulation works hand in hand with your wall’s insulation to create an effective thermal barrier.

Proper insulation for outlets enables you to ensure your home attains optimum temperature ranges regardless of the prevailing weather conditions in the most efficient way possible. It also doesn’t hurt that you get to save a bit of money along the way.

Choosing the right electrical outlet insulation seal

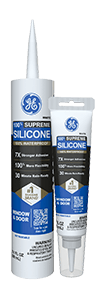
In the world of construction, not all seals are made equal. Investing in premium quality for your sealing needs ensures you don’t have to carry out maintenance every time the wind blows. If having a sealant that lasts as long as the surfaces it is bonded to sounds like something you’d like, then keep reading to understand why GE sealants are exactly what you need.
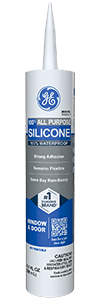
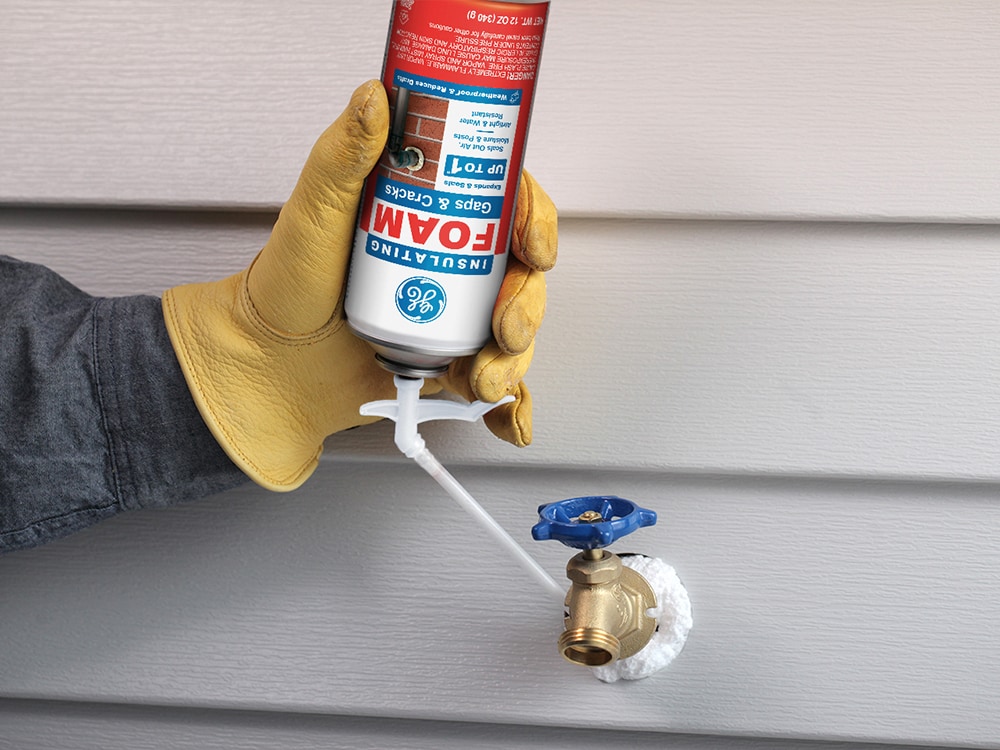
Weatherproofing

Your electrical outlets sneak in drafts and air leaks because they open a line of communication between the indoor and outdoor spaces. Consequently, when choosing a seal to plug the leak, you should choose one that effectively forms a barrier between the two spaces.

Cutting corners is not a great idea when working with electrical outlets. High-quality spray foam sealant is UV-resistant and can withstand a wide temperature range, ensuring it retains its integrity through the seasons.

Flexibility

An outlet insulator must expand to fill the space, preventing the draft from flowing into your home. High-quality spray foam will enable you to do just that while allowing you to rest assured that your repair project will not be subjected to warping or bowing. Flexibility also guarantees that the adhesive moves with the surface it is bound to, ensuring a long-lasting seal.

Pest control

Yes, the sealant’s barrier will keep draft and moisture out of your home. But what about the ants you might have seen surrounding the sugar tin in your kitchen? Can it help with that? The answer is a resounding yes! High-quality insulating foam ensures pests remain outside.

Ease of use

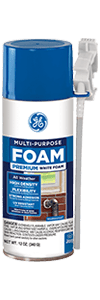
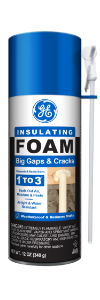
Some people would prefer to take the easier way out and install gaskets around the electrical outlet to keep out the draft. While this might be cheaper and less painstaking, applying an insulation seal offers a more permanent and effective solution. GE offers an easy-to-use option for sealing your home — spray foam. Shake the can, attach the trigger, remove the safety cap, and begin spraying.

Longevity

What’s worse than having to repair your outlet insulator? Having to do it twice. When choosing an electrical outlet insulation seal, you should select one that guarantees long-term results. The added flexibility of GE insulating foams and their chemical formula are all geared toward increasing the durability of the products.

Electrical outlet insulation is the first step toward realizing an energy-efficient home. An outlet insulator works in tandem with the wall’s insulation to maintain a steady indoor and outdoor temperature in your home. Choosing a suitable seal for the job is just as important as identifying the source of the drafts.

To find GE products near you, check out our Where to Buy page.

FAQs

Here are some frequently asked questions about electrical outlet insulation seals.

How do you stop cold air from entering through electrical outlets?

One effective way to stop cold air from entering through electrical outlets is to seal them with spray foam.

Do electrical outlet seals work?

Electrical outlet seals work, but the gasket may wear down over time or be inappropriate for the outlet. Applying a seal is the most effective way to keep out the draft.

Contact Form

Use our ultimate guide for choosing the best caulking gun How to choose the best caulking gun

Note: This DIY article is provided as a general guide only and is not intended to take the place of product-specific installation procedures; always follow applicable manufacturers’ instructions. Depending on your home’s age and condition, location within the home, and other potential factors, repairs and/or upgrades or other services may be necessary prior to the beginning and/or completion of your project that may involve the services of a home improvement professional. This article does not include advice pertaining to local building codes and/or any related inspections.

There are cheap and less reliable versions of a caulking gun. In this article, you learn how to choose the best silicone caulking gun for your project and tips on turning your caulking gun into a helpful tool.

There is no significant difference between a caulking gun and a silicone gun.

Understanding the difference between caulking guns vs. silicone guns

Dispensing silicone sealant or caulk barely sounds like rocket science. You may have never bothered to give your caulking gun a second glance after placing it in the toolbox, but is there a difference between caulking guns and silicone caulking guns?

Sometimes referred to as a caulking silicone gun, a caulking gun, a silicone caulking gun, and even a silicone dispenser, all these terms refer to the same thing. Generally speaking, the distinction between caulk and silicone sealant lies more in the chemical and physical properties of the adhesives than in the tool used to dispense them.

However, it is essential to understand that some caulking guns are designed specifically for dispensing caulk or sealant by varying some key features discussed later in this article.

What are the different types of caulking guns?

The next step in understanding how to use a caulking gun silicone dispenser is clearly distinguishing between the different types available on the market. Caulking guns can be grouped into three broad categories, depending on the mechanism involved in delivering the energy required to kickstart the extrusion of the adhesive.

Manual caulking guns

With home improvement projects, the term manual might not be your favorite prefix, but it is often the most affordable. A manual caulking gun relies on manual input (pressure from your hands) to push against the plunger and begin extrusion of sealant.

Manual caulking guns are the most common type available, owing largely to their DIY-friendly nature. The manual configuration comes in the following forms:

Ratchet rod caulking guns

The ratchet rod caulking gun harbors a basic mechanism that causes an incremental movement of the plunger with each squeeze of the trigger. The technology used in ratchet rod caulking guns is relatively old, with significant drawbacks like irregular flow. These guns also have a small thrust ratio of 5:1, making pushing out the sealant harder.

Smooth rod or dripless caulking guns

Smooth rod caulking guns are a technological improvement of the ratchet rod with a smooth rod that allows for consistent pressure when squeezing the trigger, consequently facilitating smoother application. They also boast of a larger thrust ratio of 10:1.

Battery-powered caulking guns

Battery-powered caulking guns have a motorized unit that delivers a smooth and uniform flow with minimal effort. If you’ve had to caulk a project for hours, you will appreciate the extra help from the battery. Adjustable speeds may also be helpful when working on projects requiring high precision.

Pneumatic-powered caulking guns

You might benefit from a pneumatic-powered caulking gun for large-scale professional projects where time, efficiency, and precision are the determining factors. These caulking gun silicone dispensers rely on pressure from compressed air to push against the plunger. They offer the highest consistency level and can easily handle thicker sealants, making them the best for silicone.

Features to look out for in a caulking gun

Understanding the different types of caulking guns is the first step to choosing the best silicone gun for the job. You might have already noticed that a manual caulking gun should be your preferred choice for smaller projects and when you are on a budget. For labor-intensive projects, battery-powered caulking guns offer more efficiency.

For professional and large-scale operations, pneumatic caulking guns reign supreme. However, several other features might influence your choice of a caulking gun.

Thrust ratio

Unless you’re at the gym lifting weights, no one likes having their muscles put to work. The thrust ratio defines the relationship between the force produced in the tube and the pressure applied to the trigger. For example, a 10:1 thrust ratio means that 10 pounds of pressure are generated from a single pound of pressure applied on the trigger. The higher the thrust ratio, the easier it is to maintain a consistent bead.

Built-in cutter and puncture tool

Running around looking for a sharp object to open the sealant is far from convenient. Choose a caulking gun with a thin poker rod to ensure you save time when puncturing the inner foil covering the sealant. A built-in cutter can help you snip the tip of the silicone tube.

Comfortable grip and ergonomic design

The longer you work with caulking guns, the more appreciation you will have for a lightweight and comfortable one. Choose a caulking gun with an ergonomic and comfortable grip (rubberized cushions can be a godsend) to facilitate extended use.

How to use a caulking gun silicone dispenser

Choosing the best caulking gun is only half of the puzzle. Here are steps to help you properly use your caulking gun for your DIY projects.

  1. Prepare the surface

    Before applying a new layer of sealant to a surface, clear the surface of dirt, debris, or any old sealant, which might affect its bonding strength.

  2. Cut the tip of the silicone tube

    As mentioned, choosing a caulking gun with a built-in cutter saves you time and energy. However, as a pro tip, for a smoother and more consistent bead flow, you should consider using a utility knife to cut the tip at a 45-degree angle. The 90-degree angle from the cutting tool might be quick but could result in irregular flow.

    Choose the size of the cut according to the size of the gap you are trying to seal.

  3. Load the silicone tube into the gun and start caulking

    Pierce the inner foil seal of the silicone tube, then insert it into the gun, and ensure the back end of the tube is pressed firmly against the plunger. Once complete, the only thing holding you back from a smooth bead is the squeeze of a trigger.

From ease of use to professional finishes, there are many reasons to pick out the best possible caulking gun. The type, thrust ratio, built-in features, and comfort are some features to look for when choosing a caulking gun.

To find GE products near you, check out our Where to Buy page.

FAQs

Is there a difference in caulking guns? 

Several types of caulking guns are available on the market, and they can be grouped into several broad categories depending on the means of delivering pressure or the corresponding applicator.

What is the best caulking gun ratio for silicone? 

The best ratio to use when applying silicone sealant using a caulking gun is 10:1

Are expensive caulk guns worth it? 

Caulk guns with additional features tend to cost more. Homeowners and professionals should strongly consider investing in a good caulking gun that will suit their needs.

Contact Form

Learn how to seal that tricky copper or PVC pipe like a pro! How to seal a leaking pipe from copper to PVC

Note: This DIY article is provided as a general guide only and is not intended to take the place of product-specific installation procedures; always follow applicable manufacturers’ instructions. Depending on your home’s age and condition, location within the home, and other potential factors, repairs and/or upgrades or other services may be necessary prior to the beginning and/or completion of your project that may involve the services of a home improvement professional. This article does not include advice pertaining to local building codes and/or any related inspections.

Whether it’s rust, buckling, or mold, water damage is an eyesore and a harbinger of serious repair and maintenance costs in the future. Before the floodgates open and wash away your hard-earned money, you should consider learning how to seal a leaking pipe. This article explores some DIY-friendly ways to address leaks and the different types of pipes you may expect to find in your plumbing network.

For large defects on any type of pipe, it would be best to first cut out the damaged section before beginning repairs.

How to seal a leaking pipe: Understanding pipe types

Through the ages, the human race has advanced water delivery systems from primitive clay pipes (in ancient Greece) to cast iron, terra cotta, PVC, copper, galvanized steel, and other materials in modern times. While the principle remains the same, different pipes have been developed to meet your plumbing needs, with some being more efficient than others.

Just as there are many functions of pipes in a plumbing network (from directing sewage to transporting water), a variety of pipes are designed to meet each specific situation. Below are some of the most common pipes you may encounter on your journey to answering the question “How to seal a plastic pipe.”

PVC pipes

Where you’ll find plumbing, you’ll most definitely find PVC pipes. The popularity of PVC pipes stems directly from the benefits they have to offer.  A staple in the kitchen and bathroom, polyvinyl chloride pipes (famously abbreviated as PVC) are more plastic than metal in nature and, therefore, have a better weight-to-functionality ratio.

This makes them less expensive to transport, install, and repair. Additionally, PVC remains immune to the problems that plague metallic pipes, such as rust and corrosion that may poison water delivered to your home. The inner lumen of PVC pipes is also incredibly smooth, preventing the accumulation of material that may cause blockages.

Due to their non-biodegradable nature, PVC pipes may outlast your home, making them perfect for long-term use and situations where high pressure is expected, such as with the main line.

Disadvantages of PVC

They might be durable, but PVC pipes are far from indestructible. Some of the drawbacks associated with PVC pipe use include:

  • Introduction of microscopic polyvinyl chloride residues into circulation (these have been known to affect cardiovascular, neurological, and respiratory systems)
  • Susceptibility to shatter and compressional forces
  • Reduced functionality in hot conditions

How to seal PVC pipes to avoid leaks

Proper installation and sealing of PVC pipes help ensure a longer lifespan of the plumbing network. Best practices when sealing PVC pipes include using PVC primer and cement. It would also help to use thread sealant around the male threads (the one with ridges) to ensure a tight fit around the connection. Thread sealant fills any gaps and cracks to avoid leaks.

In high-pressure systems, an additional coating of high-quality silicone sealant across the joints and connections can confer an added layer of protection on the pipe, ensuring leaks do not develop along the lines of weakness.

How to seal a PVC pipe leak

Fixing a leak on a PVC pipe is a relatively straightforward and DIY-friendly process. The complexity of the repair process depends on the size of the leak. You should use a repair kit with a rubber patch and a clamp for small leaks. For larger leaks, you may have to cut out the damaged part and install push-fit connections using a process similar to the abovementioned installation process.

Once the leak is patched up, apply a waterproof silicone sealant around the patchwork or new connections before testing the new seal.

Copper pipes

Copper has been an excellent choice for plumbing solutions for decades, and for good reason. Copper performs well under high-pressure conditions and can adequately deliver water in both extremes of temperatures, excelling in hot and cold conditions. The obvious candidate is a copper pipe when you want to maintain your water quality.

Disadvantages of copper pipes

An expected hurdle with using a precious metal for plumbing is that it is expensive to install, maintain, and replace. Metals are not known for their flexibility, and copper is more rigid than PVC, making it an inferior choice when flexibility is more important.

How to seal copper pipes to avoid leaks

Unlike PVC and plastic pipes, copper pipes are usually installed through a soldering or sweating process. However, when this is unavailable, or you prefer a less permanent fix, you may use compression fittings (including a specialized ring and nut) to create a watertight seal. You should watch out for corrosion in copper pipes, especially when dealing with water of extreme pH.

To combat chemical corrosion, consider installing dielectric unions when connecting copper to other metals with more or less reactivity.

How to seal a copper pipe leak

Copper pipe leaks are more strenuous to seal than plastic and PVC pipes. The leaks tend to occur around joints, pinholes, and seams but may occur in the middle of the pipe (which almost always requires cutting out the damaged part and replacing it with a slip coupling). To fix the leak, you may use clamps, soldering, or compression fittings to restore the pipe’s integrity.

As always, you should finish with a generous coating of waterproof silicone sealant around the joints for extra leak protection.

Plastic pipes

Plastic pipes come in all shapes and sizes. However, the most widely used plastic pipes include:

  • PEX (Cross-linked polyethylene)
  • CPVC (Chlorinated polyvinylchloride)
  • ABS (Acrylonitrile butadiene styrene)

PEX is an affordable plastic pipe that is similar to PVC in many ways with the added advantage of being more flexible. This feature makes it an excellent choice when weaving through walls, crawl spaces, attics, and other tight spaces.

ABS pipes are also similar to PVC pipes but have added resistance to colder temperatures, making them the preferred choice for vents and drain lines. Their black color easily identifies them. CPVC, as the name suggests, is a special type of PVC piping designed for hot and cold pipes.

How to seal a plastic pipe

Sealing a plastic pipe is exactly as described for PVC pipes. However, unlike PVC, plastic pipes require special connectors to remain leak-free during service. For CPVC and ABS, you should apply primer and solvent cement. For PEX, shark-bite fittings (a type of push-to-connect fitting devoid of the need for soldering or glue during installation) are the way to go, as they negate the need for complex tools or expertise.

How to use silicone sealant to seal and fix leaky pipes

Caulk or sealant? This question might cause debate in other projects, but silicone sealant is the only right answer for leaky pipes. Caulk is rigid and inadequate at forming a barrier against moisture, a must-have for plumbing. With that out of the way, here’s how to properly apply silicone sealant to leaky pipes:

  • Turn off the water supply
  • Clean the area to apply sealant (this may require scraping off oxidation and corrosion for metallic pipes)
  • Apply the silicone sealant (for patchwork, squeeze the sealant over the area, ensuring it covers both the affected and unaffected areas. For joints, apply a uniform bead around the entire length of the joint)
  • Smoothen the excess sealant with a gloved finger
  • Let the sealant cure
  • Test the repair

Different types of pipes require different approaches to ensure they remain leak-free, whether during installation or after a leak occurs during its lifetime. Sealing the pipe could mean the difference between extended use and repetitive repairs. With silicone sealant, a little goes a long way. Sealants’ waterproof and weatherproof capabilities make them an excellent barrier to keep water on the right side of the pipe.

To find GE products near you, check out our Where to Buy page.

Contact Form

Let’s air-seal the electrical boxes, outlets, and wiring in your home. 12 tips for air-sealing electrical boxes, outlets, and wiring

Note: This DIY article is provided as a general guide only and is not intended to take the place of product-specific installation procedures; always follow applicable manufacturers’ instructions. Depending on your home’s age and condition, location within the home, and other potential factors, repairs and/or upgrades or other services may be necessary prior to the beginning and/or completion of your project that may involve the services of a home improvement professional. This article does not include advice pertaining to local building codes and/or any related inspections.

This blog provides guidance on the best practices for air-sealing electrical boxes, outlining key tips and recommending reliable products suited for the job. With the right materials and techniques, you can effectively air-seal electrical boxes and minimize air leakage.

Common air leakage issues in electrical boxes

Air leakage from electrical boxes, outlets, and wiring is a common cause of energy loss in commercial buildings. Air leaks from these areas can significantly drive up heating and cooling costs, and compromise the integrity of fire-rated assemblies. As such, air-sealing electrical boxes and related assemblies is an important part of maintaining efficiency and safety in commercial buildings.

Air leaks often occur around the edges of electrical assembly boxes, where gaps in the drywall or improper sealing allow air to flow through. This kind of leak is particularly problematic in exterior walls, ceilings, and high-traffic areas where air pressure differentials can exacerbate the leakage.

Also, leaks can impact indoor air quality by allowing contaminants from outside or unconditioned spaces to enter inhabited parts of the building. Understanding these common issues allows professionals to take proactive steps in addressing air leaks.

Leaks can impact indoor air quality by allowing contaminants from outside or unconditioned spaces to enter inhabited parts of the building.

Tips for air-sealing electrical boxes

Once you’ve identified potential air leaks in your building, follow these steps to ensure you apply effective seals.

  1. Choose the right materials

    Selecting the appropriate materials is key to effectively air-sealing electrical boxes. Various products are available, each suited for different scenarios. Foams are commonly used for sealing gaps around electrical boxes. For small gaps, we recommend a high-quality insulating foam like Gaps & Cracks. This foam provides excellent durability and adheres well to both electrical boxes and surrounding drywall. Additionally, Gaps & Cracks offers a 30-minute rain-ready formula and 10-year mold-free product protection.

    For larger gaps or areas where more expansion is needed, low-expanding spray foam like Big Gaps & Cracks is an ideal option. It effectively fills voids without exerting too much pressure on the surrounding materials, maintaining an airtight seal.

  2. Prepare surfaces

    Begin by cleaning the surface around the electrical box, and remove dust, debris, and any old sealants or foams to allow proper adhesion of the new foam.

  3. Tape for precision

    Apply painter’s tape around the edges of the area to be sealed. Tape helps create cleaner lines and prevents excess foam from spreading onto unintended surfaces.

  4. Apply in dry conditions

    In commercial buildings, many of the electrical boxes and assemblies you’ll need to seal will be on the exterior or exposed to areas without climate control. As moisture prevents proper adhesion, you’ll want to either wait for dry weather or cover working areas in advance.

  5. Apply evenly

    Apply the foam evenly to provide consistent coverage without gaps.

  6. Control foam application

    When using low-expansion foam, apply slowly and observe the expansion rate. Applying too much expanding foam in tight areas causes over-expansion and can distort the seal or damage surrounding materials. If you’re unfamiliar with expanding foams, apply a small bead to a test surface and note its expansion over a few minutes.

  7. Trim excess foam

    After it has fully cured, use a utility knife to cut off any excess foam that has expanded beyond the gap. You can also use sandpaper to smooth it out if necessary.

  8. Allow sufficient curing time

    Follow manufacturer instructions for curing times. Many foams have both a drying time — after the surface of the material is set — and a longer curing time for the interior material to harden. Allow the foam to set fully — typically 24-48 hours — before exposing it to environmental factors like temperature changes or moisture.

  9. Seal large gaps in layers

    For larger gaps, apply foam in layers, allowing each layer to partially cure before applying the next.

  10. Take care to air-seal ceiling electrical boxes

    Air-sealing ceiling electrical boxes are more challenging compared to wall boxes because they are often surrounded by insulation or located in attic spaces. Any air leaks here can bypass the building’s insulation, allowing conditioned air to escape directly into unconditioned spaces​. Additionally, gaps in ceiling electrical boxes contribute to the stack effect — the natural movement of heat into higher areas — in multistory buildings.

  11. Use expanding foam for sealing around wiring housings

    Before sealing wiring housings, ensure the wires are neatly bundled together. Apply expanding foam around the wiring penetrations to create an airtight and insulating barrier. As the foam expands, it will fill gaps effectively and provide insulation. Once cured, it will maintain its shape, providing a long-lasting seal that also offers some flexibility if the wires shift slightly over time. Just be careful to avoid overfilling, as the foam expands considerably.

  12. Enhance outlet seals with airtight outlet covers

    For added protection, consider using airtight outlet covers designed to minimize airflow through outlets, especially in high-traffic or high-exposure areas.

    A photo of ceiling electrical boxes in a commercial setting

GE Sealants offers a wide range of insulating foams for effectively air-sealing electrical boxes, outlets, and wiring. Whether you’re addressing climate challenges or the stack effect in taller buildings, GE’s range of foams provides long-lasting protection for your installations. Explore the right tools for your air-sealing needs with GE Sealants for dependable results.

To get GE Sealants’ products for your commercial building, visit these fine retailers.

Contact Form

Understand the importance of window weep holes Everything you need to know about window weep holes before sealing your windows

Note: This DIY article is provided as a general guide only and is not intended to take the place of product-specific installation procedures; always follow applicable manufacturers’ instructions. Depending on your home’s age and condition, location within the home, and other potential factors, repairs and/or upgrades or other services may be necessary prior to the beginning and/or completion of your project that may involve the services of a home improvement professional. This article does not include advice pertaining to local building codes and/or any related inspections.

As a homeowner, it is always in your best interest to seal any gaps or cracks to keep moisture, drafts, and pests away. However, there is an exception to the rule. In this article, we let you know how caulking specifically installed holes (weep holes) in your windows may be the start of costly maintenance and repairs.

Read on to understand everything concerning window weep holes before sealing your windows.

Window weep holes allow window frames to drain water and moisture and, therefore, should not be blocked when sealing windows.


What are weep holes in windows?

Window weep holes are a clever addition to the normal window architecture. As the name suggests, they can be solitary or have multiple openings on the face of the window that vary in shape, size, and location. Typically located on the bottom part of windows, they are commonplace in sliding windows, double-hung windows, and other windows with sashes that can collect water.

Window weep holes drain the window’s frame of moisture and water that may accumulate within the structure. If you live in an area that experiences heavy snowfall, rain, or humidity, you should expect a weep hole in the structure of your window.

Why you shouldn’t cover weep holes in windows

Since weep holes drain your window’s frame of built-up moisture, what happens when you accidentally apply a sealant over the weep hole? To fully understand the implications of this action, you should familiarize yourself with the effects of stagnant water on surfaces such as metal, vinyl, steel, aluminum, or fiberglass.

Here are some of the consequences of intentionally or accidentally covering window weep holes:

Water damage

Trapped water poses a significant threat to the structural components of your window. Whether by corrosive action, rotting, or rusting, water can completely alter the chemical and structural nature of the materials in your window making them inefficient. Additionally, water damage may spread to the surrounding walls.

Condensation issues

Weep holes in windows provide an avenue for water to safely leave the window’s frame. Without this clear path, the water remains trapped. Consequently, your views may be obstructed by foggy windows on a hot day as condensation occurs.

Reduced window lifespan

Almost everyone attempts to either save their hard-earned money or increase the comfort they experience from their home. With blocked window weep holes, you may miss out on both thanks to the water damage incurred on your windows. This might mean a shorter period between repairs and replacements for your windows that cumulatively become expensive.

How to clean weep holes in windows

Weep holes in windows require minimal repair and maintenance during their lifespan and often last just as long as the window itself. However, they may occasionally become clogged by dirt and debris. To clean your window weep hole, you may insert a flat-head screwdriver into the openings and in sweeping movements run side-to-side to dislodge any obstructions.

You must be delicate during the cleaning process as any widening of the weep holes may reverse their function from being outlets to being inlets of water and moisture further contributing to the damage they were intended to solve.

How to properly seal a window without blocking the weep holes

You know what weep holes are, you know what they do, and now it’s time to find out how to avoid blocking them when applying sealant. Sealing your windows remains an imperative undertaking to ensure your home remains moisture, draft, and pest-free. Below is the best approach to ensure none of your maintenance work digs deeper into your pockets.

Identify the location of the weep holes

Before you begin any repair or maintenance work on your windows, you should first attempt to identify the location of the weep holes. As mentioned earlier, they are typically located on the face side of the window along the bottom margin. Different manufacturers may orient them differently.

Sometimes weep holes may be hidden from sight in pursuit of aesthetics.

Clean the surfaces

For maximum bonding strength, you should ensure that the surfaces that come in contact with the sealant are free from dirt and debris. While cleaning these surfaces, you should also spare some time and attention to cleaning the weep holes. This will ensure there is no additional maintenance work once you seal your window.

Apply the sealant

Once the surfaces are clean, the next step is to apply the sealant. Choosing the appropriate material for this step is essential for long-term results. For small gaps, prioritize sealant over spray foam. Do not use caulk for exterior surfaces that may be exposed to the elements. High-quality sealants provide a waterproof and weatherproof defensive barrier that effectively locks out moisture, drafts, and pests.

Using a caulking gun, apply the sealant on the primed surface and allow it to dry and cure to achieve maximum bonding strength. After application, you can smooth out the sealant with a gloved finger.

Install weep hole covers when possible

Some manufacturers provide weep-hole covers for their window weep holes. When available, you should install them over the weep holes while ensuring they remain porous to moisture.

Carry out regular maintenance

Don’t just turn a blind eye to your window and its weep holes once you seal it. It would be best to regularly inspect the window for gaps or cracks while monitoring for signs of damage (evidenced by peeling). You should also ensure the weep holes are free from obstruction. Early detection and repair guarantee a longer lifespan for your window.

Sealing your window is an important step toward achieving the pinnacle of comfort and energy efficiency. When done right, the appropriate sealant grants your window longevity and durability. However, caution should be taken to avoid blocking window weep holes to avoid inadvertently causing more harm than good.

To find GE products near you, check out our Where to Buy page.

FAQs

Below are some of the frequently asked questions concerning weep holes in windows.

Do all windows have weep holes?

Not all windows have weep holes. Weep holes are primarily found in metal and vinyl windows, and may be missing in other window structures.

What happens when I accidentally block my window weep holes?

Blocking your window weep holes predisposes the window structure to water damage, rust, and corrosion ultimately reducing your window’s lifespan.

Can I cover weep holes to keep pests away?

Some weep holes are fitted with special porous covers to retain their drainage capabilities while preventing the entry of pests.

Contact Form

Let’s find out how to weatherize your home to avoid long-term damage. How to weatherize your home to avoid long-term damage

Note: This DIY article is provided as a general guide only and is not intended to take the place of product-specific installation procedures; always follow applicable manufacturers’ instructions. Depending on your home’s age and condition, location within the home, and other potential factors, repairs and/or upgrades or other services may be necessary prior to the beginning and/or completion of your project that may involve the services of a home improvement professional. This article does not include advice pertaining to local building codes and/or any related inspections.

Sealing your home improves energy efficiency and also protects against water damage, pests, and air leaks. These preventative measures reduce the risk of insurance claims and costly damage. This blog explores how these improvements can help you weatherize your home to avoid long-term damage.

The importance of weatherizing your home to avoid long-term damage

Sealing your home is an effective method for avoiding long-term costly damage. Properly sealing your home with products like GE silicone sealants and insulating foams helps protect against common issues such as:

  • Water damage
  • Mold
  • Air leaks

These problems frequently lead to expensive repairs. However, by taking preventative measures to seal your home, you can reduce the likelihood of needing repairs due to weather or structural damage.

In particular, waterproofing can prevent major structural issues, while insulating foam helps maintain energy efficiency. These efforts both protect your home and help keep your home well-maintained and proactively protected.

Photo of gap and crack sealing in a home with sealants and insulating foam

These problems frequently lead to expensive repairs. However, by taking preventative measures to seal your home, you can reduce the likelihood of needing repairs due to weather or structural damage.

GE products for weatherizing your home: sealants and insulating foam

Using GE products like Advanced Silicone 2® Window & Door Sealant and Gaps & Cracks insulating foam is an effective way to weatherize your home against costly damage and repairs.

Additionally, GE insulating foam plays a key role in improving energy efficiency by preventing air leaks, which can significantly affect heating and cooling costs in your home.

GE Sealants products enhance the home’s durability and reduce risks such as flooding, water damage, and insulation issues. By investing in these high-quality materials, you protect your home and reduce your chances of incurring costly repairs.

Steps for weatherizing your home

Sealing your home can be a straightforward DIY project. It not only improves energy efficiency in your house, but it also helps you avoid costly repairs. Follow these steps to enhance your home’s protection and make it less vulnerable to damage.

  • Inspect the home’s exterior: Walk around your home and look for cracks, gaps, or holes in the foundation, walls, windows, and doors that could allow water or pests inside.
  • Choose the right sealant: Select a high-quality weatherproofing sealant appropriate for the material and area you are sealing — e.g., concrete, wood, or brick.
  • Clean the area: Before applying any sealant, make sure the surface is clean and dry. Dirt, debris, or moisture can affect the sealant’s ability to adhere properly.
  • Seal windows and doors: Apply the sealant around windows and door frames, paying close attention to gaps between the frame and wall. Insulating foam can also be used to improve energy efficiency.
  • Seal cracks in the foundation: Use an outdoor weatherproofing sealant to fill any visible cracks in the foundation, which can prevent water infiltration and subsequent structural damage.
  • Check roof flashing: Ensure that the flashing around your roof, chimneys, and vents is properly sealed to prevent leaks.
  • Seal attic and basement: Focus on insulating and sealing attics and basements to prevent air leaks, water damage, and pest intrusion.
  • Test for air leaks: Use a smoke pencil or incense stick near windows and doors to identify areas where air might be escaping. Seal the gaps you find as needed.

Benefits of weatherproofing

After sealing your home, it’s important to approach your insurance company to see if they will adjust your rates based on your improvements. Start by gathering documentation — including receipts for materials used, such as weatherproofing sealants or insulating foam, and photos of completed work. Reach out to your insurer and explain how these improvements have reduced your home’s risk of water damage, energy inefficiency, or structural issues. Ask if these upgrades qualify your home for a discount or rate reduction. Many insurance companies regularly offer discounts for proactive home maintenance to reduce potential claims.

Other ways to weatherize your home

In addition to sealing your home, there are other ways to weatherize your home. For example, you could:

  • Install fire-resistant roofing
  • Reinforce windows with storm shutters
  • Upgrade your electrical and plumbing systems

These upgrades improve your home’s resilience and make your property a lower liability for insurance companies. Adding a home security system, smoke detectors, and carbon monoxide detectors are also common steps that enhance safety and reduce the likelihood of damage.

Protect and weatherize your home with GE sealants for weatherproofing and insulation. GE sealants help you reduce the risk of water damage and improve energy efficiency in your home. Invest in your home’s longevity with GE solutions and ensure long-term savings.

To get GE Sealants’ products for your home improvement project, visit these fine retailers.

Contact Form

High-quality plumbing sealant is important when delivering exceptional finishes and impressing customers. Choosing plumbing sealant that impresses your customers

Advertising might win you customers, but excellent work is how you keep them. The right plumbing sealant could move the customer satisfaction meter in your favor, while the wrong one could cause your bank figures to dwindle. This article guides you on what works best for most situations, whether for routine maintenance or new installations.

Strength, flexibility, and durability are important factors to consider when gauging a project’s best plumbing sealant.

What to look for in a plumbing sealant

There are a variety of plumbing silicone sealants available for each project. While there might not be a blueprint for selecting an appropriate plumber sealant, there are a few key points to remember.

Drying time

Drying time dictates the project’s trajectory in several ways. A quick dry time sounds convenient, and it would save you precious time when fixing a leak or sealing around a faucet, but this means you have less time to make adjustments when necessary.

Where project completion time is the highest priority, choose a quick drying and curing plumbing sealant. When precision is more important, the extra seconds provided by a moderately curing sealant can go a long way in ensuring a professional finish.

Flexibility

Plumbing structures are exposed to variations in temperature and pressure that cause them to expand and contract. These shifts may cause widening of gaps and cracks that may exacerbate any preexisting complications. Excellent flexibility in a silicone sealant allows the sealant to shift with the underlying structures without cracking or breaking down over time.

Silicone sealants, unlike acrylic caulk, have superior flexibility and confer strength and durability to any project.

Lifespan

When choosing a plumbing sealant for leaks (such as around a faucet), it would be best to ensure the sealant will last longer than the surface it adheres to. A longer lifespan translates to fewer callbacks and happier clients, which guarantees you remain in business.

Adhesion to different materials

As a professional, you are bound to work with a variety of materials for different clients and projects. Whether you’re working with metal, plastic, vinyl, concrete, wood, or any other material, a versatile plumbing sealant will always guarantee you have the right tool for the job.

 Durability

Weatherproof, waterproof, and temperature-stability are some of the attributes to look out for when selecting a good plumbing sealant. Durability directly affects the overall lifespan of an installation or repair which similarly affects customer satisfaction.

A plumbing silicone sealant is engineered to withstand wide temperature fluctuations, working with extremely hot and cold temperatures characteristic of plumbing installations. In addition to thermal stability, good plumbing sealants have excellent moisture, mold, and mildew resistance.

Safety standards

Plumbing sealant is bound to interact with water meant for household or commercial use. A non-toxic sealant that is safe for potable water, therefore, has an edge over other sealants. Watch out for industry certifications and safety compliance to avoid legal implications for your projects.

An odorless plumber sealant also eases the application process by facilitating indoor use where ventilation may be inadequate.

Benefits of investing in a quality silicone sealant

There’s a lot to consider when picking out a worthy plumbing sealant for leaks but, so far, most of the benefits seem to be leaning toward your clients. Keeping your clients happy is important, but as in any business, you have to answer the question “What’s in it for you?”

The following section seeks to highlight some of the benefits of investing in a quality silicone sealant.

Repeated business and customer satisfaction

What’s better than a paying customer? A paying customer who comes back. Using high-quality plumbing sealant results in durable repairs and installations that translate to fewer callbacks and happier clients. Whenever the need for a reliable plumber arises, you can rest assured that your customers will have your name in mind. You might also benefit from referred clients.

Higher-quality jobs

Your competitors may settle for lower-quality plumber sealant, but investing in higher quality enables you to stand out. Additionally, a higher quality sealant enables precise application and more professional finishing ensuring your work is of the highest standard.

Easier application

High quality transcends the silicone sealant formula. Better-engineered nozzles, uniform consistency, and smooth flow are just some of the features that make high-quality sealant a joy to work with. For hard-to-reach areas and time-conscious projects, you’ll be glad you went the extra mile by getting a high-quality plumbing sealant.

The plumbing market is filled with several types of plumbing sealants with varying quality levels. Choosing the right one can prove to be a daunting task, even for the seasoned professional. However, our detailed guide allows you to start ahead of the curve when shopping for quality. There are a lot of benefits to investing in quality and both you and your clients can enjoy them considerably.

To find GE products near you, check out our Where to Buy page.

FAQs

Below are some frequently asked questions concerning plumbing sealants:

What is the best plumbing sealant for leaks?

The best plumbing sealant for leaks is silicone-based (avoid caulk). Silicone sealants offer durability and strength to any project without compromising on finishes.

How long does a plumbing sealant take to dry?

Curing and drying time vary among different types of plumbing sealants. Most sealants take 24 hours to dry. Refer to product specifications for more accuracy.

Is plumbing sealant safe for use in potable water systems?

Yes, many plumbing sealants are safe for use in potable water systems. However, refer to the product’s specifications for safety certifications.

Contact Form

Give your kitchen a stylish upgrade and protect it from water damage with our expert guide on backsplash installation and sealing. How to install a kitchen backsplash and seal it from water damage

Note: This DIY article is provided as a general guide only and is not intended to take the place of product-specific installation procedures; always follow applicable manufacturers’ instructions. Depending on your home’s age and condition, location within the home, and other potential factors, repairs and/or upgrades or other services may be necessary prior to the beginning and/or completion of your project that may involve the services of a home improvement professional. This article does not include advice pertaining to local building codes and/or any related inspections.

The kitchen backsplash is an integral part of the kitchen and your home. However, there is more than what meets the eye (literally) regarding this kitchen fixture. In this article, you will learn how to install a kitchen backsplash and seal it from water damage.

Sealant provides a physical barrier preventing moisture from seeping through and reaching the tiles and grout that make up your kitchen backsplash. Sealant should be applied after grout has been applied and allowed to cure.

How to install kitchen backsplash: Why it’s important

A kitchen backsplash serves more than gracing your eyes and livening up your kitchen space. It is no coincidence that the backsplash is present solely in areas where moisture is presumed to come into contact with the walls. Most backsplashes are made from stone, as the material is durable and has some significant water resistance.

However, over time, the stone may be degraded by long-standing water seeping through microscopic porous holes in the stone’s structure. It is worth noting that the backsplash appears faded once this occurs, and this process is irreversible. Consequently, the following are some of the reasons why it is essential to seal your backsplash.

Protection from water damage

Mold, mildew, and structural damage become your worst enemies once water sets on the tiles or grout in your backsplash. Sealant provides an extra layer of protection, preventing the insidious infiltration of water.

Protection from moisture

Another reason why the question “how to apply a backsplash” should always be followed by “with sealant” is that the sealant prevents moisture from getting under or behind the backsplash.

Easy Cleaning

You know how to put up a backsplash and understand what it means for your kitchen. But what are the benefits of backsplash? The answer lies in the ease of cleaning. Since no dirt or grime is getting into your tiles, it remains on the surface, making it easy to wipe down or clean (you don’t have to whip up a concoction of vinegar and baking soda to eliminate any odors).

Durability

Another reason why you should learn how to install a tile backsplash is the durability it offers to your kitchen. As mentioned earlier, water seeping through the backsplash may cause the growth of mold and mildew or interfere with the innate structure of the tiles. Sealant saves you from worrying about premature backsplash replacement costs.

How to install backsplash: Where sealant comes in

Depending on whether your backsplash was recently installed or has already lasted for a significant period since installation, the steps where the sealant is applicable vary.

How to install kitchen backsplash sealant around recently done tiles

If your kitchen backsplash has been recently tiled, let the grout cure before applying silicone sealant over the backsplash. On average, you may have to wait 24 hours before the backsplash is ready for the sealant. Before applying the sealant, you can brush off any grout haze that may be present using a cleaner and then apply the sealant.

The kitchen backsplash installation process is as follows:

  1. Surface preparation
  2. Adhesive application
  3. Tile installation
  4. Grout application
  5. Sealant application

How to install tile backsplash sealant for existing backsplash

Installing backsplash sealant on an existing kitchen backsplash is easier because you do not have to worry about allowing the grout to cure before applying the sealant. In this case, all you have to do is clean the surface of the backsplash and apply sealant around the tiles and grout.

To maintain safety, wear gloves and eye protection. You can also use your gloved finger to smoothen out the sealant.

How to properly clean and care for a backsplash

You know how to install a backsplash, but can you maintain it? Applying sealant is only half of the story when it comes to prolonging the lifespan of your sealant. Going the distance to improve the backsplash longevity will involve routinely carrying out the following procedures.

Regular Cleaning

Regularly cleaning the backsplash will slow down the natural degradation process of the sealant, allowing your backsplash to last longer. It would help if you prioritized using warm water and detergent when cleaning and avoided using abrasive brushes that may permanently etch the surface of the sealant and interfere with its integrity.

Use chemicals with neutral pH

Sealant is made from silicone compounds and, therefore, can be chemically altered by harsh detergents. When cleaning, you should avoid acidic or basic detergents, which may break down the sealant barrier over time.

Inspect and reapply sealant

Sealants may break down due to natural wear and tear processes, consequently exposing the tiles and grout to moisture that may cause water damage. Therefore, you must monitor the backsplash for evidence of these faults and reapply the sealant accordingly to maintain the barrier’s integrity.

Immediately clean up spills

Still, water against your backsplash may eventually seep through the tiles and grout past the sealant. To avoid any associated water damage, immediately clean up any spills and splashes that may settle on your backsplash.

Sealant bears the brunt of water damage that would otherwise affect the tiles and grout in your kitchen backsplash. This helps you avoid having to cough up thousands of dollars to replace a worn-out and faded kitchen backsplash.

Before the stains become permanent and your kitchen backsplash fades, you should consider applying high-quality sealant and enjoy the numerous benefits of a fully functional and easy-to-clean backsplash.

To find GE products near you, check out our Where to Buy page.

Contact Form

Let’s create a beautiful home! How to install wainscoting using acrylic caulk

Note: This DIY article is provided as a general guide only and is not intended to take the place of product-specific installation procedures; always follow applicable manufacturers’ instructions. Depending on your home’s age and condition, location within the home, and other potential factors, repairs and/or upgrades or other services may be necessary prior to the beginning and/or completion of your project that may involve the services of a home improvement professional. This article does not include advice pertaining to local building codes and/or any related inspections.

Learning how to install wainscoting can help you improve your home’s functionality and aesthetic appeal without breaking the bank. Our guide on how to do wainscoting details what you need to turn every room into an effortless masterpiece.

Supplies for installing wainscoting

Having the right supplies is the key to success when learning how to put up wainscoting. Here’s what you’ll need to give your home a stylish makeover with wainscoting panels.

  • Pencil
  • Tape measure
  • Stud finder
  • Caulk gun
  • Paintable caulk such as GE Sealants’ Painter’s Pro Siliconized Acrylic Caulk
  • Nail gun or hammer
  • Nails
  • Construction adhesive
  • Wood filler
  • Handsaw or circular saw

Your choice of caulk matters when learning how to do wainscoting. The best sealants create a permanent yet flexible bond that effortlessly accommodates joint movements from changing temperatures. Fully cured GE-branded caulk are paintable, crack-resistant seals that resist the growth of mold and mildew.

How to install wainscoting

Here’s how to install wainscoting panels step by step:

  1. Prepare the space by removing the base molding and painting the wall in the rooms where you wish to install wainscoting. It’s best to repair, paint, or apply wallpaper on the top part of the wall before hanging the wainscoting panels.
  2. Choose the desired height of the wainscoting and cut the boards appropriately. Test a few height variations to determine the best height. You may follow the traditional rule of thirds or opt for higher wainscoting that covers about two-thirds of your walls.
  3. Mark the placement area using a pencil and a level. Draw a straight line across the space to mark the height of the wainscoting panel from the baseboard.
  4. Cut the wainscoting panel to the proper height using a circular saw or handsaw.
  5. Test fit each piece of the wainscoting (without adhesive) as you cut the panels to size instead of cutting all the pieces at once. Ensure each piece fits perfectly before moving to the next one.

    Measuring the wall with a tape measure.
    A workman using a tape measure on a wall.
  6. Stain the boards (optional) if you didn’t get the wainscoting panels in your preferred color. It’s best to paint or stain the panels before installation.
  7. Use a stud finder to locate the studs in your walls. Mark the center of each stud with colored tape.
  8. Install the wainscoting by applying the construction adhesive      in a zigzag pattern on the wall side of the first wainscoting panel and firmly press it into the wall. Hold the piece and nail it to the wall using the nail gun as the manufacturer recommends. Repeat the process for the remaining panels. Leave the glue to dry overnight before adding the molding and baseboards.
  9. Cut angled joints by using the miter box on the cap molding. Generously apply wood glue to the back of each panel and fit it into the wall over the wainscoting. Press it into place and nail it to the wall with the nail gun. Repeat the process for base molding.
  10. Caulk the seams by cutting the nozzle of the Painter’s Pro Siliconized Acrylic Caulk cartridge and pierce the inner foil seal. Load the cartridge into the caulk gun and apply the caulk to all the seams. Apply a continuous bead of caulk in the corners, between the panels, and all trim joints. For the best result, apply GE caulk when the temperature is above 40°F (5°C).
  11. Use a tooling kit to tool the bead and smooth out the joints for a clean, professional look. GE-branded caulks have a 15-minute tooling or open time.
  12. Dip a rag in warm water and use it to remove excess caulk from the wainscoting panels. GE branded caulks are easy to clean within 30 minutes of application.
  13. Leave the caulk to cure for at least 24 hours. Letting the caulk cure fully creates a durable yet flexible seal between the panels and the trims. Caulk cure times depend on various factors, including the weather, the size of the bead, and the specific product. Thin caulk beads — about 3/16” — can cure fully in 24 hours, while thicker applications may take 2 to 7 days.Leaving the caulk to cure fully is crucial to your wainscoting installation success. Our caulks, such as the Painter’s Pro Siliconized Acrylic Caulk, are paint-ready within an hour but may take 2 to 7 days to cure fully. Once fully cured, a caulk forms a flexible yet permanent bond that keeps your wainscoting in perfect shape for years. An improperly cured caulk seal will likely fail, and you may need to replace the sealant. Fully cured caulk sealant resists the growth of stain-causing mold and mildew to help your home retain its aesthetic appeal.
  14. Use the wood putty to fill the visible nail holes on the wainscoting panels. Leave the filler to dry and sand it down for a clean, smooth finish.
  15. Finish up by painting the seams and nail holes to match the wainscoting. You can paint the seams sealed with Painter’s Pro Siliconized Acrylic Caulk with latex paint after 30 minutes. Leave it to cure for 24 hours if you prefer using an oil-based paint.

FAQs

Here is a list of the most commonly asked questions.

What is the golden rule of wainscoting? 

Wainscoting installation follows the one-third rule — the wainscoting panels should cover at least a third of your wall, starting from the base molding.

How do you attach wainscoting?

For the best results, attach wainscoting panels to the wall with a construction adhesive and fasten them to the studs in your walls using 1-inch nails.

What is the best finish for wainscoting?

The best finish for wainscoting is to seal the seams with an acrylic sealant, fill the nail holes with putty, and paint the panels with an oil-based paint.

Wainscoting panels add a touch of class and style to any room. Acrylic caulk sealants let you achieve the perfect look while protecting your walls.

Contact Form

Keep your home bright and leak-free with our simple guide to resealing your skylight using a sealant. How to reseal a skylight in your home

Note: This DIY article is provided as a general guide only and is not intended to take the place of product-specific installation procedures; always follow applicable manufacturers’ instructions. Depending on your home’s age and condition, location within the home, and other potential factors, repairs and/or upgrades or other services may be necessary prior to the beginning and/or completion of your project that may involve the services of a home improvement professional. This article does not include advice pertaining to local building codes and/or any related inspections.

Also known as the window of the roof, your skylight plays a crucial role in letting light in while keeping the elements out. This article provides you with step-by-step instructions to help you reseal skylight leaks. Read on to arm yourself with the knowledge required to restore the integrity of your roof.

Skylight damage often occurs between the flashing and skylight pane surfaces. Leaks often develop from damage to the rubber gasket surrounding the skylight. To carry out skylight seal repair, you should consider reapplying sealant to the damaged surface.

Understanding skylight seal repair: Types of skylights

There are several reasons why you might want to install a skylight in your home. True to their association with being the windows of the roof, skylights can function as both a medium for facilitating indoor lighting and allowing the movement of air and humidity. Stemming from these functions are two types of skylights:

Inoperable skylights

Also known as fixed skylights, these types of skylights do not open to the outside and, therefore, do not function with a ventilatory capacity. Most skylights found in living spaces or high ceilings are usually of this nature.

Operable skylights

This category encompasses all skylights that are capable of opening to the outside. Common in areas susceptible to humid conditions, such as the kitchen or bathroom, operable skylights facilitate the regulation of temperature and humidity when necessary and can swing open or shut. You may also find them in attics, where they free the circulation of damp air.

How to reseal skylight leaks

Skylights have several working parts, all of which can be affected by long-term wear and tear from the elements during their lifespan. Whether the leak develops from the flashing, panes, or weep holes, understanding the source of the leak is among the first steps in sealing a skylight from the inside. Below is a step-by-step guide on how to seal the roof around a skylight.

  1. Identify the source of the leak

    As mentioned earlier, skylights can leak from multiple locations throughout their working mechanism. The most common areas susceptible to leakage are the flashing and panes.

    Skylight pane leaks

    When inspecting the skylight for leaks, you should watch out for beads of moisture arranged in a linear pattern. This often indicates that there is a crack in the panes. You should also check the rubber gasket surrounding the skylight for any signs of damage. For operable skylights, ensure there is no debris obstructing the skylight from closing effectively.

    Flashing leaks

    Flashing provides a watertight seal over the surrounding of the panes, and occasionally the sealant between the skylight and flashing may degrade. Flashing is usually identified as the culprit for skylight leaks when innate problems with the panes and the surrounding rubber gasket are ruled out. This is because it is nearly impossible to notice leaks from water seeping underneath the flashing.

    Tell-tale signs that confirm the leak may be coming from faulty flashing include curling around the edges or breaks and tears along the structure of the flashing. Additionally, the appearance of the flashing may offer a clue to its structural integrity.

    Skylight seal repair is usually easier when the leak is identified as being part of the upper part of the roof slope than on the lower part since the lower parts tend to have water around the roof deck.

    Condensation leaks

    Sometimes the leak from your skylight may be caused by condensation originating from a difference in temperature between the indoor and outdoor atmospheres. Condensation may be identified as beads of moisture with no particular arrangement on the inner surface of the skylight. They may be repaired by opening the skylight (when possible) or assessing the weeping holes for damage or obstruction.

  2. Remove old sealant

    Once you have identified the source of the leak and assessed that a repair would be more feasible than a complete replacement of the skylight, then the next step in skylight seal repair is to remove old sealant that may be between the flashing and skylight. Sealing a skylight from the inside may be strenuous, depending on the height of the roof, but often requires the following materials:

    • Sealant
    • Caulking gun
    • Utility knife
    • Rags or paper towels
    • Ladder
    • Gloves and goggles

    Using the utility knife, you should carefully remove any sealant to ensure that the new sealant adheres properly.

  3. Clean the surface

    Using rags or paper towels, wipe down the area you identified as needing new sealant. Any dirt or old sealant may impede the bonding strength of the new sealant. Once satisfied with the cleaning process, you should allow the area to dry appropriately before attempting to add new sealant.

  4. Apply the sealant

    Cut the sealant nozzle at 45 degrees and place it in the caulking gun (this allows for smooth delivery of the sealant). With the caulking gun in hand, start applying the sealant to the surface for skylight seal repair. Begin with the corners (it makes it easier to maintain a straight stream) and with even pressure apply the sealant in one continuous stream and fill the gap between the flashing and skylight.

    High-quality silicone sealant works wonders when trying to reseal skylight leaks because of its physical and chemical properties. It protects the indoors from moisture that may accumulate outside.

  5. Smooth the sealant

    Using a finishing tool or your gloved finger, you may then smooth the bead of the applied sealant. Running the gloved finger over the bead may also allow you to wipe away any excess sealant that may interfere with the functionality of the skylight once the sealant dries and cures. To answer the question “how to seal the roof around a skylight,” allow the sealant to dry and cure.

    Drying may take a few minutes or hours, but curing usually takes longer, taking the better part of 24-48 hours.

Wrapping up

The proper time for curing allows the sealant to achieve peak bonding strength by giving the material time to settle and strengthen. Once this final process is complete, you should monitor the skylight for any signs of leakage that may suggest that another repair is needed, or that a complete replacement of the skylight is necessary.

Light must remain the only thing that seeps through your skylight. To avoid water damage and excessive energy bills, ensure you carry out routine maintenance of the skylight and reapply sealant when necessary. Follow the steps highlighted in this article to restore peak skylight functionality.

To find GE products near you, check out our Where to Buy page.