Pest Block Insulating Foam
Interior Seal Silicone Sealant
Exterior Seal Acrylic Caulk
Pro Seal Max Kitchen & Bath
Pro Seal Max Window & Door
Supreme Silicone Window & Door Sealant
Advanced Silicone 2® Window & Door Sealant
All Purpose Silicone 1® Sealant
Paintable Silicone Supreme Window & Door Sealant
Siliconized Advanced Acrylic Window & Door Sealant
Siliconized Multi-Purpose Acrylic Window & Door Caulk
Seal & Fill Multi-Purpose Window & Door Caulk
Supreme Silicone Kitchen & Bath Sealant
Advanced Silicone 2® Kitchen & Bath Sealant
Tub & Tile Silicone 1® Sealant
Paintable Silicone Supreme Kitchen & Bath Sealant
Siliconized Advanced Acrylic Kitchen & Bath Sealant
Siliconized Multi-Purpose Acrylic Kitchen & Bath Caulk
Re-New
Painter’s Pro Quick Dry Siliconized Acrylic
Painter’s Pro Siliconized Acrylic Caulk
Painter’s Caulk
Gutter Silicone 2® Sealant
Concrete Silicone 2® Sealant
Metal Silicone 2® Sealant
Project Filter
  • location
    Insulating Foam
    Kitchen & Bath
    Paint Projects
    Specialty
    Windows, Doors, Siding & Trim
  • project-type
    All
    Window & Door
    Kitchen & Bath
    Seal & Paint
    Insulating Foam
    Specialty
  • color
    Almond
    Black
    Brown
    Clear
    Light Gray
    Metallic Gray
    White
  • formulas
    Acrylic
    Insulating Foams
    Paintable Silicone
    Silicone
    Siliconized Acrylic
  • performance
    Not Paintable
    Paintable
  • product-type
    Adhesives
    Caulks & Sealants
    Specialty Products
  • application
    Can
    Cartridge
    Pen
    Squeeze Tube
  • gap_width
    Gaps 1"-3"
    Gaps less than 1"
    Window & Door
  • humidity-level
    Extensive Humidity
    Normal Humidity
  • product_finder
    Pathway 1
    Pathway 2
    Pathway 3
    Pathway 4
    Pathway 5
    Pathway 6
    Pathway 7

Contact Form

Let’s create the perfect home! What is a hybrid sealant and how can you use it?

Note: This DIY article is provided as a general guide only and is not intended to take the place of product-specific installation procedures; always follow applicable manufacturers’ instructions. Depending on your home’s age and condition, location within the home, and other potential factors, repairs and/or upgrades or other services may be necessary prior to the beginning and/or completion of your project that may involve the services of a home improvement professional. This article does not include advice pertaining to local building codes and/or any related inspections.

Keep your home in excellent shape and save a ton of money with a hybrid sealant.

What is a hybrid sealant?

A hybrid silicone sealant is a premium formulation that combines the superior water resistance of a silicone sealant with the convenience and paintability of an acrylic sealant. Due to their excellent durability and flexibility, hybrid silicone sealants are the go-to option for sealing indoor and outdoor paint projects that may be exposed to rain or water.

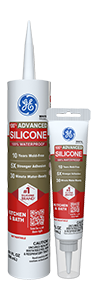
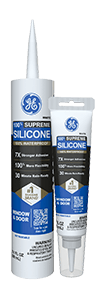
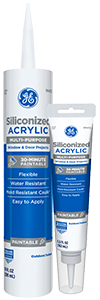
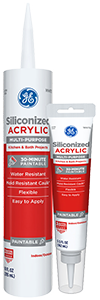
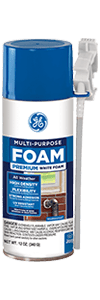
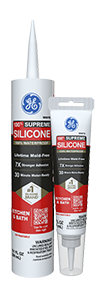
GE Sealants offers two types of hybrid silicone sealants— Paintable Silicone Supreme Windows & Door and Paintable Silicone Supreme Kitchen & Bath sealants.

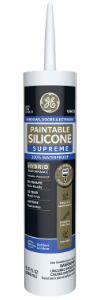
The Kitchen & Bath hybrid sealants are 100% waterproof and ideal for interior paint projects constantly exposed to moisture and humidity. They deliver incredible results when working on paint projects that benefit from a flexible but waterproof seal.

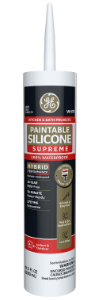
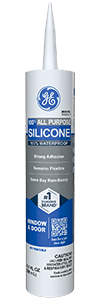
The Paintable Silicone Supreme Window & Door hybrid sealants are ideal for exterior paint projects exposed to water and inclement weather. They’re 100% waterproof, flexible, and quickly rain- and paint-ready.

Hybrid sealant vs 100% silicone sealant

Hybrid sealants combine the strengths of silicone and acrylic sealants. They’re ideal for projects that must be 100% weatherproof or waterproof in a short amount of time. Silicone sealants offer the most extreme flexibility and adhesion and are 100% waterproof, however, they are not paintable like hybrid sealants.

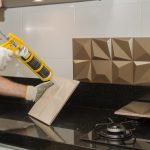
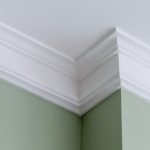
Sealing bathroom tiles

GE hybrid sealants combine the best properties of silicone and acrylic caulk to offer excellent durability and flexibility. They create durable, watertight seals that protect your bathroom from water damage and leaks.

You’ll need:

A step-by-step guide detailing how to seal bathroom tile with a hybrid sealant.

  1. Prepare the surface. Use the utility knife to remove old, damaged sealant.
  2. Clear the debris. Use a stiff wire brush to remove the dust and debris. Wipe down the surface with a mold-resistant cleaner to ensure proper adhesion.
  3. Cut the nozzle. Use the utility knife to cut the sealant’s tube nozzle at a 45-degree angle.
  4. Puncture the inner foil seal. Insert the caulk gun rod or a long nail into the nozzle to puncture the inner seal foil.
  5. Load the caulking gun. Insert the hybrid sealant cartridge into the caulking gun and adjust the trigger for a snug fit.
  6. Apply the sealant. Apply a continuous bead of hybrid silicone sealant, making sure to overfill the joint slightly.
  7. Tool the sealant. Use the silicone tooling kit to create a smooth, concave finish while ensuring contact on both sides within 15 minutes of application.
  8. Leave to cure. Allow the hybrid sealant to cure. The curing time for Paintable Silicone Supreme Kitchen & Bath Sealant depends on the prevailing weather and the bead thickness. Thin beads –less than ¼” thick may be ready for water exposure within half an hour. Thick applications may take 24 to 72 hours to cure fully.

Paintable hybrid silicone sealants from GE Sealants are shrink-resistant, sun-proof, and freeze-resistant and remain permanently flexible after curing. They won’t crack or crumble with time or UV exposure and ship with lifetime guarantees.

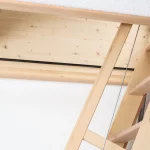
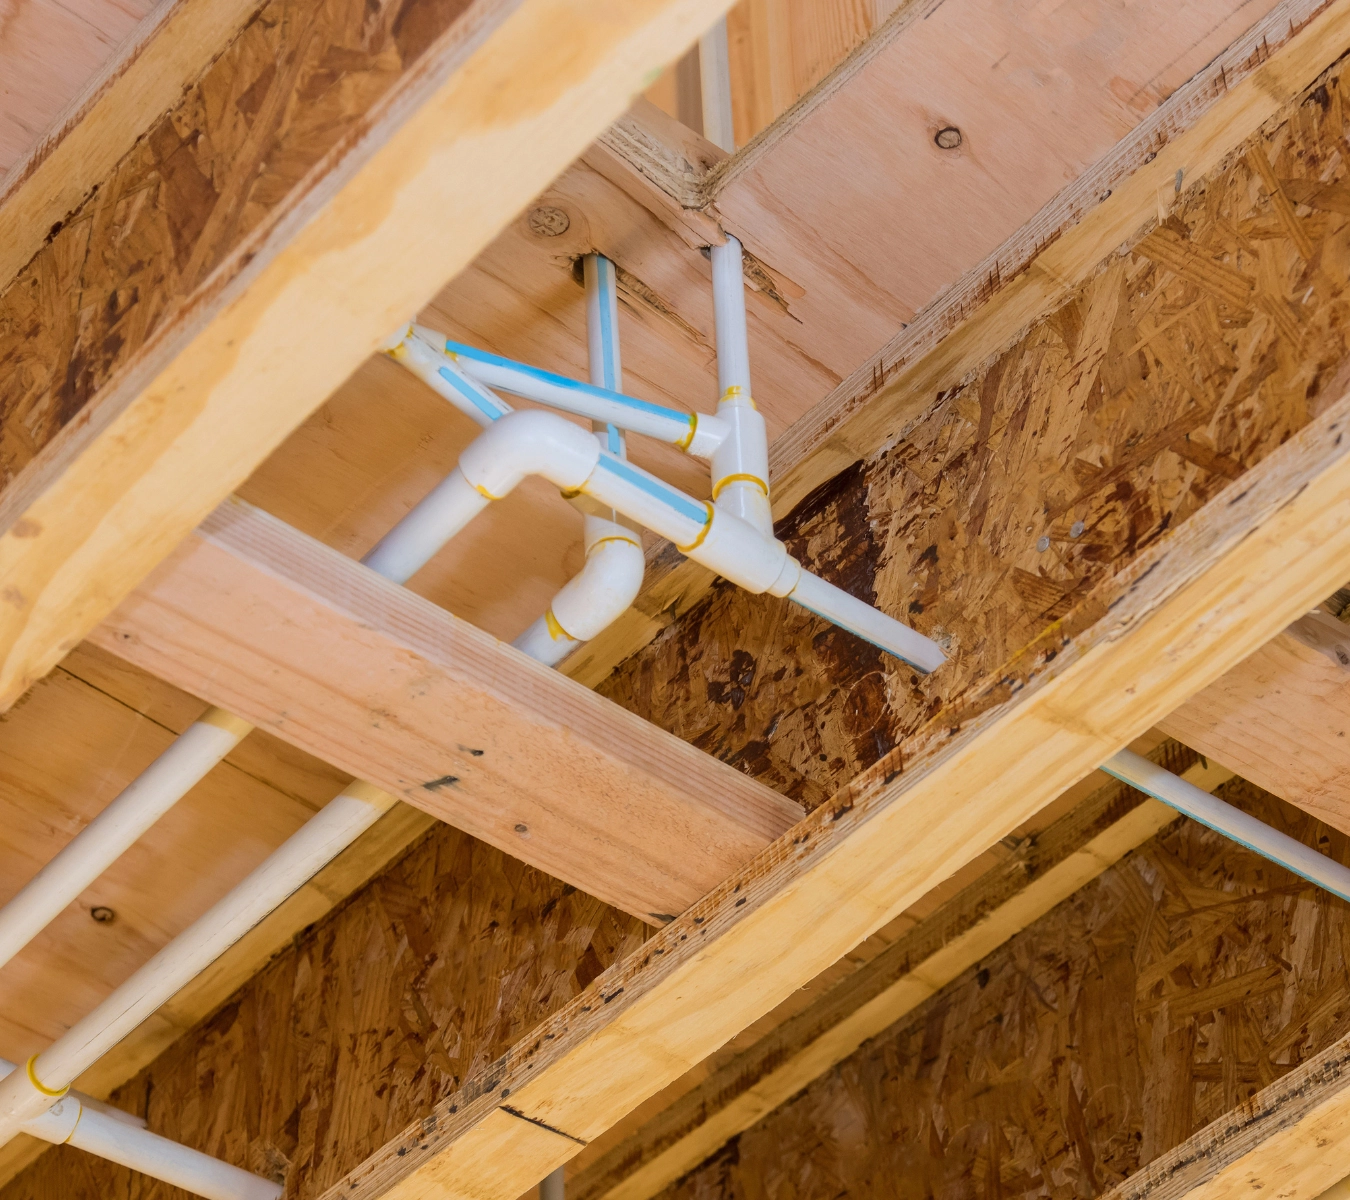
Sealing an exterior door frame

Unsealed gaps between your door frame and the siding threaten the home’s durability and integrity. Sealing the gaps with a hybrid silicone sealant improves your home’s insulation while keeping it pest-free.

You’ll need:


Here are steps detailing how to apply hybrid silicone sealant on an exterior door frame.

  1. Remove the old sealant. Carefully scrape and remove loose or damaged sealant from the door frame.
  2. Clean the surface. Use the wire brush to remove any sealant residue and wipe down the surface with the solvent.
  3. Protect the surface. Line the siding and the door frame with masking tape to avoid a messy cleanup.
  4. Cut the nozzle. Use the utility knife to cut the hybrid sealant cartridge nozzle at a 45-degree angle. An angled cut gives you better control while applying the sealant for a clean, professional finish.
  5. Pierce the inner foil seal. Use the caulk gun rod or a long pin to puncture the sealant’s inner foil. Swivel the rod at the top of the sealant gun and insert it inside the tube’s nozzle. Hybrid sealants from GE Sealants ship with an inner foil to safeguard against moisture.
  6. Load the sealant gun. Insert the cartridge into the caulking gun and adjust the trigger to fit the tube.
  7. Seal the joint. Hold the sealant applicator at a 45-degree angle to the joint and apply a continuous bead of the hybrid sealant between the door frame and the siding. Start from the top and work your way to the bottom. Apply as much sealant as you need to fill the gaps.
  8. Tool the bead. Use the caulk tool to create a neat, even finish within 15 minutes of application.
  9. Leave to cure. Leave the sealant to cure. The cure time of Paintable Silicone Supreme Window & Door Sealant depends on the bead size and prevailing weather conditions. If the bead size is less than ¼”, it can be water-ready within 30 minutes and paintable within an hour. Thick application may take 24 to 72 hours to cure fully.

Home repairs and much more. GE Sealants provide superior and durable bonding in any home improvement projects you undertake.

Contact Form

Never Use Expired Sealant Again! Does sealant expire? 5 signs it’s time to replace your sealant

Note: This DIY article is provided as a general guide only and is not intended to take the place of product-specific installation procedures; always follow applicable manufacturers’ instructions. Depending on your home’s age and condition, location within the home, and other potential factors, repairs and/or upgrades or other services may be necessary prior to the beginning and/or completion of your project that may involve the services of a home improvement professional. This article does not include advice pertaining to local building codes and/or any related inspections.

Understanding what to look for when checking if your sealant has expired can save you a lot of grief. Our guide on “Does sealant expire?” will explain why sealants expire and provide 5 pro tips to ensure you never use expired sealants again.

Does sealant expire?

Silicone sealants have a shelf life, after which they expire and become less effective. The shelf life varies between brands, with most expiring after a year. As such, a tube of sealant, even when unopened, will expire after around a year from the date of manufacture. Some silicone sealants, such as the Advanced Silicone 2 Kitchen & Bath Sealant from GE Sealants, have a shelf life of 18 months.

The best silicone brands include a sealant expiration date on the tube. While some brands offer straightforward information, others use a code that may require you to contact the manufacturer. The use-by date on GE sealants are printed on the crimping of the squeeze tube or on the cartridge.

With proper storage, silicone sealant will retain its efficiency throughout its lifespan. Since they’re moisture-curing, silicone sealants are highly susceptible to environmental factors such as humidity, temperature, and air exposure. Therefore, improper storage may lead to reduced effectiveness, premature curing, and spoilage.

  • Temperature: Extreme heat and cold temperatures may cause the sealant to degrade, ruining its consistency. To keep your sealant in the best condition, store it in a cool, dry place between 40 °F and 80 °F.
  • Air exposure: The curing process begins once you expose a silicone sealant to air. If air leaks into the sealant cartridge, the sealant starts to cure — it hardens and renders the product useless.
  • Moisture: While silicone sealants have exceptional moisture resistance, they may combine with moisture while still in the tube. Exposing the sealant’s tube to water, excessive moisture, or humidity may cause the sealant to cure prematurely.
  • Sun exposure: While silicone sealants have UV-resistant formulations, prolonged exposure of the tube to the sun leads to degradation. Storing cartridges away from direct sunlight helps prolong the sealant’s shelf life.

Because of their chemical makeup, silicone sealants have a limited shelf life. Over time, the chemical components break down and lose their effectiveness. Plasticizers, crosslinking agents, heat stabilizers, and UV absorbers may separate or evaporate, rendering the sealant ineffective.

5 signs that it's time to replace your sealant

Contractors often prefer shopping for silicone in bulk for convenience and cost savings. Shopping in bulk ensures a smooth workflow since you’re not worried about stockouts when working on a critical project. However, buying in bulk carries a significant downside — a portion of your silicone sealant batch may expire.

To avoid compromising the quality of your work, you should learn how to tell if a sealant is expired. Using an expired silicone sealant batch may deliver subpar results and cause you or your client to incur extensive losses.

How to tell if sealant is expired with 5 telltale signs:

  1. Past expiry date:

    Check your tube for the sealant expiration date — the sealant is likely expired if the sell-by date has already passed. Depending on the brand, you may find this information printed at the bottom of the sealant tube or on the crimping — where the plunger meets the tube. Some brands use the date of manufacture, others prefer the best-before dates. Some manufacturers use codes, while others fail to include this information. If in doubt about a silicone sealant’s expiry date, check the manufacturer’s website for their product’s shelf life or information to decipher their code. If all else fails, call their customer service desk for clarification.


  2. Inconsistent texture:

    Your silicone sealant has gone bad if it is runny or has separated into different layers within the tube. The inconsistency indicates a breakdown in the sealant’s chemical components. The silicone polymer chains may have separated from the plasticizers, fillers, coupling agents, and other additives responsible for the exceptional sealing capabilities. We recommend discarding the sealant using a fresh tube and ensuring the sealant has a gel-like consistency.

  3. Hardened sealant inside the tube:

    A silicone sealant may cure and harden if the tube is exposed to air and moisture. Hardened sealant won’t flow from the tube no matter how hard you push the plunger of the sealant gun. You will likely face this problem if you leave a partially used silicone tube for too long or improperly stored. If you seal and store it properly, you can preserve unused sealant in an opened tube for future use. We recommend pushing the sealant until some oozes out of the nozzle, then taping the nozzle with aluminum foil or plastic wrap. That eliminates the air inside the cartridge and creates an airtight seal to prevent curing.

  4. Unrealistic cure time:

    Ideally, silicone sealants cure within 24 hours. You’re likely using an expired sealant if it doesn’t skin within 30 minutes or cure fully even after several days. The sealant should be dry to the touch within an hour of application. However, the curing periods vary between brands. The Supreme Silicone Kitchen & Bath Sealant from GE Sealants is water-ready within 30 minutes of application.

  5. Deteriorating seals:

    Quality silicone sealants create durable seals that last for years. If you notice gaps, cracks, or deteriorating seal appearance over time, you may have used an expired silicone sealant.

If you mistakenly use expired silicone sealant to waterproof your bathroom, it will likely not harden within half an hour and may remain uncured . At this point, you may wonder if the expired sealant will ever cure. Unfortunately, the chemical breakdown is irreversible, so the sealant won’t harden and cure, even if you leave it for weeks. You may need to strip the spoiled batch and reapply it to reap silicone sealants’ reliable, quick-drying benefits.

You may find yourself in a difficult position if you have a large batch of unused but expired sealant in stock. You may wonder, “Can I use out-of-date silicone sealant?” to avoid huge losses. Unfortunately, using expired silicone is a recipe for disaster. First, the sealant may fail to cure, and if it does, the seal may fail rather quickly, especially when used in wet areas such as the bathroom or a basement. As such, you or your client may face the risk of water damage and mold infestation, which may cost more time, effort, and money to fix. Regularly investing in new sealant keeps your stash top-quality so you can seal every project to perfection.

Silicone sealants have a shelf life to help you seal each project to perfection. GE Sealants have extended shelf life, up to 18 months, to ensure you get value for your money. Find a store near you!

Contact Form

Let’s seal an outdoor light fixture Your complete guide on how to seal an outdoor light fixture

Note: This DIY article is provided as a general guide only and is not intended to take the place of product-specific installation procedures; always follow applicable manufacturers’ instructions. Depending on your home’s age and condition, location within the home, and other potential factors, repairs and/or upgrades or other services may be necessary prior to the beginning and/or completion of your project that may involve the services of a home improvement professional. This article does not include advice pertaining to local building codes and/or any related inspections. 

Learning how to seal an outdoor light fixture can bolster your home maintenance efforts and save you money. Our guide to outdoor light fixture sealing explains everything you need to protect these fixtures from the elements.

Supplies for sealing outdoor light fixtures

Gathering the right tools and materials is key to learning how to seal an outdoor light fixture. Here’s what you need to get started when weatherproofing outdoor light fixtures.

  • Screwdriver (flathead and Phillips head)
  • Utility knife or a pair of heavy scissors
  • Rags or paper towels
  • Supreme Silicone Window & Door sealant
  • Caulk gun
  • Step ladder (if the fixture is high on the wall)
  • Tooling aid

We recommend using silicone sealant over caulk because it’s highly water-resistant, less prone to expansion and contractions, and mold-resistant.

Silicone sealant is better than acrylic caulk for this project. Avoid using acrylic caulk when sealing around an exterior light fixture because it’s less flexible and may crack over time when exposed to inclement weather. Silicone sealants are better because they’re durable, waterproof, and can accommodate the fixture movements against the brick wall.

How to seal outdoor light fixture on brick wall

Here’s a step-by-step guide on how to seal an outdoor light fixture mounted on a brick wall.

  1. Set up the work area.

    Spread a drop cloth or an old blanket directly below the light fixture. Position the step ladder in the center of the work area. We recommend using a step ladder when sealing an elevated outdoor light. It provides a better view of your workspace and minimizes strain.

  2. Position the step ladder.

    Place it securely against the brick wall to maximize safety and safeguard your well-being.

  3. Remove the fixture.

    Use the step ladder to reach the outdoor luminary and detach the fixture from the wall with the screwdriver. A fixture that’s attached directly to the wall is unlikely to form a waterproof seal. While you may use a gasket or caulk to seal an outdoor fixture, they require maintenance over time. Conversely, you may use a high-quality silicone sealant to create a durable, weatherproof gasket.

  4. Clean the area.

    Use a moist rag or towel to clean around the outdoor fixture. Silicone sealants work best when applied to a spotless surface. Pat the area dry with paper towels or leave it to air dry.

  5. Cut your silicone tube.

    Use a utility knife to cut off the tip of the sealant tube. Cut the tip at a 45-degree angle instead of straight across to create a more pointed nozzle. An angled nozzle gives you better bead size and flow when applying the sealant for a clean professional finish.

  6. Puncture the inner foil seal.

    Swivel the metal rod attachment at the front end of your caulk gun and insert it into the cartridge’s nozzle to break the inner foil. You may also use a long pin or nail.

  7. Load the caulk gun.

    Insert Supreme Silicone Window & Door sealant into the gun.

  8. Apply a bead of silicone sealant.

    Apply a bead of silicone sealant directly on the brick wall, tracing the width of the area covered by the outdoor light fixture.

  9. Smooth the silicone.

    For good adhesion, create a nearly invisible seal around your fixture.

  10. Refasten the fixture.

    Replace the fixture and fasten it to the brick wall using the screws.

  11. Let the silicone cure.

    Let Supreme Silicone Window & Door sealant cure for 30 minutes. Curing is a chemical process during which the silicone reacts with the air moisture to create a waterproof seal around your fixture.

How to seal an outdoor light fixture on siding

Unlike brick walls or stucco, siding has a flat surface that allows the fixture to lie flush with the wall. As such, you may create a waterproof seal without detaching the fixture from the wall. Here’s what you’ll need to seal around an exterior light fixture:

  • Rags or paper towels
  • Utility knife or a pair of heavy scissors
  • All Purpose Silicone 1® sealant
  • Caulk gun
  • Step ladder (if the fixture is high on the wall)
  • Tooling aid
  • Water

Here’s a step-by-step guide on how to seal an outdoor light fixture on siding:

  1. Prepare your work area.

    Spread an old blanket below the light fixture to catch any sealant that falls on the ground. Place a step ladder below an elevated light fixture for improved access and minimize strain.

  2. Clean the area around the fixture.

    Use the cloth rag to remove dirt and dust around the fixture. You may also clean it with soapy water. Silicone sealants form durable and flawless seals around fixtures when the surface is spotless. Pat the area dry with paper towels or leave to air dry. Never apply a silicone sealant on a wet surface when sealing around exterior light fixtures.

  3. Cut the nozzle.

    Cut the nozzle of the silicone sealant tube. Use a pair of heavy scissors or a utility knife to cut the tip at a 45-degree. An angled cut created a pointed tip that allows the sealant to flow out of the tube evenly and smoothly, preventing messy blobs and drips. Such a tip lets you guide sealant into tight corners and edges as you seal an outdoor light fixture.

  4. Puncture the inner foil seal.

    Insert the metal rod attachment on your caulk gun into the cartridge’s nozzle and use it to break the inner foil. Any sharp, long objects, including nails and pins, may also work.

  5. Load the sealant gun.

    Load All Purpose Silicone 1® sealant into the gun.

  6. Apply the sealant.

    Hold the angled side of the nozzle to the light fixture and apply a continuous bead of the silicone sealant around the light fixture. Cover the entire fixture but leave a weep hole at the bottom to keep moisture from accumulating inside.

  7. Tool the sealant.

    Leave the sealant to set for 5 to 10 minutes. Use a sealant tooling aid to shape the silicone bead around the light fixture. Tooling a sealant gives your project a uniform, professional-grade finish while ensuring proper adhesion between the fixture and siding. Tooling pushes the sealant into the gaps and crevices, creating a tight, weatherproof seal. For a classy, professional finish, dip your tooling aid in water. That prevents the sealant from sticking to the tool and lets you achieve a smooth, uniform finish.

  8. Leave the sealant to cure.

    The All Purpose Silicone 1® sealant cures fully in 12 hours. The curing process transforms the liquid sealant into a solid, rubber-like material. The silicone reacts with the atmospheric humidity to create a durable, waterproof seal. Although silicone may feel dry to the touch within 30 minutes of application, it takes at least 12 hours before it’s waterproof or ready for full service.

Don’t let inclement weather ruin your outdoor light fixtures. Silicone sealants help you create weatherproof seals that protect your fixtures for years!

Contact Form

Let’s find out why you need to caulk your DIY accent wall. Why you need to caulk your DIY accent wall

Note: This DIY article is provided as a general guide only and is not intended to take the place of product-specific installation procedures; always follow applicable manufacturers’ instructions. Depending on your home’s age and condition, location within the home, and other potential factors, repairs and/or upgrades or other services may be necessary prior to the beginning and/or completion of your project that may involve the services of a home improvement professional. This article does not include advice pertaining to local building codes and/or any related inspections.

Caulking gaps and cracks prevent moisture damage. This blog will guide you through the reasons why caulking your DIY accent wall is crucial for achieving a flawless finish and long-lasting durability. Whether you’re a seasoned DIY enthusiast or a novice, you’ll be able to find something here to hone your skills.

4 reasons to caulk your DIY accent wall

Accent walls are selected walls in a room painted or decorated differently from the others to create a focal point. Homeowners typically use accent walls to add visual interest and character to a space. Whether you’re going for shiplap, wood panel, or even good old-fashioned wainscoting, caulking is an essential step in any DIY accent wall project. When creating an accent wall, attention to the finer details can make the difference between a polished, professional look and a project you might wish to blame on your kids. Here are the top four reasons to caulk your DIY accent wall.

Beyond providing protection, caulking will significantly enhance the appearance and aesthetic appeal of your project. It hides gaps and seams between the wall and trim, creating a seamless and polished finish. Without caulk, even the most well-designed accent wall will likely look a bit unfinished and amateur.

  1. Sealing gaps and cracks

    Caulking is an essential part of sealing gaps and cracks between the wall and trim in your DIY accent wall. Gaps can occur due to uneven walls, trim misalignment, or natural settling of the foundation over time. By applying caulk, you can eliminate — or at least effectively conceal — these imperfections.

    Sealing these gaps also prevents air leaks, which can reduce your home’s energy efficiency. Additionally, caulking creates a barrier that helps to keep dust and allergens from entering through the cracks, leaving you with a cleaner indoor environment.

  2. Preventing moisture damage

    Over time, moisture and humidity from the exterior or gaps between walls will pass through any unsealed areas. When moisture seeps into unsealed gaps, it causes mold, mildew, and wood rot. Bathrooms and kitchens tend to be particularly vulnerable to moisture damage.

    By applying caulk, you create a watertight seal to protect your wall materials from moisture damage. This preserves the structural integrity of your accent wall and keeps mold and mildew out of your home.

  3. Professional appearance

    Beyond providing protection, caulking will significantly enhance the appearance and aesthetic appeal of your project. It hides gaps and seams between the wall and trim, creating a seamless and polished finish. Without caulk, even the most well-designed accent wall will likely look a bit unfinished and amateurish.

    Properly applied caulk keeps lines clean and transitions smooth. Attention to detail in this area elevates the overall look of your space. Investing in this finishing touch will make your DIY project stand out and impress.

  4. Insulating against temperature changes

    Caulking helps insulate your accent wall against temperature changes. Gaps and cracks can allow cold air to enter during winter and warm air during summer, making it harder to maintain a consistent indoor temperature.

    By sealing these openings with caulk, you minimize drafts and reduce the strain on your heating and cooling systems. Thus, in addition to making your living environment more comfortable, caulking your DIY accent wall may also lower your energy bills.

Step-by-step guide to caulking your DIY accent wall

Caulking your DIY accent wall is a straightforward process that enhances its appearance and longevity. Here’s a step-by-step guide to help you achieve professional results:

  1. Gather the necessary materials

    You will need:

  2. Prepare the surface

    Clean the wall and trim thoroughly to remove dust and debris. Make sure the surface is dry before you start caulking.

  3. Apply painter’s tape

    To leave clean lines, apply painter’s tape along the edges where the wall meets the trim. This helps create a neat finish and keeps the excess caulk from spreading onto unwanted areas.

  4. Cut the caulk tube tip

    Cut the tip of the caulk tube at a 45-degree angle with your utility knife. Try to match the size of the opening with the width of the gap you are sealing.

  5. Pierce the inner foil/seal

    Insert a sharp object like a long nail or wire into the nozzle and push it through the seal.

  6. Load the caulking gun

    Insert the caulk tube into the caulking gun and squeeze the trigger until the caulk starts to flow so that you have a sense of how much pressure to apply.

  7. Apply the caulk

    Starting at one end, apply a steady bead of caulk along the gap. Move the gun smoothly and steadily to ensure even application.

  8. Smooth the caulk

    Immediately after applying, smooth the caulk bead with a caulk smoothing tool or your finger dipped in water. Try to press the caulk into gaps to create a clean finish.

  9. Remove painter’s tape

    Carefully remove the painter’s tape before the caulk dries to ensure sharp, clean edges.

  10. Clean up

    Wipe away any excess caulk with a damp cloth and allow the caulk to dry as per the manufacturer’s instructions before painting or further decorating.

To get GE sealant products for your home improvement project, visit these fine retailers.

Contact Form

Make your home cozy by sealing your windows! 6 tips for sealing windows to improve your energy efficiency

Note: This DIY article is provided as a general guide only and is not intended to take the place of product-specific installation procedures; always follow applicable manufacturers’ instructions. Depending on your home’s age and condition, location within the home, and other potential factors, repairs and/or upgrades or other services may be necessary prior to the beginning and/or completion of your project that may involve the services of a home improvement professional. This article does not include advice pertaining to local building codes and/or any related inspections.

Improving energy efficiency is a significant pain point when the topic of cost-effectiveness is tabled. Whether you are a contractor, professional, or a simple homeowner, having an energy-efficient home can have tremendous benefits. While some architects recommend incorporating greenery to your walls, or having high ceilings, for those of you who can’t make such drastic changes, the answer may be in your windows.

Windows offers more than an aesthetic value to a property. However, they often facilitate the flow of drafts in and out of the house. In the long run, these defects can set you back several thousand dollars in electricity bills (primarily due to air conditioning) as well as increase your carbon footprint. This article explores some of the most effective (and simple) ways of how to apply sealant to keep your home energy efficient.

Tip 1: Understanding leaks in your windows and how to find them

Before you go about fixing the various leaks and gaps in your windows, you have to find them. This task may prove to be a tremendous problem, especially when the gaps are millimeters thin and barely visible to the naked eye. Depending on the nature and material of your windows, you may need one or more of the following techniques to locate cracks.

Flames

Small open flames are very sensitive to drafts (you know this if you’ve ever tried walking with a candle in hand). Consequently, you can hold a burning candle next to your window and pass it along its length and width to identify streams of air. As a disclaimer, this method works best during windy conditions.

Smoke

If you have a smoke-emitting object lying around (like an incense stick), you could use this to identify cracks. Just like open flames, smoke can point to the trajectory of flowing air, helping you mark them up for sealant later on.

We prefer smoke over fire as it is not only safer but also works on calmer days.

Inspect glass panes

Double-pane glass windows are notorious for coming apart. Cracks and broken seals on the pane can allow heat and cool air to escape the building and, therefore, should be promptly identified.

Materials and tools needed

Sealing a window isn’t rocket science, but it can be a daunting task for some. To ensure you hit the ground running, you should consider stocking up on the following essential tools. Depending on your preferred technique, you may or may not require all the tools highlighted in the list.

The best sealing techniques to keep your home cozy

It is safe to say that when it comes to sealing windows, there is no such thing as one-size-fits-all. Depending on the material and characteristics of your window, different techniques may be more effective than others when getting the job done. However, you can follow our guide below on the best sealing techniques to make sure you give yourself the best start.

Tip 2: How to apply sealant

There are several things to consider when thinking of what sealant to use. Silicone-based sealants are excellent when it comes to insulating your windows, and are a quick way to start saving on those energy bills. Exterior grade sealants are ideally silicone-based because of the extreme demands from the elements. Interior-grade sealants are usually caulk-based. To apply the sealant, you should clean the area you would like to seal and ensure there is no caulk debris from any previous sealing attempts.

How to use a caulk gun

One of the caulking gun tips to keep in mind is to cut the caulk at exactly 45 degrees before placing it in the caulking gun to ensure smooth flow (you could also use a glue applicator for this). Piercing the inner foil of the cartridge before applying the sealant will prevent the tube from exploding from the back side when you apply pressure. You should then apply the sealant to your desired location and smooth it with a gloved finger (to avoid any of it sticking to you). The final step in applying the caulk would be to let it cure. Depending on the manufacturer’s specifications, this may take varying amounts of time.

Tip 3: Install some weather stripping

Popular in movable points all around your house, weather stripping is an effective way of sealing windows, but it is susceptible to wear and tear. In case your weather stripping is missing or damaged you should consider replacing it. The best options for weather stripping include:

  • Self-adhesive double-sided weather stripping
  • Nail-on weather stripping
  • Felt
  • V-strip

Your choice in weather stripping should be governed by utility. Closely evaluate your windows and follow the manufacturer’s recommendations when applying the strips.

To apply the strip, cut the weather strip according to the dimensions of your window and press it firmly into place. Ensure there are no wrinkles while doing this. An adhesive applicator can be a valuable tool here.

Tip 4: Use window insulation film

Window insulation will help you shave off a few extra degrees during summer and maintain warmer temperatures during winter. As a bonus, applying the insulation film is as easy as applying weather stripping, albeit at a larger scale. All you have to do is cut the film to size, apply it, and use a heat gun to eliminate any wrinkles made during the installation.

Tip 5: Foam application

If you have gaps that weather stripping just can’t fill, you should consider foam application. Applying foam involves measuring the gap size, cutting the foam tape to fill the gap, and then finally pressing in the foam tape until it fits snuggly. Spray foam sealants are also a healthy alternative.

Tip 6: Adapting through the seasons

Preparing for seasonal changes could be the difference between having an incident-free year or paying exorbitant energy fees from inefficient energy usage. Preparing for winter is especially important as heating costs can skyrocket in a matter of days. Before the cold weather sets in, you should address any condensation issues and assess for leaks.

Repairing leaks (using a waterproof sealant) before summer can also result in significant savings. For maximum efficiency, you should consider installing double-glazed windows or retrofitting existing windows. Additionally, you can also use window treatments such as thermal curtains, blinds, and shades. Always prioritize professional equipment when carrying out insulation to improve your window’s life expectancy.

Small gaps around windows have the potential to ruin you financially in the long run. To avoid digging deep into your pockets to cover renovation and energy fees, you should consider sealing your windows. Silicone sealant is perfect for plugging the cracks and holes that allow rogue air in and out of your home. Purchasing the best GE caulk is your first step toward making your home toasty in winter and cool during the summer.

To find GE products near you, check out our Where to Buy page.

Contact Form

Let’s find the right acrylic caulk or silicone sealant for your project. Acrylic Caulk vs. silicone sealant: Which is better for your project?

Note: This DIY article is provided as a general guide only and is not intended to take the place of product-specific installation procedures; always follow applicable manufacturers’ instructions. Depending on your home’s age and condition, location within the home, and other potential factors, repairs and/or upgrades or other services may be necessary prior to the beginning and/or completion of your project that may involve the services of a home improvement professional. This article does not include advice pertaining to local building codes and/or any related inspections.

Choosing the right sealant for your home improvement project is crucial if you want both durability and a professional finish. Acrylic caulk and silicone are widely used sealants, each with unique properties that make them suitable for different applications. This blog will help you understand the strengths and limitations of acrylic caulk and silicone sealant and will help you decide which product to use for specific tasks.

Whether you’re sealing gaps in your bathroom or finishing interior trim, selecting the appropriate sealant can make a significant difference in the longevity and appearance of your work. By the end of this guide, you’ll be equipped with the knowledge to make an informed decision and finish your project with outstanding results.

Best uses for acrylic caulk

Acrylic caulk is a versatile sealant commonly used for interior finishing tasks. It’s particularly effective in projects where aesthetics and ease of application are important. For example, acrylic caulk is ideal for sealing gaps. Common areas of application include:

  • Baseboards
  • Crown molding
  • Window and door frames

Acrylic caulks, like GE sealants’ Siliconized Multi-Purpose Acrylic Kitchen & Bath Caulk, create a smooth, paintable surface, making it an excellent choice for areas that require a neat, finished look.

In addition to its ease of application, acrylic caulk is flexible enough to handle minor shifts and movements in the materials it seals, preventing cracks and gaps from forming over time. This makes it a great choice for projects where slight movement is expected, such as in trim work and around fixtures. Undried caulk is also water-soluble and does not require harsh solvents for cleanup.

However, caulk has its limitations. It doesn’t work well in areas exposed to high moisture or extreme temperatures, as it can denature and lose its effectiveness. For these types of projects, a more durable sealant, like silicone, may be necessary.

You can use silicone sealant for windows, doors, and other exterior gaps to prevent drafts and water infiltration. Silicone’s persistent flexibility allows it to expand and contract — an absolutely necessary property for sealing older, wooden houses — with changing temperatures without cracking or losing adhesion.

Best uses for silicone sealant

Silicone sealant is a highly durable and flexible material, making it ideal for a variety of projects. Specifically, silicone sealant excels for applications in areas exposed to moisture and extreme temperatures. Its waterproof properties are particularly beneficial in areas such as bathrooms and kitchens, where builders frequently use it to seal around sinks, bathtubs, showers, and other fixtures regularly exposed to moisture.

Silicone sealant’s other useful characteristics include:

  1. Durability and mold resistance:

    Longevity and resistance to mold and mildew growth also make silicone sealant a superior choice for these environments.

  2. Persistent elasticity

    Silicone sealant remains elastic and intact in both high and low temperatures. Once in place, silicone seals will continue to adhere where they are applied, even under stress and structural movement. We recommend Advanced Silicone 2® Window & Door Sealant for high-stress areas.

  3. Adhesion to non-porous materials:

    Silicone sealant also bonds well with a variety of non-porous materials, including glass, metal, and ceramic. This makes it a preferred choice for sealing glass structures and other specialized applications where a strong, water-tight bond is required.

  4. UV resistance:

    Silicone sealant is resistant to ultraviolet light, making it suitable for outdoor applications where it won’t degrade from sun exposure.

    You can use silicone sealant to seal windows, doors, and other exterior gaps to prevent drafts and water infiltration. Silicone’s persistent flexibility allows it to expand and contract — a necessary property for sealing older, wooden houses — with changing temperatures without cracking or losing adhesion.

    Despite its advantages, silicone sealant does have some drawbacks in certain applications. In projects where a seamless, painted finish is desired it can be a limitation because it is not paintable. Additionally, silicone sealant can be more challenging to apply neatly and has a longer curing time than acrylic caulk. The cost is also higher, which might be a consideration for larger projects.

    Silicone sealant, overall, is a reliable choice for high durability and water resistance areas, making it a valuable tool for residential and commercial projects.

Acrylic caulk vs. silicone sealant: how to choose

Selecting the right sealant depends on the specific needs of your project. For indoor projects requiring paintable surfaces, such as sealing gaps around baseboards or trim, acrylic caulk is the preferred choice due to its ease of application and clean-up with water.

Conversely, silicone sealant is superior for areas exposed to moisture and extreme temperatures, like bathrooms, kitchens, and outdoor applications. Its flexibility and durability make it ideal for sealing around sinks, bathtubs, and windows.

Additionally, consider the surfaces involved. Silicone adheres well to non-porous materials like glass and metal, while acrylic caulk is better for porous surfaces like wood. For larger projects where cost is a concern, caulk may be more economical. Ultimately, before you make a decision, assess:

  • The environment
  • Material compatibility
  • Required longevity

Keeping these factors in mind, you can select the right materials to finish your project with professional style and quality.

Consider GE sealants for reliable sealing solutions in your next project. With a range of acrylic caulk and silicone products, you can find the perfect sealant to meet your specific needs. Ensure durability and professional results by choosing GE Sealants for your home improvement tasks.

To get GE sealants’ products for your home improvement project, visit these fine retailers.

Contact Form

Tackle attic leaks now to stay cooler all summer long How to air seal your attic for a cooler home this summer

Note: This DIY article is provided as a general guide only and is not intended to take the place of product-specific installation procedures; always follow applicable manufacturers’ instructions. Depending on your home’s age and condition, location within the home, and other potential factors, repairs and/or upgrades or other services may be necessary prior to the beginning and/or completion of your project that may involve the services of a home improvement professional. This article does not include advice pertaining to local building codes and/or any related inspections.

An unsealed attic can let summer heat pour into your home, forcing your AC to work overtime and driving up energy costs. Small gaps around pipes, vents, and framing let hot air in—and cool air out. This guide walks you through how to air seal your attic step by step using GE sealants to keep your home cooler, more efficient, and pest-free.

Air sealing your attic with GE Advanced Silicone Window & Door Sealant and GE Multipurpose Foam helps prevent hot air, humidity, and pests from entering your home. Target small cracks, wide gaps, and hatch leaks now to reduce your energy costs and keep your home cooler through the hottest months.

How to keep your home cool

Follow this step-by-step guide to air-seal your attic before summer to keep the home cool and keep out pests.

  1. Inspect for air leaks Before you start sealing, take time to thoroughly inspect your attic for air leaks. Focus on common problem areas where hot outdoor air can enter or conditioned air can escape. These include gaps around plumbing stacks, light fixtures, chimney chases, attic knee walls, and places where walls meet the attic floor. Small cracks, holes, or seams in framing often go unnoticed but can have a big impact on your home’s energy efficiency.Use a flashlight to look for visible gaps, or try a smoke pencil to detect air movement on breezy days. Look for dust trails or insulation darkening, which often indicate airflow. Mark each leak with painter’s tape or a marker so they’re easy to locate when you’re ready to seal. A complete inspection ensures you target every vulnerable spot and get the most out of your sealing work.
  2. Seal gaps and cracks with silicone sealant
    GE Advanced Silicone Window & Door Sealant.
    A photo of GE Advanced Silicone Window & Door Sealant.

    Once you’ve identified small gaps and cracks, seal them using a high-performance silicone sealant. GE Advanced Silicone Window & Door Sealant is ideal for attic use. It’s 100% waterproof, permanently flexible, and adheres well to wood, metal, and other common attic materials. This makes it especially effective for sealing around pipe penetrations, wiring, vent stacks, and framing joints exposed to seasonal temperature shifts.

    Start by cleaning the area to remove dust and debris, which can impede adhesion. Cut the nozzle at a 45-degree angle, load the cartridge into a caulk gun, and apply a steady, continuous bead along each gap. Immediately smooth the sealant with GE’s Sealant Smoothing Tool or a gloved finger to ensure it bonds evenly and fills the space.

    Learn more about the superior durability of silicone sealants in this how-to guide.

  3. Insulate around the attic hatchThe attic hatch is an often-overlooked part of knowing how to cool your home, but it can be a major source of air leaks and energy loss. To seal this area effectively, start by applying adhesive-backed weatherstripping around the hatch perimeter. This creates a tight seal when the hatch is closed, blocking hot attic air from entering your living space.Next, insulate the back of the hatch door using rigid foam insulation or reflective panels secured with construction adhesive. For added efficiency, consider installing a pre-fitted insulated cover or hatch tent on the attic side of the opening. These additions help reduce heat gain in summer and improve year-round temperature control.

    Always make sure the hatch closes snugly against the weatherstripping. A sealed and insulated hatch is a simple upgrade that greatly improves your home’s thermal envelope and complements your attic air-sealing efforts.

  4. Fill larger openings with expanding foam
    A gap around a pipe in an attic.
    A photo of a gap around a pipe in an attic.

    For larger gaps around pipes, wiring, and HVAC penetrations, expanding foam is typically the best solution. GE Multipurpose Foam expands to fill irregular spaces, creating a durable, airtight seal that blocks airflow and pest entry. It’s ideal for sealing around plumbing vents, cable runs, and utility cutouts too wide for silicone alone.

    Before applying, clean the area to remove dust and debris. Shake the can well, attach the nozzle, and apply the foam in short bursts—filling only about 50% of the gap, as the foam will expand to fill the rest. Once cured, trim any excess with a utility knife for a flush, finished look.

    This foam is water-resistant and designed to flex with seasonal movement, making it well-suited for attic environments. Use it in combination with silicone sealant to ensure all leak points—large and small—are properly sealed for better temperature control.

    Get a more detailed walk-through for air-sealing electrical boxes and wiring components in this article.

  5. Seal around light fixtures and fansRecessed lights and exhaust fans are common sources of attic air leaks. Use IC-rated covers or airtight boxes to enclose these fixtures safely, especially if they generate heat. Once installed, seal the edges or spray foam to block air from escaping around the housing. Make sure insulation stays clear unless the fixture is rated for contact. This added barrier helps maintain airflow control while keeping your attic properly insulated and fire-safe.
  6. Inspect and seal ductworkLeaky attic ductwork can let cooled air escape before it ever reaches your living space. Inspect all visible duct joints for gaps or damage, especially near seams and bends. Seal small leaks using foil HVAC tape or GE Advanced Silicone. After sealing, wrap the ducts with insulation sleeves or fiberglass wrap to prevent heat transfer. Properly sealed and insulated ducts help your HVAC system run more efficiently and keep your home cooler in summer.
  7. Check ventilation to prevent moisture buildupWhile sealing air leaks is important, maintaining proper attic ventilation is equally crucial for preventing moisture buildup. Ensure the soffit, ridge, and gable vents are clear and unobstructed. Use baffles to keep insulation from blocking airflow at the eaves. Balanced ventilation allows hot, humid air to escape, reducing the risk of mold and structural damage, especially in sealed attics where trapped moisture can become a hidden problem.
  8. Block pest entry pointsTo keep pests out of your attic, seal entry points and cover openings with durable materials. You can use GE Pest Block Foam or Multipurpose Foam to fill gaps around pipes, cables, and framing where rodents or insects might squeeze through. Install metal mesh screens over vents to block larger pests without restricting airflow. Check these barriers seasonally as rodents can chew through weaker materials over time.

To get GE Sealants’ products for your home improvement project, visit these fine retailers in the U.S. or Canada.

Contact Form

Let’s find out how long sealant takes to dry and how you can speed up the process. How long does sealant take to dry and what can you do to speed up the process?

Note: This DIY article is provided as a general guide only and is not intended to take the place of product-specific installation procedures; always follow applicable manufacturers’ instructions. Depending on your home’s age and condition, location within the home, and other potential factors, repairs and/or upgrades or other services may be necessary prior to the beginning and/or completion of your project that may involve the services of a home improvement professional. This article does not include advice pertaining to local building codes and/or any related inspections.

In home improvement and other DIY projects, understanding sealant dry times and curing times will help you achieve professional-grade results. This blog explains how long it takes for silicone sealant to dry and cure and highlights the distinction between the two processes. We will explore factors influencing these times and offer practical tips on how to make sealant dry faster. Equipped with this knowledge, you can avoid common pitfalls and ensure your projects are water-ready and fully cured.

Understanding sealant dry time

Sealant dry time refers to the period it takes for the outer layer of the sealant to become dry to the touch. For silicone sealants, the average dry time typically ranges from 30 minutes to an hour, depending on various factors.

  1. Humidity and temperature:

    The humidity and ambient temperature of the room play a significant role in determining how quickly the sealant dries. Higher humidity levels and warmer temperatures can accelerate the drying process, while lower humidity and cooler temperatures can slow it down.

  2. Thickness of application:

    The thickness of the sealant application also affects dry time. Naturally, a thicker layer will take longer to dry than a thinner one. It’s important to apply the sealant evenly to ensure a consistent drying process.

  3. Ventilation:

    Surrounding airflow is also important. Good ventilation can help the sealant dry faster by allowing moisture to escape more rapidly.

Understanding the dry time is essential for planning subsequent steps in your project. If you proceed too early, you risk disrupting the sealant’s adhesion and effectiveness. By considering these factors and allowing adequate drying time, you can achieve a durable and reliable seal.

Understanding sealant curing time

Sealant curing time refers to the period it takes for the sealant to fully harden and achieve its maximum strength and durability. Unlike dry time — which only addresses the surface layer — curing time involves the entire depth of the sealant. For silicone sealants, the curing process typically takes between 24 hours to 48 hours under optimal conditions.

The difference between dry time and curing time is important to note for several reasons. While the sealant may feel dry to the touch within an hour, it is not yet ready to withstand significant stress or exposure to moisture until it is fully cured. The curing process involves a chemical reaction that solidifies the sealant, creating long-term effectiveness.

Several factors influence curing time, including:

  • Temperature
  • Humidity
  • Sealant thickness

Warmer temperatures and higher humidity levels generally speed up the curing process, while colder temperatures and low humidity can extend it. Additionally, a thicker application will take longer to cure fully.

“Sealant dries in distinct stages, each crucial for different applications. The first stage is touch-dry, where the surface of the sealant becomes dry to the touch, typically within 30 minutes to an hour for silicone sealants. At this stage, the sealant forms a skin but is not fully set.”

Stages of sealant drying

Sealant dries in distinct stages, each crucial for different applications. The first stage is touch-dry, where the surface of the sealant becomes dry to the touch, typically within 30 minutes to an hour for silicone sealants. At this stage, the sealant forms a skin but is not fully set.

The next stage is water-ready. This stage occurs when the sealant has dried sufficiently to resist water exposure without washing away or breaking adhesion. For most silicone sealants, water resistance happens within 24 hours.

The final stage is fully cured. This stage signifies that the sealant has completely hardened and achieved its maximum strength and durability. This process generally takes 24 to 48 hours. At this point, the sealant can withstand significant stress and exposure to moisture.

How to make sealant dry faster

Here are some practical tips to speed up the drying process:

  1. Optimize temperature and humidity:

    Applying sealant in a warm, humid environment can significantly reduce drying time. Aim for temperatures between 70-80°F (21-27°C) and maintain a humidity level above 50%.

  2. Increase ventilation:

    Good airflow helps moisture escape more quickly. Use fans or open windows to improve air circulation around the sealed area.

  3. Apply thin layers:

    Thinner applications of sealant dry faster. Apply multiple thin layers instead of one thick layer to reduce drying time.

  4. Use a sealant accelerator:

    Some sealants can be mixed with accelerators designed to speed up the curing process. Follow the manufacturer’s instructions for the best results.

  5. Choose fast-drying sealants:

    Some silicone sealants like Advanced Silicone 2® Window & Door Sealant are formulated for quicker drying times and are rain-ready in 30 minutes. Opt for these products when rapid drying is essential.

To find GE sealant products for your home improvement project, visit these fine retailers.

Contact Form

Let’s go seal your kitchen counters! 10 modern approaches to sealing kitchen counters

Note: This DIY article is provided as a general guide only and is not intended to take the place of product-specific installation procedures; always follow applicable manufacturers’ instructions. Depending on your home’s age and condition, location within the home, and other potential factors, repairs and/or upgrades or other services may be necessary prior to the beginning and/or completion of your project that may involve the services of a home improvement professional. This article does not include advice pertaining to local building codes and/or any related inspections.

Kitchen counters contribute greatly to both the functionality and aesthetics of any modern kitchen. However, they are vulnerable to damage from water, crumbs, and other kitchen debris. Gaps exposed to moisture will attract mold and other health concerns. Knowing how to seal a kitchen countertop is necessary to prevent mold growth, water damage, and the premature aging of materials.

Silicone-based sealants excel in sealing kitchen counters, offering a durable barrier that naturally conforms to surfaces, expands to fill gaps, and resists heat and moisture. In this guide, we explore ten modern techniques for applying silicone sealant to kitchen counters to ensure they remain pristine and functional for years. Whether you’re installing a new kitchen or maintaining an existing one, understanding these sealing methods will help you provide lasting protection and enhanced durability to your counters.

What you need for sealing kitchen countertops

Before getting to work on your countertops, gather the right tools and supplies. Choose a high-quality silicone-based sealant designed for kitchens and baths, such as Supreme Silicone Kitchen & Bath Sealant, which offers waterproof protection and mold resistance. Silicone sealants remain flexible and maintain strong adhesion to surfaces, creating a lasting barrier against moisture and humidity. On average, you will need 4 grams of sealant per sealing task.

Supplies List

  • 100% Silicone Sealant: Ensure it’s a suitable color for your countertop material to avoid any staining
  • Caulk Gun: For precise application of your sealant
  • Painter’s Tape: To mask off areas around the sealant line for clean edges
  • Latex Gloves: To protect your hands during application
  • Soapy Water and Paper Towels: For cleaning the surface before application
  • Utility Blade and Caulk Tool: For opening the sealant tube and smoothing the applied sealant
  • Mineral Spirits or Isopropyl Alcohol: For cleaning and prepping the surface

Before starting, clean the countertop thoroughly with isopropyl alcohol and remove any old sealant so that the new application adheres well and performs effectively. Keep windows open when possible and be mindful of ventilation whenever you use cleaning solvents.

Before starting, clean the countertop thoroughly with isopropyl alcohol and remove any old sealant.

Kitchen counter sealing like a pro

With your supplies on hand, you’re ready to seal your countertops with a lasting protective barrier and a clean, professional aesthetic. Use these tips to get the most effective results.

  1. Seam Sealing

    To prevent debris, water, and humidity from accumulating in the seams where countertop sections join, apply a bead of silicone sealant. This method effectively seals the gaps and thwarts the growth of mold and mildew. Additionally, silicone sealants are not rigid when dry, leaving a flexible bond that will not crack. By creating a seamless barrier, seam sealing both protects against water damage and enhances the overall cleanliness and durability of your kitchen counters.

  2. Sink Edge Sealing

    Applying silicone sealant around the edges of the sink is crucial for creating a waterproof barrier. This barrier prevents excess moisture around the sink from seeping under the countertop and causing significant damage such as rot and mildew. Properly sealing the sink edge also helps maintain the structural integrity and appearance of the counter.

  3. Backsplash Sealing

    Apply silicone sealant along the joint where your countertop meets the backsplash to protect against water splashes and stains. Any glance at a bathroom mirror not recently cleaned will show you just how far water regularly splashes outside sinks. Applying sealant prevents moisture penetration from degrading wall materials over time and secures the backsplash, leaving a clean, hygienic surface for food preparation. This step is essential for maintaining the aesthetics and functionality of your kitchen.

  4. Edge Protection

    Seal your countertop’s front and side edges with silicone to safeguard against moisture and debris. Doing so will improve the countertop’s durability by resisting water ingress and preventing dirt and grime accumulation in most vulnerable areas. Taking the time to apply proper edge protection will add significant longevity and a pristine appearance to your counters.

  5. Fixture Sealing

    To secure fixtures like faucets and soap dispensers against water leaks, apply silicone sealant around their bases. Having sealed fixtures bases prevents moisture penetration into the cabinetry below, protecting against water damage and mold growth. Proper fixture sealing helps preserve kitchen installations and makes them cleaner overall.

  6. Joint Filling

    For countertops comprising multiple pieces or materials, use silicone sealant to fill the joints effectively. With sealed joints, you will create a smooth, uniform appearance while also preventing crumbs and liquids from getting trapped in between component sections. Time spent joint filling will pay off in the long run, leaving your counters easier to clean and maintain.

  7. Crack Repair

    Use silicone sealant to address existing cracks or chips in your countertop surfaces. Filling cracks mitigates further damage and deterioration. What appear to be minor, cosmetic imperfections today can quickly become larger, structural issues requiring replacement.

  8. Undermount Sink Installation

    Put a few beads of silicone around the rims of undermount sinks before setting them in place to leave a strong, waterproof bond. Sink installations are a common cause of mold ingress in kitchen counters.

  9. Temporary Seals

    Countertop materials are particularly vulnerable to damage during construction or renovation. Applying silicone to seal edges temporarily will protect exposed materials and surfaces from moisture, dust, and debris. Temporary seals are easy to apply and remove, offering a proactive solution for preserving the quality of your kitchen surfaces.

  10. Enhanced Aesthetics

    Silicone sealants do not take to paints. Pick colored silicone sealants to match or contrast with your countertop material. With the right color choice, homeowners can maintain any existing design themes or even add a unique accent detail.

Taking the DIY approach to home maintenance shouldn’t have to be a compromise of quality for thriftiness. With the right guidance — and the right materials — homeowners can maintain and enhance their kitchen countertops as effectively as the pros. If you’ve found this guide helpful, visit GE’s website or more end-to-end DIY guides for home improvement.

Contact Form

Install crown molding and seal it like a pro! 5 tips for caulking after installing crown molding

Note: This DIY article is provided as a general guide only and is not intended to take the place of product-specific installation procedures; always follow applicable manufacturers’ instructions. Depending on your home’s age and condition, location within the home, and other potential factors, repairs and/or upgrades or other services may be necessary prior to the beginning and/or completion of your project that may involve the services of a home improvement professional. This article does not include advice pertaining to local building codes and/or any related inspections.

Crown molding provides a stunning, seamless finish to any room, connecting your walls to your ceiling. However, that connection can be broken if there are unsightly gaps. Not only do the gaps impact the visual appeal of crown molding, but they can harbor bacteria and moisture. Learn how installing crown molding and sealing the gaps with caulk improves your home’s aesthetic and durability.

Do you need to caulk your crown molding?

You do not need to caulk crown molding to install it in your home. However, it does have several benefits worth considering.

Let’s first take a look at why people install crown molding to better understand the role caulk plays in installation.

You install crown molding at the top of the walls where it meets the ceiling. You can also use it where wall cabinets meet the ceiling. It’s a type of trim specifically for that crease between the wall and ceiling, helping to smooth that transition.

Crown molding is attractive and protective. A stunning molding adds more dimension and decoration to a room, often helping rooms look larger. It also covers cracks that appear between the wall and ceiling.

Caulking crown molding also prevents pests, dirt, and especially moisture from accumulating in that gap, along with bacteria that might grow unchecked since those cracks aren’t areas you usually clean.

The caulk seals those cracks, making cleaning a breeze.

Crown molding often has gaps that harbor bacteria and hold moisture. Caulking crown molding protects it for its lifetime and adds to its seamless finish.

Which crown molding sealant is better, silicone or acrylic?

Choosing the right sealant is a crucial step in how to seal crown molding.

There are two primary types of sealant to choose from: acrylic or silicone based caulk, with pros and cons to each.

Pros and cons of acrylic caulk

PROS: Acrylic caulk is often the recommended type of sealant because it allows contractors to paint over it. It is also much easier to clean up than silicone sealant, which can help you achieve a pristine finish. Acrylic caulk is mold-resistant, preventing harmful growth inside the cracks of your crown molding.

CONS: Acrylic caulk tends to be more rigid than silicone alternatives. Because of its rigidity, there is a risk of cracking or gaps when temperature changes cause materials to shrink and expand.

BEST OPTION: GE’s Painter’s Pro Siliconized Acrylic Caulk offers the benefits of acrylic caulk with additional flexibility. It resists cracking and fights mold for long-lasting results.

Pros and cons of silicone sealant

PROS: Silicone sealant is not the first choice contractors use for crown molding. However, some will opt for it due to its flexibility and durability. The silicone in sealant can withstand drastic temperature changes better than most acrylic options, helping it last longer without showing signs of cracking.

CONS: While silicone is flexible, the traditional silicone formula is not paintable. If you paint over a silicone sealant, the paint will crack over time. It also tends to be messier, which is not the ideal solution for crown molding that will sit front and center in your room.

BEST OPTION: If you are looking for the benefits of silicone sealant, opt for GE’s Paintable Silicone Supreme Window & Door Sealant. This silicone sealant uses a specially crafted formula that combines silicone with other ingredients that traditional silicone sealants don’t have. This paint-friendly formula allows you to paint over the sealant. It is shrink and crack-proof, standing up to temperature fluctuations over time, and protecting your crown molding longer.

How to finish crown molding with a caulk

Learn five tips for how to finish crown molding with caulk to fill the gaps for that smooth look.

  1. Tip 1: Properly install the crown molding

    How do you install crown molding and caulk so it looks best?

    Even though you may plan to fill in gaps with caulk, you will want to try to eliminate significant gaps during the installation step. Here are a few tips for how to install crown molding:

    • Measure and check that your pieces are the correct length
    • Make sure you are installing the molding in the correct direction, with the top of the molding often larger than the bottom.

    Once the molding fits together, use nails or glue to securely connect it to the wall.

  2. Tip 2: Always caulk before painting

    Now you have your crown molding up, it’s time to caulk. You do not want to paint before you caulk, as that will make the caulk stand out too much over the top of the paint. The paint can also impact how well the caulk adheres to the molding, wall, and ceiling.

    Instead, run a bead inside the crack. Then, use a gloved finger or caulking tool to smooth the bead and help it properly adhere.

    However, because most caulking products are not paintable. Be sure to double-check the product description to find the ones you can paint over. If you prefer non-paintable sealants, choose one that matches the color of your wall and apply it after painting.

  3. Tip 3: Paint the crown molding and caulk

    Before painting, you must wait for the caulk to fully dry. Check your caulk’s specific drying time. It takes 24 hours for most caulks to fully cure before you can expose it to moisture. While some contractors may start painting once the caulk is dry, waiting for complete cure time will result in the strongest bond.

    Once it fully dries, you can paint over the caulk and molding as one piece.

    Painting over your sealant is optional. If you use a sealant that isn’t paintable, it’s ok to leave out this step and not paint over the caulk bead.

    Enjoy your stunning walls and ceiling!

  4. Tip 4: Upkeep your caulk and molding

    Because sealant is waterproof, you can wipe your crown molding down without worrying about trapping water. Regularly clean your crown molding to prevent dirt and grime build-up, which can weaken your sealant over time.

    Sealant requires very little maintenance to remain effective because it is a strong binding agent.

  5. Tip 5: Replace the caulk when necessary

    One repair you don’t want to wait on is cracking caulk. When caulk begins to crack, it also begins letting in moisture, mold, and bacteria. You will see very little to no damage if you catch the cracks early and replace the area with new caulk. Leaving cracks can worsen the damage, maybe even leading to needing new crown molding due to excess moisture and mold.

    When you replace the caulk, first entirely remove the old caulk. Because of the paint and finishes on your ceiling and wall, try to remove it by scrapping it rather than using chemicals that might strip the paint. After thoroughly cleaning the area, apply new caulk and repaint it to return it to its pristine state.

    Replacing caulk isn’t an easy task. Instead of going through the tedious process of scrapping, cleaning, and painting every few years, you can do it once and have it last for a lifetime.

    Choosing the right caulk, like GE’s high-quality caulk, can help your caulk last the molding’s lifetime. In addition, following proper caulking techniques like smoothing it and allowing it to cure fully will ensure it has a strong enough bond to avoid cracking over time.

Installing crown molding and sealing with the right caulk will ensure years of strength and smooth finishes without unsightly cracks and gaps. It will fight off mold while attracting compliments from your visitors who notice the stunning look of your crown molding. Find a store near you that carries caulk for trim.