Pest Block Insulating Foam
Interior Seal Silicone Sealant
Exterior Seal Acrylic Caulk
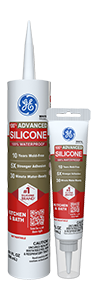
Pro Seal Max Kitchen & Bath
Pro Seal Max Window & Door
Supreme Silicone Window & Door Sealant
Advanced Silicone 2® Window & Door Sealant
All Purpose Silicone 1® Sealant
Paintable Silicone Supreme Window & Door Sealant
Siliconized Advanced Acrylic Window & Door Sealant
Siliconized Multi-Purpose Acrylic Window & Door Caulk
Seal & Fill Multi-Purpose Window & Door Caulk
Supreme Silicone Kitchen & Bath Sealant
Advanced Silicone 2® Kitchen & Bath Sealant
Tub & Tile Silicone 1® Sealant
Paintable Silicone Supreme Kitchen & Bath Sealant
Siliconized Advanced Acrylic Kitchen & Bath Sealant
Siliconized Multi-Purpose Acrylic Kitchen & Bath Caulk
Re-New
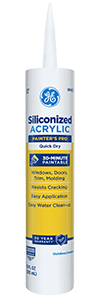
Painter’s Pro Quick Dry Siliconized Acrylic
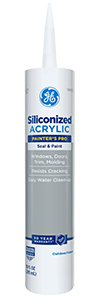
Painter’s Pro Siliconized Acrylic Caulk
Painter’s Caulk
Gutter Silicone 2® Sealant
Concrete Silicone 2® Sealant
Metal Silicone 2® Sealant
Project Filter
  • location
    Insulating Foam
    Kitchen & Bath
    Paint Projects
    Specialty
    Windows, Doors, Siding & Trim
  • project-type
    All
    Window & Door
    Kitchen & Bath
    Seal & Paint
    Insulating Foam
    Specialty
  • color
    Almond
    Black
    Brown
    Clear
    Light Gray
    Metallic Gray
    White
  • formulas
    Acrylic
    Insulating Foams
    Paintable Silicone
    Silicone
    Siliconized Acrylic
  • performance
    Not Paintable
    Paintable
  • product-type
    Adhesives
    Caulks & Sealants
    Specialty Products
  • application
    Can
    Cartridge
    Pen
    Squeeze Tube
  • gap_width
    Gaps 1"-3"
    Gaps less than 1"
    Window & Door
  • humidity-level
    Extensive Humidity
    Normal Humidity
  • product_finder
    Pathway 1
    Pathway 2
    Pathway 3
    Pathway 4
    Pathway 5
    Pathway 6
    Pathway 7

Contact Form

Keep your undermount sinks mold-free Installing Undermount Sinks and Sealing them to Prevent Leaks

Note: This DIY article is provided as a general guide only and is not intended to take the place of product-specific installation procedures; always follow applicable manufacturers’ instructions. Depending on your home’s age and condition, location within the home, and other potential factors, repairs and/or upgrades or other services may be necessary prior to the beginning and/or completion of your project that may involve the services of a home improvement professional. This article does not include advice pertaining to local building codes and/or any related inspections.

Homeowners dread small cracks and crevices in their sinks that hold in dirt, grime, and bacteria. They are challenging to clean and can often lead to strange smells. That’s why undermount sinks are popular. The kitchen counters are much easier to clean than traditional sinks and they are aesthetically pleasing.

We’ll break down the top tips for installing an undermount sink and focus on how to seal sinks to prevent leaks and water damage.

What makes undermount sinks unique?

Undermount and drop-in sinks function similarly but have critical differences due to their unique installation.

An overview of drop-in sinks

Drop-in sinks are easy to install and are often the go-to choice for DIYers. You can conveniently place the sink inside a gap in your counter or a table, like putting together a puzzle. Then, seal around the edges, and you’re good to go.

However, drop-in sinks often sit slightly above the counter. This can lead to a small lip that’s challenging to clean and collects water.

That’s why some homeowners opt for the undermount sink.

An overview of undermount sinks

An undermount sink goes below your counter, providing more counter space and a smoother appearance. That way, your entire counter is even right up to the edge of the sink. Cleaning is much easier with undermount sinks as you can wipe directly into the sink without worrying about pushing grime into the crevice between the counter and sink.

While undermount sinks win for cleaning around the sink, they can be challenging to clean under the sink. There’s often a gap where the sink meets the counter, which is difficult to reach.

The solution is to use a quality sealant when installing your undermount sink to ensure the gap stays waterproof and bacteria-free. A quality sealant also means the sink will have a longer life, so you can enjoy the many benefits of an undermount sink without worrying about the challenge of reapplying sink sealant every few years.
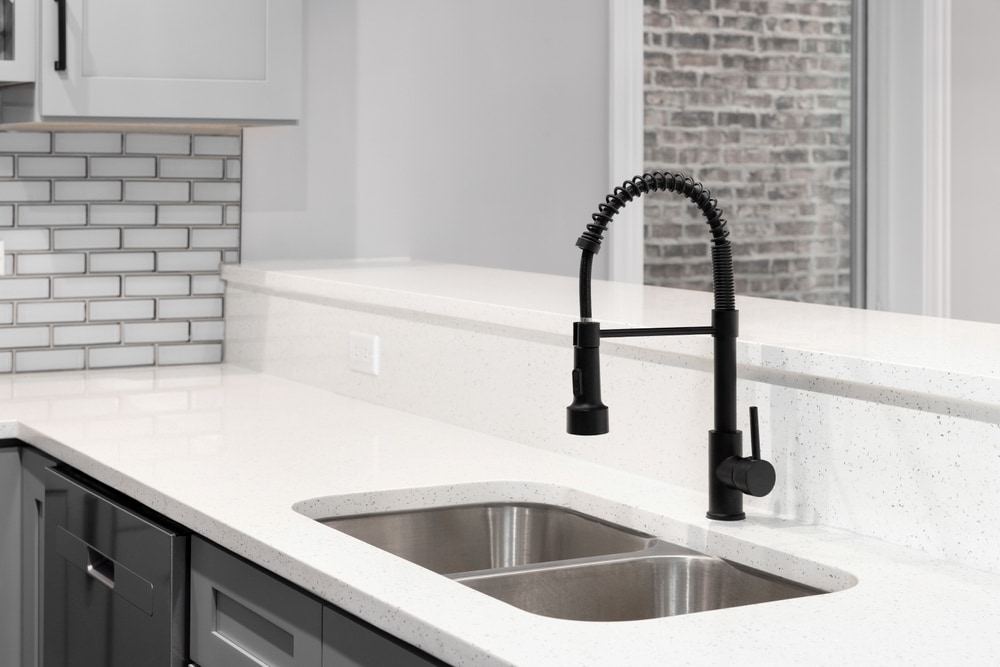
An image showing an undermount sink.

Undermount sinks require sealant around the rim before installation.

5 steps to installing an undermount sink and sealing it

The sealant does not go on an undermount sink the same way you apply it to a drop-in sink.

Follow these five tips when installing an undermount sink to learn how to seal a kitchen sink correctly so that it lasts many years.

  1. Step 1: Plan your project

    Undermount sinks go underneath the counter but don’t always align with the counter above. If the sink has a small step between the counter and the basin, it’s called a positive reveal. However, if the counter sticks out slightly over the sink, it’s called a negative reveal. If the sink is flush with the counter, it’s called a zero reveal sink.

    The reveal matters as it will impact where you need to seal. A zero reveal sink is easiest to clean and seal as your sink and counter form one wall with a single gap you can access to seal without awkward edges and steps that harbor bacteria.

  2. Step 2: Prep the area

    Before installing the kitchen sink, you must cut a hole in the counter that matches your desired reveal. You will also install your mounting clips to hold the sink in place.

    The sealant will be your last step before installing the sink. Carefully choose a sealant with extra strong adhesion power, like GE’s Supreme Silicone Kitchen and Bath sealant.

    You will want to place a steady bead around the sink’s edge where the sink will come in contact with the countertop. The silicone will help hold the sink in place and ensure a waterproof seal.

    Avoid putting a bead that is too thick around the edge, as a significant amount of silicone is pushed out of the gap and onto the surrounding area. You will want just enough to cover the rim when pressed against the counter. You will only want a little extra, which you will smooth with your gloved finger to press it in place.

  3. Step 3: Install the sink according to its instructions

    Follow your undermount sink’s instructions for proper installation. Once you have the silicone on the sink’s edge, you will want to move relatively quickly as it will begin curing. Many types of silicone will be water-ready in as little as 30 minutes after you expose it to air and it begins drying.

    Carefully lift the sink under the counter. You will attach it to the sink mounting clips and adhere the sealant to the counter.

    When the sink is in place and secure while drying, take a towel or gloved finger to wipe any excess wet silicone and smooth what remains. Be careful when cleaning up silicone. Wiping it can easily smear it around the area, making a bigger mess. If the mess is too extensive or you’re unsure you can clean it up, wait for it to dry, then carefully scrape up the extra silicone.

  4. Step 4: Seal around all hardware

    If there is a gap, water can accumulate, and bacteria can thrive. Use your sealant to fill in those gaps. Pay special attention to these areas as you seal around your sink:

    • Faucet
    • Pipes
    • Where the sink touches walls or cupboards
    • Garbage disposal/drain

    Sealing the sink drain with silicone and around the sink area ensures it remains 100% waterproof to avoid a leaky sink.

    You do not need to run a bead around the edge of the sink, as you have silicone under the rim that is already protecting that area. However, you should seal around your counter and the sink to waterproof the area thoroughly.

  5. Step 5: Wait for the silicone to dry

    When you see water-ready silicone in 30 minutes, you might be eager to jump right into the next step. However, you must wait for the silicone to cure fully to ensure the sink properly adheres to the counter.

    Silicone sealant usually takes about 24 hours before fully cured, but you will want to check with your sealant for the exact time.

    During this time, keep any additional support on your sink, such as clamps that hold it in place. Once those 24 hours pass, you can remove them and enjoy your sink!

Keep out the bacteria, mold, and leaks by adequately sealing your kitchen sink during installation. The proper seal holds the sink in place and prevents damage. Let GE help you keep your kitchen looking crisp and waterproof your sink. Find a store near you that carries strong sink sealant.

Contact Form

Let’s go caulk trim! How to Caulk Trim like a Pro and Without Making a Mess

Note: This DIY article is provided as a general guide only and is not intended to take the place of product-specific installation procedures; always follow applicable manufacturers’ instructions. Depending on your home’s age and condition, location within the home, and other potential factors, repairs and/or upgrades or other services may be necessary prior to the beginning and/or completion of your project that may involve the services of a home improvement professional. This article does not include advice about local building codes and/or any related inspections.

Caulking trim may seem like a mundane task, easily overshadowed by the grandeur of other home improvement projects. Nevertheless, knowing how to caulk trim is important for the meticulous attention to detail it demands. Done well, trimmed caulk will elevate the overall aesthetic and longevity of your interior spaces. 

For example, imagine you’ve painstakingly installed new trim and baseboards and envisioned a seamless transition between wall and molding. However, upon closer inspection, unsightly gaps and imperfections threaten to mar your hard work. Enter caulking, the unsung hero of finishing touches, poised to bridge these gaps and put a professional polish to your efforts.

In this comprehensive guide, we delve into the art of caulking trim, imparting invaluable techniques to achieve flawless results. From selecting the right caulk to mastering application methods, each step holds the key to unlocking the full potential of your home’s interior. 

How to apply caulk trim: 11 critical steps

To caulk trim without making a mess, follow these critical steps.

  1. Prepare the surface

    Before getting started, ensure your canvas is pristine. Take the time to meticulously clean the surface to remove any dust, dirt, or remnants of old caulk. A rag dipped in soapy water works wonders for wiping away imperfections and setting up optimal adhesion for the new caulk.

  2. Fill nail holes with spackle

    Don’t overlook the importance of addressing nail holes before caulking. Use a high-quality spackling compound to fill these tiny voids, leaving a smooth and seamless finish. Remember, a little spackle goes a long way. Aim for a slightly raised surface to accommodate shrinkage during drying, minimizing the need for additional coats.

  3. Choose the right caulk

    Choosing the appropriate caulk is essential for your project. Opt for a paintable, white latex caulk suited for interior applications such as Painter’s Pro Siliconized Acrylic Caulk. This versatile option offers ease of use, fast drying times, and compatibility with various materials commonly found in trim and molding installations.

  4. Cut the caulk tube at an angle

    Achieving precision in caulking begins with meticulous preparation of the caulk tube. Using a razor blade, carefully slice the tip at a 45-degree angle and adjust the opening to control the width of the caulk bead. Applying this deliberate cut facilitates smoother application and affords greater command over the caulk flow, imparting a neat and uniform finish along the joints of trim and molding.

  5. Load the caulk gun

    Proper loading of the caulking gun should not be overlooked. Begin by securely inserting the caulk tube into the gun, then gently squeeze the trigger until a small amount of caulk emerges from the tip. This initial priming action readies the gun for smooth and consistent dispensing and minimizes interruptions.

  6. Apply caulk at a 45-degree angle

    The art of caulking hinges on precision and finesse in application technique. Hold the caulking gun at a 45-degree angle to the trim or molding joint, positioning the tip of the tube at the desired starting point. Apply steady pressure to the trigger while smoothly moving the gun along the joint, dispensing a uniform bead of caulk. Taking the time to learn this technique ensures thorough coverage and provides optimal adhesion to the surface.

  7. Work in sections

    For efficient caulking, break down the project into manageable sections. This approach prevents the caulk from drying prematurely, allowing ample time for smoothing. Complete one section at a time, applying caulk along the joint before moving on to the next. By working systematically, you will create more thorough coverage and maintain consistency throughout the process.

  8. Smooth the caulk

    Achieving a seamless finish requires careful attention to smoothing the caulk. After application, use a wet cloth or your finger to gently glide along the bead, flattening for even distribution and eliminating excess. This step enhances the finished appearance and encourages optimal adhesion and durability. Take your time to finesse the caulk, refining each joint to perfection for a polished result.

  9. Clean up excess caulk

    Attention to detail extends to the cleanup phase of caulking. Once you have applied the caulk and smoothed the surface, promptly remove any excess with a damp paper towel. This technique shapes the appearance and prevents unsightly drips or smudges from drying onto adjacent surfaces. By maintaining a clean workspace and meticulously attending to clean up, you ensure a professional-quality finish that stands the test of time.

  10. Allow caulk to dry

    Patience is key in the final stages of caulking. Allow the caulk to dry completely according to the manufacturer’s instructions before proceeding with painting or further finishing. Rushing this step may compromise the integrity of the caulk and result in subpar adhesion or finish. By waiting out the proper drying times, you guarantee a durable and long-lasting seal that enhances the overall appearance of your trim and molding.

  11. Inspect and touch up

    Following the manufacturer-suggested drying period, inspect the caulked joints. Pay close attention to detail, identifying any areas requiring further attention or touch-up. Addressing missed spots or imperfections promptly is much easier when handled in a timely fashion. Having patience in this stage guarantees the integrity and visual appeal of the trim and molding throughout your living space.

    When caulking trim, opt for high-quality caulking materials to ensure durability and longevity. Acrylic caulks offer excellent flexibility and resistance to moisture, ideal for trim applications.

Upgrade your trim with confidence using high-quality GE caulks. Our paintable latex caulks are engineered for precision, ensuring seamless joints and a professional finish. Trust in our proven reliability for your next trim project.

Contact Form

Fight mold and mildew by properly sealing your shower door design How to seal a shower door Correctly Every Time

Note: This article is a general guide and is not intended to replace product-specific installation procedures; always follow applicable manufacturer’s instructions. Depending on your home’s age and condition, location within the house, and other potential factors, repairs and/or upgrades or other services may be necessary prior to the beginning and/or completion of your project that may involve the services of a home improvement professional. This article does not include advice pertaining to local building codes and/or any related inspections.

There are over a dozen shower doors, meaning over a dozen ways to apply sealant. Learning how to seal a shower door requires first understanding your door’s unique features and how that might impact the process.

We have made this easier for you by breaking down the different shower door types and how to adjust your sealant strategy for each one for the best look and function.

General shower door sealant rules

Before jumping into what makes each shower door unique, there are some universal shower sealant rules. These will apply to all shower door designs you might encounter as a contractor when you seal a shower :

  • Use 100% silicone sealant because it’s waterproof and durable.
  • Clean the area before applying sealant.
  • Seal any areas where plumbing connects with walls and floors as per your local plumbing code.
  • Cut your sealant tube at a 45-degree angle and apply using a caulk gun for an even bead.
  • Smooth your sealant bead with a gloved finger for a polished finish.

When sealing shower doors, stick with sealants designed specifically for bathrooms. They are both durable and flexible for a longer life. They also work well with the surfaces and materials you might find in the bathroom, like finished metals.

If you want to learn how to fix a shower door seal, you will follow the exact instructions above, but add a step for first removing the old sealant. If the damage on the old sealant is minimal, consider using a silicone refresher rather than redoing the entire seal.

Use silicone sealant and shower sweeps together for the ultimate shower door moisture protection.

Sealing with silicone sealant vs. shower door sweeps

Sealing a shower requires two types of sealants. You will need shower door sweeps and silicone sealant.

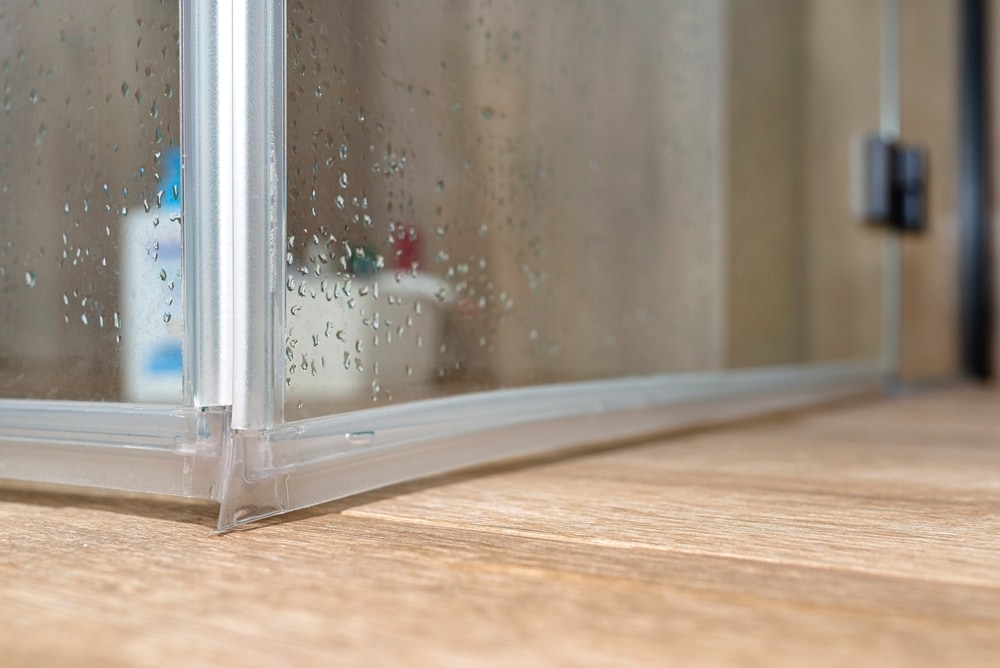
A shower door sweep is a long plastic or rubber piece that attaches to your shower door’s sides, top, and bottom. The purpose of a sweep is to move with the door but prevent water leakage from the shower once you close the door.

If you’re looking for how to seal a shower door at the bottom, you will want to opt for a shower door sweep.

Silicone sealant, which you find in a tube and hardens after application, is a sealant you place between two immovable features, like the sides of a wall. The purpose of silicone sealant is to keep moisture and bacteria out of cracks and gaps, which can lead to mold growth.

You can use these two products together for the ultimate shower door moisture protection. First, put on your shower door sweeps along any edges where water might leak out. You can run your shower first to identify those cracks, as you might not need a sweep on every edge. For instance, the top might be too high for water to leak out.

After you put on a sweep, use silicone sealant along the edge of the sweep. The sealant will help hold the sweep in position so it stays in place even with regular use. The sealant also prevents moisture from becoming trapped between the sweep and door, leading to mold growth and early deterioration of the sweep.

A shower door sweep

How to seal a framed glass shower door

Framed doors are easier to seal because the frame can be your guide. Seal around the door frame where it connects to the shower. There are gaskets available for shower frames, which can help with leakage. If you have gaskets, we still recommend using sealant to help fill in the gaps in the gaskets, as only sealant is 100% gap-free.

After sealing around the frame, move on to the hinges. Seal around the hinges where they connect to the frame, being careful not to seal any areas that might impact the door’s movement.

Before starting on your frame, learn how to install a shower door bottom seal with a sweep so you can finish the sweep with silicone while sealing the frame.

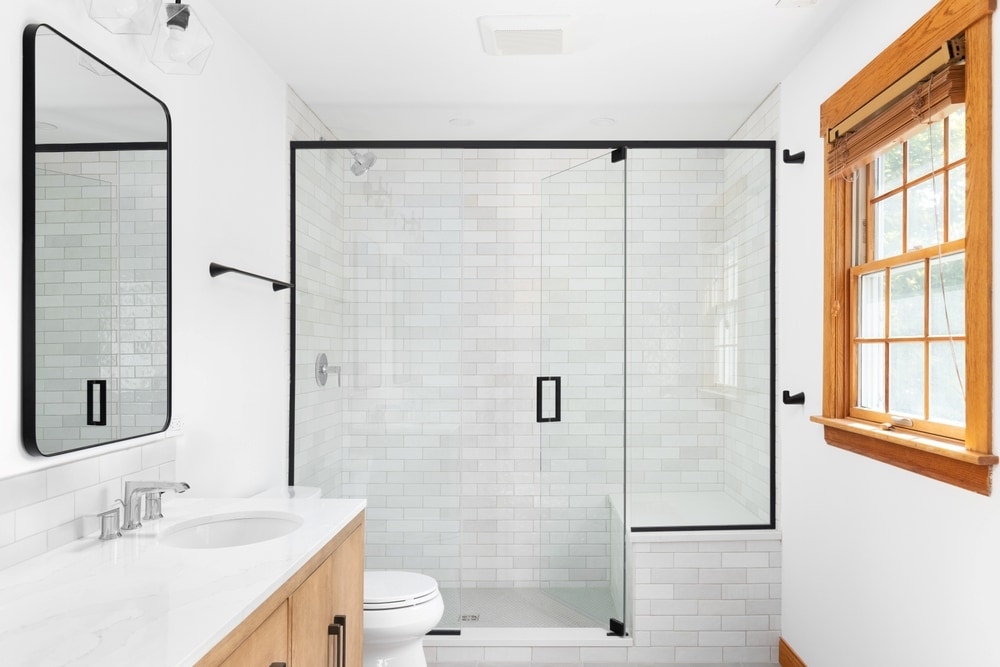
How to seal a glass shower door

Sealing a glass shower door without a frame is less work because there are fewer joints and gaps for water to gather.

You will still have hinges and door sweeps you will want to seal around. You will also want to seal where the glass wall meets the regular bathroom wall.

What makes glass doors unique over most of your other shower doors is that you don’t have a frame, which means the sealant will stand out like a sore thumb. We recommend using a clear sealant along your pristine glass doors.

How to seal a glass shower door

How to seal a sliding shower door

Sliding doors will not have any hinges to seal. However, they do have tracks they run along.

Seal around the outside of the bottom track. If your top track attaches to a wall or ceiling, you will also seal around the outside of the top track. Keep the sealant outside the track. If you put it inside the track, the sealant will prevent the doors from sliding correctly.

How to seal a pivot shower door

A pivot shower door can move both inward and outward. Because of this broader range of motion, it usually doesn’t have much of a frame, if any.

Treat a glass pivot shower door like the previous frameless door example and use clear silicone sealant around the hinges.

Because pivot doors are usually free-swinging, you most likely have shower walls on both sides of the door. If that’s the case, seal where those walls meet your bathroom walls.

How to seal bi-fold and tri-fold shower doors

You must pay special attention when dealing with shower doors with multiple seams. Open and close the door several times to understand what parts are stationary and which parts fold. You do not want to accidentally seal a movable part of a tri-fold shower door.

Once you understand which parts are moving parts, you can avoid those areas and focus on the hinges and seams where stationary panels meet the wall, if there are any.

How to seal a stationary shower door

Some shower doors are stationary and act as walls rather than doors. If you encounter a stationary shower door, treat it like a regular wall, sealing around the edges where the stationary door meets the wall, floor, and tub.

Have you protected your shower doors against mold, mildew, and bacteria? Take action now by proactively fighting moisture buildup through proper sealing techniques. Use GE Sealant’s high-quality, 100% silicone sealant for a durable, flexible seal that works for all shower door designs.

Find a store near you that carries GE bathroom sealant.

Contact Form

Open and reseal your sealant tubes like a pro! How to open a tube of sealant and save the excess

The sealant tube is designed to make sealing a breeze. However, before you can jump right into your task, you need to know how to open a tube of silicone sealant properly. Knowing how to open a tube of sealant not only gives you more control over your bead but also ensures you can reseal the tube for later use, saving you valuable money and avoiding waste.

Learn pro tips for cutting, prepping, and resealing a tube of sealant for optimal efficiency at your job.

Note: This DIY article is a general guide and is not intended to replace product-specific installation procedures; always follow applicable manufacturer’s instructions. Depending on your home’s age and condition, location within the house, and other potential factors, repairs and/or upgrades or other services may be necessary prior to the beginning and/or completion of your project that may involve the services of a home improvement professional. This article does not include advice pertaining to local building codes and/or any related inspections.

What types of sealant tubes are there?

You will find two primary types of sealant tubes: cartridge and squeeze tubes.

The cartridge tubes go in your cartridge gun. They are perfect for big jobs like sealing windows, bathtubs, flooring, and more. They often do not have resealable caps and require cutting to open the tip at the ideal size to fit your job.

The squeeze tubes are for smaller jobs, like touching up small areas or sealing small cracks. They do not go in your cartridge gun. Instead, you use them by hand. They often come with a resealable cap because smaller jobs will most likely not use the entire tube.

While most of the tips we’ll cover are for the cartridge-style tube, they also work for the squeeze tube. Even though you have a resealable cap, you may end up with excess air in your tube that might dry it out faster. Taking the extra steps to bleed out air and properly seal the tube saves the excess.

How to cut open a tube of sealant

How you cut open a tube of sealant determines its flow and your ability to seal it afterward for reuse. A properly cut sealant tube will have a steady, small flow, giving you greater control over your sealant beads.

Use these tips to learn how to open up a tube of sealant.

How wide should the cut be?

Because the sealant tube has a tapered tip, the closer you cut to the tip, the narrower your bead will be. If you have a more significant job, like large gaps, a cut further back will allow a larger flow.

Generally, keep your cut smaller than your desired bead size and the area. Then, add more width by applying pressure when squeezing the cartridge gun handle to increase your bead size as needed.

What angle should the cut be?

Cut your sealant tube at a 45-degree angle near the tip for more control and a smoother bead.

Always cut your tube at an angle. A 45-degree angle will align best with the tilt of your cartridge gun. That way, you will have a steady bead.

How should you cut the sealant tube?

There are several ways to cut the tip of a sealant tube:

  • Use the hole in the side of your cartridge gun to cut the seal. Place the tube at a 45-degree angle and squeeze the trigger to cut the tip.
  • If you don’t have a cartridge gun, use a sharp knife (like a utility blade or painter’s knife) or scissors to cut the tip of the tube at an angle.

Many sealant tubes also have a foil seal. This provides extra security against air, allowing the sealant to last longer. After cutting the tip, you will also need to puncture this internal seal.

  • Use a nail or stiff wire to push into the sealant’s seal.
  • Use the seal punch underneath your cartridge gun to puncture a hole in the inner foil seal.

Now your sealant tube is ready to load and use in your cartridge gun for your sealant project!

How to save an open tube of sealant

After you complete a small job, there’s a chance you’ll have some sealant left over. If you have a steady stream of clients, you can save yourself resources by properly opening and resealing the sealant tube to reuse at the next job.

Follow these three steps to help preserve your sealant longer

  1. Step 1: Thoroughly clean the nozzle

    You will want to remove as much excess sealant as you can from the outside of your tube. A damp cloth will work well to clear up the nozzle.

  2. Step 2: Remove excess air

    Because you already used some sealant, air will be inside the tube. That air can dry your sealant, even if you properly seal the outside.

    To reduce the amount of air trapped inside the tube, push a small amount of sealant right to the tip, trying not to leave any mess on your freshly cleaned external nozzle. Some pros will even squeeze a small amount out to help seal the cap back on and limit any leakage.

  3. Step 3: Close the tip

    Once the outside is clean and excess air is out, you will want to close the hole you cut to prevent air from entering and drying out the sealant faster.

    Here are a few of the top ways professionals reseal their sealant tubes:

    • Place the cap back on the tube if it has an airtight cap like the squeeze tubes.
    • Place the tip you cut off upside down inside the tube again.
    • Push a 2-inch nail or screw into the opening to seal it.
    • Wrap cling wrap around the nozzle and secure it with a rubber band.
    • Seal the tip using electrician or plastic tape.

How to store a tube of sealant

Storing your resealed tube of sealant properly extends its life. Typically, a quality tube that you have not opened yet will last for several years. Once you open the sealant tube, its shelf life depends on how much air exposure it has. A well-sealed sealant tube could last for months, while a poorly sealed tube that leaks air into the tube may only last days.

Here are a few storing tips:

  • Keep your tubes upside down. This reduces the amount of air that leaks in through the cut tip.
  • Store the tube in a location between 40 degrees and 80 degrees.
  • Prevent storing the silicone sealant in high moisture or humidity areas.
  • Keep your silicone sealant tubes away from UV radiation and sunlight.

If you are using a tube you sealed after a previous project, we highly recommend doing a test strip before using it on a client’s area. That test strip will let you see any bumps, hardening, or failure to cure, which signals that air leaked into the tube during storage. If it beads properly and cures, you can use that tube again.

Choosing high-quality sealant ensures your sealant has a longer shelf life and is less likely to have air leaks. GE’s professional, quality sealants are easy to use and reseal, saving you valuable resources and materials.

Find a store near you carrying one of our many sealants.

Contact Form

Is silicone sealant sticking around on your hands? How to Get Sealant Off Your Hands and Equipment After a Job

Note: This DIY article is provided as a general guide only and is not intended to replace product-specific installation procedures; always follow applicable manufacturer’s instructions. Depending on your home’s age and condition, location within the house, and other potential factors, repairs and/or upgrades or other services may be necessary prior to the beginning and/or completion of your project that may involve the services of a home improvement professional. This article does not include advice pertaining to local building codes and/or any related inspections.

How are you supposed to clean up a product that’s waterproof and meant to last ten years? It’s not usually as simple as soap and water. But it also doesn’t have to be a nightmare situation where you’re scraping unwanted silicone sealant off a client’s bathroom floor or your hands for hours.

We’ll give you the inside scoop on how to clean up after a job, including how to get sealant off your hands, equipment, and surrounding area.

Be proactive: Tips for avoiding a mess when using silicone sealant

How do you get sealant off easily? Start by proactively avoiding sealant messes.

Here are a few tips to keep your area sealant-free, other than the spots you want to seal:

  • Wear gloves to keep it off your skin
  • Keep bare skin wet to prevent silicone from sticking to the skin
  • Lay down cloth on the floor where you are working
  • Use tape when necessary to avoid getting silicone where it shouldn’t be

To remove silicone sealant from your hands, peel off the excess, wash with soap and water before it dries, use an adhesive, then fall back on home remedies for the stubborn spots.

How to get silicone sealant off your hands and equipment

Messes are bound to happen when you are sealing a room, and sealant is sure to end up on your hands, surrounding areas and all over your equipment. Here are our tried-and-true tips for cleaning up a sticky sealant situation without damaging your skin or equipment.

Clean with soap and water

Most silicone sealants are not immediately waterproof. Many GE Sealants take about thirty minutes before they become waterproof. Double check your product as there are some that may take longer. If you catch a mess on your hands or equipment early enough, cleaning up may be as simple as washing with soap and water.

Remove the caulk by hand

Some silicone caulk can be removed by peeling or rubbing it off after it dries. This is the best way to start the cleaning process, as it will remove any large pieces. You’ll be left with minimal cleanup afterward, making all the other options much easier to complete.

Even if you must resort to other methods to remove the silicone sealant from your hands, you will still want to end with soap and water. It helps remove some of the remaining residue or oils and chemicals from the other removal methods.

Use silicone remover

There are chemicals designed specifically for removing silicone sealant. Wash your equipment or, if the remover says it’s safe, your hands. If you do use any type of chemical, be sure you’re working in a well-ventilated area.

If you don’t have a silicone remover, paint thinners also work. Remember, if you use paint thinner, only use it for your equipment. Paint thinners contain harmful chemicals that will hurt your skin.

Scrub or abrasive

Some silicone sealants will be more stubborn and won’t wash off with soap or even silicone remover. A strong scrub brush along with those methods will help peel it off your skin and equipment. It works best with soap and water for a dual attack method.

Use a professional’s home remedy

You tried the above methods and are still baffled as to how to remove sealant from skin.

While there are common methods for cleaning up silicone sealant, professionals often have their insider secrets for getting tough pieces off their hands and equipment. You may need to try these if you left the sealant for too long and it has fully dried.

Here are some of the top tips:

  • Use butter on your hands, followed by baking soda. The butter’s oil helps unstick the sealant, while the baking soda acts as an abrasive.
  • White vinegar is strong enough to wash some stubborn silicone sealant.
  • Isopropyl alcohol, commonly found in rubbing alcohol, can work to remove silicone sealant. Rub it on your hands, then wipe it off using a cloth or abrasive material.
  • Acetone, found in nail polish remover, is not healthy to regularly apply to your skin, but can work in a pinch.
  • Rub the silicone with cheap plastic as silicone sticks better to plastic than it does to skin.
  • Goo Gone works well on sticky messes, including silicone sealant. You can use it occasionally to help remove silicone from your hands, but avoid using it regularly as it isn’t meant to be a skin product.

If you have gone through this entire list and there is still silicone stuck to you, you may just need to wait it out. Your skin will eventually shed it naturally over time.

How to get silicone sealant off a wall

When you spill silicone on floors or in your work area, wiping it with soap and water might make the situation more messy. Instead, opt for using a scraper to delicately remove the excess silicone. This will allow you to preserve your work without smearing around the extra silicone.

You can also use a silicone remover to gently remove it from certain surfaces. Just be aware of the surface you’re working on. Silicone remover is very potent and can strip paint and other coats and sealants.

How to clean up after removing sealant

While silicone may look runny like a paste, it should not go down a drain. Silicone sealant can harm the environment, which is why many regions have strict regulations about disposal.

Because silicone isn’t biodegradable, you shouldn’t throw it out with regular trash as it won’t break down in a landfill. A hazardous waste facility will usually accept silicone. Some regular recycling companies also have hazardous waste services.

Place all excess silicone in a special recycling container and bring it to a recycling program to dispose of the product.

While cleaning silicone sealant off your hands can be frustrating, seeing that quality seal on a project is rewarding. A silicone sealant that refuses to budge will last longer and hold stronger than cheap alternatives that wash off with soap and water.

GE Sealant offers silicone sealants for all your sealing needs. They may come off your hands and equipment, but will stick to your projects for years.

Find sealants in a store near you.

Contact Form

Discover how to caulk a toilet to fight mold and bathroom bacteria! How to caulk a toilet to prevent leaks and preserve floors

Caulking a toilet to seal out moisture and improve stability is one of the final steps professionals must complete before wrapping up a bathroom renovation. Not only is it important for your client’s health, but it’s also required by code. Proper caulking methods greatly increase a toilet’s expected lifespan and improve the overall aesthetics of the bathroom, helping to differentiate your professional services from the average contractor.

Learn why caulking a toilet properly matters. We’ll walk you through how to caulk a toilet that exceeds code requirements.

Note: This article is a general guide and does not intend to replace product-specific installation procedures; always follow applicable manufacturer instructions. Depending on your home’s age and condition, location within the house, and other potential factors, repairs and/or upgrades or other services may be necessary before the beginning and/or completion of your project that may involve the services of a home improvement professional.

Why do you need to caulk a toilet?

The International Plumbing Code requires caulk around the base of a toilet. You must use 100% silicone caulk where fixtures meet the wall or floor.

Here are a few of the primary reasons it’s required, and you should take the time to properly seal toilets above and beyond basic code requirements.

Maintain hygiene

The bathroom is a moisture magnet and tends to be the most humid room in the house.

Properly sealing any gaps in the bathroom is crucial for preventing excess humidity from turning into destructive mold and mildew.

There are often small gaps around your toilet, even in the most professionally installed toilets. Those gaps become havens for moisture to collect and turn into mold and bacteria. This mold and bacteria harm your client’s health and can damage your work much faster than a properly sealed toilet.

Prevent water damage

Like any other equipment that uses water, toilets are prone to occasional leakage. It might be splashes from cleaning the toilet, spraying from the nearby shower, or leaking from an old toilet.

Properly sealing all gaps in the toilet prevents leaks from running into those holes and creating water damage. Instead, a quality sealant ensures the water lays harmlessly outside the toilet, where someone can easily mop it.

Enhance aesthetics

Caulking provides a finished look to your bathroom renovations. It conceals visible gaps and unevenness between the toilet base and the floor. This will help improve your client’s satisfaction with your work and look better in any professional photos you might take of the renovation.

Improves stability

Caulk is not glue or an adhesive in the traditional sense. It’s a sealant that fills gaps and holes. However, by filling in gaps, you can add extra stability to the toilet. Caulk ensures it fits snugly in place and is less likely to shift over time. 100% Silicone sealant is the most durable and flexible sealant option for securing

How to caulk a toilet to the floor

Use these tips to take your toilet caulking skills to the next level to impress your clients and improve your work’s quality.

  1. Thoroughly clean the area

    You may be eager to jump into the job, especially if your client has you on a strict schedule. But preparation is just as crucial as sealing the toilet.

    Thoroughly clean the toilet base before applying caulk. You want to remove any old caulk, dirt, or debris. A clean surface ensures the new caulk adheres properly.

  2. Choose the right caulk

    Knowing how to caulk around a toilet starts with choosing the right caulk.

    You will want a high-quality, waterproof caulk specifically for bathroom use to meet the code. These caulks will withstand the extra moisture and wear of a bathroom.

    Silicone bathroom caulk tends to perform best for sealing toilets. It’s water-resistant and flexible.

  3. Prepare the surrounding area

    When working in a client’s home, you must be extra careful to avoid mess. Properly covering the surrounding area with towels and cloth protects the floor from spills or drips.

    You do not want to use tape when caulking. It leaves ridges and makes your silicone caulk more susceptible to peeling off early. Rather than using tape, properly cut your tube.

    Always cut the tube of your caulk smaller than the area you plan to seal. This gives you more control over the thickness and flow of the caulk     .

    You will also want to ensure you have proper ventilation in the bathroom. Ventilation prevents any strong odors while speeding up the drying process.

  4. Use proper caulking methods

    Take your time to caulk so it looks smooth and seals correctly. You’ll want to use the caulking gun to apply a thin caulk bead around the toilet base where it meets the floor or walls. You want to keep the caulk thickness consistent.

    Use a gloved finger or caulk finishing tool to smooth out the caulk bead. It improves the appearance and helps it adhere and seal better. If you use a wet finger, try to avoid soap with silicone caulk as soap can prevent it from properly adhering to the toilet surface.

  5. Wrap up

    Be sure you communicate clearly with your clients about how long it takes for the caulk to dry. You’ll want to tell them before you begin so they can plan around that timeline. You’ll then want to remind your clients again once you finish so they don’t use the toilet and mess up the seal.

    On average, silicone caulk takes 24 hours to fully cure. This timeframe can vary depending on what your sealant is made from. Always check your product instructions for your product’s specific dry time. Ask your clients not to touch or disturb the caulk during that time.

    On average, caulk takes 24 hours to dry, but times may vary depending on your product. Be sure to communicate before and after caulking to ensure adequate time for it to dry properly.

How to caulk a toilet base and detect wax ring leaks

You now know how to caulk a toilet bowl, but here’s a common mistake to avoid in the process.

When you caulk the toilet base, you keep water damage out. However, you can also keep any internal leaks in. The average wax toilet ring will last about twenty to thirty years before it begins to leak. This can cause significant water damage and mold growth if not caught early.

Due to this risk, homeowners may request you not seal the toilet bowl so they can detect any wax ring leaks early. A common request is asking contractors to seal the toilet in a U shape, leaving the back open to detect leaks.

We do not recommend doing this method as it is against the code. However, most caulk lasts about five years. Regularly redoing caulk also allows plumbers and contractors to inspect the toilet base for signs of a leak, especially when that wax seal nears its expiration date.

Properly sealing toilets lengthens the life of the toilet and bathroom and improves your customer’s satisfaction level, ensuring you have a customer for life. They will know they can depend on you to get the job done right the first time. Quality toilet caulking begins with quality silicone caulk. You can count on GE Supreme Silicone Kitchen & Bath Sealant to keep out the mold.

Find a store near you that carries our strong, reliable sealant.

Contact Form

Remove the moldy caulking in your shower. How to remove mold from shower caulking area before recaulking

Stepping into a clean, refreshing shower is a great way to start or end your day. However, when unsightly mold starts creeping into and staining the caulk around your shower, it can quickly turn your oasis into a nightmare. Mold not only looks unpleasant, but it can also pose health risks if left unattended.

Fortunately, removing mold and replacing the shower caulk is a manageable task with our 100% waterproof and mold and mildew-resistant silicone sealants and hybrid caulks. In this comprehensive guide, we’ll teach you how to remove mold from shower caulking areas before applying a fresh bead of new caulk.

Disclaimer: Note: This DIY article is provided as a general guide only and is not intended to take the place of product-specific installation procedures; always follow applicable manufacturers’ instructions. Depending on your home’s age and condition, location within the home, and other potential factors, repairs and/or upgrades or other services may be necessary prior to the beginning and/or completion of your project that may involve the services of a home improvement professional. This article does not include advice pertaining to local building codes and/or any related inspections.

Understanding mold growth

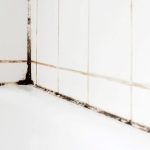
Bathrooms provide an ideal environment for mold growth due to the combination of moisture, warmth, and organic matter. Caulking, with its porous nature, easily traps moisture, becoming a breeding ground for mold spores. Additionally, soap scum and residues provide nutrients for mold to flourish. Regular cleaning and maintenance can prevent mold growth, but once it appears, prompt action is necessary to prevent further spread.

If the mold is allowed to grow, it can potentially cause health problems, such as respiratory issues or allergic reactions.

Showers offer the ideal environment for mold to grow with moisture, warmth, and organic matter. Remove shower mold quickly before it spreads and causes more problems.

Tools and materials needed to remove mold from shower caulking

Before you start tackling your mold problem, gather all the tools and materials you’ll need.

  • Protective Gear: Rubber gloves, safety goggles, and a mask to protect yourself from mold spores and cleaning agents.
  • Cleaning Agents: Bleach, hydrogen peroxide, white vinegar, baking soda, or commercial mold removers.
  • Scrubbing Tools: Old toothbrush, scrub brush, or a sponge.
  • Caulking Tools: Silicone caulk and caulking gun for resealing after cleaning.

A step-by-step guide to removing mold from shower caulking

Follow these steps to get your shower looking fresh and clean again.

  1. Safety first

    Before starting the cleaning process, ensure proper ventilation in the bathroom and wear protective gear to prevent exposure to mold spores and cleaning agents.

  2. Prepare the area

    Remove any items from the shower area and create a clear workspace. Lay down old towels or plastic sheets to protect surrounding surfaces from cleaning solutions.

  3. Mix cleaning solution

    Depending on personal preference and availability, prepare a cleaning solution using one of the following options:

    • Bleach Solution: Mix one part bleach with three parts water in a spray bottle.
    • Vinegar Solution: Fill a spray bottle with undiluted white vinegar.
    • Baking Soda Paste: Mix baking soda with water to create a thick paste.
    • Hydrogen Peroxide: Use undiluted hydrogen peroxide for stubborn mold stains.

    Remember, you should never mix different cleaning solutions as they can react and release harmful chemicals and gasses.

  4. Apply cleaning solution

    Spray or apply the chosen cleaning solution directly onto the moldy caulking, ensuring thorough coverage. Allow the solution to penetrate the mold for several minutes to loosen its grip.

  5. Scrub the area

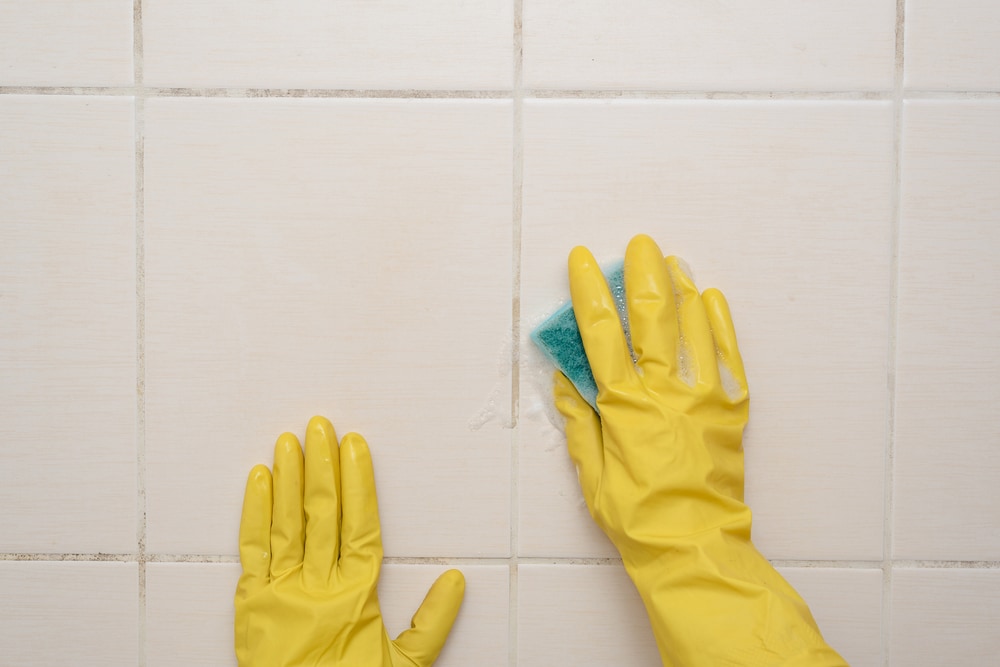
    Using a scrub brush, old toothbrush, or sponge, scrub the moldy caulking vigorously to dislodge mold growth. Focus on stubborn areas and ensure that all traces of mold are removed.

    Scrub vigorously to remove mold from shower caulking.
  6. Rinse thoroughly

    Once the mold has been scrubbed away, rinse the caulking thoroughly with clean water to remove any remaining residue and cleaning solution.

  7. Dry completely

    Use a dry towel or cloth to wipe down the shower caulking and ensure it is completely dry. Adequate drying helps prevent future mold growth.

  8. Seal with silicone caulk

    Inspect the caulking for any signs of damage or gaps. If necessary, remove old caulking and reapply a fresh bead of silicone caulk, like the GE Advanced Silicone 2® Kitchen & Bath Sealant. This silicone sealant is 100% waterproof and has 10-year mold free product protection.

    Smooth the caulk with a damp finger for a neat finish.

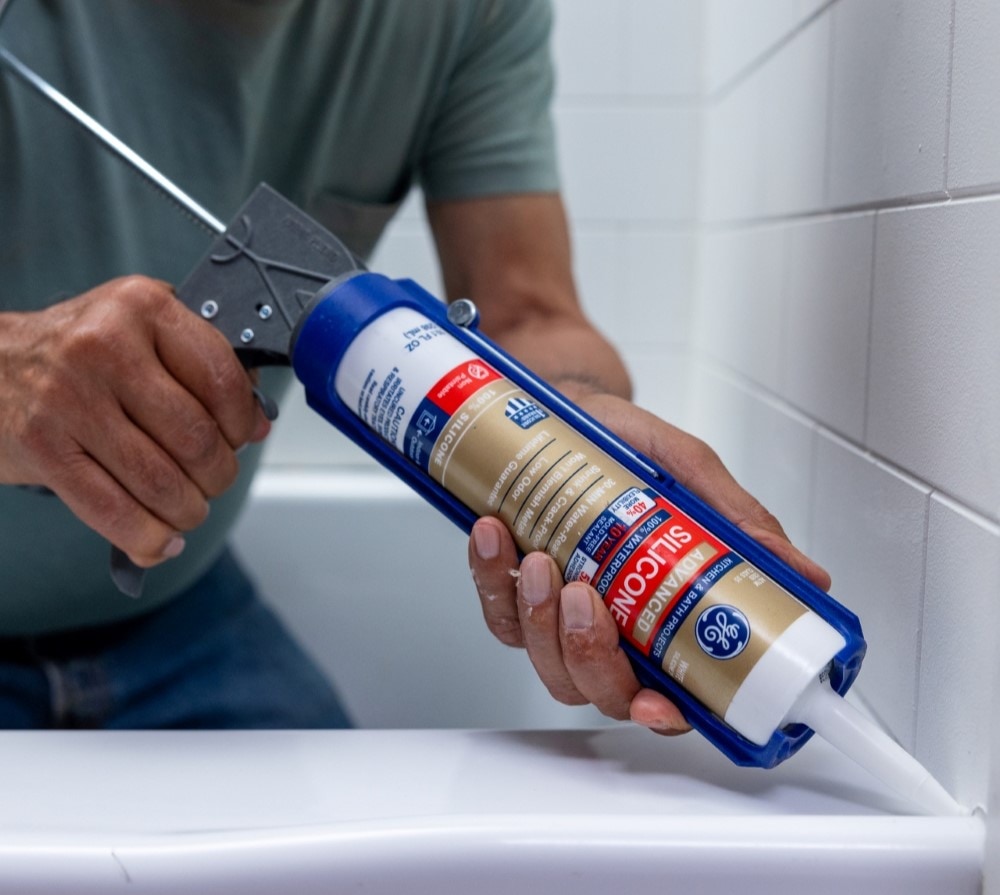
    Someone applying a fresh bead of silicone caulk in a shower.
    Apply a fresh bead of silicone caulk in your shower after removing the mold.

Preventative measures

To help prevent future mold growth, consider using some of these preventative measures.

  • Mold Resistant Products: One of the best ways to prevent mold and mildew growth is to use products that help stop the growth from happening. In a shower, this includes silicone sealant instead of other caulking products like vinyl latex. Silicone sealants are 100% waterproof and mold and mildew resistant.
  • Ventilation: Proper ventilation is crucial for reducing moisture buildup in the bathroom. Install and use exhaust fans during and after showers to expel humid air outside.
  • Regular Cleaning: Incorporate regular cleaning into your bathroom maintenance routine. Wipe down shower surfaces, including caulking, with a disinfectant cleaner or vinegar solution to prevent mold growth.
  • Dry Surfaces: After each shower, wipe down wet surfaces, including walls, floors, and caulking, with a squeegee or dry towel to remove excess moisture.
  • Repair Leaks: Address any leaks or water damage promptly to prevent moisture from seeping into walls, floors, and caulking.

Refresh your shower caulking with professional caulks and sealants from GE

Removing mold from shower caulking requires diligence, patience, and the right tools and techniques. By following the step-by-step process outlined in this guide and implementing preventative measures, you can effectively banish mold and maintain a clean, mold-free shower environment. Remember, regular maintenance is key to preventing mold growth and preserving the integrity of your bathroom. With these strategies in place, you can enjoy a refreshing shower experience without the worry of mold creeping back into your caulking.

When you need to replace the caulk in your shower, check out the professional products available from GE. Our silicone sealants and hybrid caulks are 100% waterproof and mold and mildew-resistant.

Purchase GE sealants from any of these retailers.

Contact Form

How to remove silicone sealant when renovating a client’s house

Silicone sealant is a versatile material commonly used for sealing gaps and joints in various surfaces, from bathrooms to windows. However, its removal can be a daunting task if not approached correctly. Whether you’re repairing a leak or taking on a major renovation for a client, knowing how to properly remove silicone sealant efficiently is essential.

In this comprehensive guide, we’ll explore various methods and tips to teach you how to remove silicone sealant.

Understanding silicone sealant

Before diving into removal techniques, it’s crucial to understand what silicone sealant is and how it works. Silicone sealant is a durable, flexible material commonly used in construction and household applications. It forms a waterproof seal when applied to surfaces, preventing water and air leakage. Silicone sealants come in various formulations each with its specific properties and applications.

Some key characteristics and properties of silicone sealant include:

  • Flexibility: Silicone sealants remain flexible over a wide range of temperatures, from extreme cold to high heat, without losing their sealing properties. This flexibility allows them to accommodate movement and vibrations without cracking or becoming brittle.
  • Chemical Resistance: Silicone sealants exhibit excellent resistance to many chemicals, including water, acids, alkalis, and solvents. This chemical resistance makes them suitable for use in environments where exposure to chemicals is common, such as bathrooms and kitchens. This is also why silicone sealants are particularly difficult to remove.
  • Adhesion: Silicone sealants adhere well to a wide variety of materials, including glass, metal, plastic, ceramic, and most building materials like wood and concrete. Proper surface preparation is essential to ensure good adhesion and long-lasting performance.
  • Mold and Mildew Resistance: Silicone sealants are naturally resistant to mold and mildew growth, thanks to their moisture-resistant properties. This makes them an excellent choice for sealing areas prone to moisture accumulations, such as showers, bathtubs, and sinks.

Silicone is an incredibly versatile and flexible substance. When used as a sealant, silicone is 100% waterproof, flexible, chemical resistant, and mold and mildew resistant.

Tools and materials for silicone sealant removal

Before you begin the removal process, gather the necessary tools and materials. Here’s what you’ll need:

  • Utility knife or razor blade
  • Silicone sealant remover or solvent
  • Plastic scraper or putty knife
  • Rubbing alcohol
  • Clean cloth
  • Gloves
  • Safety goggles
  • Ventilation mask (if using solvent-based remover)

Types of Silicone Sealant Solvents

There are several solvents commonly used to remove silicone sealant. These solvents work by softening and dissolving the silicone, making it easier to remove from surfaces. It’s important to note that some solvents may be more effective for certain types of silicone sealants or specific applications. Use these solvents carefully and always test them first to make sure they won’t damage the underlying surface.

Here are some of the commonly used solvents for removing silicone sealant:

  • Mineral spirits
  • Isopropyl alcohol (rubbing alcohol)
  • Acetone
  • Xylene
  • Methyl ethyl ketone (MEK)
  • Toluene
  • Commercial silicone sealant removers

How to remove silicone sealant: 3 different methods

Now that you have everything ready, let’s explore the different methods for removing silicone sealant:

  1. Manual Removal

    Manual removal involves physically cutting and scraping away the silicone sealant using a utility knife or razor blade. Follow these steps:

    • Use the utility knife or razor blade to carefully cut along the edges of the silicone sealant, creating a clean line.
    • Once the sealant is scored, use a plastic scraper to putty knife to gently pry and lift the sealant from the surface.
    • Work slowly and methodically to avoid damaging the surrounding areas.

  2. Chemical Removal

    For stubborn or old silicone sealant, a combination of manual and chemical removal methods may be necessary. Here’s how to combine both techniques effectively:

    • Start by scoring the sealant with a utility knife or razor blade as described in the manual removal method.
    • Apply a silicone sealant remover or solvent to the scored sealant, following the chemical removal method.
    • After 15 minutes to an hour, test a small area to see if the sealant is soft enough to scrape away. If it isn’t, continue to wait. Otherwise, use a plastic scraper or putty knife to scrape away the soft sealant.
    • Repeat the process as needed until the sealant is removed.
    Someone applying a silicone sealant solvent.
    Carefully follow the directions when using a silicone sealant solvent.
  3. Combination Method

    For stubborn or old silicone sealant, a combination of manual and chemical removal methods may be necessary. Here’s how to combine both techniques effectively:

    • Start by scoring the sealant with a utility knife or razor blade as described in the manual removal method.
    • Apply a silicone sealant remover or solvent to the scored sealant, following the chemical removal method.
    • After 15 minutes to an hour, test a small area to see if the sealant is soft enough to scrape away. If it isn’t, continue to wait. Otherwise, use a plastic scraper or putty knife to scrape away the soft sealant.
    • Repeat the process as needed until the sealant is removed.
    Someone using a putty knife to scrape away silicone sealant.
    After the sealant has softened, scrape it away with a putty knife.

Tips for sealant removal success

In addition to the above procedures, these tips will help improve your sealant removal outcomes:

  • Always read and follow the manufacturer’s instructions when using silicone sealant removers or solvents.
  • Wear appropriate safety gear, including gloves, safety goggles, and a ventilation mask when working with chemical removers or solvents.
  • Test any new removal method or product on a small, inconspicuous area first to ensure compatibility with the surface.
  • Work slowly and carefully to avoid damaging the surrounding areas.
  • After removing the silicone sealant, clean the surface with rubbing alcohol and a clean cloth to remove any remaining residue.

Use GE sealants to finish the job with professional results

Removing silicone sealant doesn’t have to be a daunting task. With the right tools, materials, and techniques, you can effectively remove old or unwanted sealant from various surfaces with minimal effort. Whether you prefer manual removal, chemical removal, or a combination of both, following these tips and methods will help you master the art of silicone sealant removal with ease. So roll up your sleeves, gather your tools, and say goodbye to old sealant – you’ve got this!

Check out our extensive lineup of GE caulks and sealants to choose the best product for your renovation project.

Contact Form

Stay comfortable all year with proper window insulation! How to insulate windows for all four seasons

Windows are our connection to the outside world, offering natural light, views of nature, and fresh air. However, they can also be a significant source of energy loss, especially during extreme weather conditions. Whether it’s the biting cold of winter or the scorching heat of summer, properly insulating your windows can make a world of difference in maintaining a comfortable indoor environment and reducing energy bills.

In this comprehensive guide, we’ll explore how to insulate windows for all four seasons, ensuring your home remains cozy and energy-efficient no matter the weather outside.

Understanding the need for window insulation

Before diving into specific insulation methods, it’s crucial to understand why window insulation matters. Windows are notorious for allowing heat transfer, meaning they can contribute to both heat gain and heat loss depending on the season. During winter, poorly insulated windows let cold air seep into your home while letting valuable heat escape.

During the summer, they can let in unwanted heat, making your air conditioning work harder to maintain a comfortable temperature. By effectively insulating your windows, you can create a thermal barrier that helps regulate indoor temperatures and reduces the strain on your heating and cooling systems.

If you’re not sure if you need extra insulation for your windows, look for gaps and cracks around the edges. You can also try to feel any drafts coming through your windows.

Regular window inspections are key to knowing if you need additional insulation. Look for gaps and cracks and feel for any air drafts.

How to insulate windows for each season

Depending on where you live, each season may bring unique challenges when it comes to keeping your home comfortable. Adding an extra layer of insulation to your windows can help you stay comfortable, no matter what the weather is like outside.

  1. Stay warm in the winter

    If you live in the northern part of the United States, winter can get extreme. You don’t want cold drafts blowing into your house. Try these insulation techniques to keep you and your family warm.

    • Weatherstripping: Apply self-adhesive weatherstripping along the edges of windows to seal gaps and prevent drafts.
    • Caulking: Use caulking or seal any gaps or cracks around window frames, preventing cold air from entering and warm air from escaping.

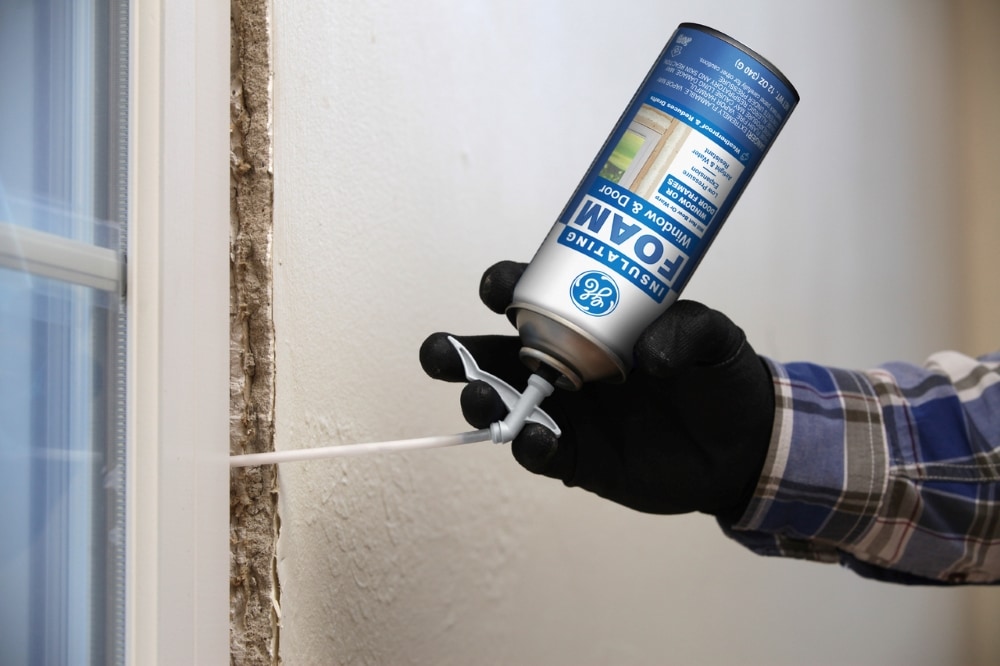
    • Insulating Foam: If there are any larger gaps along the interior or exterior of your windows, an expanding insulating foam can help seal those spaces.
    • Insulated Curtains: Install thick, insulated curtains or drapes to provide an additional layer of insulation. Close them at night to trap heat inside and open them during the day to let sunlight in for natural heating.
    • Window Insulation Film: Apply a window insulation film to create an extra layer of insulation. These films are easy to install and can significantly reduce heat loss through windows.
    Insulating foam being applied to a large gap around a window frame.
    Insulating foam can help seal large gaps in your windows.
  2. Let the sunshine in during the spring

    • Remove Winter Insulation: As temperatures begin to rise, remove any heavy winter insulation such as insulated curtains or window films to allow sunlight and fresh air into your home.
    • Install Screens: Install window screens to keep insects out while allowing fresh air to circulate freely. Screens also diffuse sunlight, reducing glare and heat gain indoors.
  3. Stay cool in the summer

    While you may enjoy the warm rays of sunshine in the summer, there are days when the heat can be unbearable. According to the Office of Energy Efficiency & Renewable Energy, 76% of the sunlight that hits standard double-pane windows enters your house as heat.

    Keep your cool with some extra protection on your windows.

    • Reflective Window Film: Apply reflective window film to reduce solar heat gain. These films reflect a portion of the sun’s rays, keeping your home cooler and reducing the need for excessive air conditioning.
    • Exterior Shades: Install exterior shades or awnings to block direct sunlight from entering your windows. This prevents heat from penetrating your home’s interior while still allowing natural light to filter through.
    • Window Sealant: If your windows are leaking air around the edges, they are letting the hot summer air in. Seal your windows along the edges with caulk or silicone sealant to keep the hot air out.
    • Interior Shades: While most homes have window blinds, some types, including cellular shades, are better at reflecting heat. These shades have a honeycomb design that traps the heat inside the shades and can be opened and closed whenever you want.
  4. Enjoy the colors of fall

    Now that the temperatures are dropping, it’s time to prepare for winter again.

    • Check Caulking and Weatherstripping: Inspect caulking and weatherstripping for any signs of wear or damage. Replace or repair as needed to ensure your windows remain properly sealed.
    • Insulated Window Panels: Install removable insulated window panels for added insulation during colder months. These panels can be easily attached to the interior of windows and removed when not needed.

Additional tips for year-round window insulation

Beyond the tips we already shared, consider these strategies to help keep your home comfortable through every season:

  • Use Draft Stoppers: Place draft stoppers or draft snakes along the bottom of windows and doors to prevent cold air from entering and warm air from escaping.
  • Upgrade to Energy-Efficient Windows: Consider investing in energy-efficient windows with double or triple-pane glass, low-emissivity coatings, and gas fills for enhanced insulation.
  • Plant Trees and Shrubs: Strategically plant trees and shrubs around your home to provide natural shade during summer months, reducing heat gain through windows.
    shade trees, window insulation
    Strategically planted trees can offer shade and insulation for your home.
  • Inspect Your Windows: Additional insulation materials, like caulk and weatherstripping, do not last forever. Inspect your windows during each season to see if any of these materials need to be

GE sealants can help insulate your windows for year-round comfort

Properly insulating your windows for all four seasons is essential for maintaining a comfortable indoor environment and reducing energy costs. By implementing the strategies outlined in this guide, you can effectively insulate your windows through every season, keeping your home cozy in winter, cool in summer, and energy-efficient throughout the year.

Small changes in window insulation can significantly improve comfort and energy savings, making it a worthwhile investment for any homeowner.

Check out our lineup of GE caulks and sealants to help insulate your windows.

Contact Form

Learn how to caulk like a pro! How to Caulk Baseboards for a Seamless Finish

Learning how to caulk baseboards the right way can make all the difference in the finished look of your room. Our step-by-step guide to caulking baseboards will help you achieve the seamless, professional look you want.

A step-by-step guide on how to caulk baseboards

Follow these steps for a high-quality finish that looks great and lasts a long time.

  1. Gather Your Supplies

    Before you begin, gather all the supplies. You’ll need:

  2. Prepare the Surface

    Thoroughly clean the area around the baseboards. Use a damp cloth or vacuum cleaner to remove any dust, dirt, or debris. For best results, cleanse the surface with rubbing alcohol to ensure it’s free of any grease or residue, which could interfere with adhesion.

  3. Apply Painter’s Tape

    To protect the surrounding surfaces from excess caulk and ensure clean lines, apply painter’s tape along the edges of the baseboards and adjacent walls. Press the tape firmly to prevent caulk from seeping underneath.

  4. Load the Caulk Gun

    Place the caulk or sealant tube in the caulk gun. Cut the nozzle tip at a 45-degree angle using a utility knife and pierce the seal. The size of the opening will determine the thickness of the caulk bead. Start with a smaller cut, adjusting as needed.

  5. Apply the Caulk

    Hold the caulk gun at a 45-degree angle. Squeeze the trigger slowly to dispense a continuous bead of caulk along the gap between the baseboard and the wall. Use steady pressure and keep the caulk gun moving smoothly to ensure even coverage. Avoid applying too much caulk to prevent a messy finish.

  6. Smooth the Caulk

    Once you’ve applied the caulk, smooth the bead with a caulk smoothing tool or a damp finger. Work quickly but carefully to achieve a neat, uniform finish. Remove any excess caulk before it dries to avoid bumps or ridges.

  7. Remove Painter’s Tape

    While the caulk is still wet, pull off the painter’s tape at a 45-degree angle to reveal clean, crisp edges. Be careful not to smear or smudge the freshly applied caulk.

  8. Clean Up

    Dispose of used caulk tubes and wipe down your tools with a damp cloth or paper towel to remove any residual caulk. If you accidentally get caulk on your skin or clothing, use soap and water to clean it off before it dries.

  9. Allow to Dry

    Let the caulk dry following the manufacturer’s instructions before painting or exposing it to moisture. This typically takes anywhere from 24 to 48 hours, depending on the type of caulk and environmental conditions.

  10. Paint (Optional)

    If desired, paint the caulk after it cures to match the color of your baseboards and achieve a seamless finish. Use quality paint and apply evenly for the best look.

    Repeat these steps to caulk the bottom of the baseboards to the floor.

Preparation is key! An improperly prepared surface will hinder the long-term adhesion of your caulk.

How to extend the lifespan of caulk on baseboards

Over time, the caulk along your baseboards may start peeling off or become discolored. To prevent this, follow these steps to extend the life of the caulk on your baseboards.

  1. Choose the Right Caulk

    Choosing a high-quality, paintable caulk specifically for indoor use is crucial for its longevity.

    Acrylic latex and acrylic hybrid caulks are excellent choices for their durability and ease of application. Before purchasing, read the label to ensure the caulk is suitable for baseboards and the surrounding materials.

  2. Prepare the Surface Properly

    Good adhesion and caulk longevity start with proper surface preparation. As mentioned earlier, thoroughly clean the surface to remove any dirt, dust, grease, or old caulk residue. A mild detergent or rubbing alcohol works well. Allow the surface to dry completely before caulking.

  3. Apply Caulk Correctly

    Improper application can have a significant impact on caulk’s longevity. Avoid gaps, bubbles, or imperfections, as these can collect dust and weaken adhesion. Once applied, smooth it out carefully with your finger or a caulking tool.

  4. Seal Joints and Gaps

    In addition to caulking the gap between the baseboard and the wall, seal any other joints or large gaps in the baseboard itself. Inspect the baseboards for cracks, splits, or gaps and fill them with caulk.

    Pay special attention to corners and where baseboards meet other trim pieces. This step helps prevent air leaks and moisture intrusion, which can weaken the caulk over time.

  5. Monitor and Maintain

    Regularly check the caulk for signs of wear, damage, or deterioration, such as cracks, shrinkage, or discoloration. If you detect any issues, promptly re-caulk or touch up the affected areas to prevent further damage.

    Keeping the surrounding area clean and free of debris also helps maintain the caulk’s appearance and performance.

  6. Consider Environmental Factors

    Environmental factors such as temperature fluctuations, humidity levels, and exposure to sunlight can affect the durability of caulk. Choose a caulk suitable for your area’s environmental conditions.

    For example, if you live in a region with extreme temperature variations, opt for a caulk that is formulated for both indoor and outdoor use and can withstand temperature extremes without cracking or shrinking.

Signs it’s time to re-caulk

Your baseboards will eventually need re-caulking. Look for these signs:

  • Visible gaps
  • Cracked or peeling caulk
  • Discoloration
  • Water damage
  • Drafts or air leaks

If you notice these signs, remove the old caulk with a caulk removal tool or utility knife, taking care not to damage the surfaces. Once the old caulk has been removed, thoroughly clean the surface to remove any dirt and dust. Then, follow the step-by-step instructions on how to apply caulk.

While baseboards are easily overlooked, they give your home a clean, polished look. Choosing the right sealant for your baseboards will help them last longer and look better.

Looking to apply new caulk or sealant to your baseboards? Choose a GE Sealant product for reliable results.