QRCODE - Sealant Smoothing ToolQRCODE - Sealant Remover ToolQRCODE - Grout Whitener PenQRCODE Cartridge Opener Smoothing ToolQRCODE - Interior SealQRCODE - Interior FillQRCODE - Exterior SealGE AccessoriesFrequently Asked QuestionsQRcode Pro Seal Max K&BQRcode Pro Seal Max W&DSealed For Good Insulating FoamPRO / DIY QR Code Landing Page - Advanced Silicone 2 WDPRO / DIY QR Code Landing Page - Advanced Silicone 2 Kitchen & BathPRO / DIY QR Code Landing Page - Supreme Silicone WDPRO / DIY QR Code Landing Page - Supreme Silicone KBPRO / DIY QR Code Landing Page - All PurposePRO / DIY QR Code Landing Page - Tub and TileWeatherizationPro Market SweepstakesConfirmationSilicone SealantSealed For Good Window & DoorSealed for Good Kitchen & BathtestingSkills USA 2023 - Post EventJC TestAcrylic Caulks & SealantsPaintable SealantsSilicone SealantsReNew - ShoppableAdvanced Acrylic - LowesFoam - ShoppableSustainabilitySkills USAWarrantyRe-NewRe-New ProRe-NewThank you for getting in touch with GE SealantsSupreme SiliconeSupreme Silicone at Lowe'sSupreme Silicone At Home DepotRepair and PrepareInstagramCA Privacy NoticeFill In the GapsKitchen & BathInsulating FoamGE-Branded Insulating Foams at WalmartGE-Branded Silicone Sealants at The Home DepotGE-Branded Silicone Sealants at Lowe's Home ImprovementGE-Branded Acrylic SealantsGE-Branded Silicone SealantsGE-Branded Hybrid SealantsSealants for Window & Door ProjectsCaulks and Sealants for Kitchen & Bath ProjectsCaulks and Sealants for Seal & Paint Projects404Product Disclaimers & GuaranteesHomeContact UsNewsroomPress ReleasesAll ProductsOur ProductsWindow & DoorKitchen & BathSeal & PaintInsulating FoamPrivacy PolicySpecialtyProjects & How-To'sTerms and ConditionsTrademarks and Legal NoticesWhere to Buy GE Products
Pest Block Insulating Foam
Interior Seal Silicone Sealant
Exterior Seal Acrylic Caulk
Pro Seal Max Kitchen & Bath
Pro Seal Max Window & Door
Supreme Silicone Window & Door Sealant
Advanced Silicone 2® Window & Door Sealant
All Purpose Silicone 1® Sealant
Paintable Silicone Supreme Window & Door Sealant
Siliconized Advanced Acrylic Window & Door Sealant
Siliconized Multi-Purpose Acrylic Window & Door Caulk
Seal & Fill Multi-Purpose Window & Door Caulk
Supreme Silicone Kitchen & Bath Sealant
Advanced Silicone 2® Kitchen & Bath Sealant
Tub & Tile Silicone 1® Sealant
Paintable Silicone Supreme Kitchen & Bath Sealant
Siliconized Advanced Acrylic Kitchen & Bath Sealant
Siliconized Multi-Purpose Acrylic Kitchen & Bath Caulk
Re-New
Painter’s Pro Quick Dry Siliconized Acrylic
Painter’s Pro Siliconized Acrylic Caulk
Painter’s Caulk
Gutter Silicone 2® Sealant
Concrete Silicone 2® Sealant
Metal Silicone 2® Sealant
Project Filter
  • location
    Insulating Foam
    Kitchen & Bath
    Paint Projects
    Specialty
    Windows, Doors, Siding & Trim
  • project-type
    All
    Window & Door
    Kitchen & Bath
    Seal & Paint
    Insulating Foam
    Specialty
  • color
    Almond
    Black
    Brown
    Clear
    Light Gray
    Metallic Gray
    White
  • formulas
    Acrylic
    Insulating Foams
    Paintable Silicone
    Silicone
    Siliconized Acrylic
  • performance
    Not Paintable
    Paintable
  • product-type
    Adhesives
    Caulks & Sealants
    Specialty Products
  • application
    Can
    Cartridge
    Pen
    Squeeze Tube
  • gap_width
    Gaps 1"-3"
    Gaps less than 1"
    Window & Door
  • humidity-level
    Extensive Humidity
    Normal Humidity
  • product_finder
    Pathway 1
    Pathway 2
    Pathway 3
    Pathway 4
    Pathway 5
    Pathway 6
    Pathway 7

Contact Form

Advanced Silicone 2® Kitchen & Bath Sealant

Contact Form

Seal out spring showers and humidity with GE’s trusted home waterproofing solutions! A helpful guide to preventing water damage this spring

Note: This DIY article is provided as a general guide only and is not intended to take the place of product-specific installation procedures; always follow applicable manufacturers’ instructions. Depending on your home’s age and condition, location within the home, and other potential factors, repairs and/or upgrades or other services may be necessary prior to the beginning and/or completion of your project that may involve the services of a home improvement professional. This article does not include advice pertaining to local building codes and/or any related inspections.

Spring may bring warmer temperatures and longer days, but it also brings heavy rain and rising humidity—prime conditions for water damage. Without proper moisture protection, leaks can develop in kitchens, bathrooms, basements, and around exterior openings. This guide will show you how to inspect, seal, and safeguard your home using trusted GE silicone sealants.

Springtime water risks

Spring weather can quickly expose weaknesses in your home’s waterproofing. As temperatures rise and snow melts, added moisture can overwhelm old sealant, worn joints, and porous surfaces. Heavy rains and shifting ground can lead to basement leaks, while increased humidity contributes to mold growth in bathrooms and around windows. Even small gaps or cracks can allow water to penetrate walls, trim, and foundation seams—causing water damage that often goes unnoticed until it’s too late.

Learn more about sealing windows in our how-to article.

Bathrooms and kitchens are particularly vulnerable due to frequent water use and steam buildup. On the exterior, poorly sealed windows, doors, and siding are common entry points for moisture. Without a proper barrier, water intrusion can damage drywall, flooring, insulation, and structural materials over time.

Understanding these seasonal risks is the first step toward prevention. By proactively inspecting and sealing potential trouble spots, you can help prevent moisture damage before it starts. The right products—paired with early action—can make all the difference in maintaining a dry, protected living space.

Inspecting your home for vulnerabilities

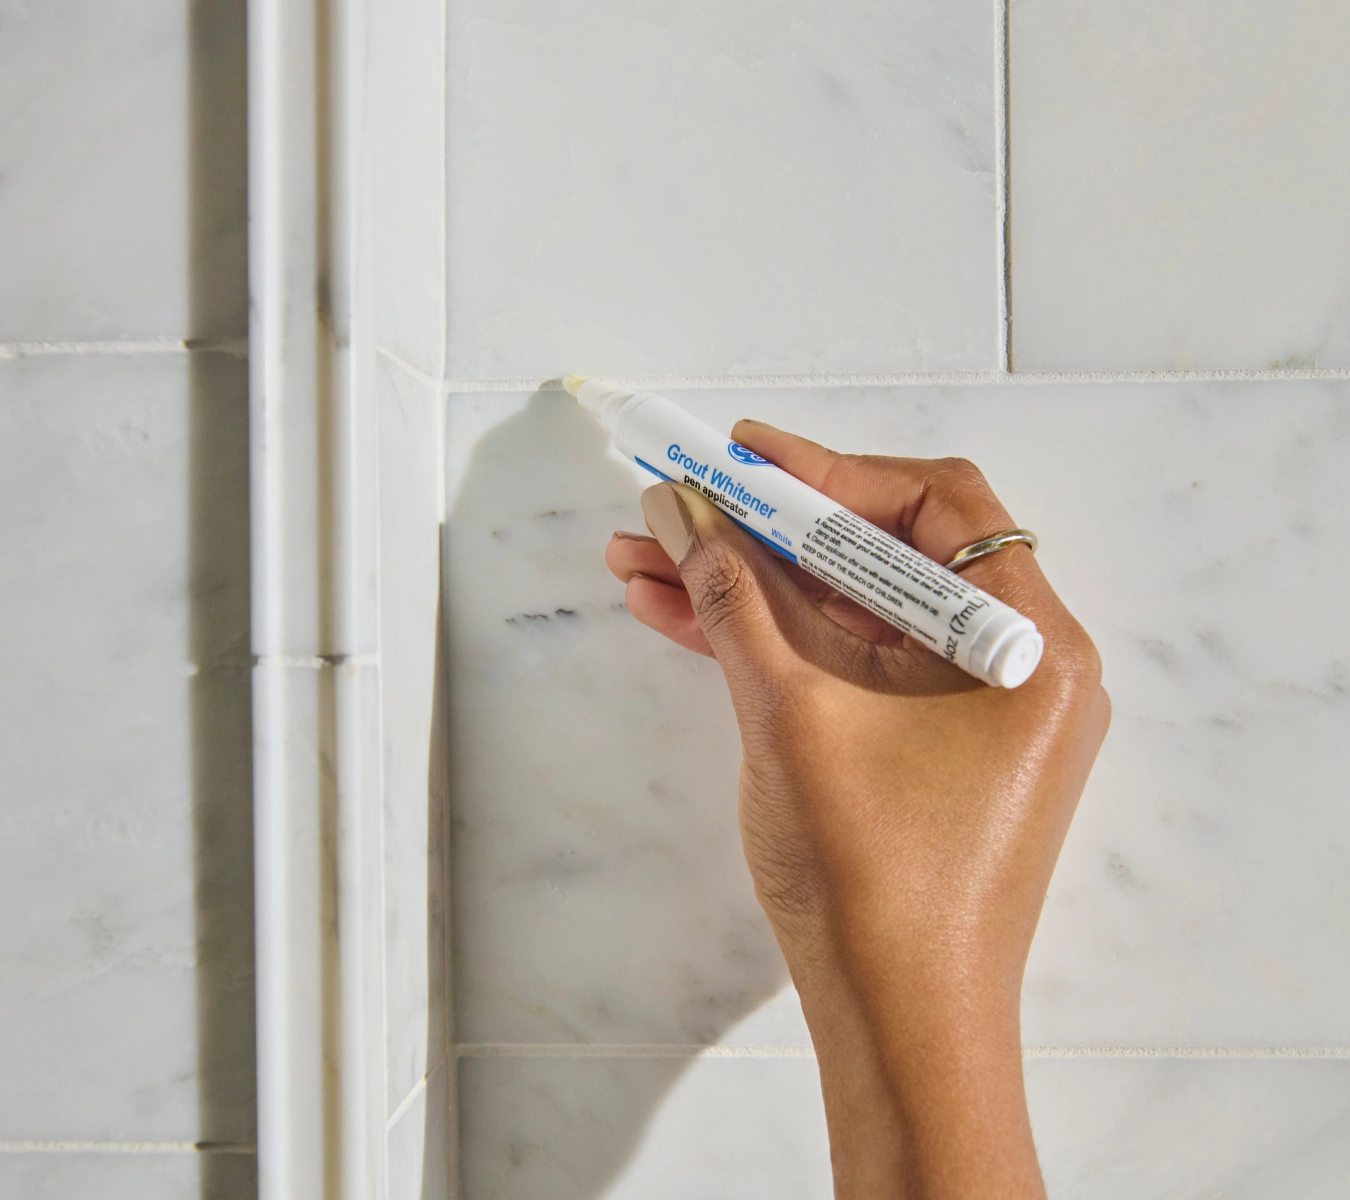
A thorough inspection is the start of any effective water damage prevention plan. Start by checking common problem areas where moisture is most likely to enter. In the kitchen and bathroom, look for cracked, shrinking, or moldy sealant around sinks, tubs, backsplashes, and countertops. Discoloration or separation at the seams can signal failure and should be addressed immediately.

Move to the basement, inspecting walls and floors for any signs of dampness, musty odors, or efflorescence—a white powdery residue that often indicates water infiltration. On the exterior, examine the seals around windows and doors, siding joints, and areas where pipes or vents penetrate the wall. Look for gaps, dried or peeling sealant, or material pulling away from the surface.

Don’t forget the attic and roofline—check for water stains or soft spots that may result from ice dams or roof leaks. Spotting vulnerabilities early helps prevent small gaps from turning into costly repairs.

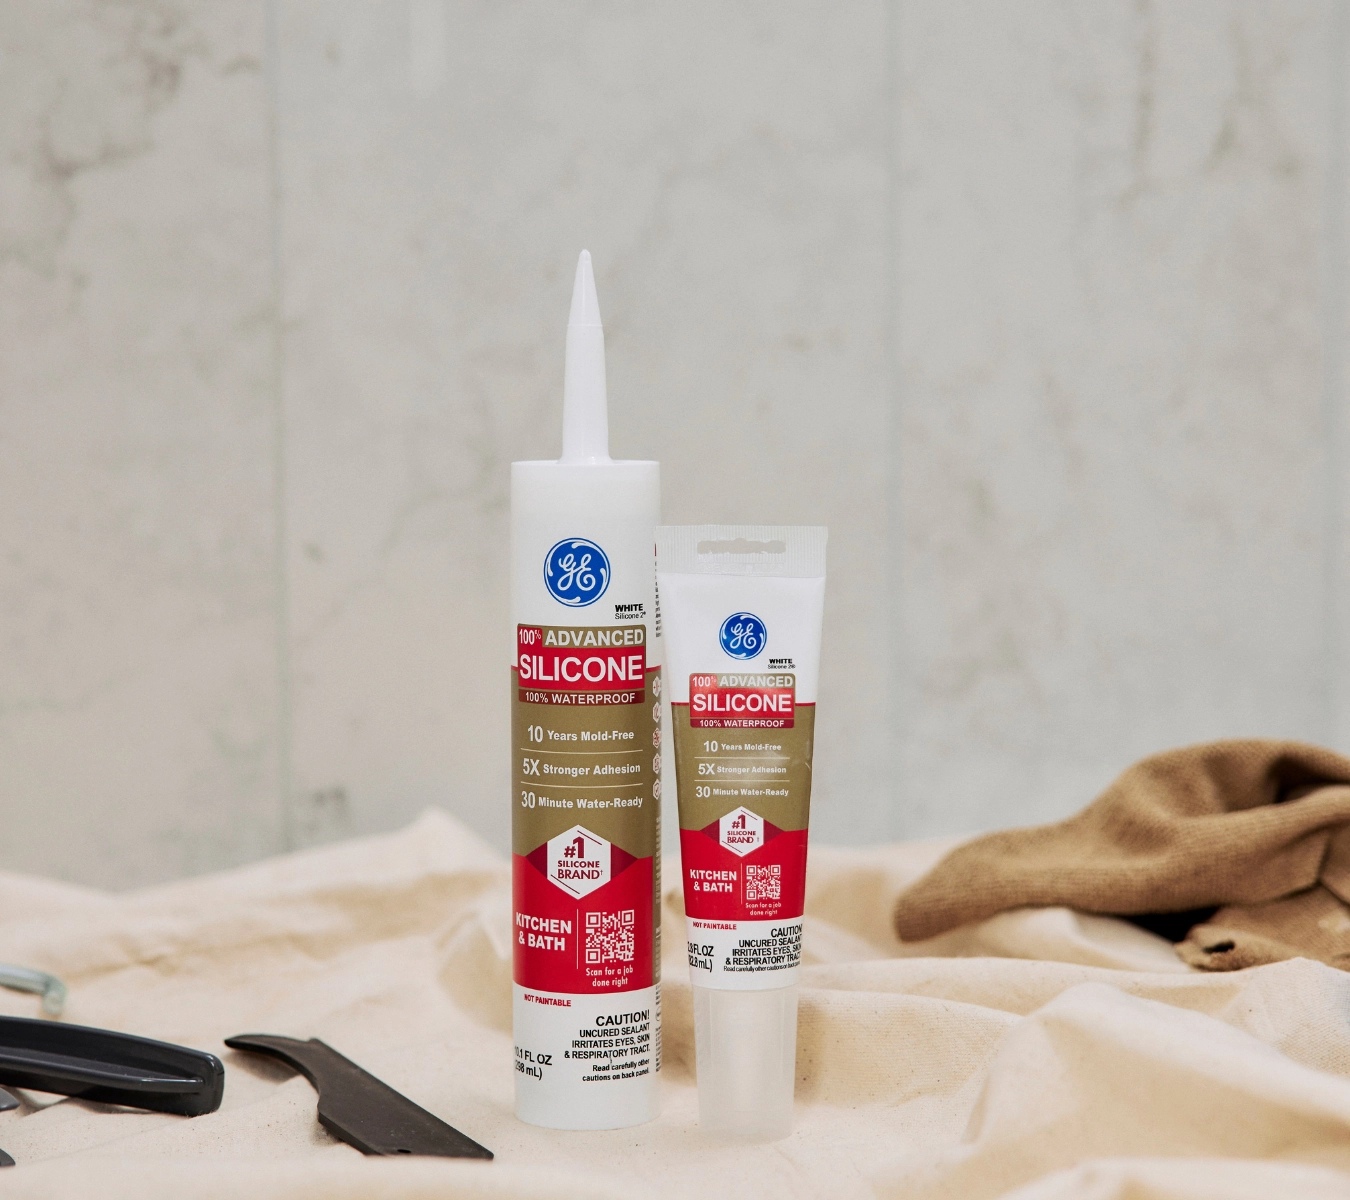
Seal early and stay dry. Spring is the season to get ahead of leaks. GE Advanced Silicone Kitchen and Bath Sealant and All Purpose Silicone provide long-lasting, waterproof protection in kitchens, bathrooms, basements, and exteriors—so moisture stays out and your home stays intact.

Sealing solutions for interior spaces

Interior spaces like kitchens and bathrooms are prime locations for moisture buildup and water damage—and without proper sealing, water can seep behind fixtures, into walls, or under flooring. That’s why using a durable, mold-resistant sealant is essential for lasting protection in high-humidity zones.

Advanced Silicone Kitchen and Bath Sealant.
A photo of Advanced Silicone Kitchen and Bath Sealant.


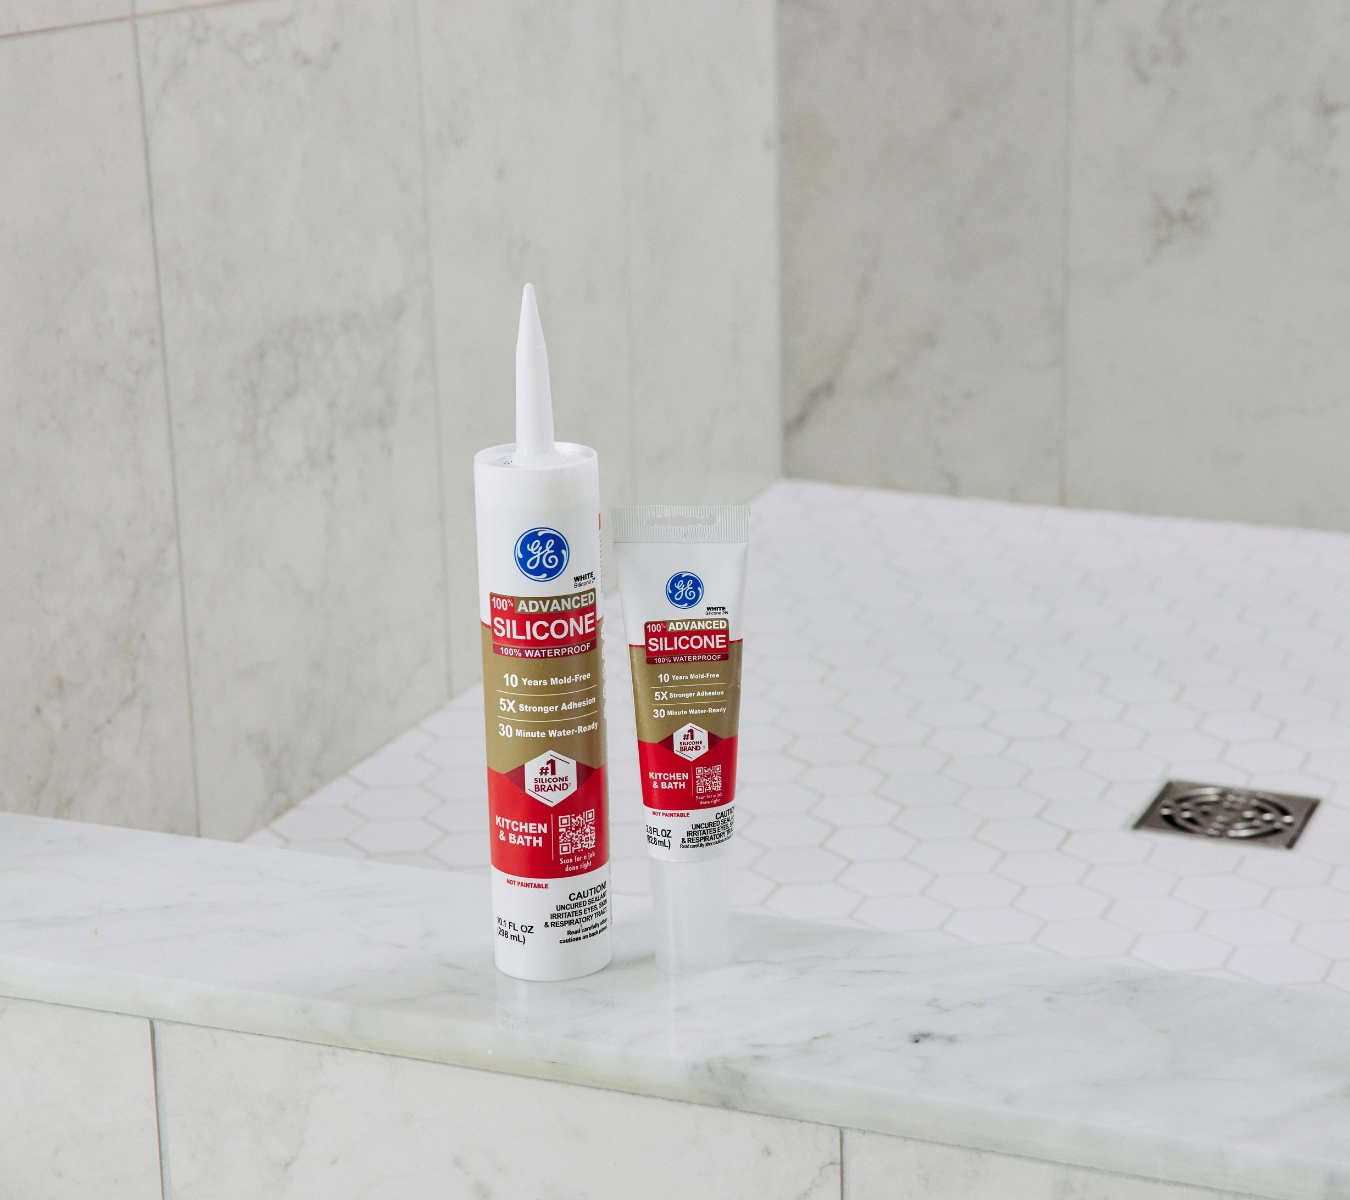
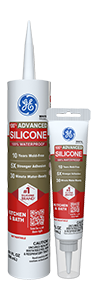
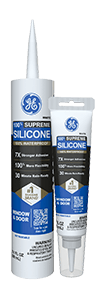
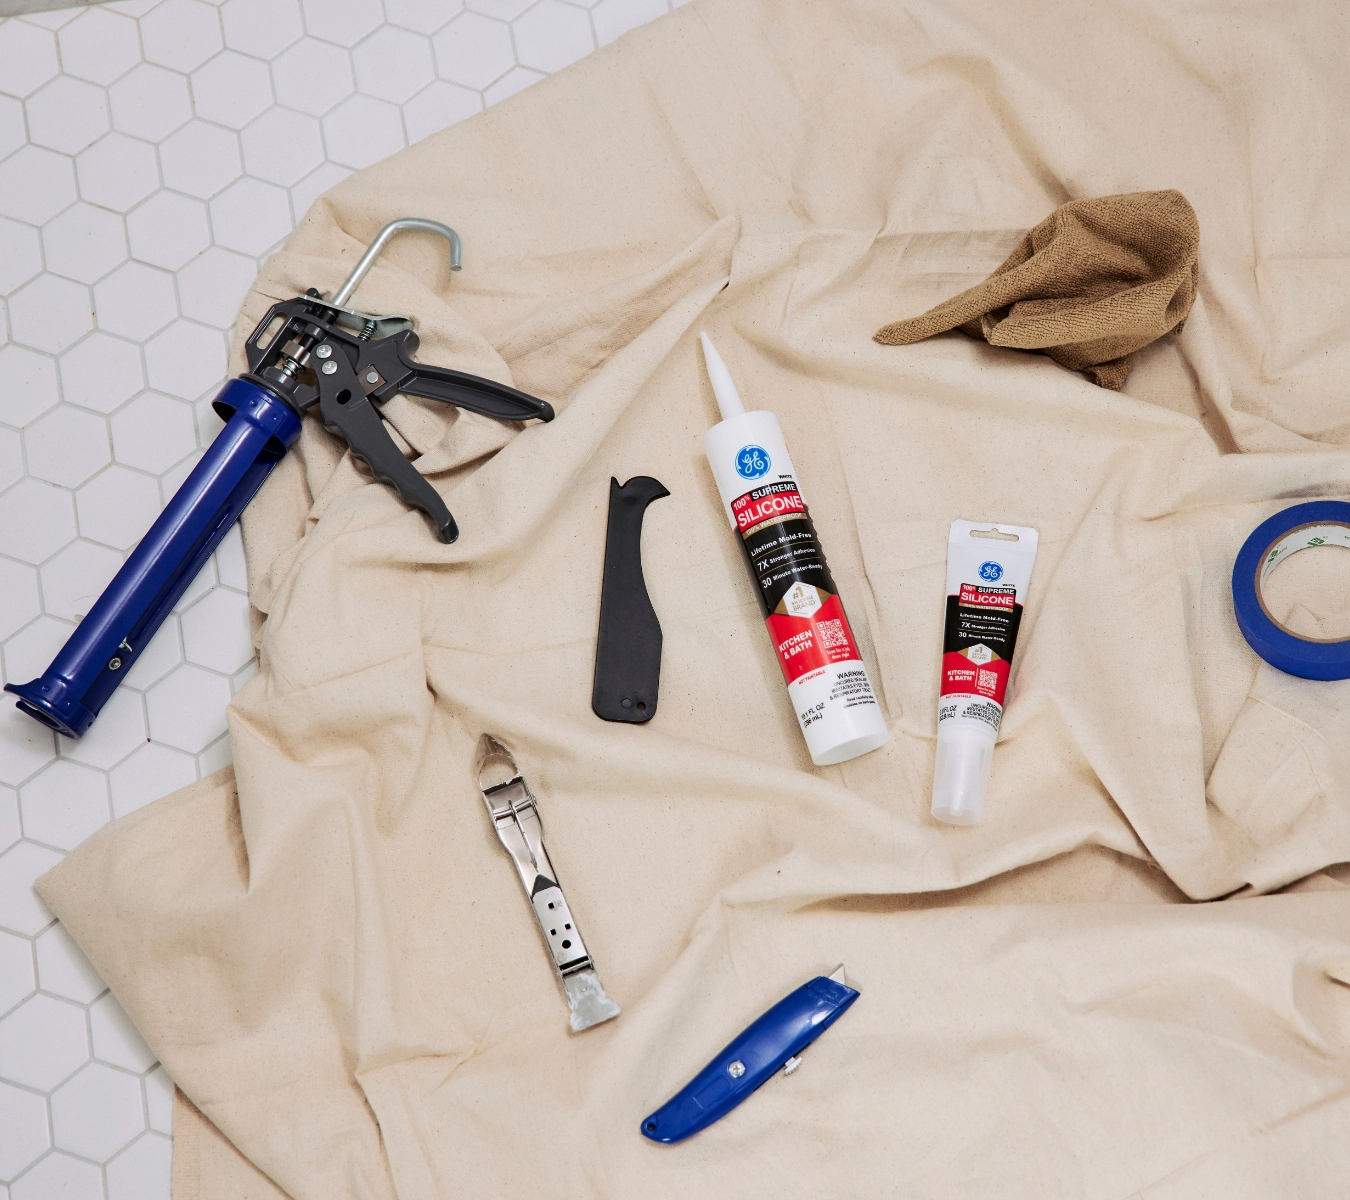
GE Advanced Silicone Kitchen & Bath Sealant is specifically formulated for these environments. This 100% silicone product is permanently waterproof, offering strong adhesion to surfaces like tile, porcelain, glass, and laminate. It’s also mold-resistant for up to 10 years, helping to keep wet areas cleaner and healthier over time. And with its 30-minute water-ready cure time, it’s ideal for quick, efficient repairs or upgrades.

Apply it around sinks, tubs, shower edges, countertops, and backsplashes—anywhere water is present daily. Be sure to remove old, failing sealant before reapplying. Clean and dry the surface, apply a continuous bead, and smooth it with a caulking tool or gloved finger.

This product’s flexibility ensures it won’t crack or shrink, even with daily cleaning and temperature fluctuations. For kitchens and baths, Advanced Silicone delivers the reliability and performance professionals trust for interior leak prevention and long-term moisture protection.

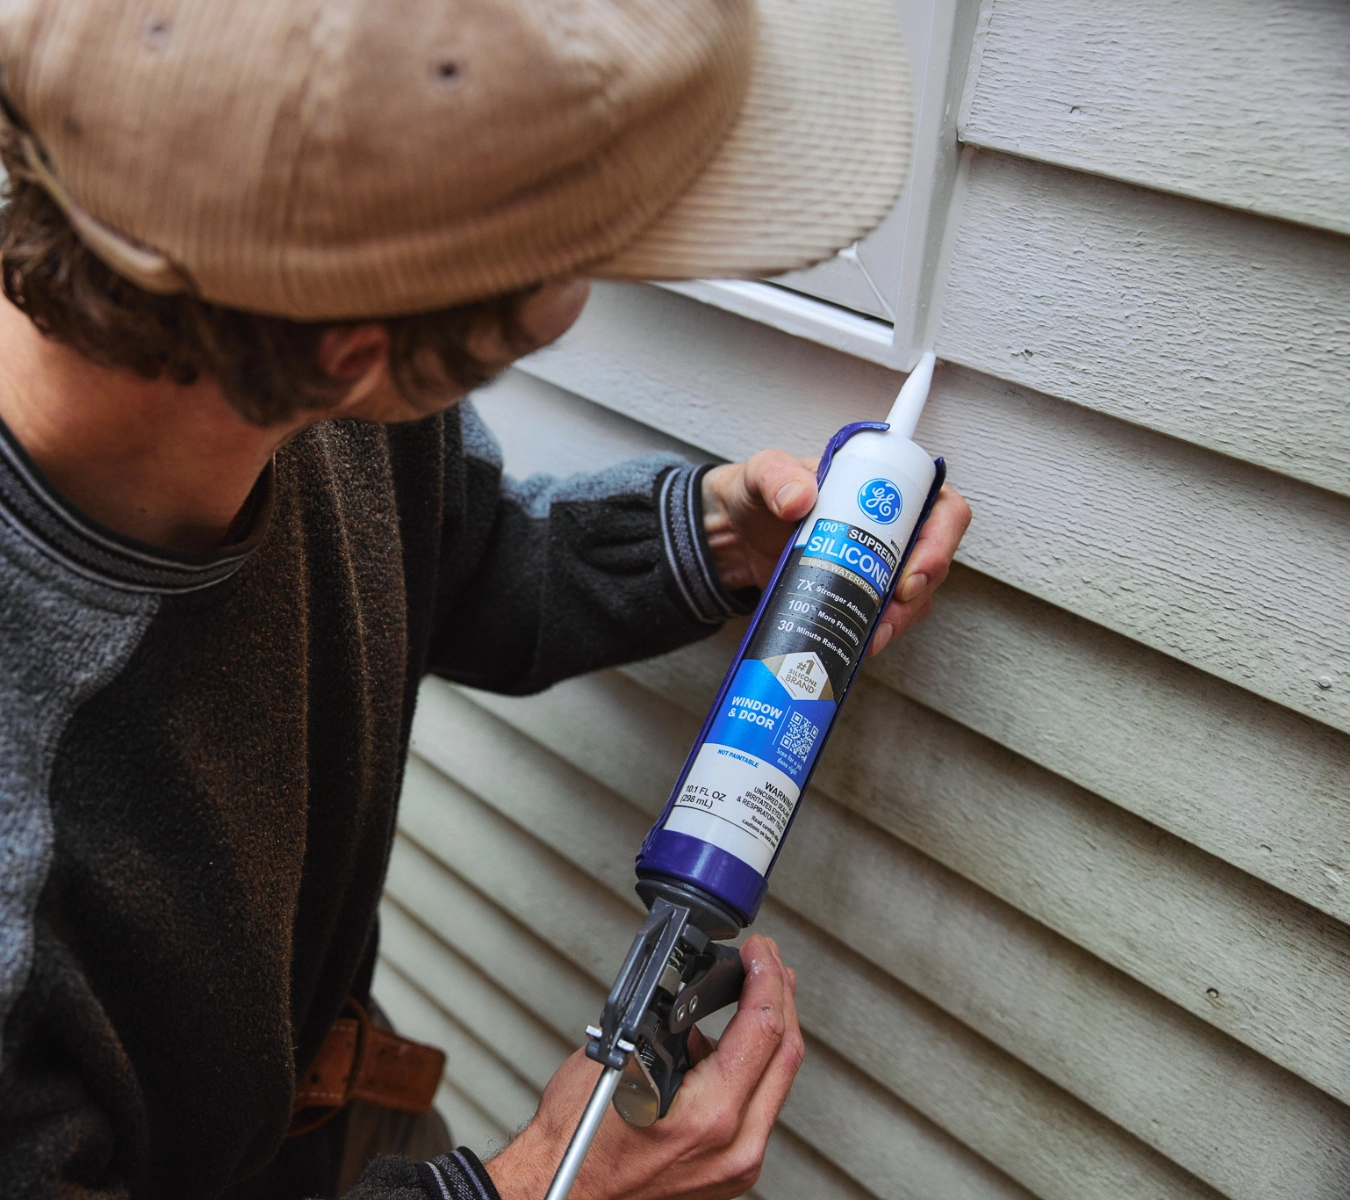
Fortifying exterior defenses

The exterior of your home is the first line of defense against spring rain and humidity. Gaps around windows, doors, siding joints, and utility penetrations can allow water to seep into your home’s structure, leading to rot, mold, and energy loss. Proper sealing with a weather-resistant sealant is an essential part of maintaining a watertight barrier.

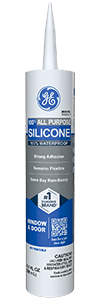
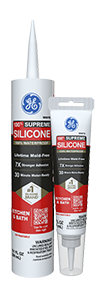
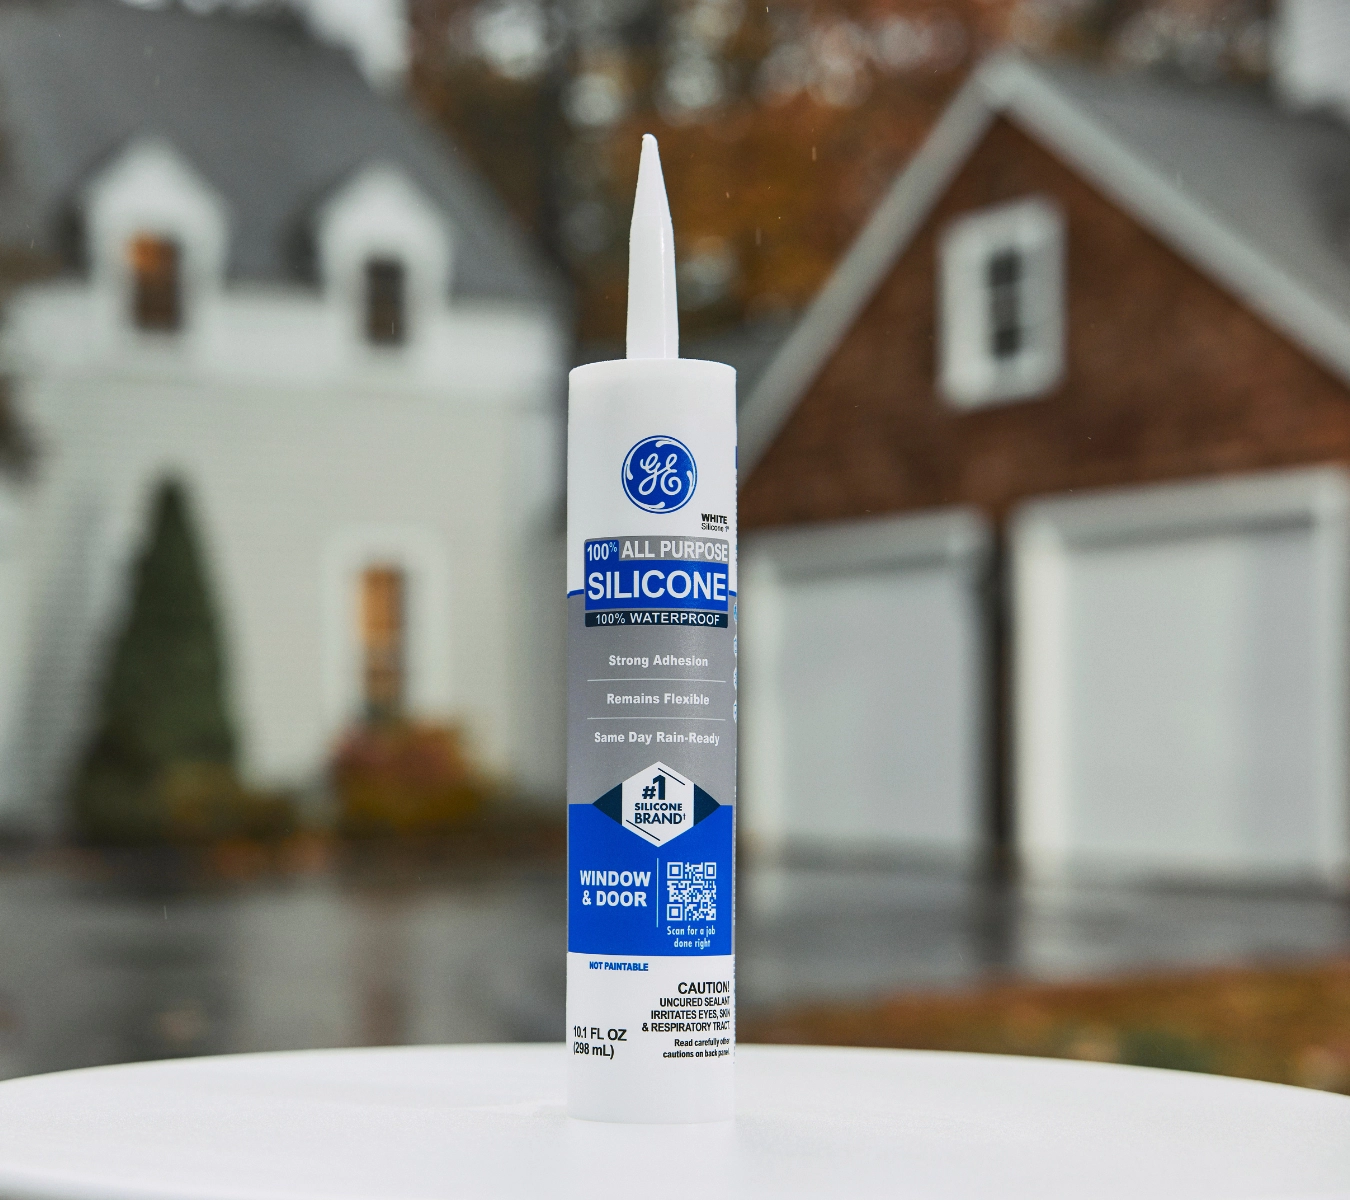
GE All Purpose Silicone Sealant is an excellent choice for leak prevention in these high-exposure areas. This 100% silicone formula is permanently weatherproof, delivering strong adhesion and flexibility to a range of materials including wood, vinyl, metal, and brick. It becomes water-ready in just 30 minutes, making it ideal for quick touch-ups or full resealing projects.


A homeowner removes old sealant in a bathroom with GE’s Sealant Remover Tool.
A photo of a homeowner removing old sealant in a bathroom with GE’s Sealant Remover Tool.

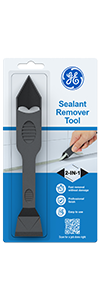
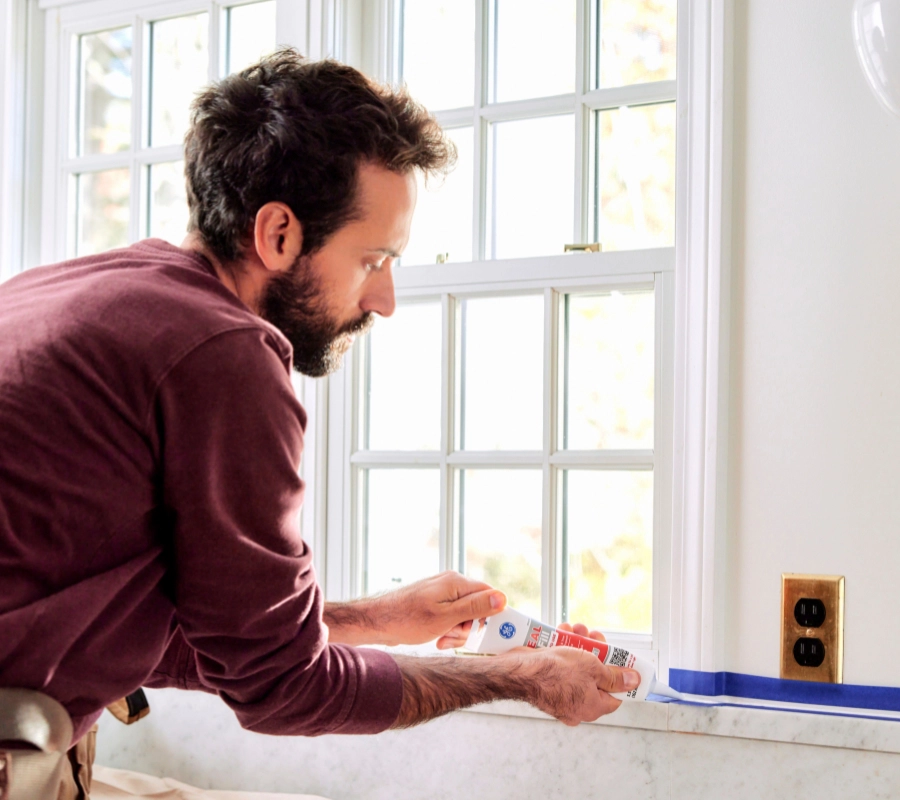
Use it to seal exterior trim, window and door frames, siding seams, and other vulnerable gaps. Before applying, remove any cracked or deteriorated sealant with GE’s Sealant Remover Tool or a putty knife. Then clean the surface and allow it to dry. Apply a steady bead along the joint and smooth it immediately for a clean finish and optimal contact.

Dried sealant on your hands and equipment? Learn more about removing sealant after a job.

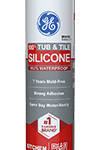
GE All Purpose Silicone won’t shrink, crack, or break down in extreme temperatures or UV exposure. With reliable performance and 7-year mold-free product protection, it helps preserve your exterior and keep water where it belongs—outside.

Maintenance and long-term home waterproofing

Home waterproofing isn’t a one-time task—it’s part of regular home maintenance. Even the best sealants need periodic inspection, especially after heavy storms or temperature swings that can shift materials and create new gaps. Make it a habit to check high-moisture areas—like bathrooms, kitchens, basements, and exterior joints—at the start of each season.

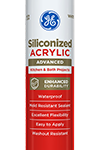
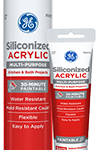
Reapply sealant as needed to maintain a strong barrier against water, mold, and air leaks. GE silicone sealants, such as Advanced Silicone Kitchen and Bath and All Purpose Silicone, are designed for long-term durability and minimal upkeep. Their flexibility and adhesion help them stay intact longer than water-based or acrylic alternatives. With consistent care and quality products, you can protect your home year-round and avoid costly moisture-related repairs.

To get GE Sealants’ products for your home improvement project, visit these fine retailers in the U.S. or Canada.

Contact Form

Tub & Tile Silicone 1® Sealant

Contact Form

Paintable Silicone Supreme Kitchen & Bath Sealant

Contact Form

Get cleaner lines, longer-lasting paint, and a sealed kitchen you’ll be proud of How to apply sealant when painting your kitchen

Note: This DIY article is provided as a general guide only and is not intended to take the place of product-specific installation procedures; always follow applicable manufacturers’ instructions. Depending on your home’s age and condition, location within the home, and other potential factors, repairs and/or upgrades or other services may be necessary prior to the beginning and/or completion of your project that may involve the services of a home improvement professional. This article does not include advice pertaining to local building codes and/or any related inspections.

Painting your kitchen is a great way to refresh the space, but don’t forget sealant to protect surfaces and leave a clean finish. Knowing when and where to apply kitchen sealant—before or after painting—can make a big difference in both appearance and durability. This guide covers the key steps for sealing properly during your kitchen painting project.

Why you should apply sealant when painting your kitchen

In kitchen painting projects, sealant does more than just add a clean appearance—it plays an important role in protecting your surfaces. Kitchens are high-moisture environments, and water can easily seep into gaps where countertops meet walls, around sinks, or along backsplashes. Without proper sealing, moisture can lead to peeling paint, warped materials, or even mold growth.

Applying a high-quality silicone sealant helps create a flexible, waterproof barrier in vulnerable areas. It also gives painted edges a crisp, finished look, especially where trim or tile meets the wall. For areas that require regular cleaning or exposure to splashes, using a kitchen-grade silicone sealant ensures lasting protection that won’t crack or shrink.

Paint or seal first? It depends.

If you’re using Seal & Fill Multi-Purpose Kitchen & Bath Caulk, you can apply it before painting for a seamless finish. For non-paintable options like GE Advanced Silicone Kitchen & Bath Sealant, paint first, then seal. Always check the label to avoid adhesion issues. For a clean look, choose a sealant color that matches your paint or trim, or use clear for minimal visual impact.

When to seal and when to paint

A photo of GE Seal and Fill Kitchen & Bath Caulk

One of the most common questions about kitchen painting is whether to seal before or after applying paint. The answer depends on the type of sealant you plan to use. If you’re working with a paintable silicone, such as Seal & Fill Multi-Purpose Kitchen & Bath Caulk, you can apply the sealant first, allow it to fully cure, and then paint over it for a seamless look. This is ideal for areas where you want both moisture protection and a uniform paint finish.

However, if you’re using a non-paintable silicone sealant, such as GE Advanced Silicone Kitchen & Bath, you should complete all painting first, allow the paint to completely dry, and then apply the sealant. Unmodified silicone does not take paint well and applying paint over it will result in poor adhesion and peeling. For best visual results, choose a sealant color that blends with your paint or trim, or use a clear formula when working with multiple finishes.

To get clean lines when sealing after painting, apply painter’s tape along both sides of the joint before applying sealant. Smooth the bead with GE’s Smoothing Tool or a gloved finger and remove the tape immediately for a crisp, finished edge. Planning ahead ensures your sealant performs well and your paint job looks professional.

Where to seal in your kitchen

Knowing where to apply sealant is key to protecting your newly painted kitchen from moisture damage and daily wear. Focus on areas where water, steam, or food particles are likely to collect—these are the points most vulnerable to damage if left unsealed.

Common spots that require silicone kitchen sealant include the joint where countertops meet the wall, especially behind sinks or stoves. Backsplashes should also be sealed at their edges to prevent water from seeping behind tiles or panels. Around sinks and faucet bases, a waterproof seal is essential to stop drips from entering cabinets or damaging countertops. Don’t forget corners, trim edges, and any joints where different materials meet, such as tile and drywall.

Kitchen painting tips

Painting a kitchen requires more planning than other rooms due to high moisture, frequent cleaning, and the variety of surface types involved. To get the best results, start by thoroughly cleaning all surfaces to remove grease, food residue, and dust—especially around cabinets, baseboards, and backsplash areas. A degreasing cleaner or a mix of warm water and dish soap works well for this step.

Read this article to learn more about sealing backsplashes.

Next, repair any dings, cracks, or holes with a patching compound. Lightly sand the surfaces to promote paint adhesion and wipe away dust with a damp cloth. Use painter’s tape to mask off edges, trim, and surfaces you plan to seal later.

Choose a high-quality paint with a semi-gloss or satin finish, which is easier to clean and holds up better in kitchens. Flat or matte finishes tend to absorb moisture and stain more easily. For surfaces near the stove or sink, consider a paint labeled mildew-resistant or kitchen-specific.

Apply primer to any repaired or previously unpainted areas, then follow with two coats of paint for even coverage. Let the paint dry completely before applying any sealant unless you’re using a paintable silicone sealant, which allows you to reverse the order if needed.

How to remove and replace old sealant

Before applying new sealant in your kitchen, it’s important to remove any old, cracked, or peeling material. Applying new sealant over damaged or loose areas can prevent proper adhesion and reduce the effectiveness of the seal.

Once you’ve applied the new sealant, a few simple finishing steps can make a big difference in the final appearance. A smooth, even bead not only looks more professional but also helps create a stronger, more effective seal.

A photo of a homeowner sealing the backsplash in his kitchen using GE Seal & Fill Sealant.

Start by using a tool specifically designed for the job—like the GE Sealant Remover Tool—which helps lift away old silicone without damaging surrounding surfaces. Work slowly and carefully to remove all traces of the previous sealant, especially in corners or uneven areas. Once removed, clean the surface thoroughly with soap and water to eliminate residue, grease, or dust. Rinse and dry the area completely—sealant won’t bond properly to damp or dirty surfaces.

A photo of a homeowner using his finger to smooth a bead of sealant in the kitchen.

Finally, allow the sealant to cure fully according to product instructions—typically 24 hours—before exposing it to water or regular use. With proper finishing, your kitchen will look polished and stay protected from daily wear.

To get GE Sealants’ products for your home improvement project, visit these fine retailers in the U.S. or Canada.

Contact Form

Siliconized Advanced Acrylic Kitchen & Bath Sealant

Contact Form

Brighten your grout, seal your edges, and protect your tile with confidence! Sealing and protecting tile surfaces in the bathroom: what you need to know

Note: This DIY article is provided as a general guide only and is not intended to take the place of product-specific installation procedures; always follow applicable manufacturers’ instructions. Depending on your home’s age and condition, location within the home, and other potential factors, repairs and/or upgrades or other services may be necessary prior to the beginning and/or completion of your project that may involve the services of a home improvement professional. This article does not include advice pertaining to local building codes and/or any related inspections.

Bathroom tile takes a daily beating from water, steam, and frequent cleaning. Without regular sealing and maintenance, tile surfaces can stain, loosen, or allow moisture to penetrate behind walls and floors. This guide explains how to protect tile surfaces with GE silicone sealants and simple upkeep steps that keep your bathroom looking clean and performing well.

Why your bathroom tile needs protection

Tile may be water-resistant, but the joints and edges around it are not—and that’s where problems start. Grout and sealant lines are especially vulnerable to water, soap, and humidity, which can break them down over time. When these protective barriers fail, water can seep into walls, floors, or cabinetry, leading to mold, mildew, and long-term, costly damage.

In high-use areas like showers, tub surrounds, and backsplashes, unsealed or deteriorating joints are common trouble spots. Without proper sealing, even small gaps can let moisture in, weakening the adhesive behind tiles or staining grout. Mold and mildew can also develop in corners and seams, making the bathroom harder to clean and less hygienic.

That’s why sealing and maintaining tile surfaces is important. A well-sealed bathroom helps prevent moisture from reaching vulnerable areas while keeping the tile looking cleaner and newer longer. With the right products and a few simple steps, you can extend the life of your bathroom surfaces and protect your home from hidden water damage.

Protect your bathroom tile from daily wear with GE Supreme Silicone Kitchen & Bath Sealant for flexible, waterproof joints—and refresh stained grout with a whitening pen for a like-new finish. Maintenance is simple, but the impact is long-term.

Sealing tile surfaces: key areas

To effectively protect tile surfaces in the bathroom, focus on sealing the areas most exposed to water and humidity. These include the edges where tile meets tubs, showers, or countertops, as well as inside corners and vertical seams where walls join. These junctions are frequent trouble spots for water intrusion, especially in high-splash zones like showers and around sinks.

Don’t overlook the backsplash area behind the bathroom vanity, where water from handwashing or cleaning can easily be collected. The transition joints between tile floors and baseboards or between different flooring materials should also be sealed to prevent water from seeping beneath the surface and damaging subflooring.

Leaky undermount sink? Learn how to seal undermount sinks effectively.

Advanced Silicone Kitchen and Bath Sealant.
A photo of Advanced Silicone Kitchen and Bath Sealant.

Use a 100% silicone sealant—like GE Advanced Silicone Kitchen & Bath—for these joints, as it remains flexible and waterproof even in wet, high-traffic areas. Proper sealing in these locations prevents mold growth, water stains, and structural damage. It’s a small step that plays a big role in keeping bathroom tile secure, clean, and looking its best over time.

Replacing old or damaged sealant

Over time, bathroom sealant can crack, discolor, or peel away from tile surfaces—especially in high-moisture areas like tub surrounds, backsplashes, and shower corners. When this happens, it’s important to remove and replace the sealant promptly to prevent water from reaching underlying surfaces.

Start by using the GE Sealant Remover Tool to lift away old silicone sealant without damaging tile or grout. Once removed, clean the area thoroughly with soap and water to eliminate residue, mold, or mildew. Allow the surface to dry completely before applying the new sealant.

For long-lasting protection, apply GE Supreme Silicone Kitchen & Bath Sealant. It offers Class 50 flexibility and lifetime mold-free product protection, making it well-suited for wet areas that experience movement or temperature swings. It becomes water-ready in 30 minutes, making it ideal for busy bathrooms where downtime is limited.

Apply a continuous bead along the joint and smooth it immediately with the GE Smoothing Tool or a gloved finger for a clean, finished edge. Allow the sealant to fully cure according to the label before exposing it to water.

Brighten grout lines with a grout whitening pen

Even if your tile is in good condition, dingy or discolored grout can make the entire bathroom look dated. Over time, grout absorbs moisture, soap residue, and everyday dirt—leading to dark spots and uneven coloring. Rather than regrouting, a grout whitening pen offers a simple way to refresh these lines and restore a cleaner look.

A homeowner uses a grout whitening pen on discolored grout lines.
A photo of a homeowner using a grout whitening pen on discolored grout lines.

Start by cleaning the grout thoroughly using a non-abrasive bathroom cleaner or a mixture of vinegar and water. Allow it to dry completely. Shake the whitening pen well, then apply it directly along the grout lines, using a steady hand for even coverage. Wipe away any excess with a damp cloth before it dries to avoid haze on the tile surface.

Pairing this quick refresh with newly applied GE Advanced Silicone or GE Supreme Silicone around joints creates a like-new appearance throughout your bathroom. It’s a fast, cost-effective way to brighten the space and improve tile aesthetics without major renovation.

Tips for long-term tile maintenance

Keeping your tile looking new takes more than just a one-time seal. Regular maintenance helps prevent buildup, discoloration, and moisture-related issues that can shorten the lifespan of your bathroom surfaces. Start by checking sealed joints every 6 to 12 months for peeling, gaps, or signs of mold—especially in high-use areas like shower corners and backsplash seams.

Reapply silicone sealant as needed to maintain waterproof protection. Use non-abrasive cleaners to avoid damaging grout or sealant and always run ventilation during and after showers to minimize humidity buildup.

Wiping down tile walls and floors with a towel or squeegee after use also helps reduce water spots and soap residue. With a simple maintenance routine, your sealed tile surfaces will stay cleaner, brighter, and better protected for years.

Read this article if you want more bathroom sealing tips.

To get GE Sealants’ products for your home improvement project, visit these fine retailers in the U.S. or Canada.

Contact Form

Siliconized Multi-Purpose Acrylic Kitchen & Bath Caulk

Contact Form

Protect your home before summer heat and humidity do their worst The ultimate home maintenance tasks to tackle before summer

Note: This DIY article is provided as a general guide only and is not intended to take the place of product-specific installation procedures; always follow applicable manufacturers’ instructions. Depending on your home’s age and condition, location within the home, and other potential factors, repairs and/or upgrades or other services may be necessary prior to the beginning and/or completion of your project that may involve the services of a home improvement professional. This article does not include advice pertaining to local building codes and/or any related inspections.

Summer is tough on a house. Heat stretches siding, storms push water where it shouldn’t go, and humidity feeds mold in the corners you forgot to check. This guide walks you through the smartest home maintenance tasks to tackle before summer— from sealing windows to clearing vents.

Home maintenance before summer: start outside where heat, rain, and sun do the most damage

Summer doesn’t ask permission—it expands, cracks, and floods whatever isn’t ready. Start by walking your home’s exterior. Look for brittle or peeling sealant around windows, doors, trim, and siding joints—especially on the south and west sides, where UV exposure hits hardest.

Any gap you find is a potential water path. Left untreated, it won’t just let moisture in. It can swell framing, encourage mold inside your walls, and drive up cooling costs. That’s why exterior sealing should always lead your home maintenance before summer begins in full.

For joints that flex with temperature and movement, you need the right product—not just any sealant from the shelf. GE Supreme Silicone Window & Door offers:

  • Class 50 flexibility
  • Rain-ready protection in 30 minutes
  • UV resistance for long-term durability in full sun
  • Permanent adhesion to most common materials.

It holds its seal through summer highs, winter lows, and everything in between.

Before sealing, clean out the old bead completely—especially if it’s acrylic, which silicone won’t bond to. If the gap is wider than 1/4 inch, insert a backer rod for depth control. Once you apply the sealant, tool the bead within five minutes to ensure a smooth, tight finish. For best results, use a smoothing tool like GE’s Smoothing Tool.

Quick checklist:

  • Inspect all exterior trim joints
  • Remove failed sealant
  • Clean with isopropyl alcohol
  • Apply GE Supreme Silicone Window & Door
  • Tool bead, let cure per label

Miss a single seal, and moisture finds its way in. Stay ahead with a checklist that covers the joints, corners, and surfaces summer hits hardest.

Summer home prep: seal your kitchens and baths before humidity hits

Once the outside’s sealed, move your summer home prep indoors. Humidity doesn’t stay out. It creeps into bathrooms and kitchens, where lingering moisture turns minor seal failures into mold blooms and water damage.

That’s why home maintenance before summer should always include checking your wet zones.

Start with your bathrooms and kitchen. Check the sealant around tubs, showers, sinks, and backsplashes. If the bead is soft, darkened, cracked, or pulling away from the surface, it’s no longer doing its job.

That’s where GE Advanced Silicone Kitchen & Bath sealant comes in. It’s designed for wet, high-humidity areas and provides up to 10 years of mold-free protection. It’s also water-ready in 30 minutes and won’t stain chrome or discolor high-end finishes.

Before applying, use a plastic scraper to remove old sealant—metal can gouge tile or tub surfaces. Clean the area thoroughly with isopropyl alcohol to eliminate residue that could compromise adhesion. Apply the new sealant in a steady bead, then tool it immediately for a watertight finish.

Quick checklist:

  • Inspect seals for mold or lifting
  • Remove all loose sealant
  • Clean with isopropyl alcohol
  • Apply GE Advanced Silicone
  • Let cure before exposing to water
 GE Advanced Kitchen & Bath Silicone shown in bathroom setting—ideal for wet zones with mold risk.
GE Advanced Silicone Kitchen & Bath sealant placed on a marble shower ledge in a tiled bathroom

Seasonal maintenance checklist: clear vents and fans to keep moisture moving

A tight seal only works if air can move where it needs to. As part of your seasonal maintenance checklist, take time to clear the ventilation systems that keep moisture and heat from building up indoors.

Start with your dryer vent—clean it inside and out. Lint buildup isn’t just a fire risk. It makes your dryer run hotter and longer.

Next, wash the grease-trapped filters in your kitchen hood. And finally, vacuum the covers of your bathroom exhaust fans and test airflow. Weak suction means hidden buildup that’s holding onto humidity.

Even the best sealing work won’t help if your home can’t breathe.

Quick checklist:

  • Unclog dryer vent and cap
  • Clean kitchen filters
  • Vacuum bath fans, check suction
Sealing home’s exterior siding joint to block moisture before summer heat and humidity.
Sealing siding joint with GE Supreme Silicone to weatherproof exterior seam.

Check decks, patios, and outdoor fixtures

Sealant fails quietly. Then one good rain, and the rot sets in. On decks, patios, and outdoor fixtures, they often show up too late—after water’s seeped in and rot has taken hold.

That’s why summer home prep should always include a scan of every exposed seam, joint, and fixture under the open sky.

Inspect exterior railing bases, stair stringers, wall-to-siding junctions, and outdoor utility points like faucets or outdoor sinks. Look for gaps where wood meets concrete, cracks where trim separates, or sealant that’s pulled back or turned brittle.

For these areas, you need something built for the elements. GE Silicone All Purpose is weatherproof, freeze-resistant, and won’t crack or shrink under sun exposure. It’s designed to hold firm across wood, metal, masonry, and more.

Work in the shade if possible. In direct sun, the surface can skin over before the sealant bonds properly underneath—leading to weak adhesion. And skip paintable acrylics outside. They can’t flex, and they won’t last.

Quick checklist:

  • Inspect all outdoor seal points
  • Clean and dry surface
  • Apply GE All Purpose Silicone
  • Allow full cure before foot traffic

Once you’ve sealed the surfaces underfoot, shift your attention to where water falls, from above.

GE Silicone All Purpose cartridge displayed outside in front of a home.
A photo of GE Silicone All Purpose cartridge placed on a workbench in front of a house.

Roofline final check—gutters, flashing, penetrations

Leaks don’t always start where the damage shows. Water travels, then ruins the ceilings weeks later.

As part of your seasonal maintenance checklist, clean out gutters and downspouts to prevent overflow. Then inspect seals around flashing, skylights, and vent stacks. These are your home’s highest-risk joints.

Any seal that’s cracked, lifting, or showing rust trails needs attention. And if it’s been a few seasons, it’s worth resealing now rather than waiting for stains to show up.

For these exposed joints, use the right GE Specialty Silicone based on the surface:

  • Metal for flashing and vent stacks
  • Gutter for seams in aluminum gutters and downspouts
  • Concrete for masonry joints or parapet caps

Each formula is engineered for long-term flexibility, UV exposure, and wet or extreme conditions—without shrinking or cracking over time.

Use ladder stabilizers to avoid damaging the gutters, and don’t just check from the ground. You need a close-up look to catch what a storm will exploit.

Quick checklist:

  • Clean all drainage paths
  • Inspect roof seal points
  • Reseal with the correct GE Specialty formula

Prevention isn’t glamorous—but it’s what keeps emergencies off your to-do list.

You’ve sealed the gaps, cleared the vents, and covered the trouble spots. Your home’s ready to take on summer the way it should be: dry, protected, and worry-free.

FAQ Summer home maintenance & sealing

What’s the best GE sealant for exterior siding and trim?

GE Supreme Silicone Window & Door is ideal. It’s Class 50 rated for joint movement, permanently waterproof, and won’t crack or shrink—even in full sun or freezing temps.

Can I apply silicone in humid conditions?

Yes—but the surface must be dry. Silicone cures by reacting to moisture in the air, but applying it to a damp surface can compromise adhesion. If rain is in the forecast, use a formula like GE Advanced Silicone, which is water-ready in 30 minutes.

Need the right GE Sealant for your summer prep? Find a store near you in the U.S. or Canada.

Contact Form

Prevent mold in your bathroom with the right sealants, tools, and maintenance. Bathroom mold prevention: the best sealants and tips for a healthier space

This DIY article is provided as a general guide only and is not intended to take the place of product-specific installation procedures; always follow applicable manufacturers’ instructions. Depending on your home’s age and condition, location within the home, and other potential factors, repairs and/or upgrades or other services may be necessary prior to the beginning and/or completion of your project that may involve the services of a home improvement professional. This article does not include advice pertaining to local building codes and/or any related inspections.

Bathrooms are one of the most common places for mold to develop, thanks to constant humidity and frequent water exposure. Without proper sealing and maintenance, moisture can seep into tile seams, grout lines, and behind fixtures, creating ideal conditions for mold growth. This guide highlights the best GE sealants and practical tips to help you protect your bathroom surfaces and keep mold at bay.

Why bathrooms are prone to mold

Mold thrives in damp, poorly ventilated environments, making bathrooms a natural hotspot for growth. Daily activities like showering, bathing, and handwashing generate constant moisture, which often lingers on surfaces, in corners, and in the air. Without proper waterproofing, water can seep into grout lines, behind tile, and around fixtures, creating hidden pockets of dampness where mold spores flourish.

High humidity levels, combined with limited airflow, make it difficult for bathrooms to dry out fully between uses. This persistent moisture provides the perfect conditions for mold and mildew, especially in areas like shower walls, tub surrounds, and the seams where tile meets other materials. In addition to being unsightly, mold can degrade materials, produce unpleasant odors, and contribute to respiratory issues in sensitive individuals.

The key to mold-proofing your bathroom lies in sealing vulnerable areas with the right products and maintaining dry surfaces. With the proper approach, it’s possible to create a healthier bathroom environment that resists mold before it has a chance to grow.

Mold prevention starts with the right sealant. GE Advanced Silicone Kitchen & Bath Sealant and GE Supreme Silicone Kitchen & Bath Sealant offer waterproof, mold-resistant protection where bathrooms need it most. Combine them with routine maintenance and a grout whitening pen to keep surfaces cleaner and healthier for the long run.

Where mold grows and how to stop it

Mold often grows in the places you don’t always see—corners, seams, and joints where water tends to linger. In the bathroom, high-risk zones include shower corners, tub surrounds, backsplash edges, and under sink rims where splashing and condensation are common. Grout lines, floor transitions, and wall-to-tile seams are also frequent mold hotspots, especially when sealant is cracked or missing.

GE Advanced Silicone Kitchen and Bath Sealant for bathroom mold prevention.
A photo of GE Advanced Silicone Kitchen and Bath Sealant.

To stop mold from taking hold, focus on creating a watertight seal in these areas. You’ll need to apply one of the best bathroom sealants, such as GE Advanced Silicone Kitchen & Bath Sealant or GE Supreme Silicone Kitchen & Bath Sealant, to block water from seeping into gaps. These products offer mold resistance and long-term flexibility, even in high-humidity environments.

In addition to sealing, improve air circulation by using exhaust fans or opening windows after showers. Wipe down wet surfaces with a towel or squeegee to reduce standing moisture. By targeting mold-prone zones with the right sealant and daily moisture control, you can keep your bathroom cleaner, drier, and healthier.

Best GE bathroom sealants for mold resistance

GE offers two professional-grade silicone sealants specifically formulated to resist mold and protect against water damage.

GE Advanced Silicone Kitchen & Bath Sealant is a top choice for sealing high-moisture areas. This 100% silicone product is permanently waterproof and offers mold resistance for up to 10 years. It adheres strongly to common bathroom surfaces like tile, glass, metal, and porcelain, and it’s water-ready in just 30 minutes—ideal for fast-paced work or quick repairs. Use it around sinks, backsplashes, tub edges, and shower corners to create a durable, mold-resistant barrier.

For areas that see frequent movement or temperature fluctuations, GE Supreme Silicone Kitchen & Bath Sealant provides Class 50 flexibility and lifetime mold-free product protection. It maintains a strong seal even as materials shift, making it ideal for wall seams, floor transitions, and heavy-use zones. Both products are available in clear and white finishes to match your space. When used correctly, these GE silicone sealants help stop mold before it starts.

Wondering when to use caulk vs sealant? Learn the differences.

Refresh and protect grout with a grout whitening pen

A grout whitening pen brightens discolored grout.
Homeowner using a grout whitening pen brightening discolored grout.

Even with well-sealed edges, discolored grout can make your bathroom feel less clean and may indicate mold buildup. Over time, grout absorbs moisture, soap residue, and dirt, creating the perfect environment for mold to thrive. Rather than replacing grout entirely, a grout whitening pen offers a fast, affordable way to restore the look of tile joints and discourage mold regrowth.

Start by cleaning the grout lines with a non-abrasive cleaner or a vinegar-water solution, then let them dry completely. Shake the pen, apply it evenly along the grout lines, and wipe away any excess before it dries on the tile surface. The result is a cleaner, brighter appearance with improved surface hygiene.

Pairing this step with fresh GE Advanced Silicone or GE Supreme Silicone sealant around corners and seams gives your bathroom a complete refresh—both functionally and visually.

Learn more about removing shower mold.

Daily and seasonal bathroom mold prevention tips

Consistent maintenance is key to keeping mold out of your bathroom. Start with daily habits: run the exhaust fan during and after showers to reduce humidity, and wipe down wet surfaces—like shower walls, tub rims, and tile—with a squeegee or towel to prevent standing moisture. Keeping surfaces dry helps slow mold growth before it can start.

On a seasonal basis, inspect sealed joints around tubs, sinks, and backsplashes for signs of wear, such as peeling, cracking, or mold stains. If needed, remove the old sealant and reapply a mold-resistant sealant.  Use non-abrasive cleaners regularly to protect both grout and sealant from breakdown. With just a few small changes to your daily and seasonal routine, you can keep your bathroom resistant to mold.

To get GE Sealants’ products for your home improvement project, visit these fine retailers in the U.S. or Canada.